Deploying a Client VPN Endpoint
Sections:
- Meraki Client VPN Features
- Meraki Client VPN Benefits
- Lab Topology
- Meraki ClientVPN Configuration
- Windows ClientVPN Configuration
- IOS ClientVPN Configuration
- Port Forwarding
- ClientVPN Authentication
- Active Directory ClientVPN Configuration
Resources:
- Client VPN Overview
- Duo Two-Factor Authentication for Meraki Client VPN
- AnyConnect Licensing on the MX Appliance
- Managing User Accounts using Meraki Cloud Authentication
- Eero Port-Forwarding
- AnyConnect on MX Appliance
- AnyConnect Authentication Methods
Overview:
- Client VPNs refer to a remote access VPN that allows users to securely connect to the corporate network from external locations, such as home or while traveling via a VPN client
- Meraki provides a simple, cloud managed solution to set up and manage client VPNs
- In this section, I will go over Meraki's client VPN features and in a later section, configure a client VPN on a laptop machine to demonstrate this concept
Meraki Client VPN Features
L2TP/IPsec Protocol
- Cisco Meraki supports L2TP/IPsec as the primary protocol for client VPN. L2TP is a tunneling protocol used for VPN connections, while IPsec provides encryption to secure the data in transit
- Unlike some other VPN solutions, Meraki Client VPN does not require specialized client software and works with built-in VPN clients on most operating systems
Cloud Management
- One of the key advantages of Meraki Client VPN is that it's fully cloud-managed. Configuration and monitoring are done through the Meraki Dashboard, simplifying the management of VPN settings, user access, and security policies
User Authentication
- Meraki client VPN supports various authentication methods for user login:
- Meraki Cloud Authentication
- Uses Meraki's cloud database for authentication
- Active Directory (AD)
- Integrates with an on-premise Active Directory server for user authentication
- RADIUS
- Integrates with a RADIUS server for user authentication
- Meraki Cloud Authentication
Split Tunneling
- Split tunneling allows users to access both the corporate network, through the VPN tunnel, and the Internet, directly bypassing the VPN simultaneously. The goal of split tunneling is to reduce bandwidth load on the VPN server and can be enabled or disabled depending on security and performance requirements
Access Control & Permissions
- Admins can define which resources on the corporate network remote users can access such as certain internal servers, applications, or IP subnets. This feature also allows for controlling the client VPN IP address range assigned to remote users using the client VPN
High Availability
- If the network environment is configured with multiple Meraki appliances, Client VPN traffic can be distributed across multiple devices, ensuring high availability and failover in case of hardware failure
Encryption
- IPsec encryption ensures that all data passed through the VPN is securely encrypted, protecting the integrity and confidentiality of communications
Meraki Client VPN Benefits
Easy Setup
- The Meraki Dashboard offers an interface for configuring VPN settings, simplifying the client VPN setup
Cross-Platform Compatibility
- The VPN is compatible on a wide range of operating systems, including Windows, macOS, iOS, and Android without requiring additional software beyond the built-in VPN client
Cloud Managed Infrastructure
- The cloud based management of Meraki devices allows administrators to monitor VPN connections and troubleshoot any issues remotely without being physically present
Scalability
- As the organization grows, Meraki Client VPN can scale supporting a large number of simultaneous users without performance degradation
Lab Topology
Overview:
- In this section, I will be demonstrating a clientVPN configuration using the Cisco Anyconnect VPN client on a Windows machine and a IOS Iphone
- In this demonstration, I will be utilizing the Meraki Cloud Authentication type for VPN clients. In the next section, I'll go over the additional authentication types
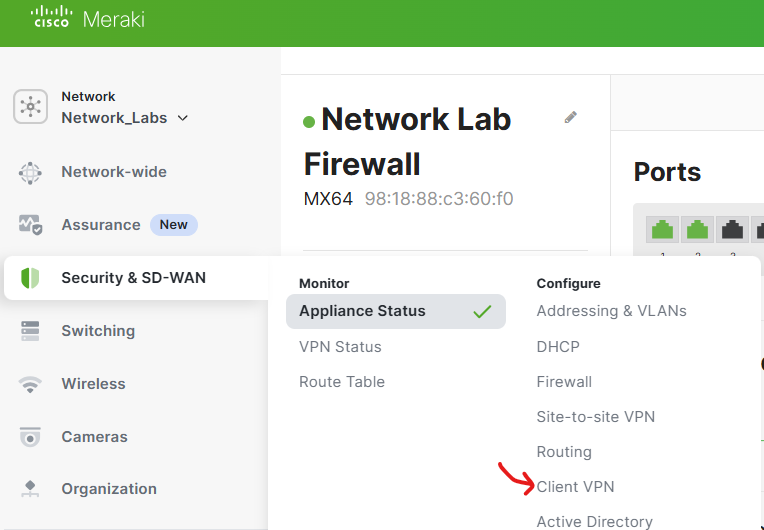
Meraki ClientVPN Configuration
Menu to configure ClientVPN
AnyConnect Parameters
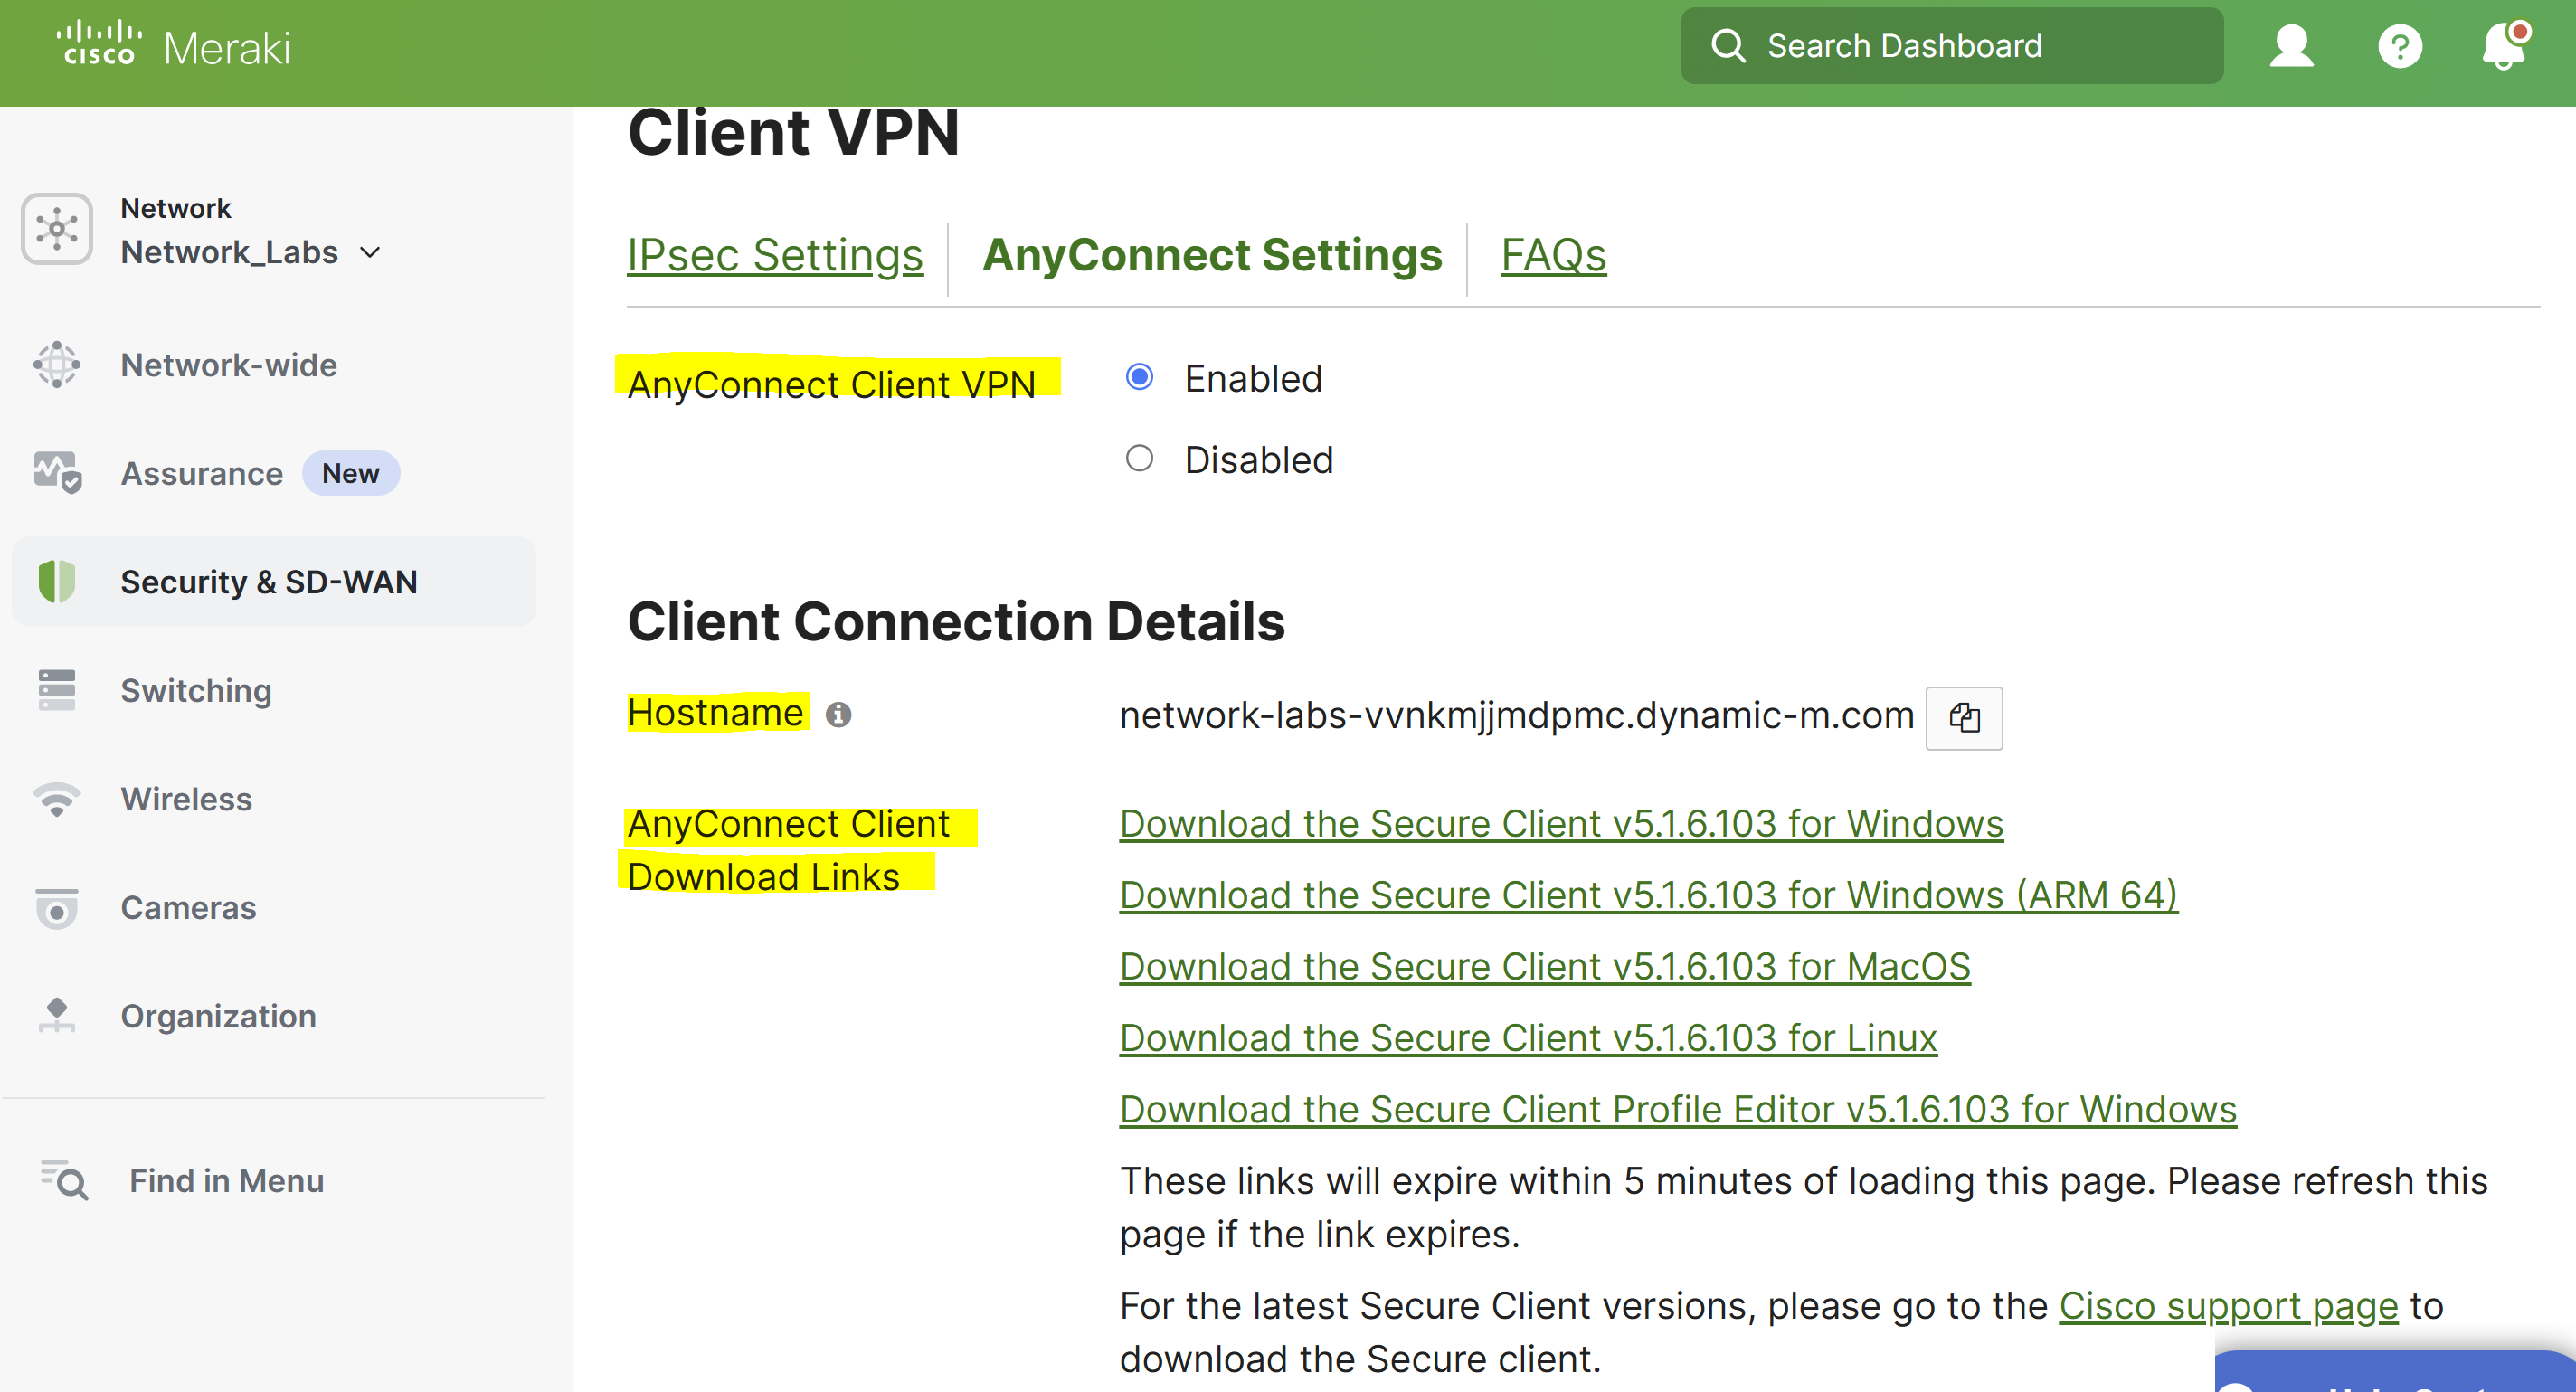
AnyConnect Client VPN
- Option to either enable or disable the clientVPN feature. Feature is disabled by default
Hostname
- The hostname parameter is a dynamic DNS (DDNS) host record correlating to the public IP address of the MX
- This is the hostname of the MX that clientVPN users will use to connect
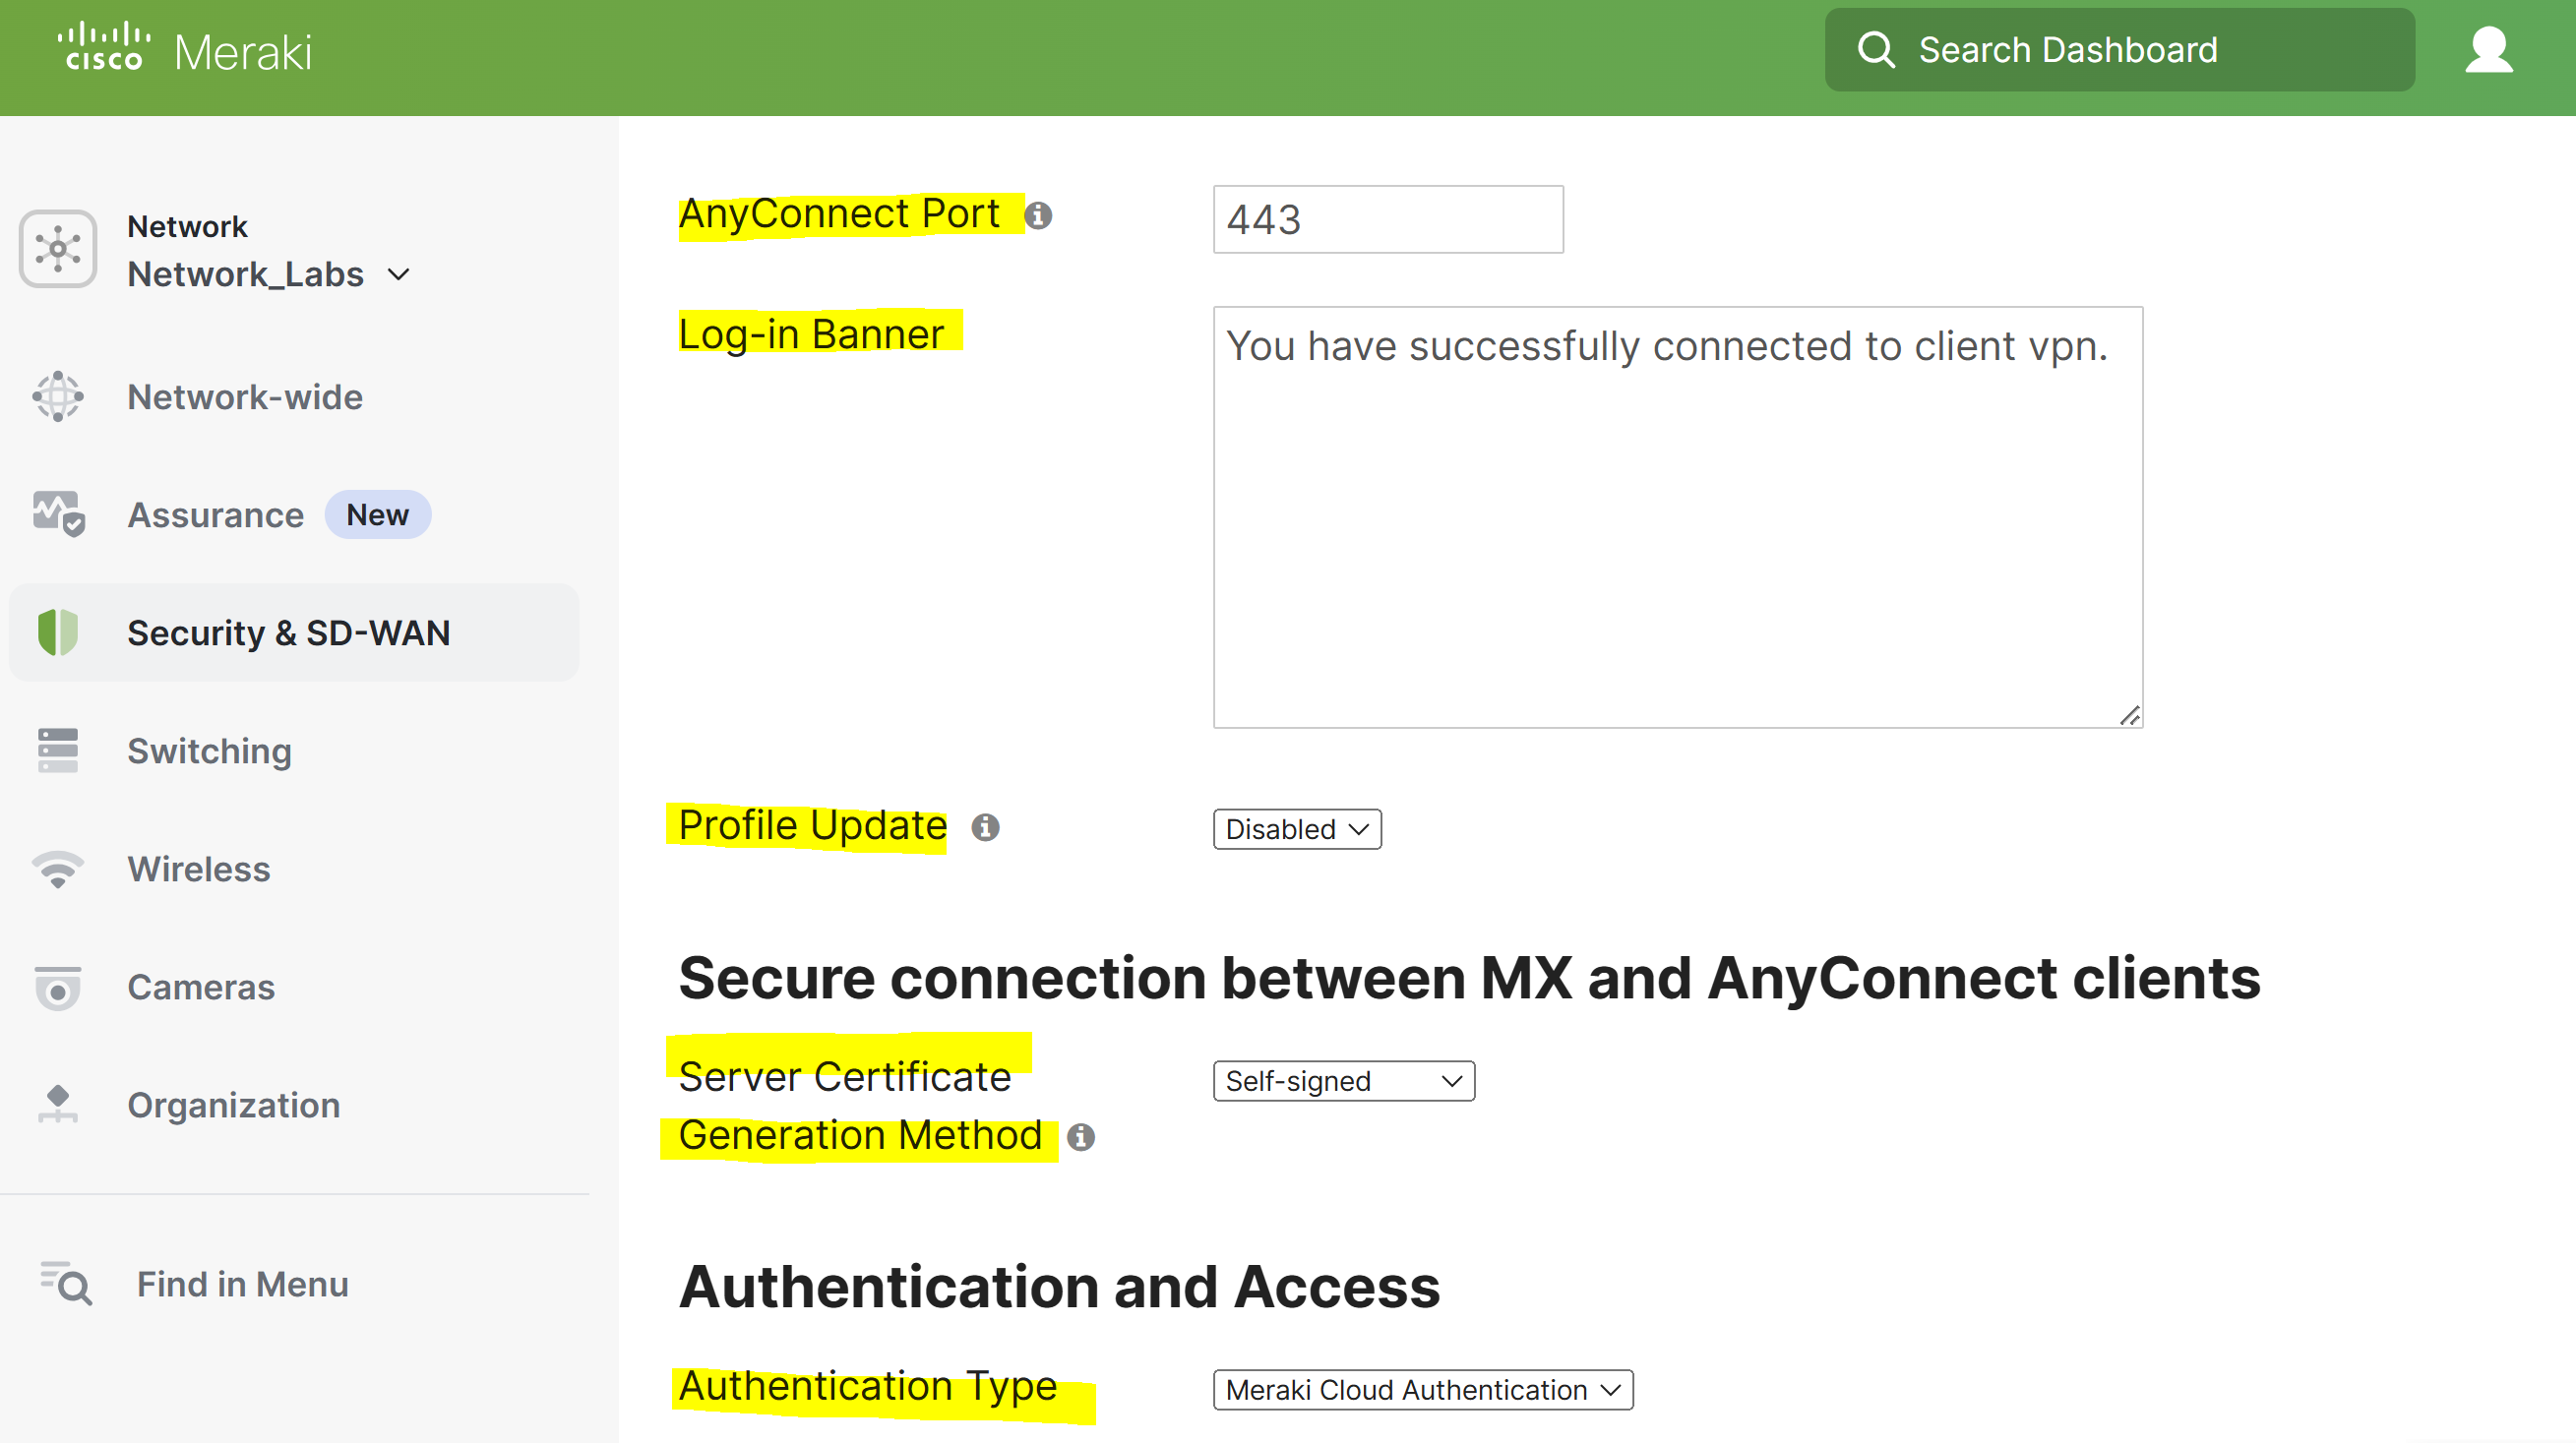
AnyConnect Port
- This port specifies the port the AnyConnect server will accept and negotiate tunnels on
Log-in Banner
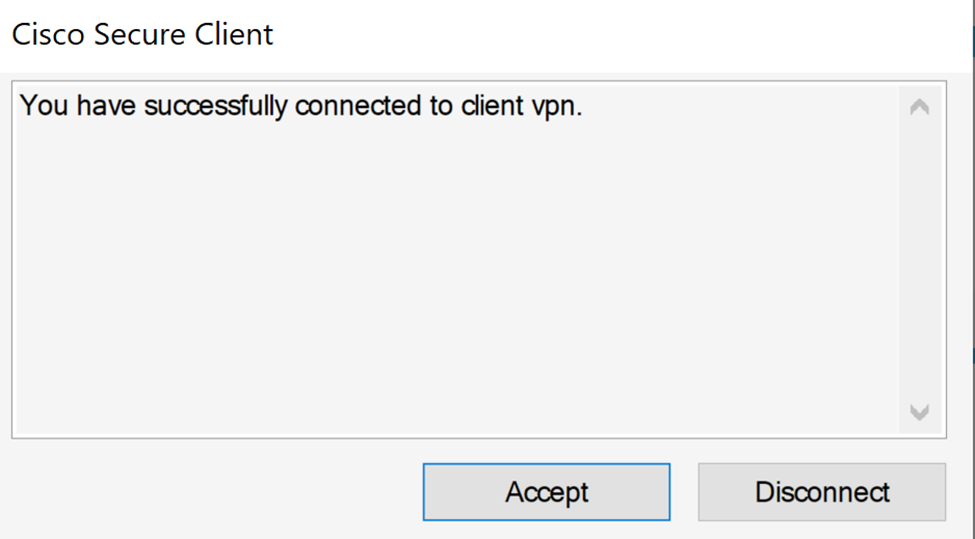
- This banner specifies the message seen on the AnyConnect clients when a user successfully authenticates to the ClientVPN
- To disable the log-in banner, simply leave the banner field blank
Profile Update
- Identifies the AnyConnect VPN configuration profile that gets pushed to the user on authentication
Server Certificate Generation Method
- Administrators can generate a CSR, that can be signed by a public CA
- The signed certificate can then be uploaded to the MX appliance via the dashboard allowing admins to use a preferred hostname ; for example, vpn.abc.com
Authentication Type
- How VPN clients will be authenticated. Meraki offers Meraki Cloud Authentication, RADIUS, and Active Directory
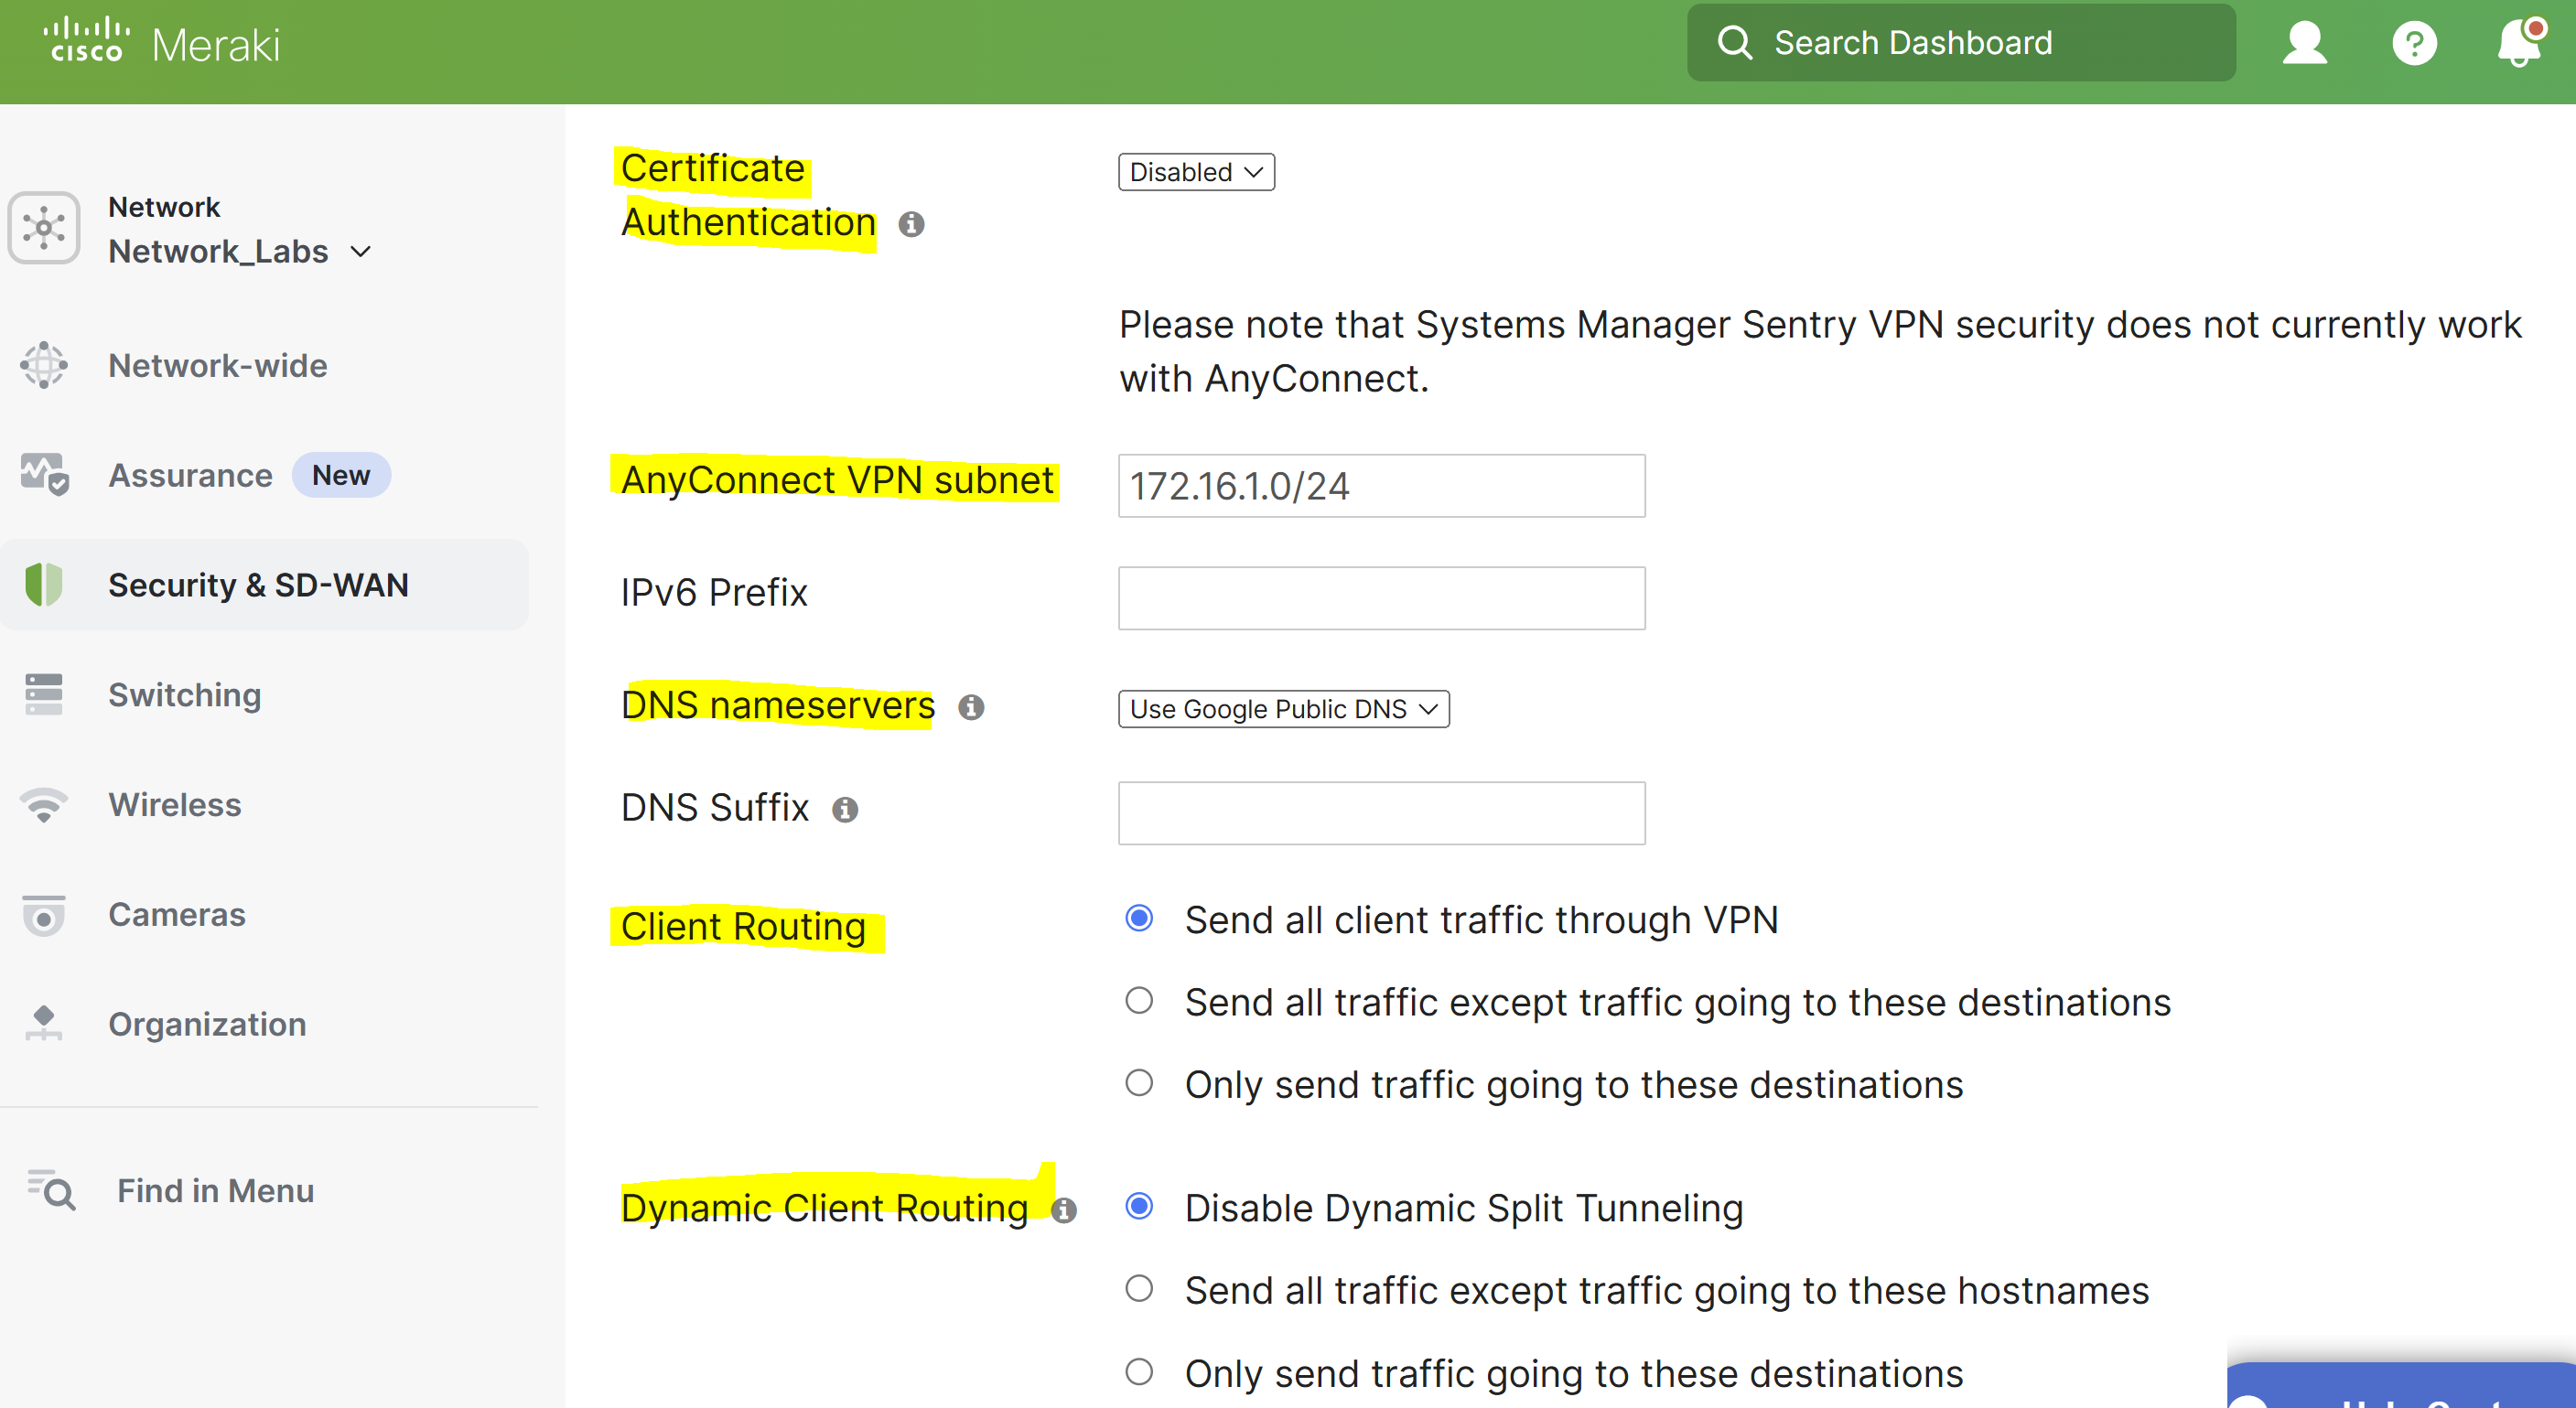
Certificate Authentication
- This is used to configure the trusted CA file that is used to authenticate client devices
- This configuration is only required if you need to authenticate client devices with a certificate
AnyConnect VPN subnet
- This specifies the address pool used for authenticated clientVPN clients
DNS nameservers
- Specifies the DNS settings assigned to the VPN clients
Client Routing
- Used to specify full or split-tunnel rules pushed to the AnyConnect client device
- With a Full tunneling configuration, you can send all traffic through the VPN
- With a Split tunneling configuration, you can send specified traffic through the VPN
Dynamic Client Routing
- This is used to specify full or split-tunneling rules pushed to the AnyConnect client device by hostname
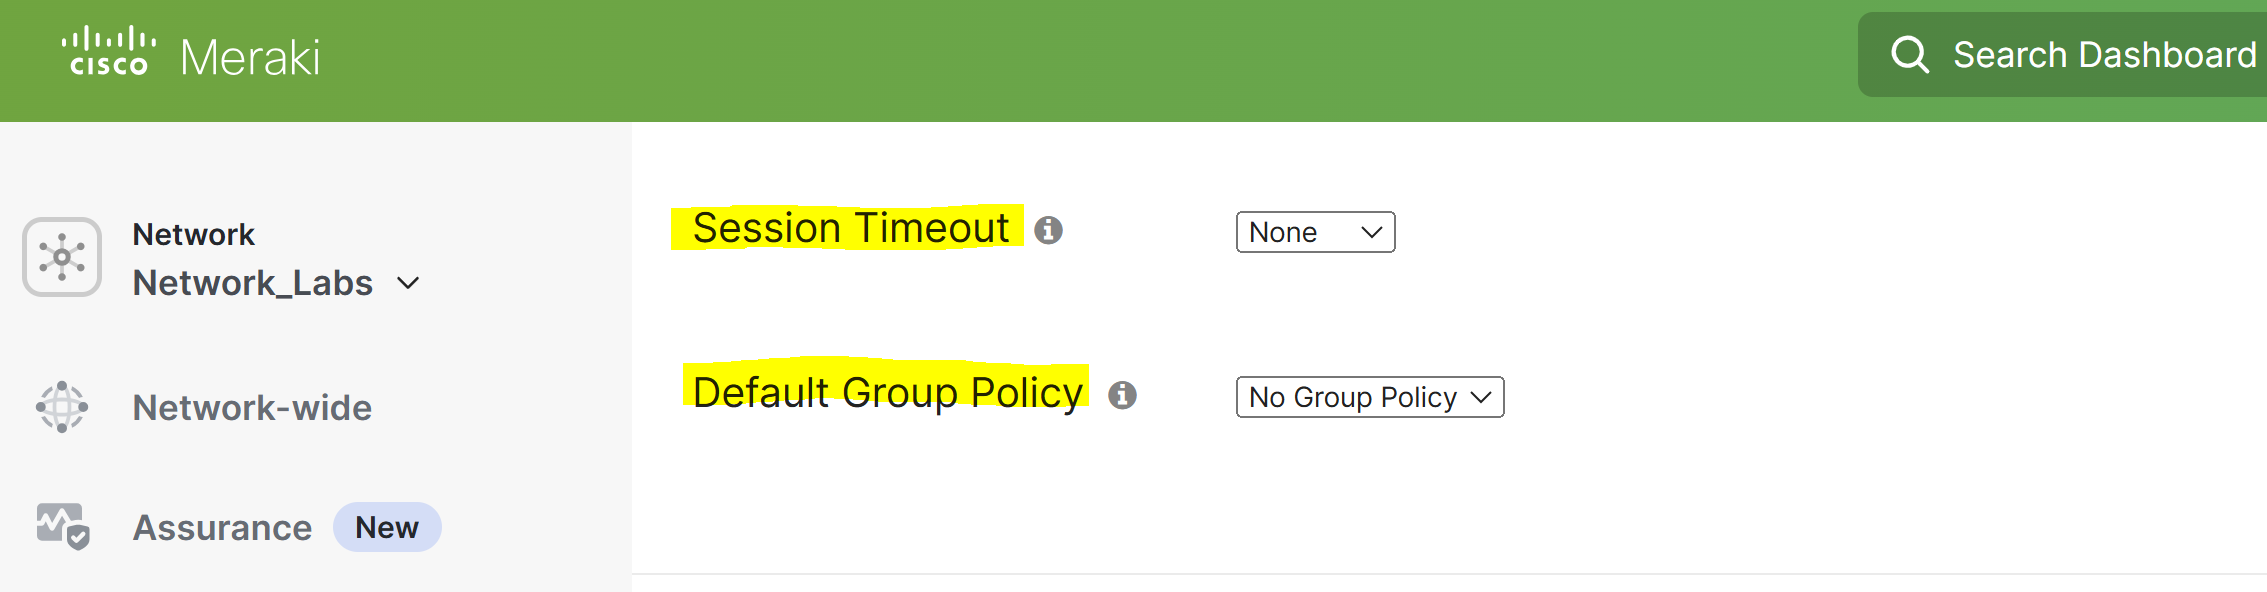
Session Timeout
- The amount of time in hours that a VPN session is allowed to stay up regardless of user activity
Default Group Policy
- Used to apply a default group policy to all connecting AnyConnect clients
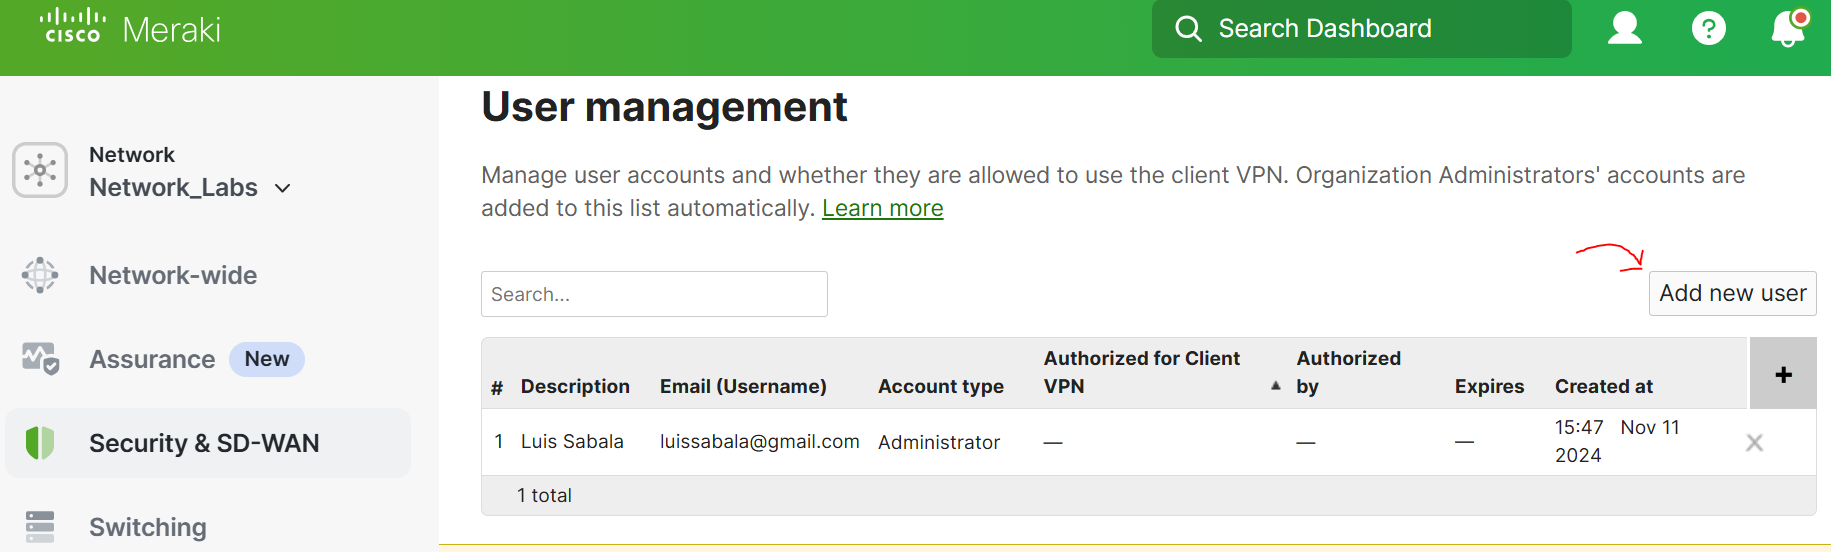
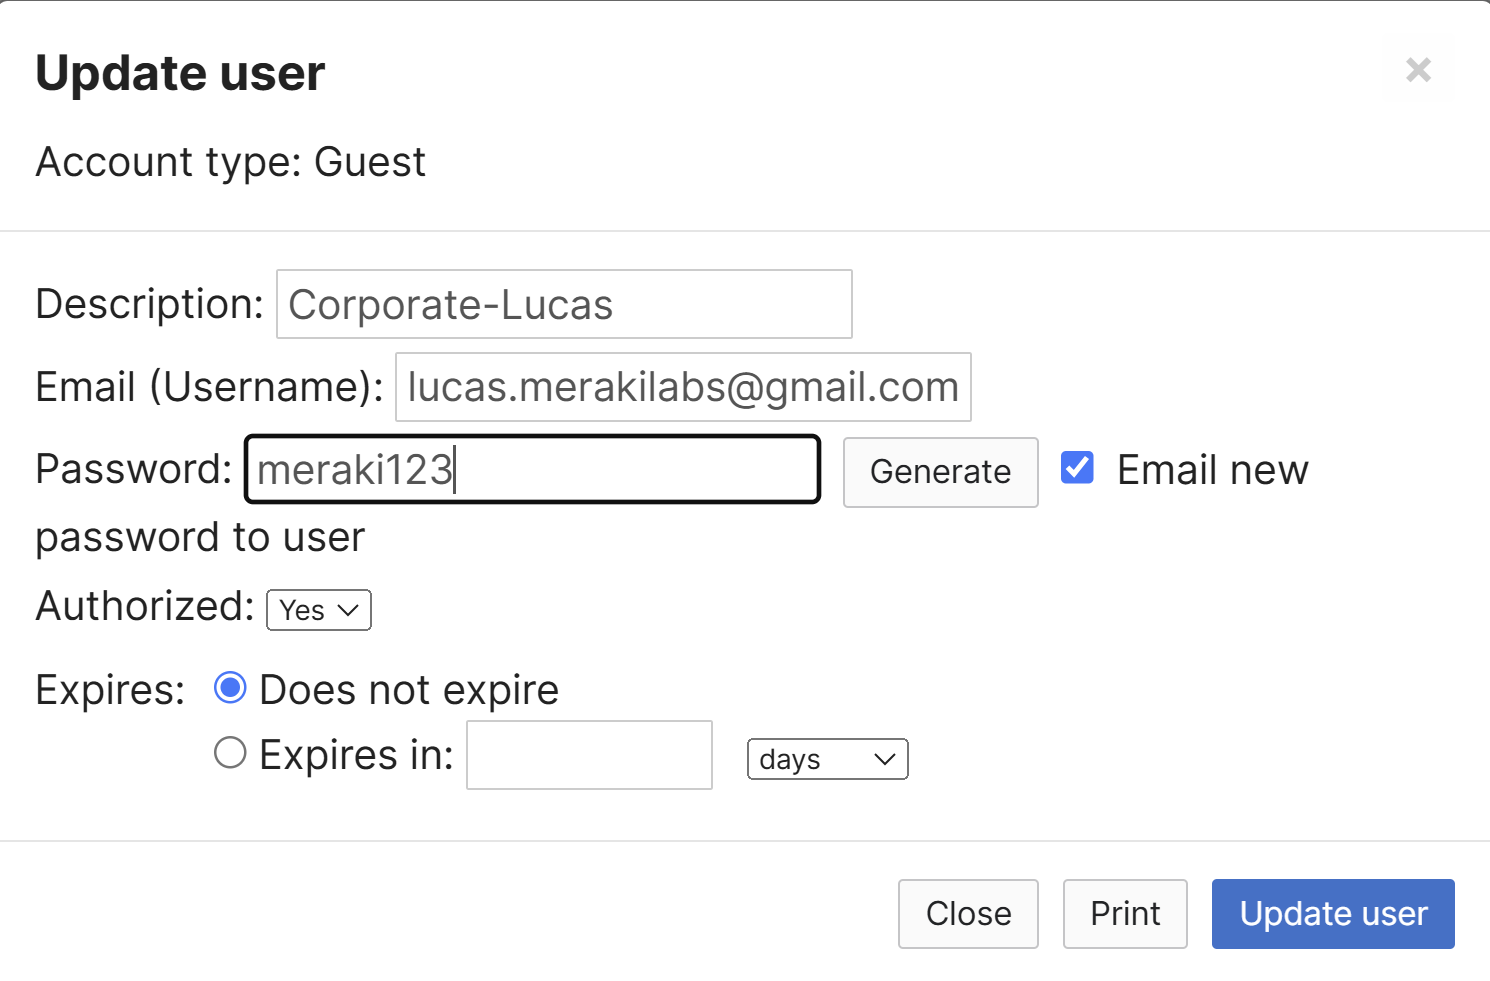
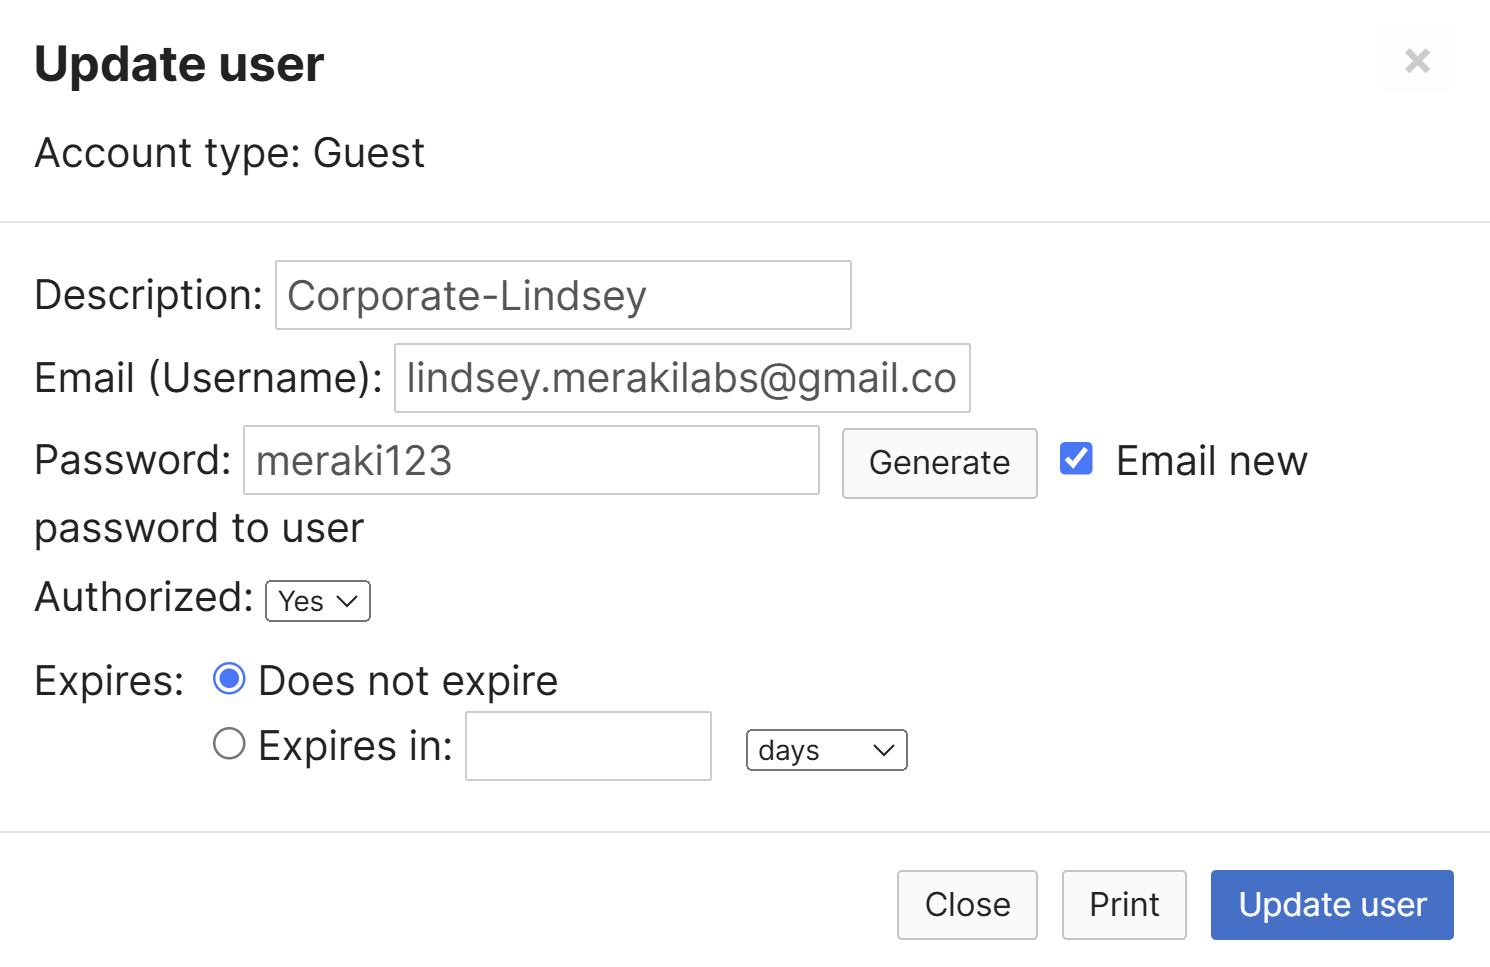
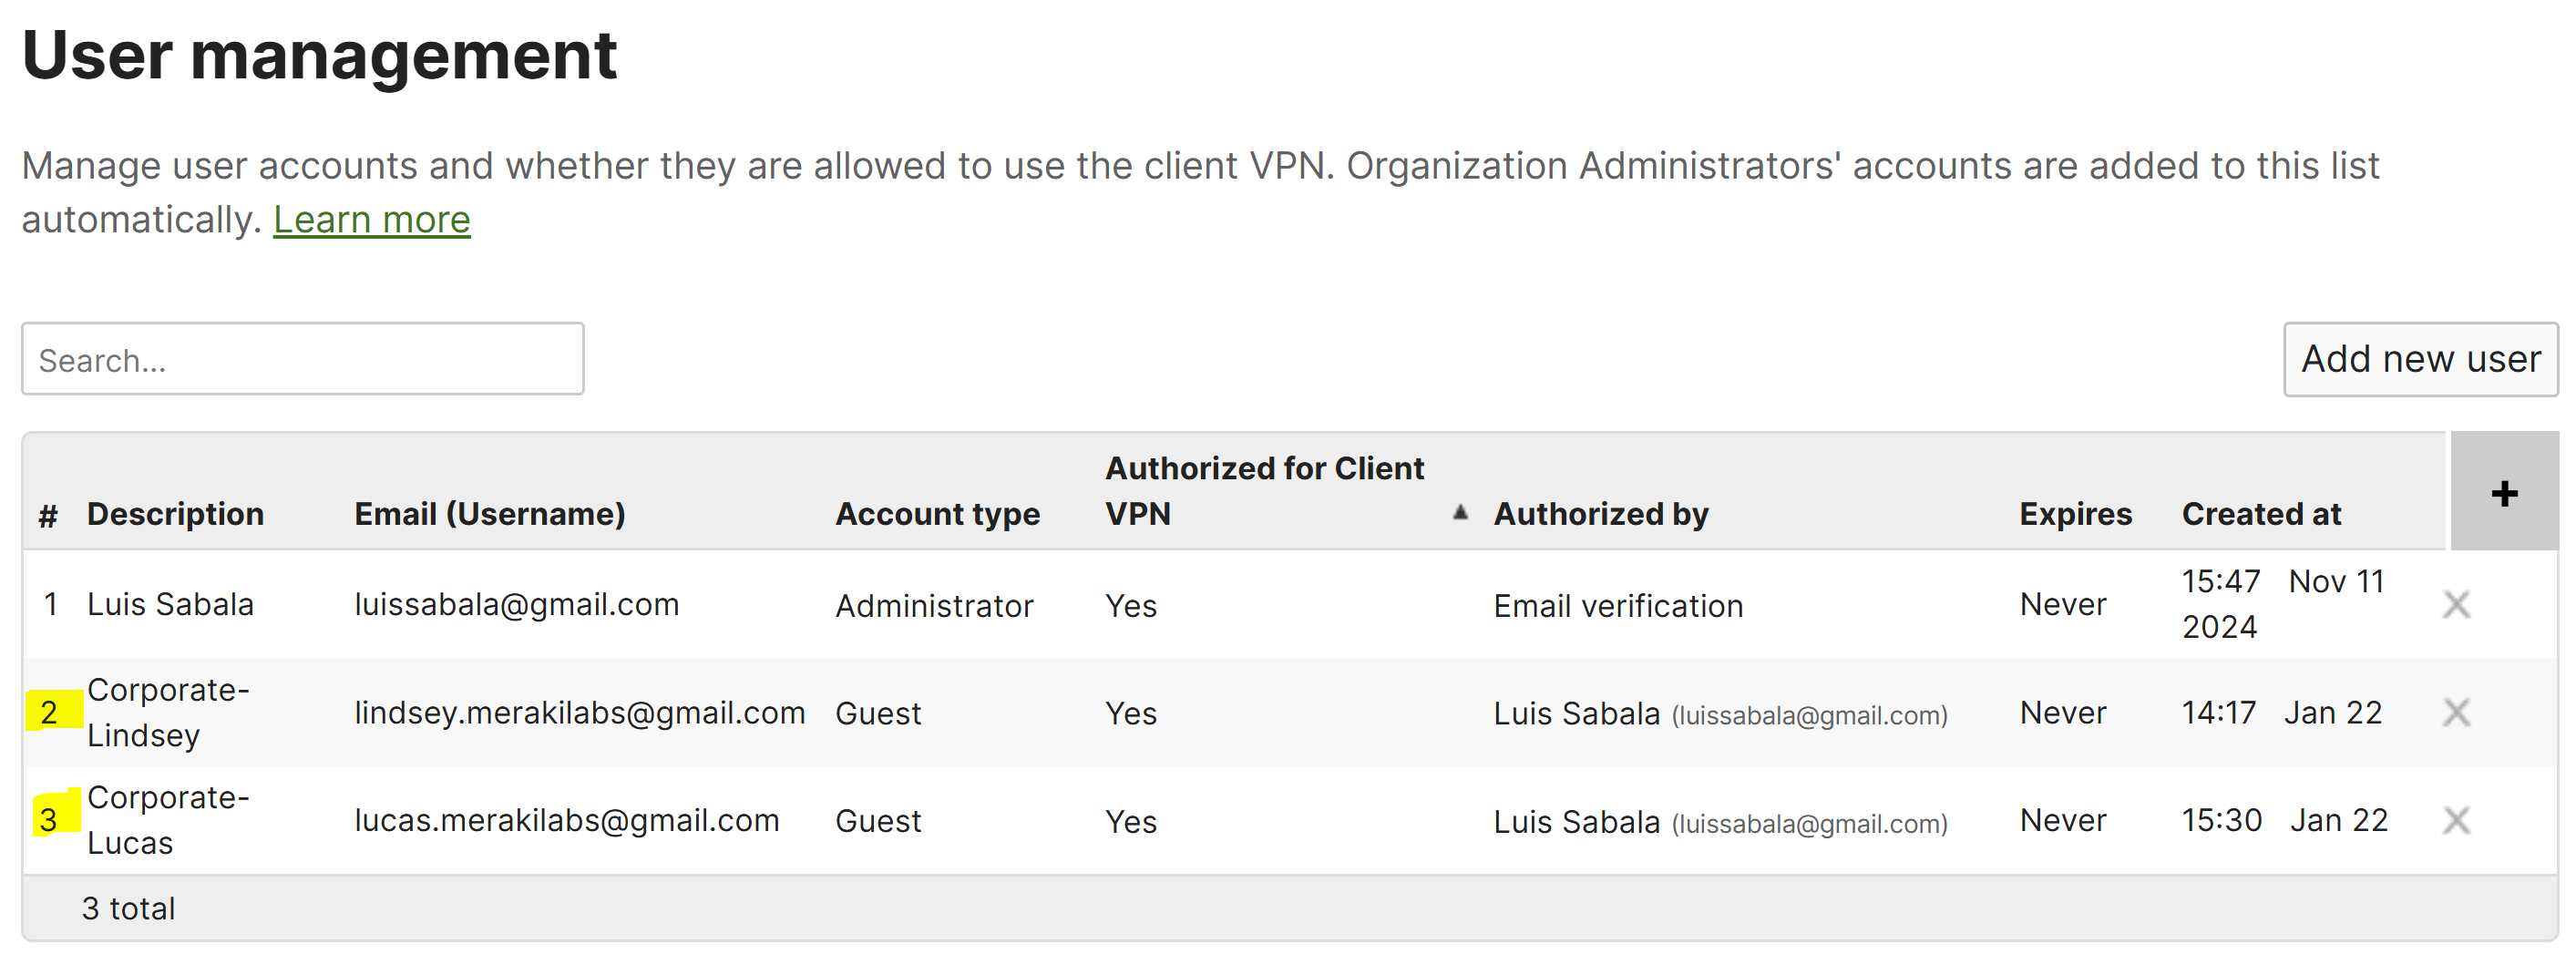
User Management
- In the following screenshots, if an Active Directory or RADIUS server is not available, VPN users can be managed with the Meraki Cloud Authentication type
- For this lab exercise, I've defined two guest users named Lucas and Lindsey that will be active clientVPN users
- By default, administrator accounts will automatically populate as clientVPN users
Windows ClientVPN Configuration
Overview:
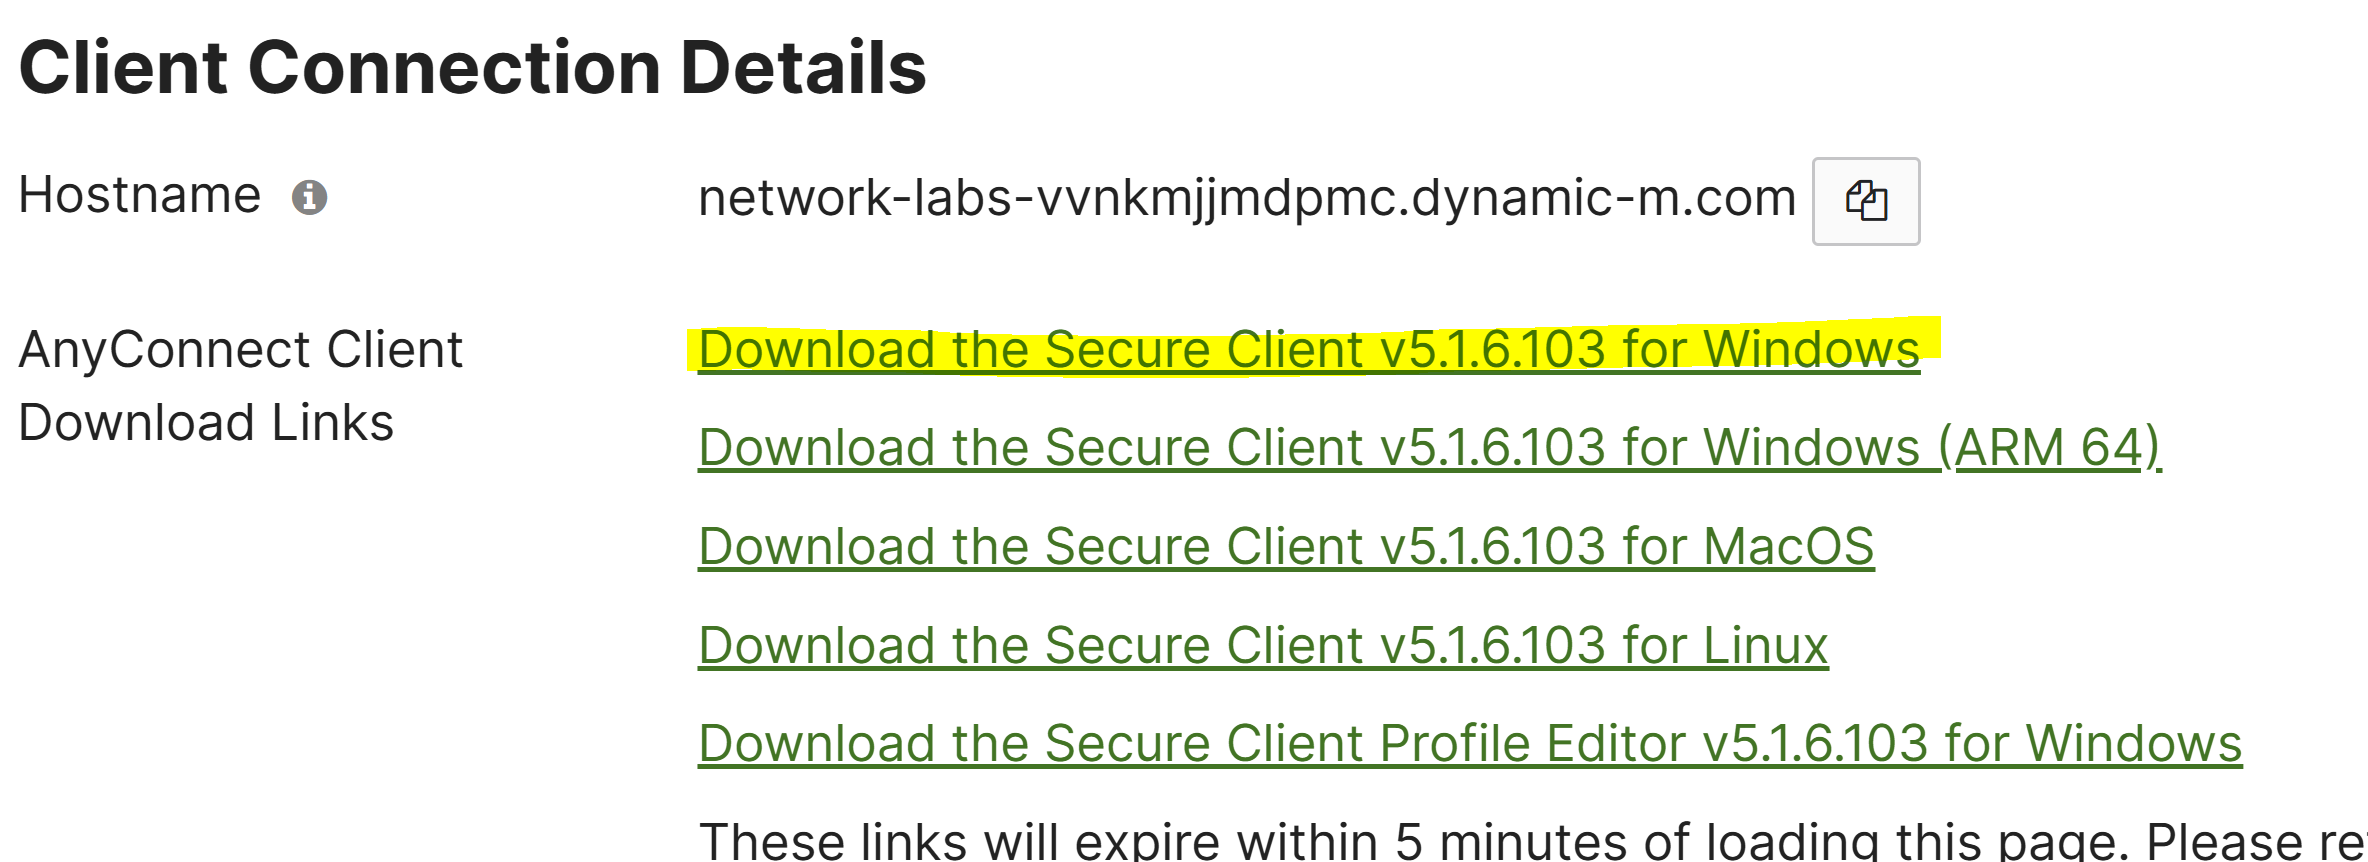
- After configuring VPN users in the Meraki Dashboard, the next step would be to transfer over the Cisco AnyConnect client software to the client device that will be using the VPN
- The VPN software can be downloaded from the Client VPN section of the Meraki Dashboard
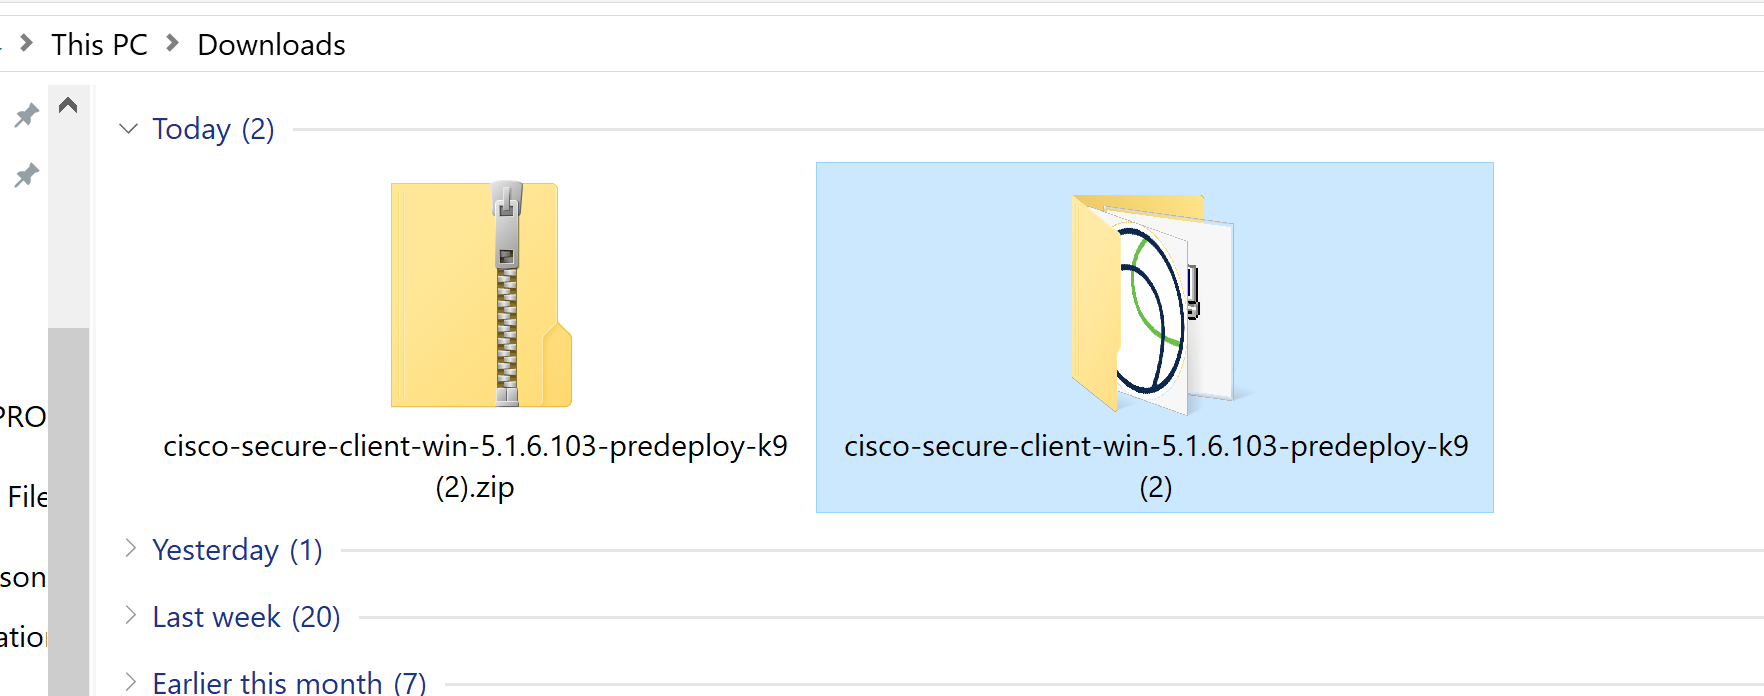
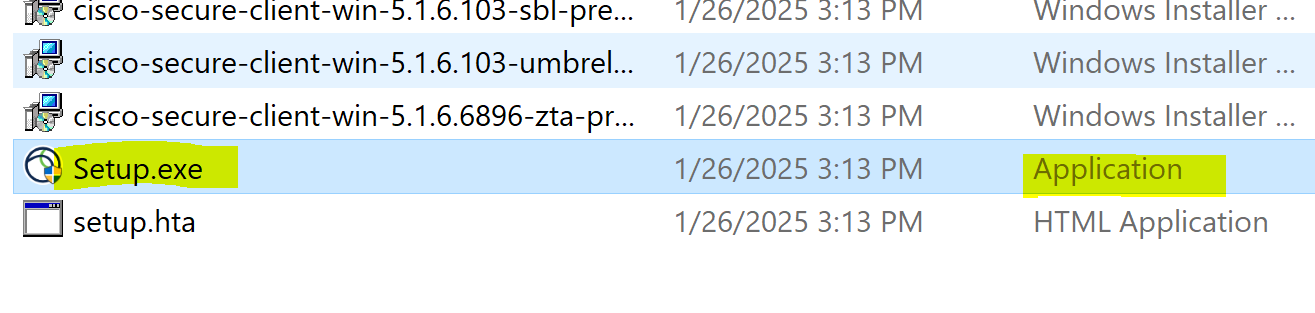
- Extract the .zip folder and run the executable to install the AnyConnect client

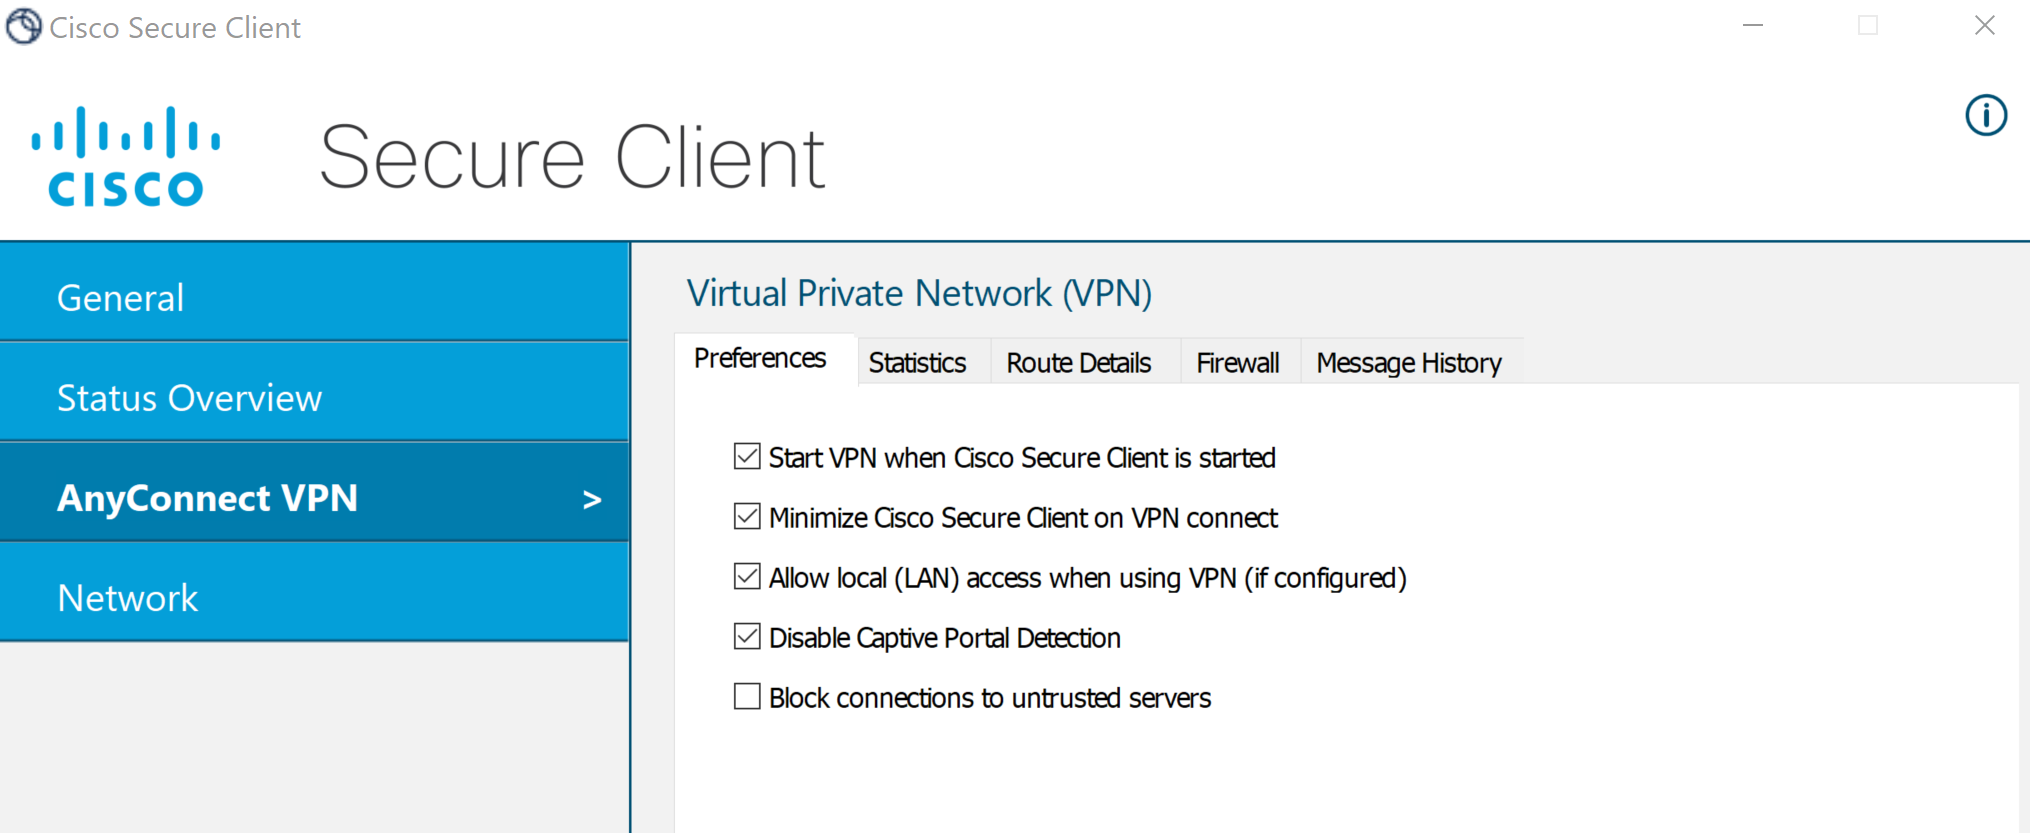
AnyConnect Preference Options
- The following AnyConnect preference options can be adjusted accordingly based on your network environment
Enable Local LAN Access
- Enable this option to permit the device to access both the VPN network and your local network simultaneously
Disable Captive Portal Detection
- This option prevents the VPN client from trying to auto detect and handle captive portals when connecting to public Wifi networks
- In short, enabling this option can make the VPN connection process smoother in certain situations
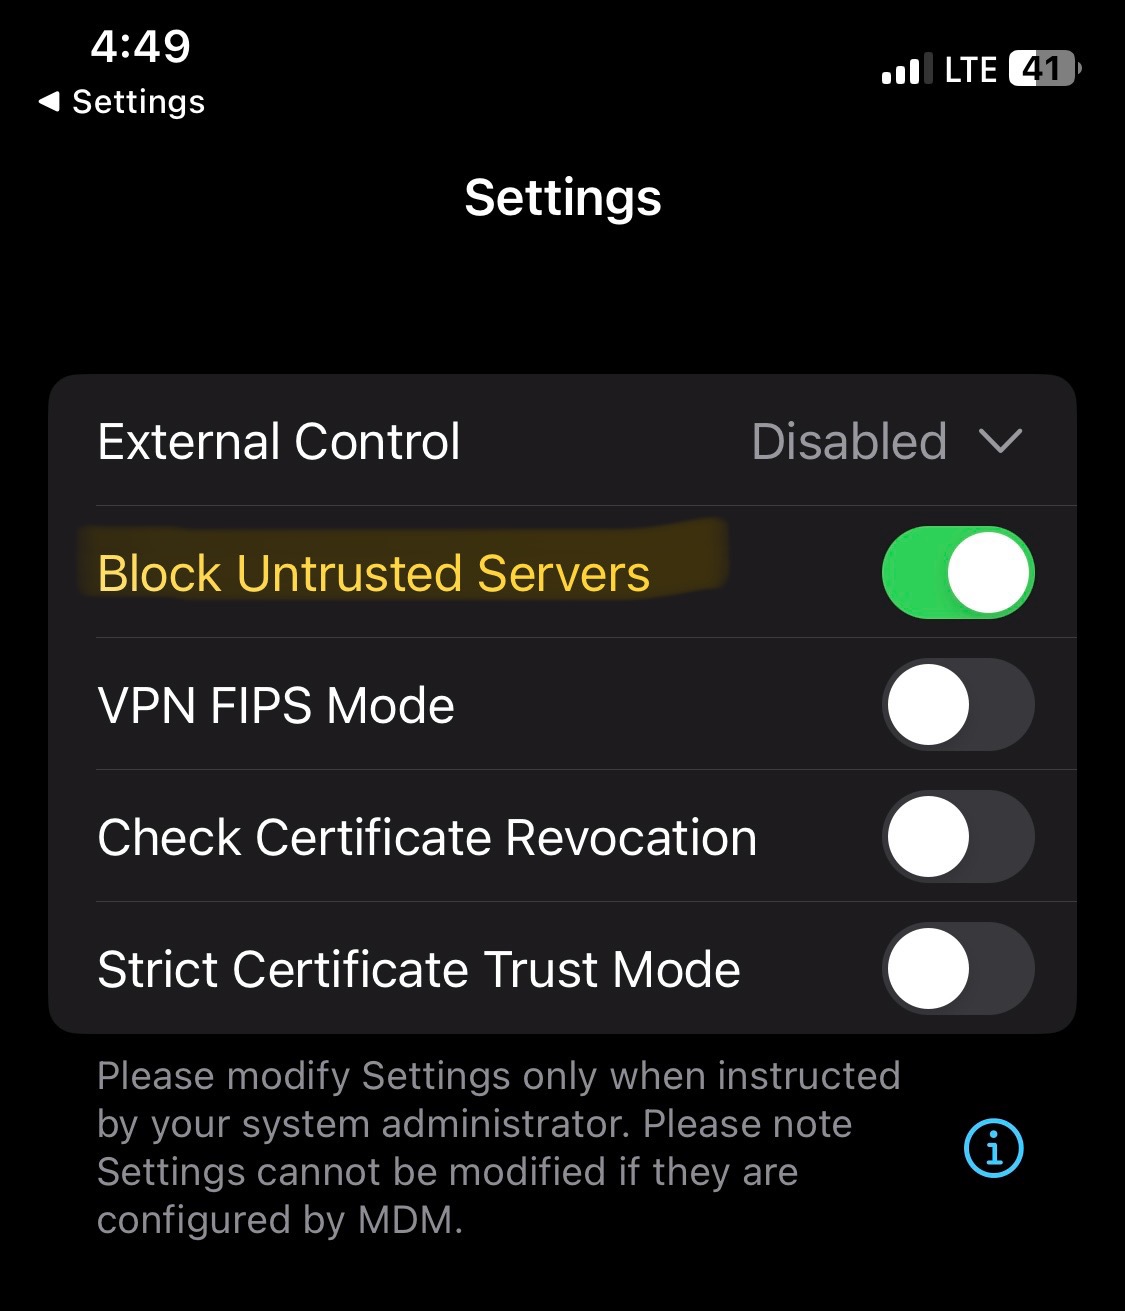
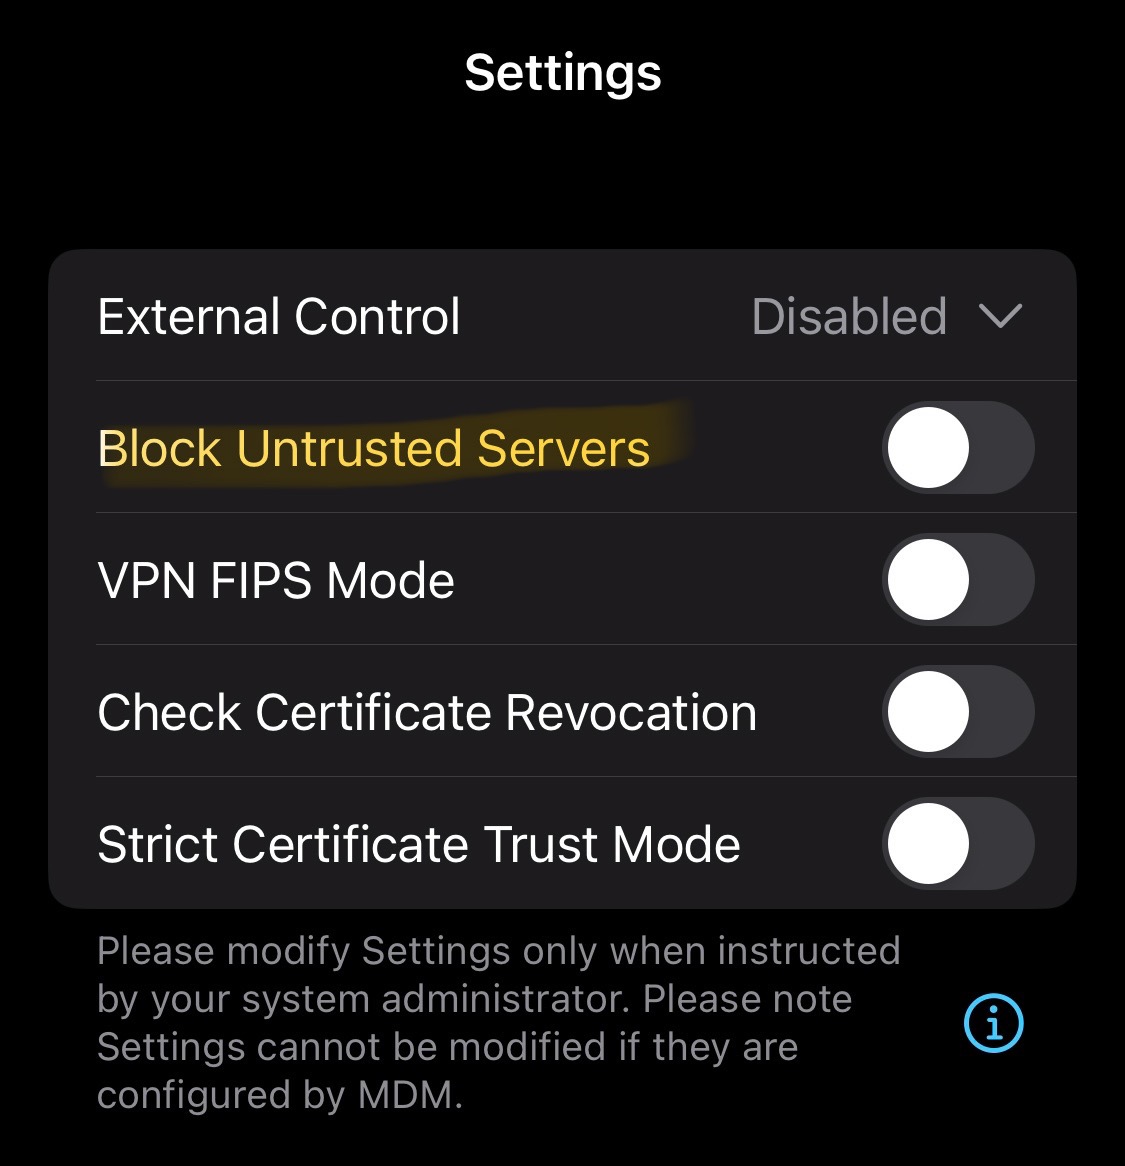
Block Connections to Untrusted Servers
- A security feature that helps ensure that your VPN connection only communicates with trusted and secure servers
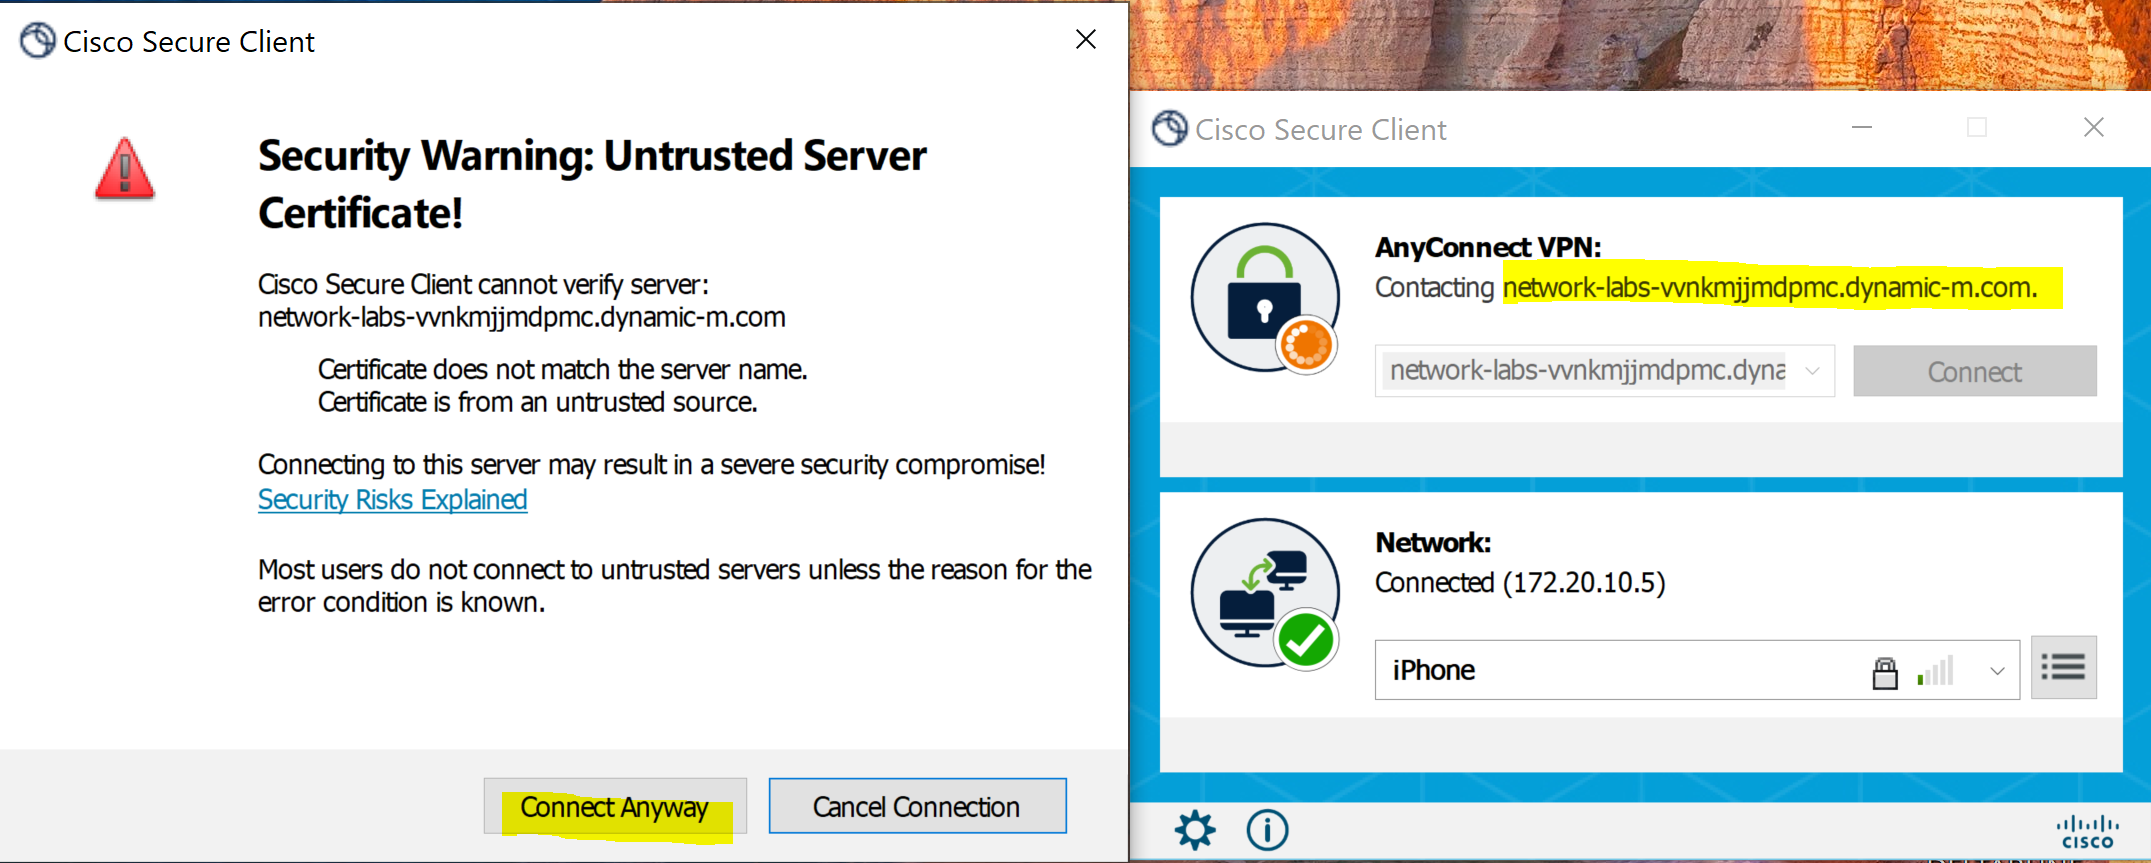
- Since this is a lab scenario, I've this option unchecked as my Meraki MX is not utilizing a trusted certificate
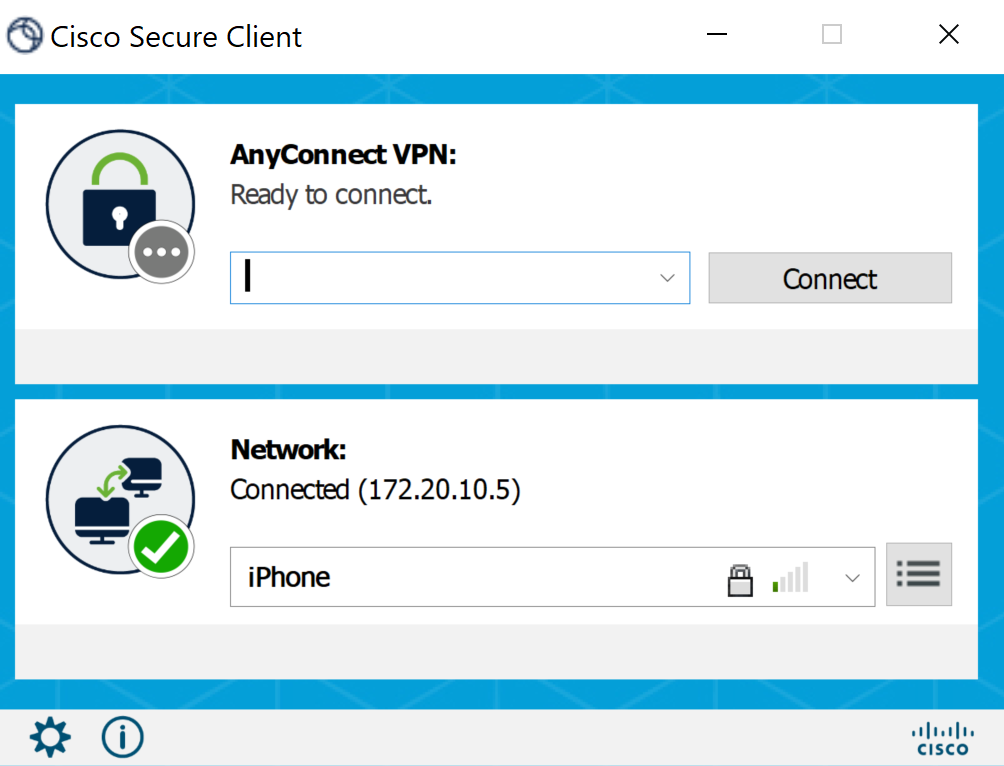
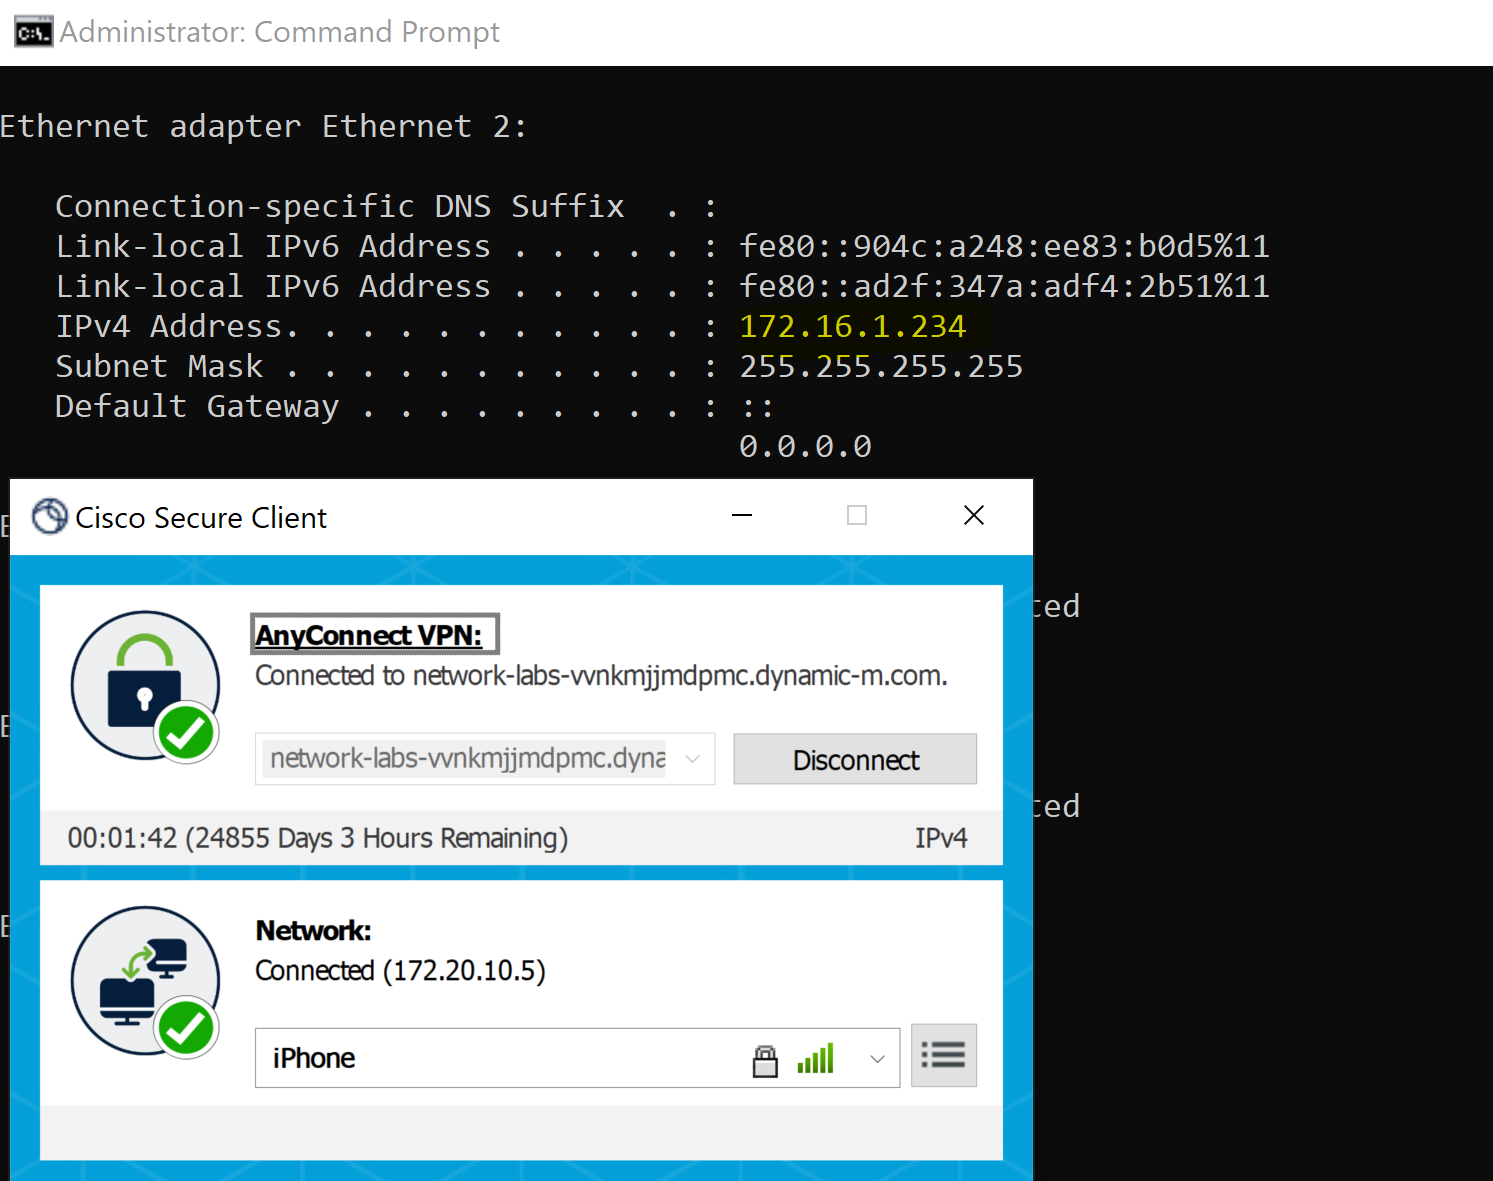
Connecting to the Meraki VPN server using the DDNS hostname
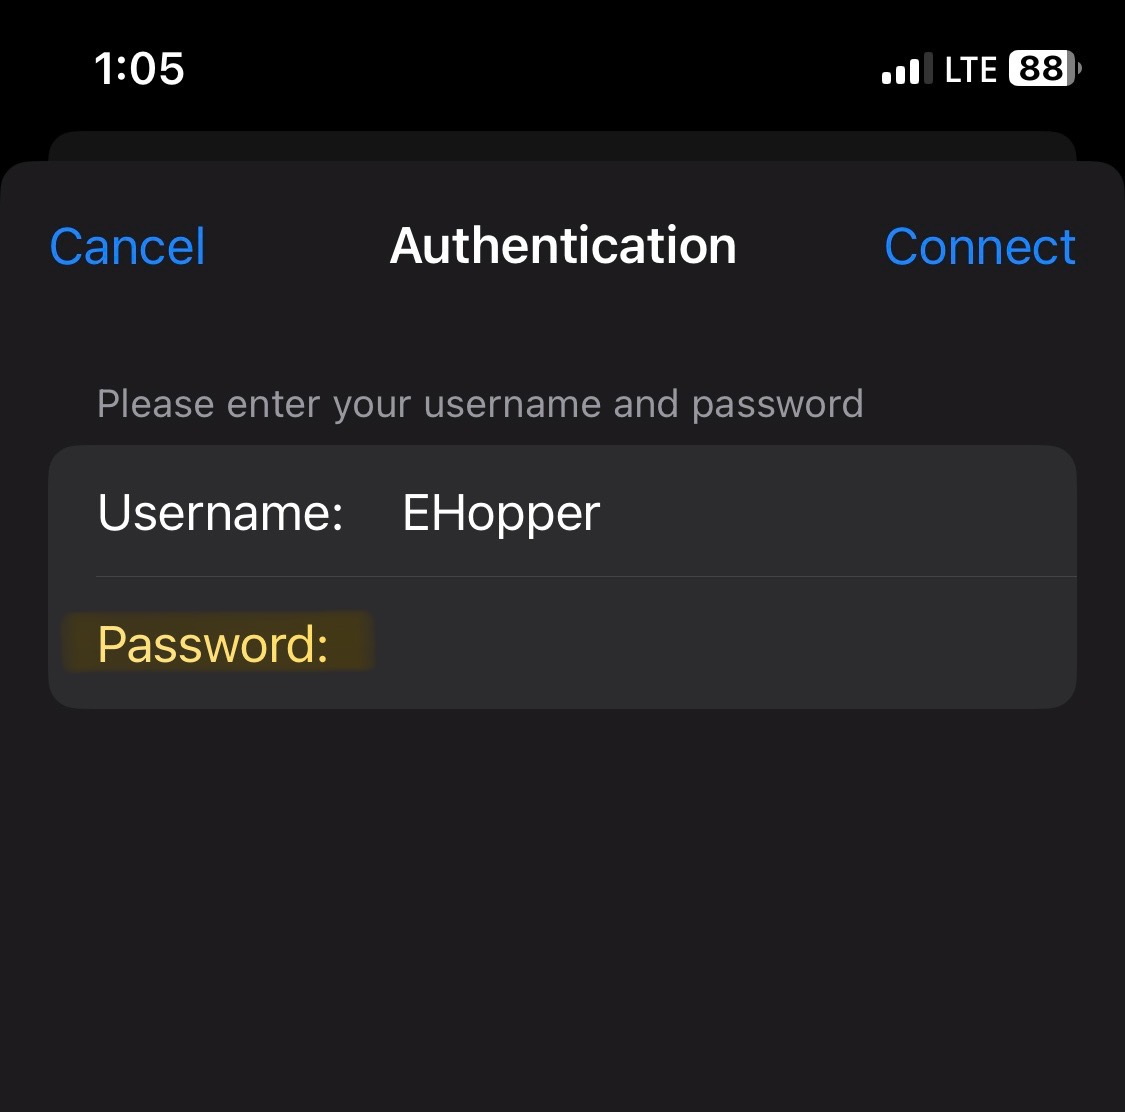
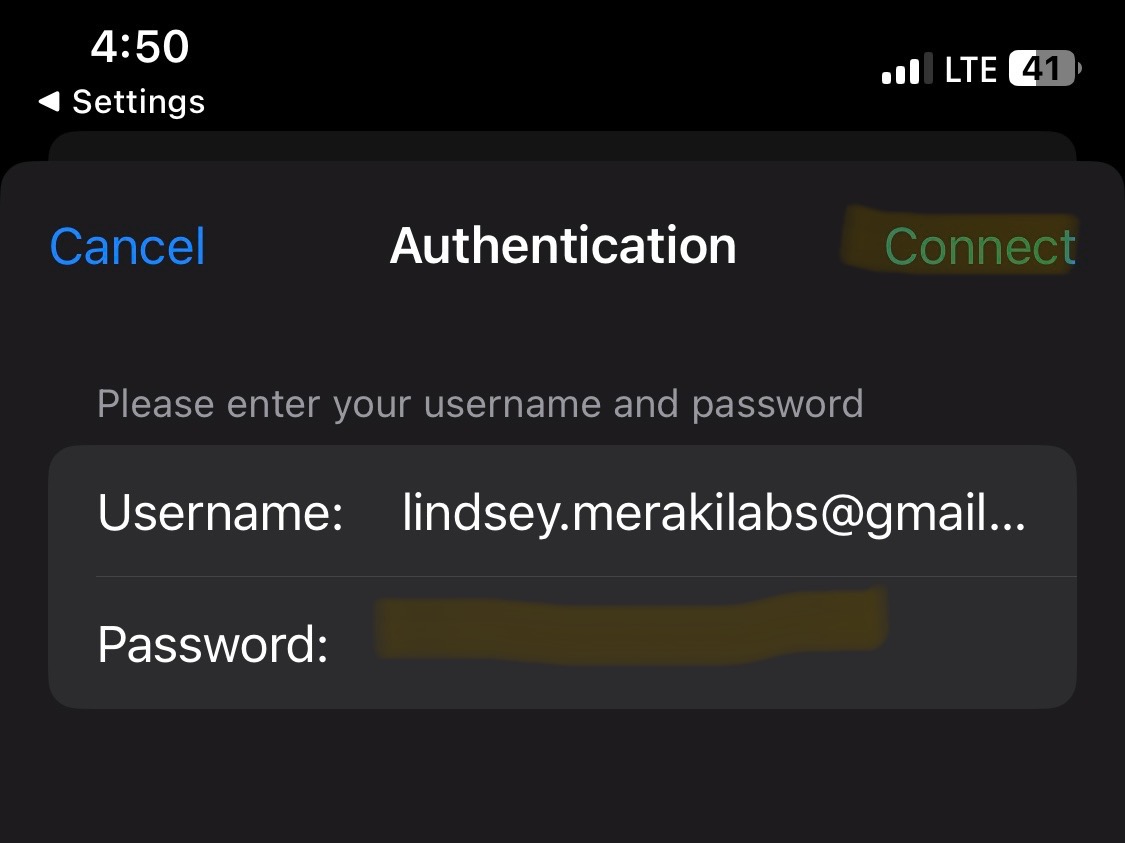
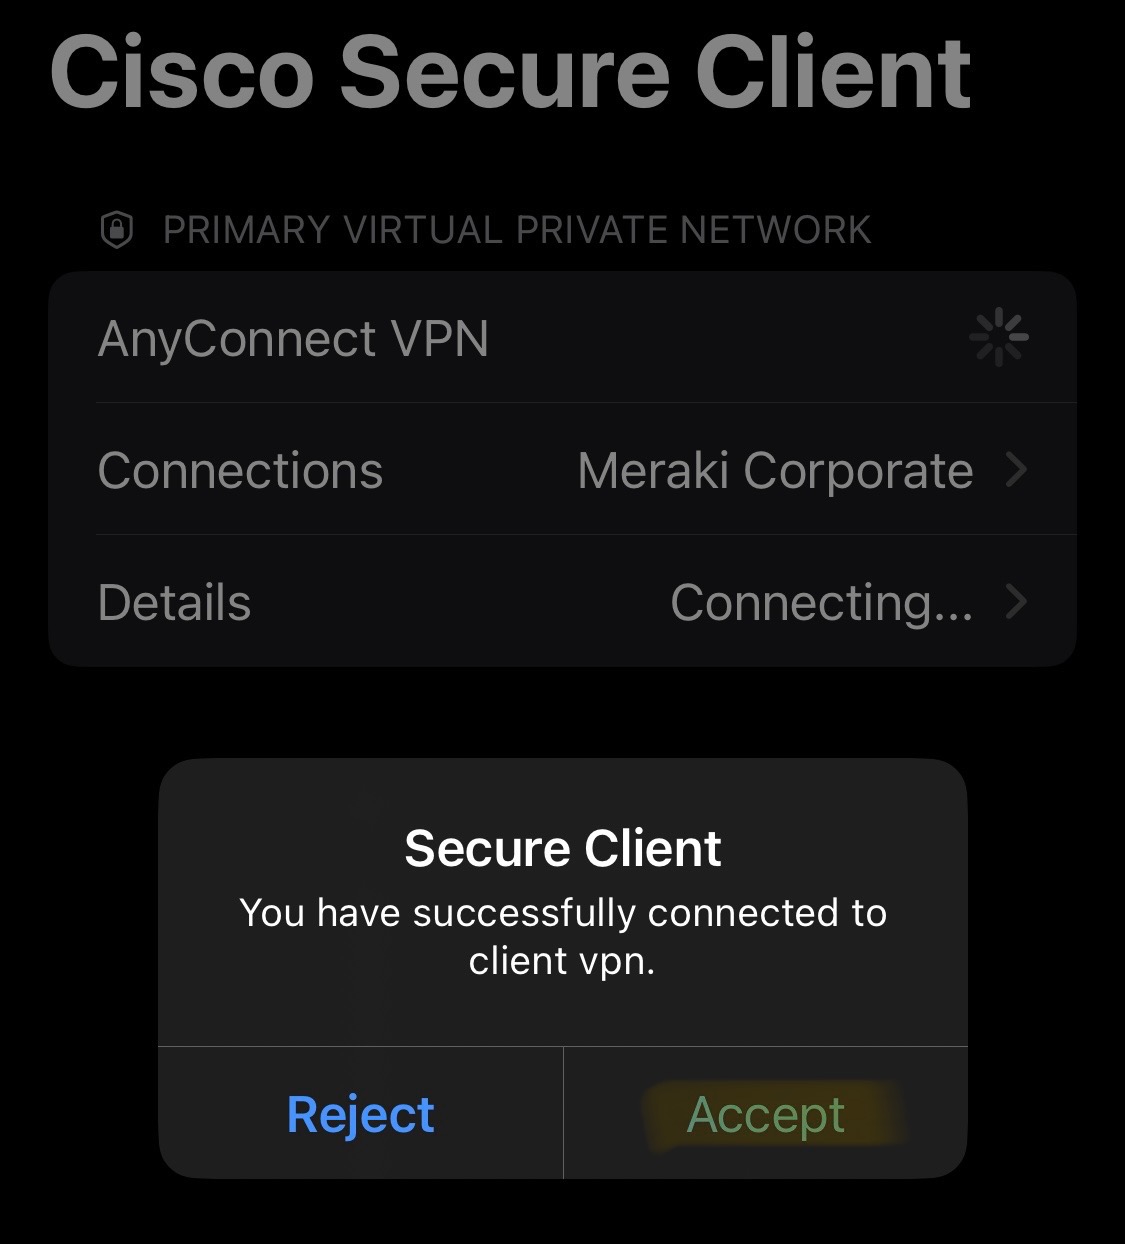
Authentication Credentials to authenticate to the VPN server

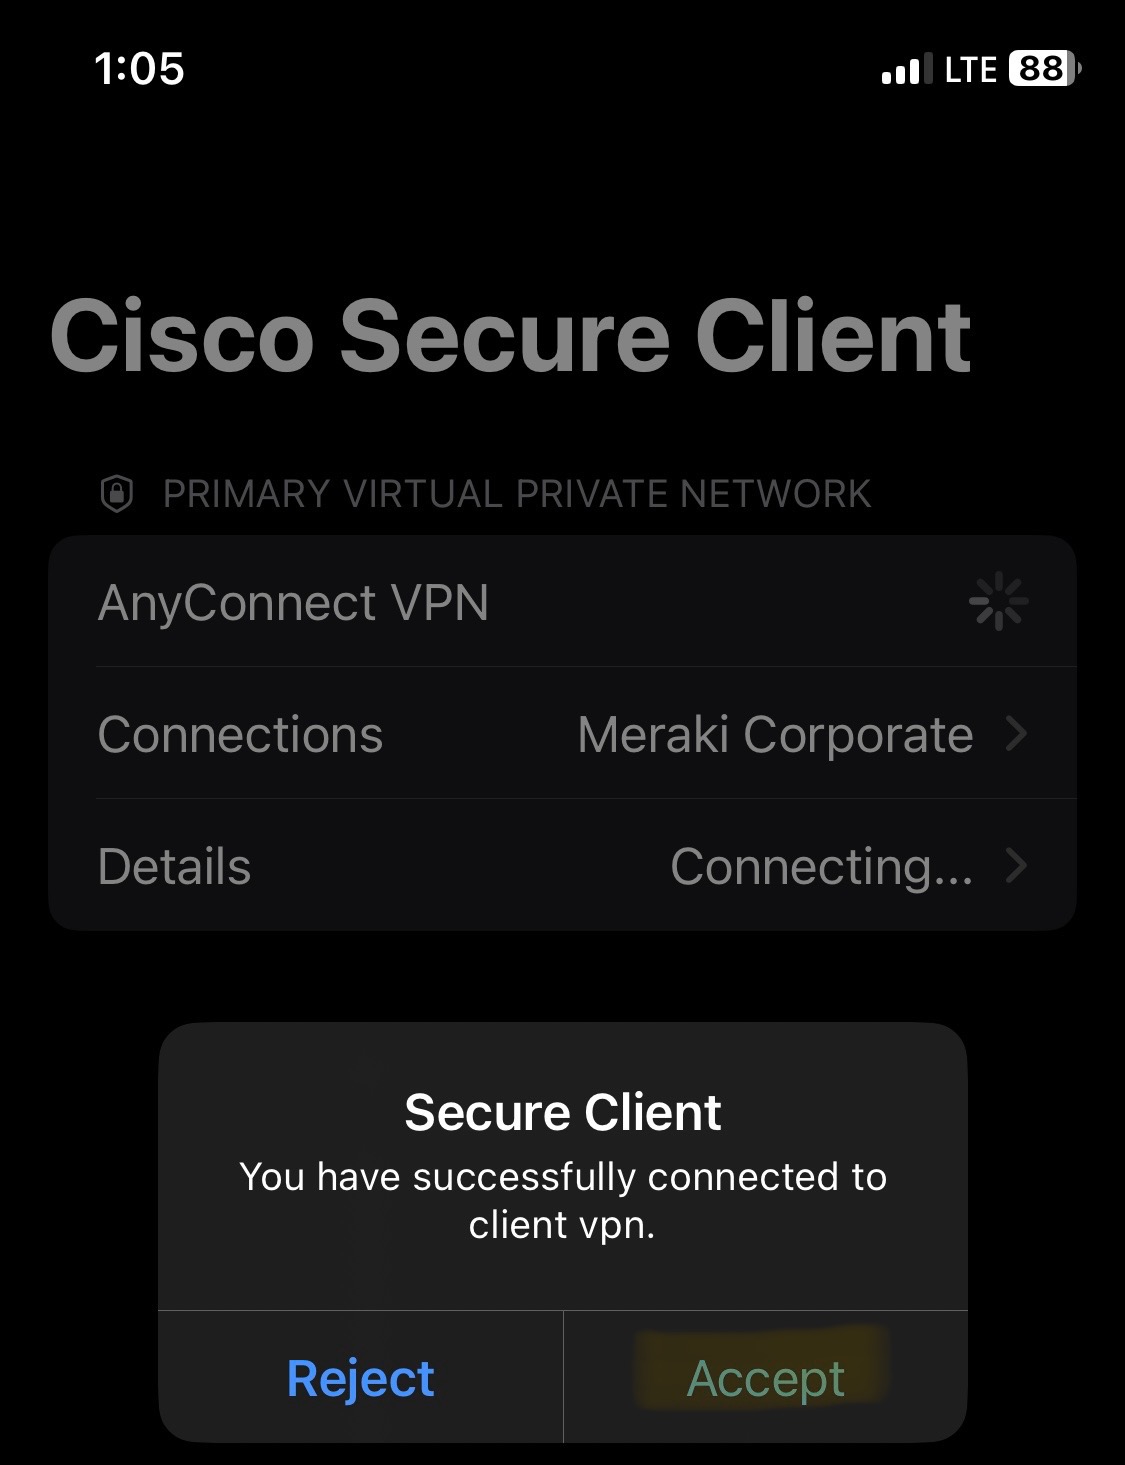
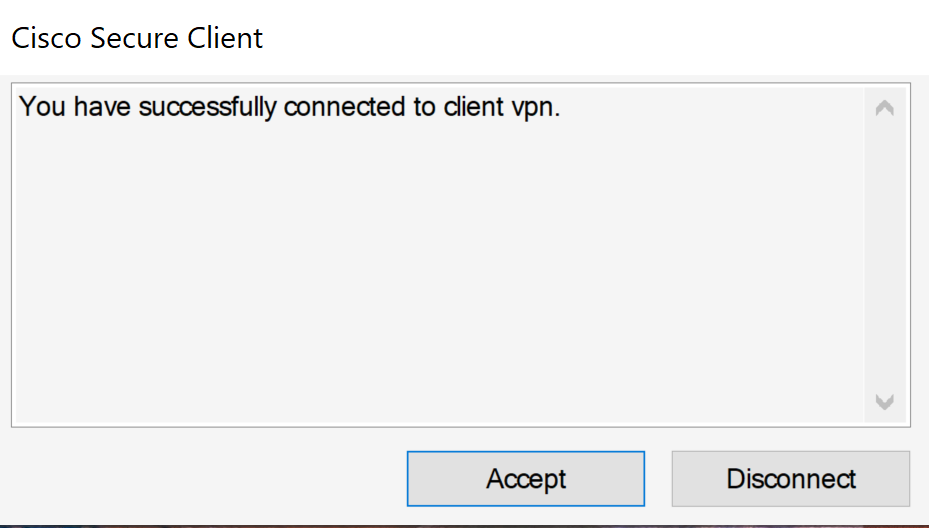
Triggered Log-in Banner upon successful authentication to the VPN server
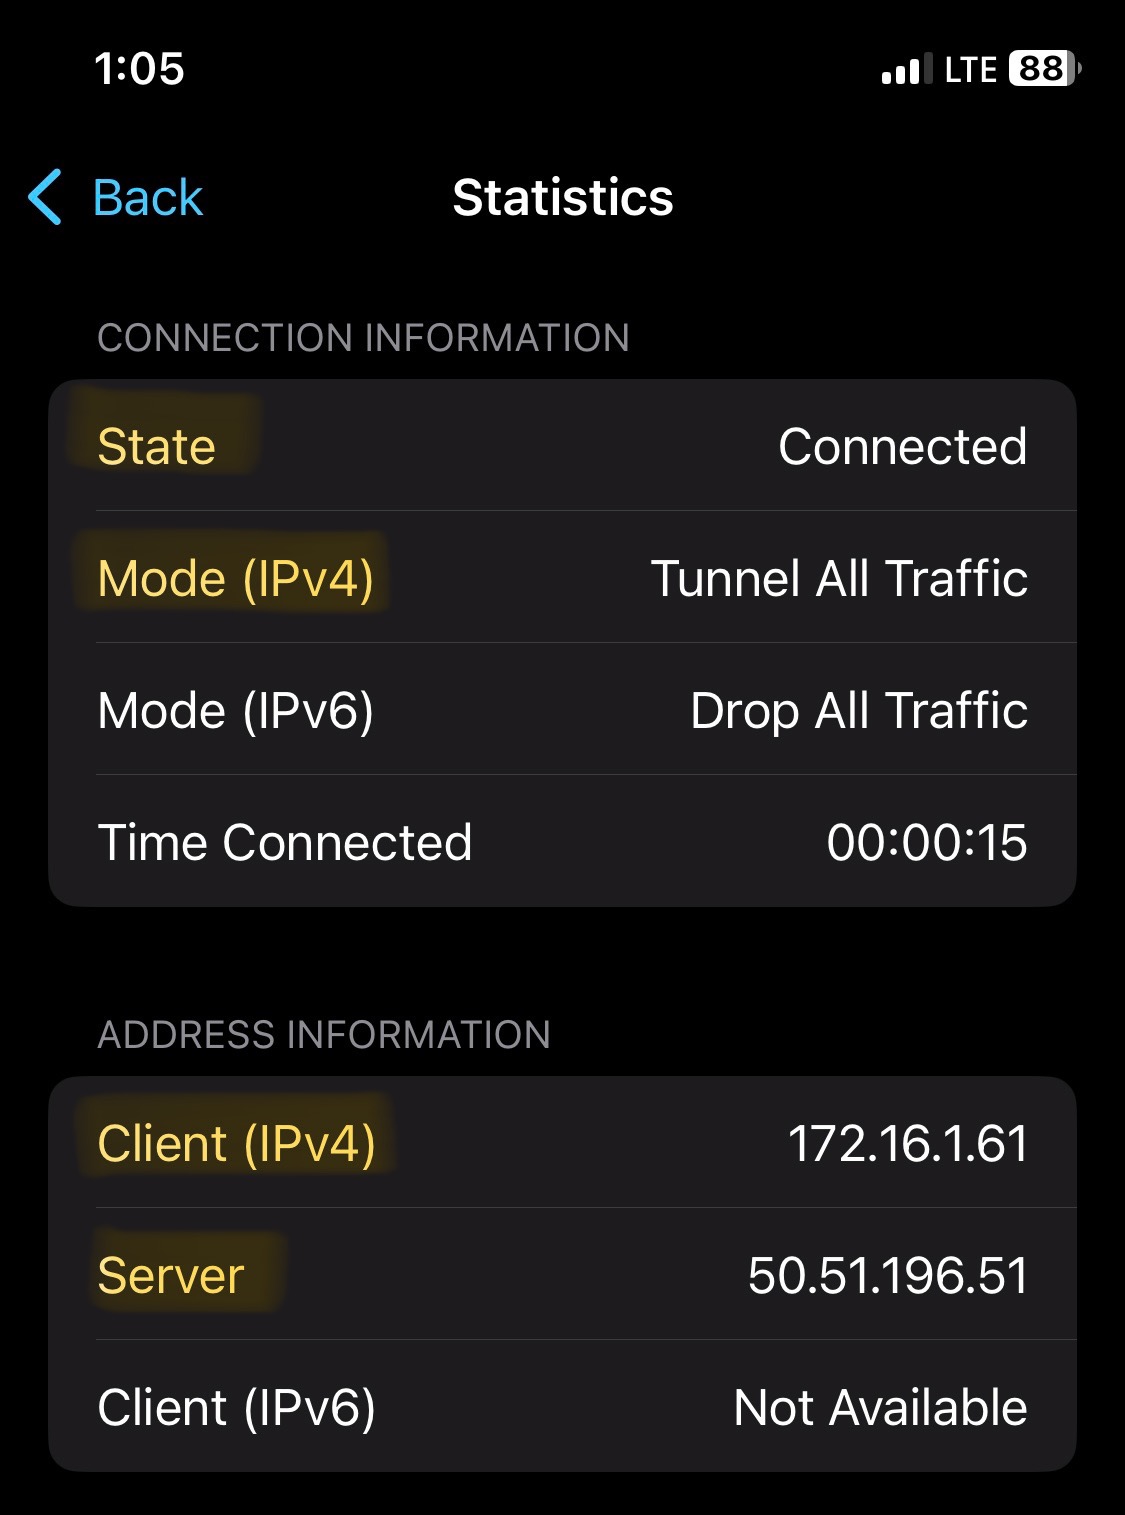
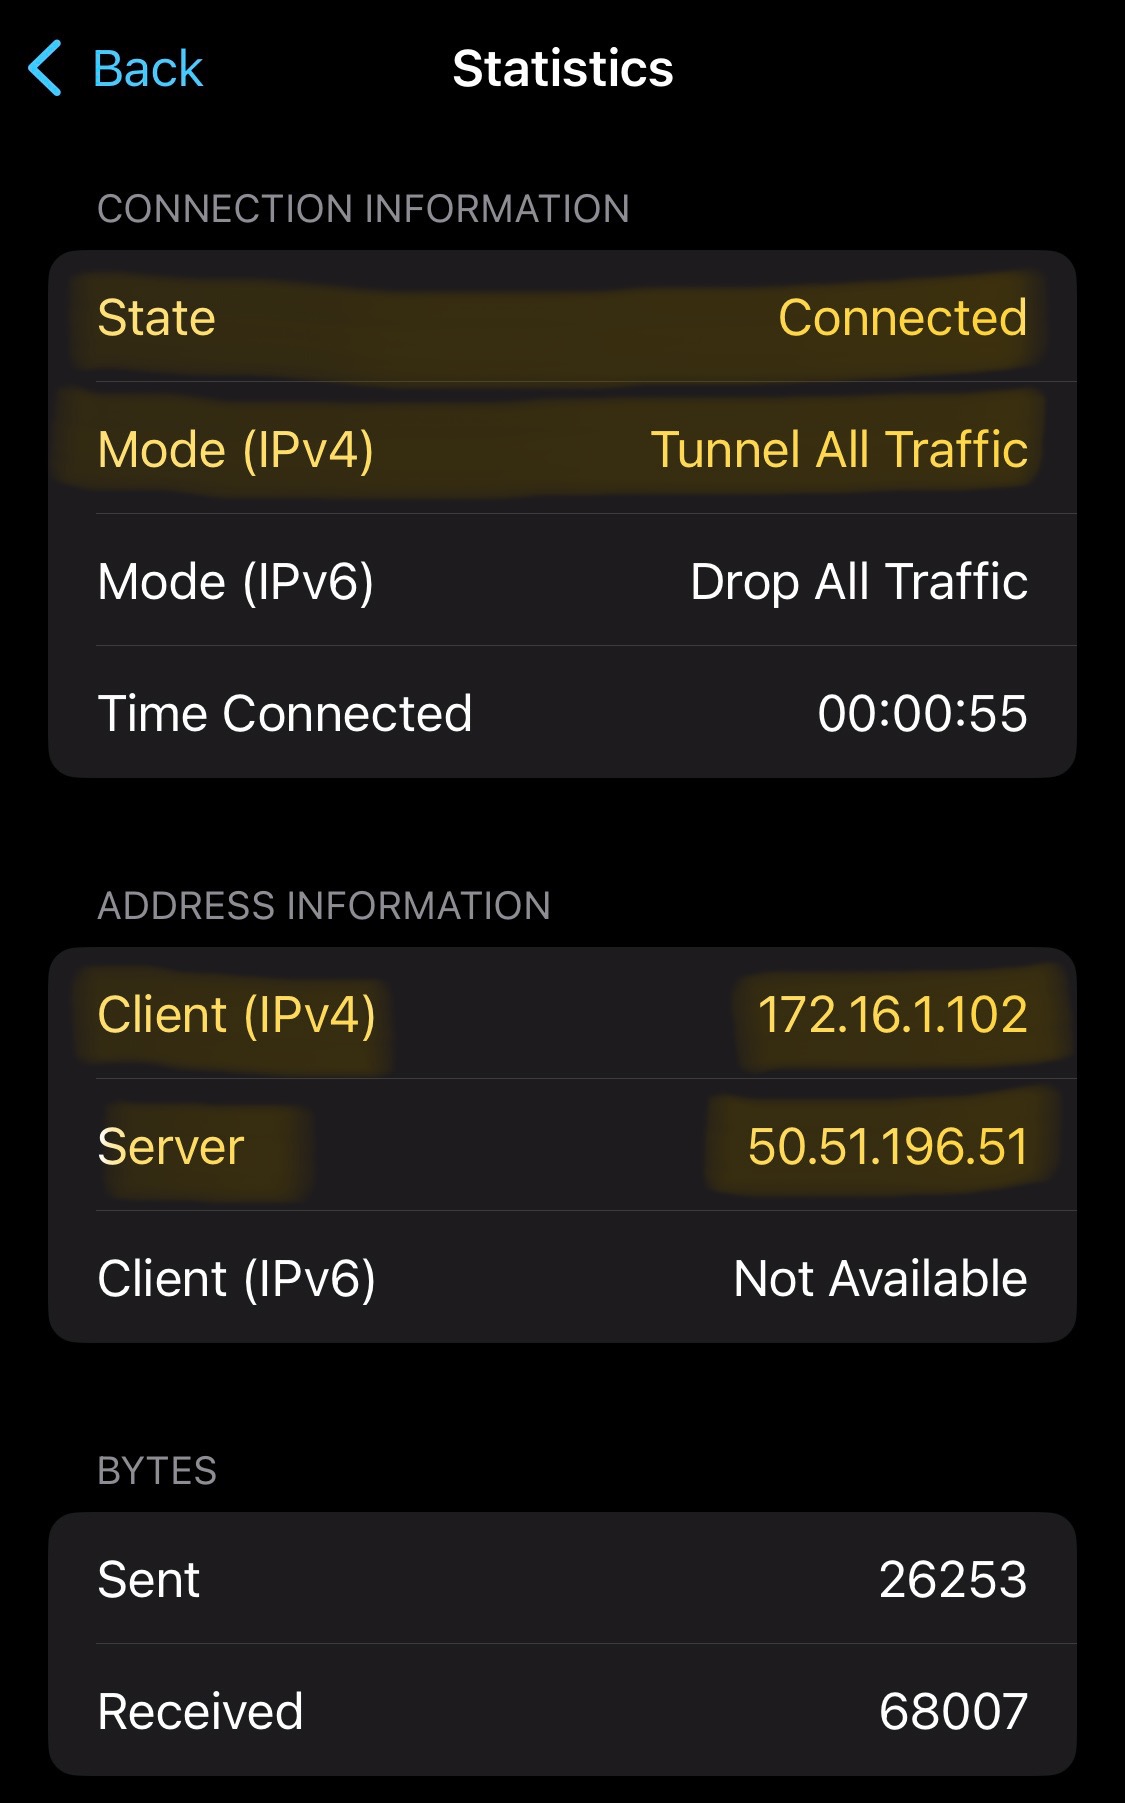
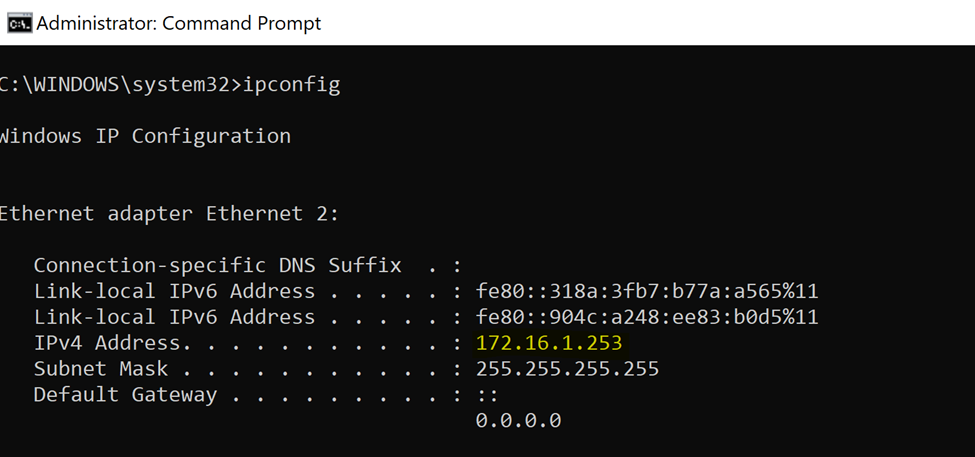
VPN subnet verification defined in the AnyConnect settings in the Meraki Dashboard
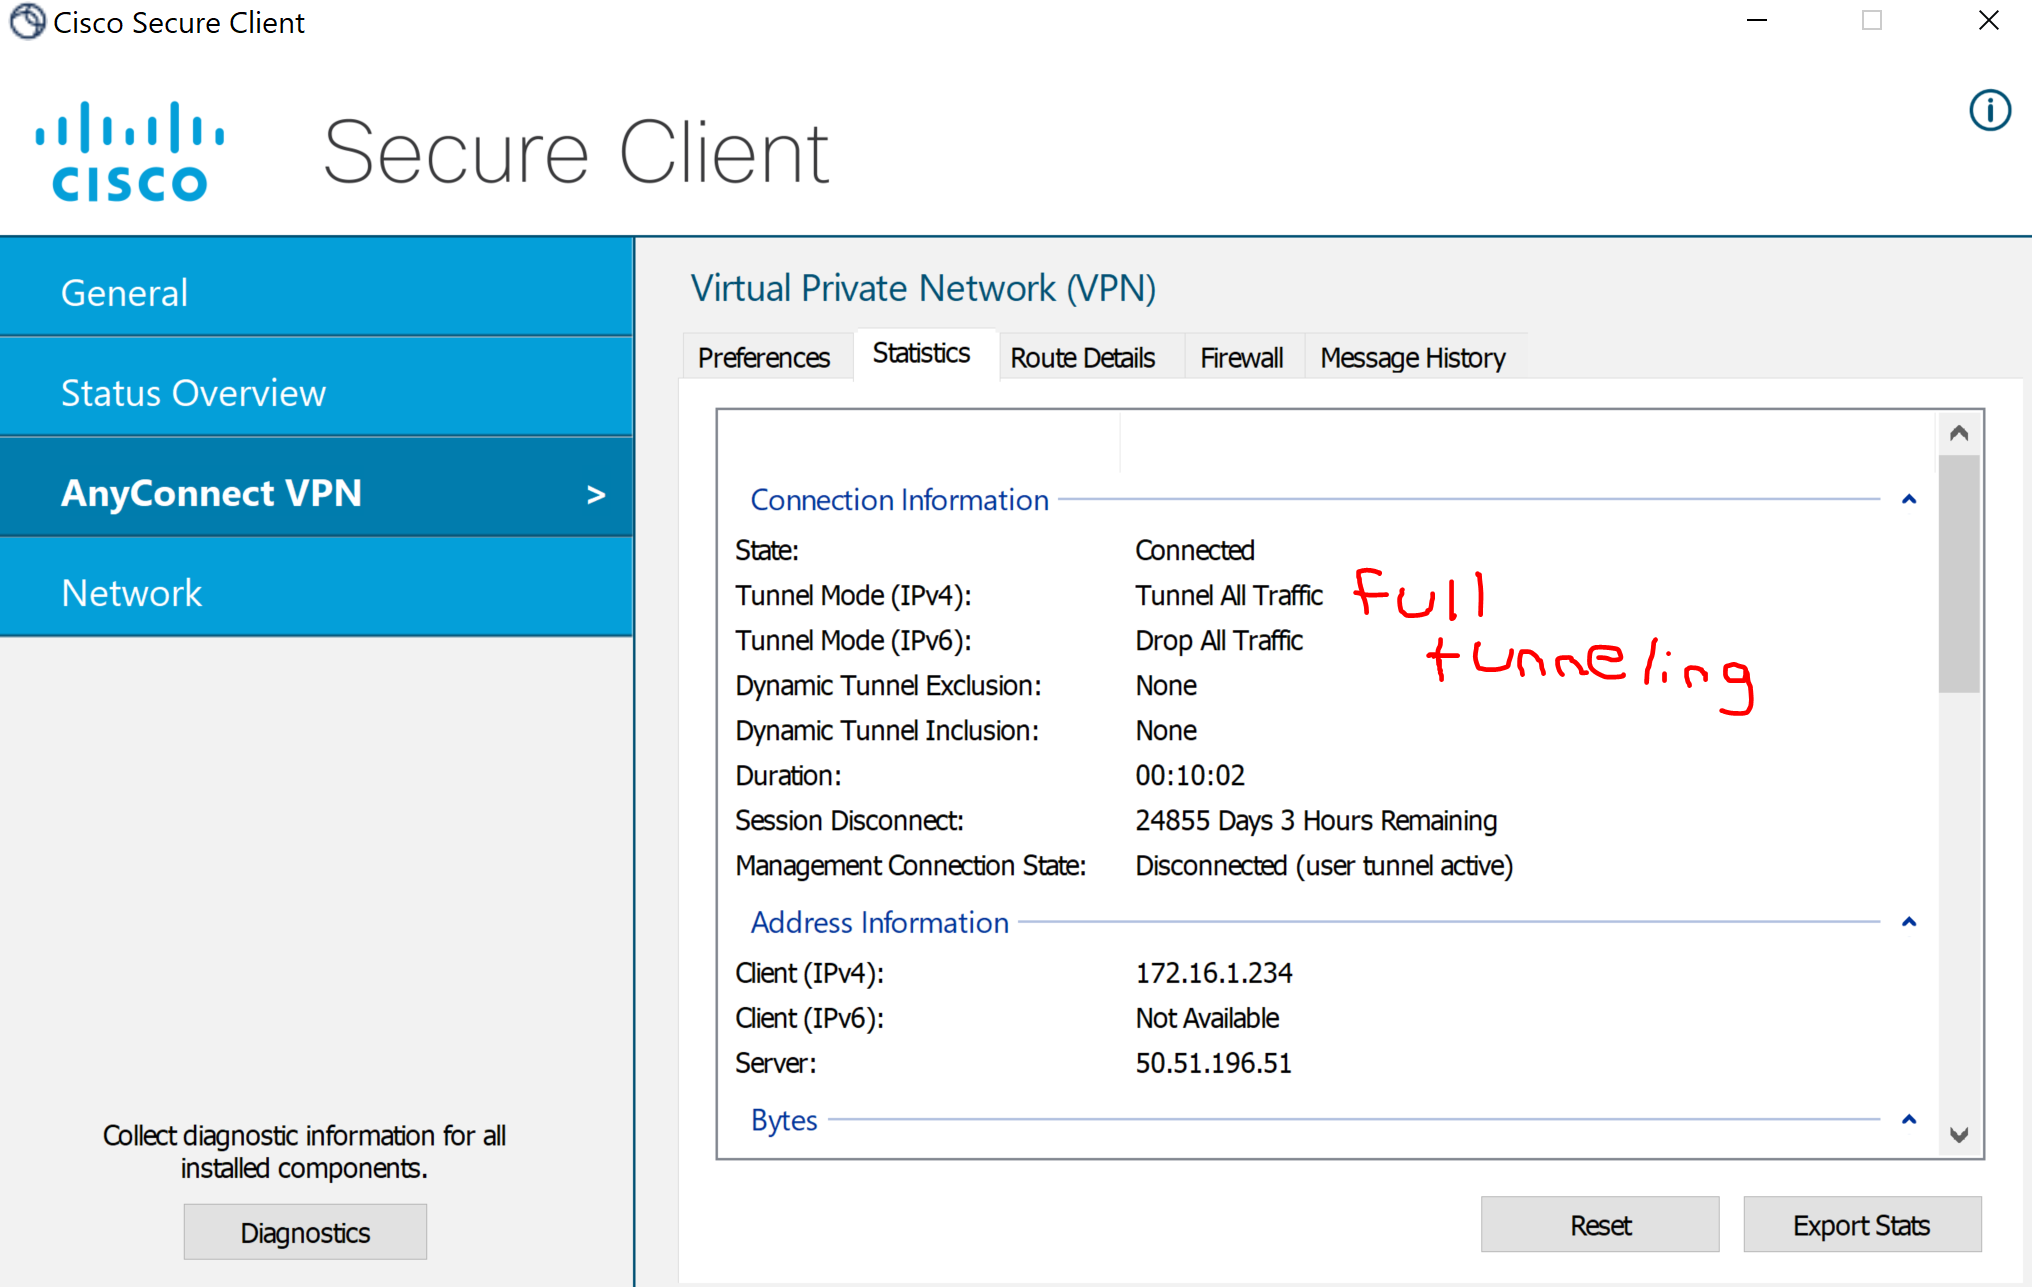
Verification of the Full tunneling method defined in the AnyConnect settings in the Meraki Dashboard
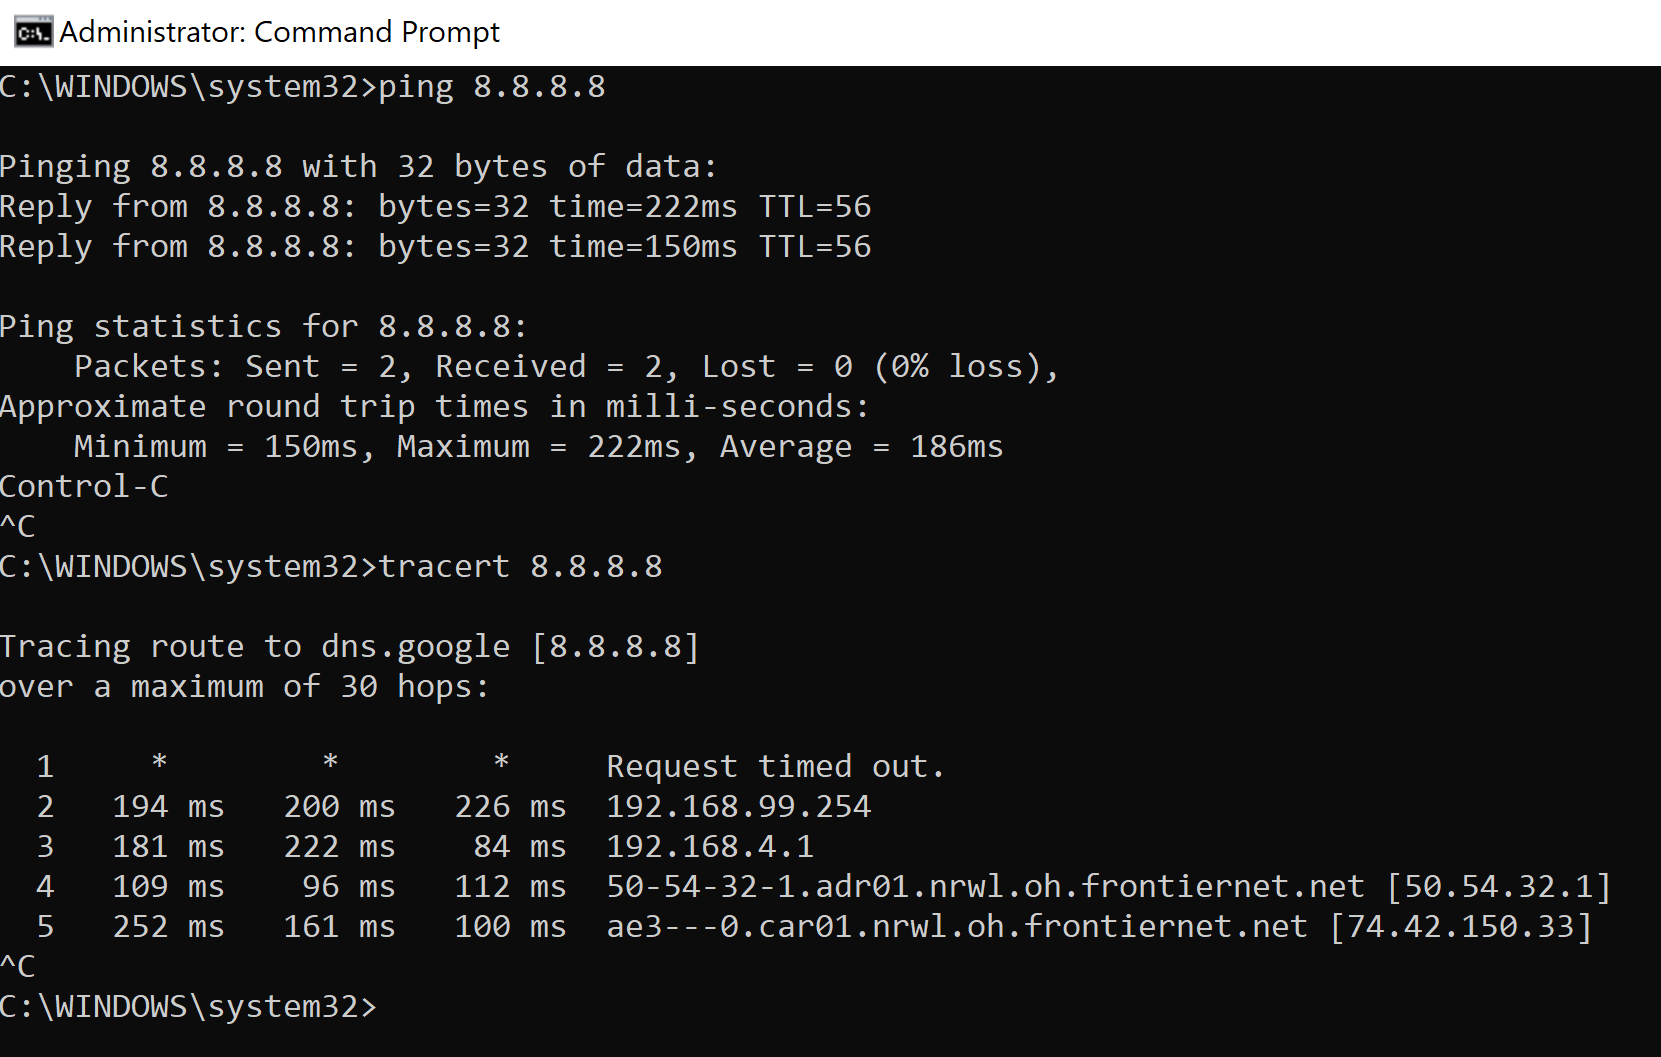
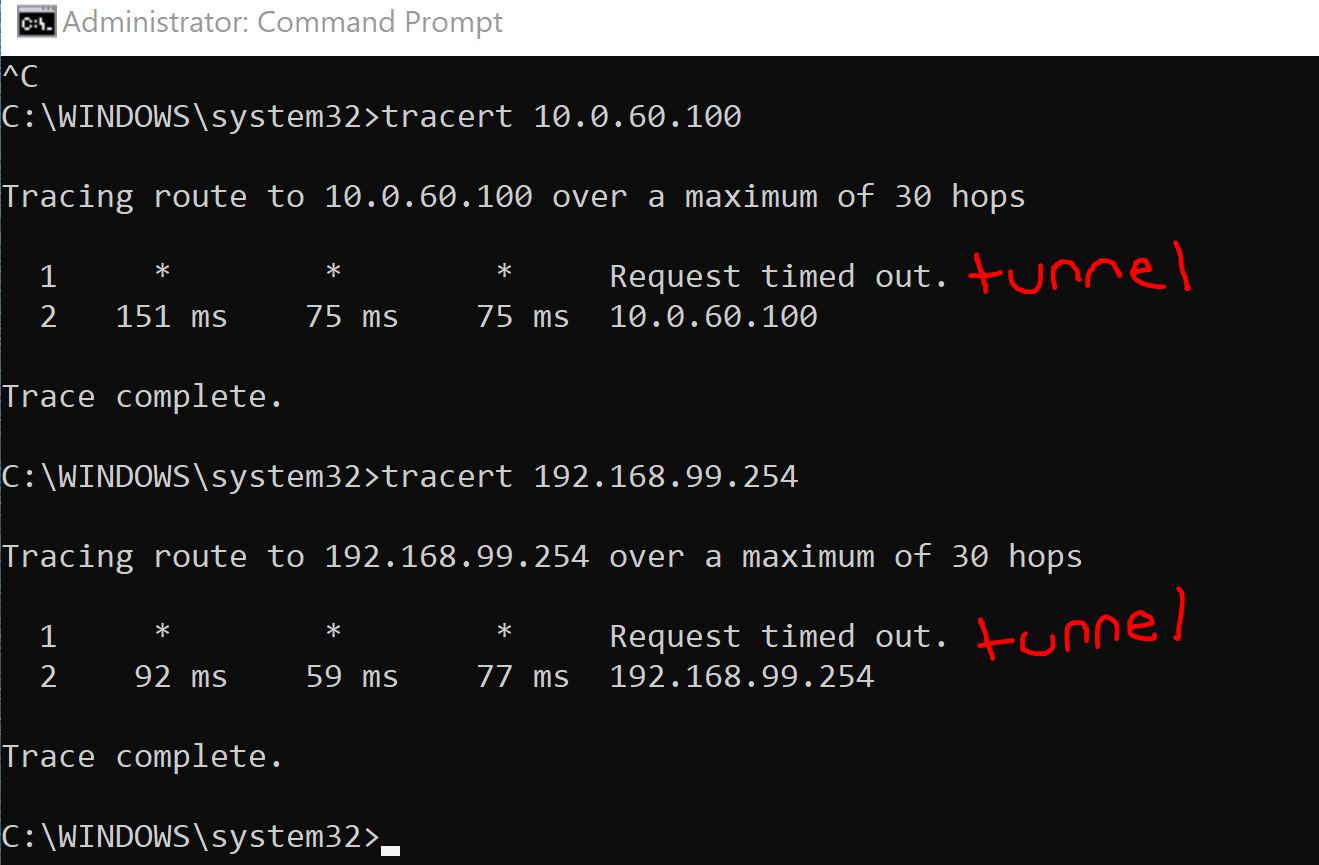
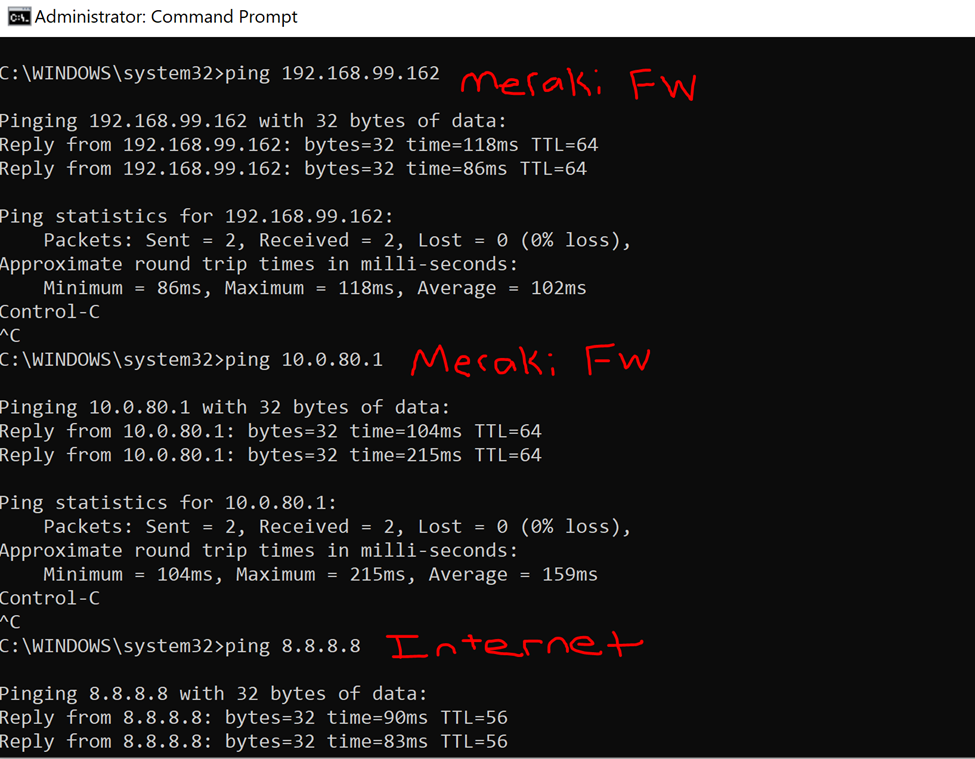
Full tunneling verification by analyzing a traceroute towards the Internet. All traffic is directed towards the VPN
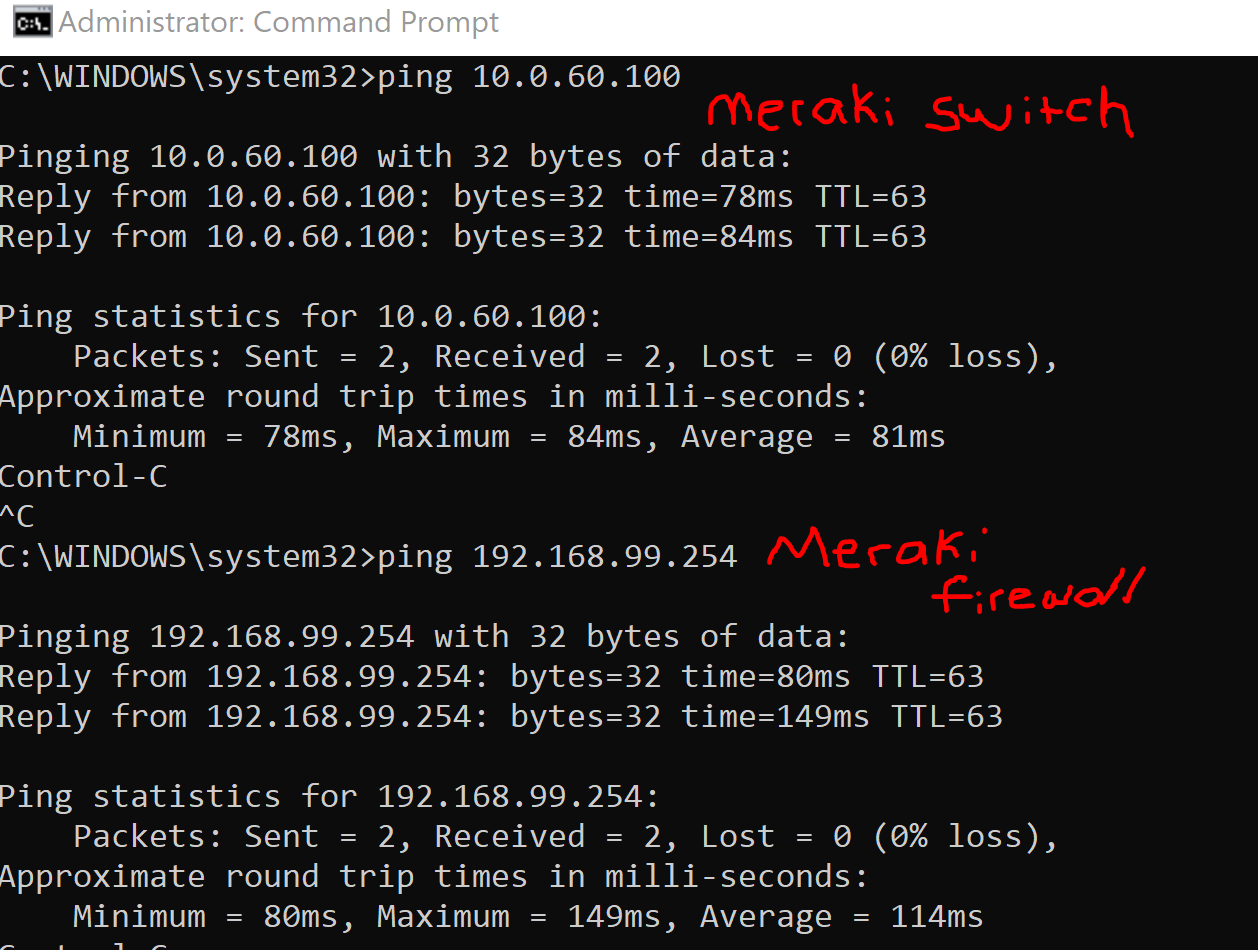
ClientVPN verification by testing connectivity to devices reachable through the VPN tunnel
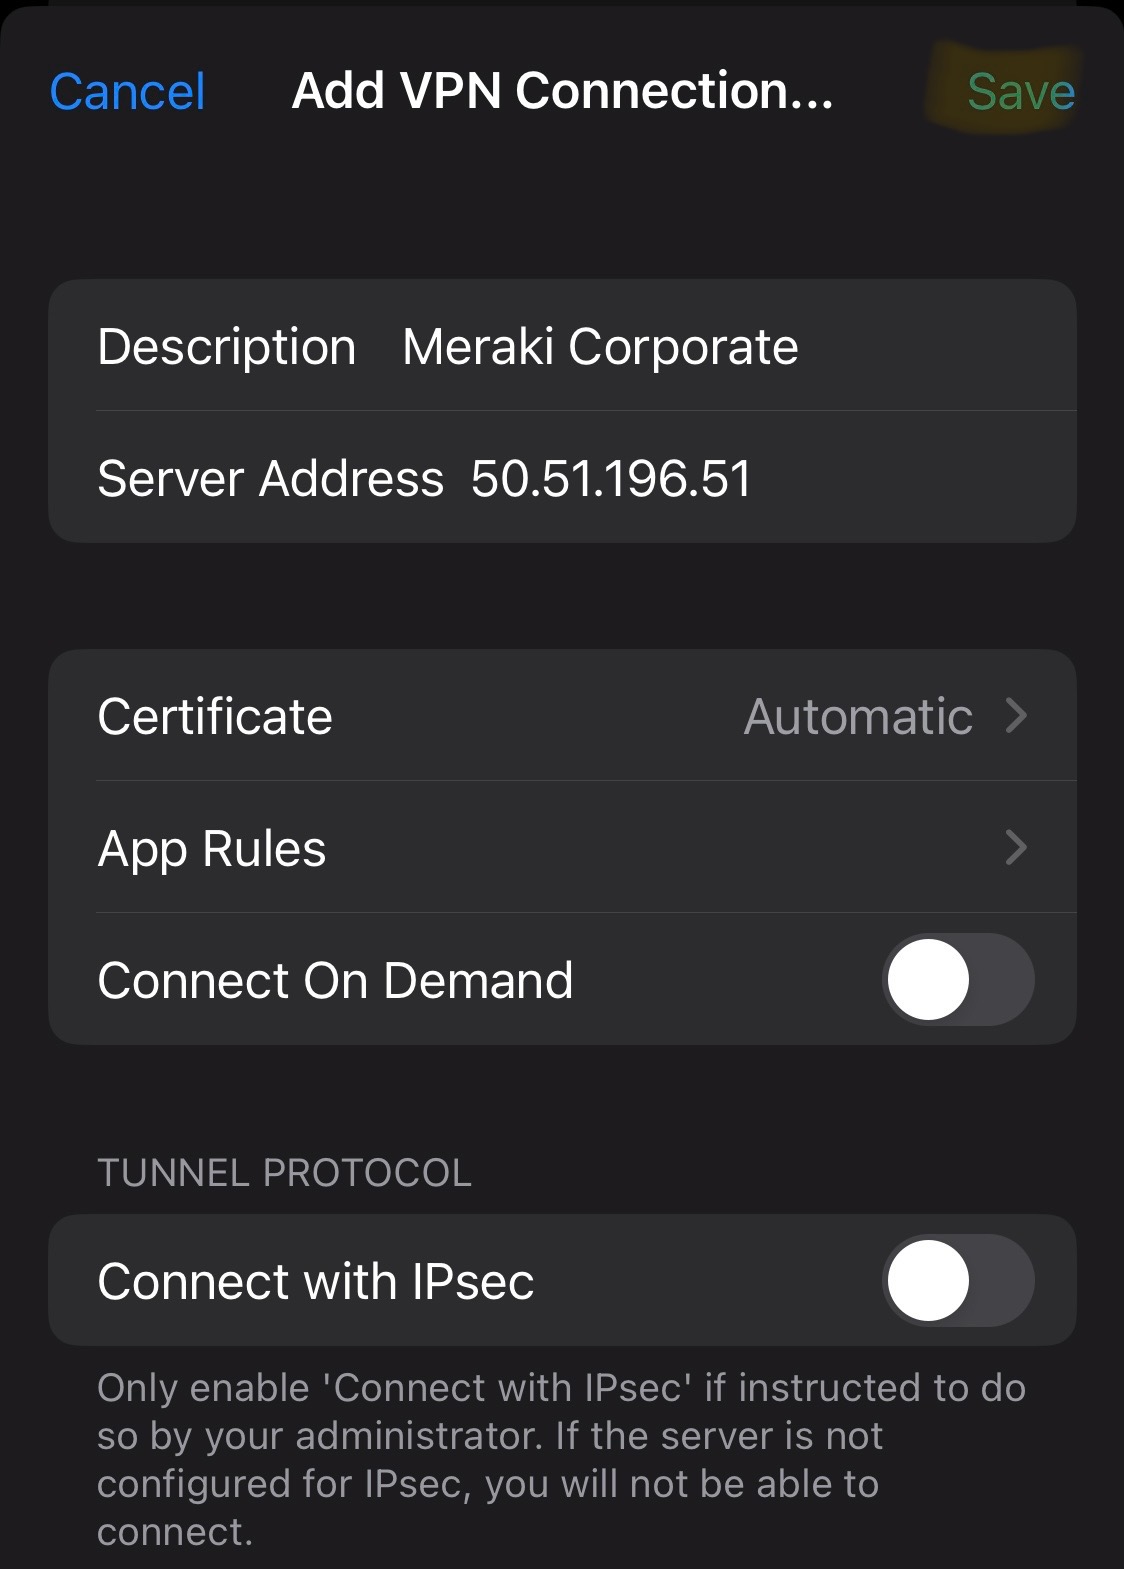
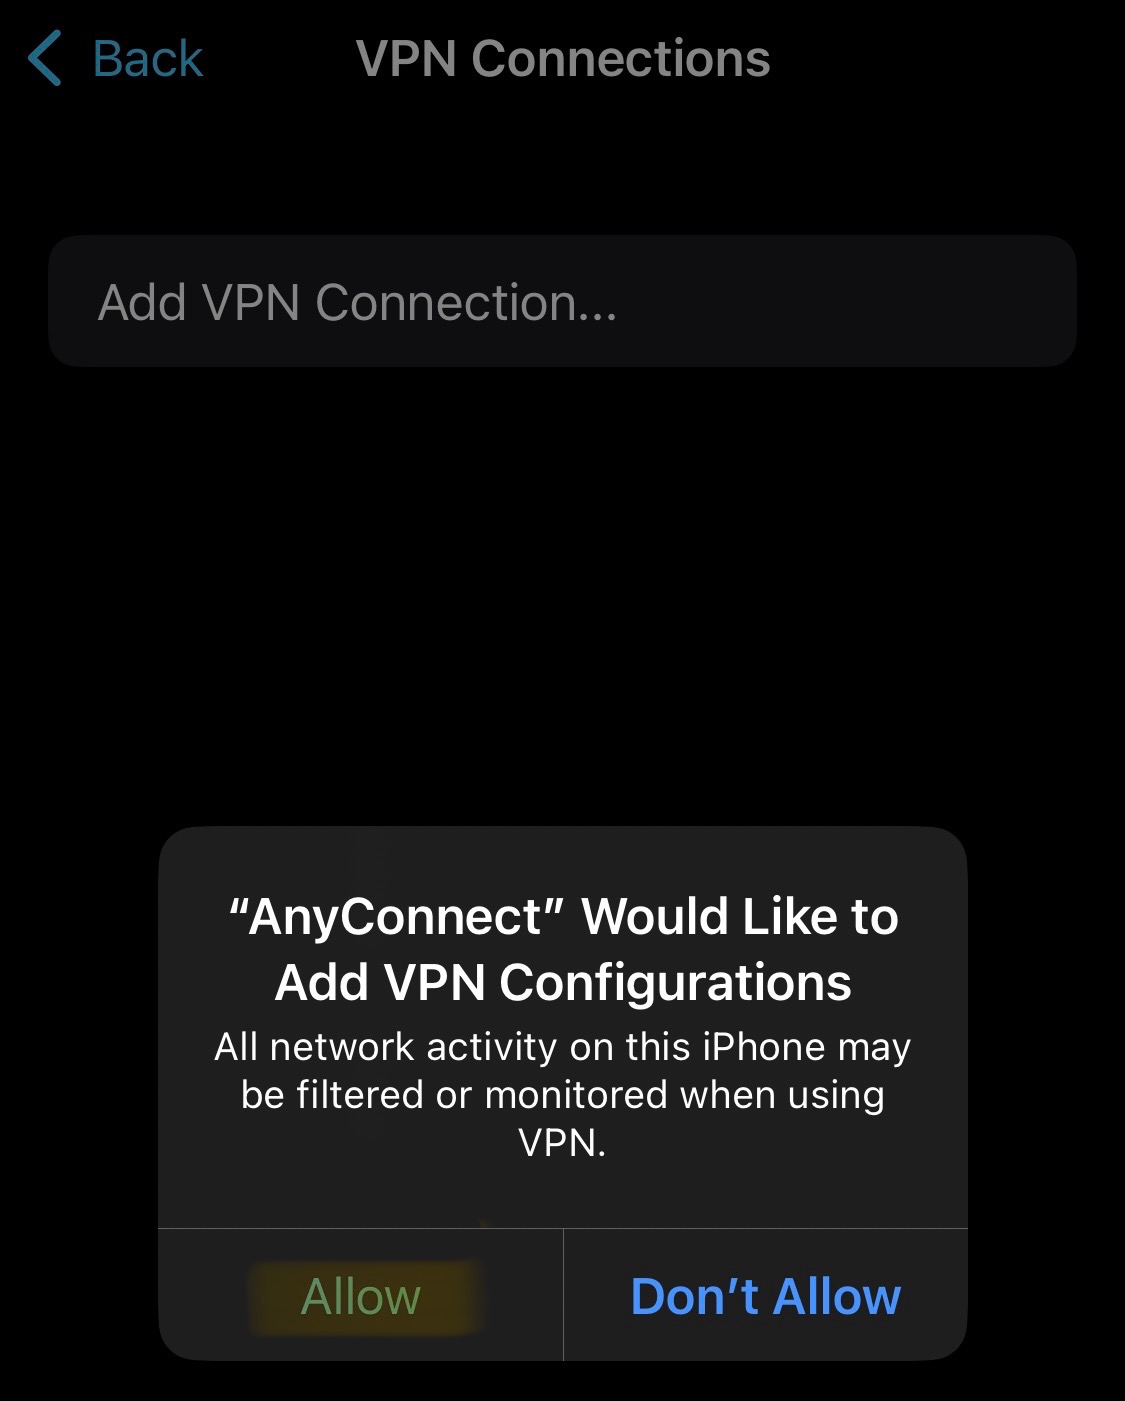
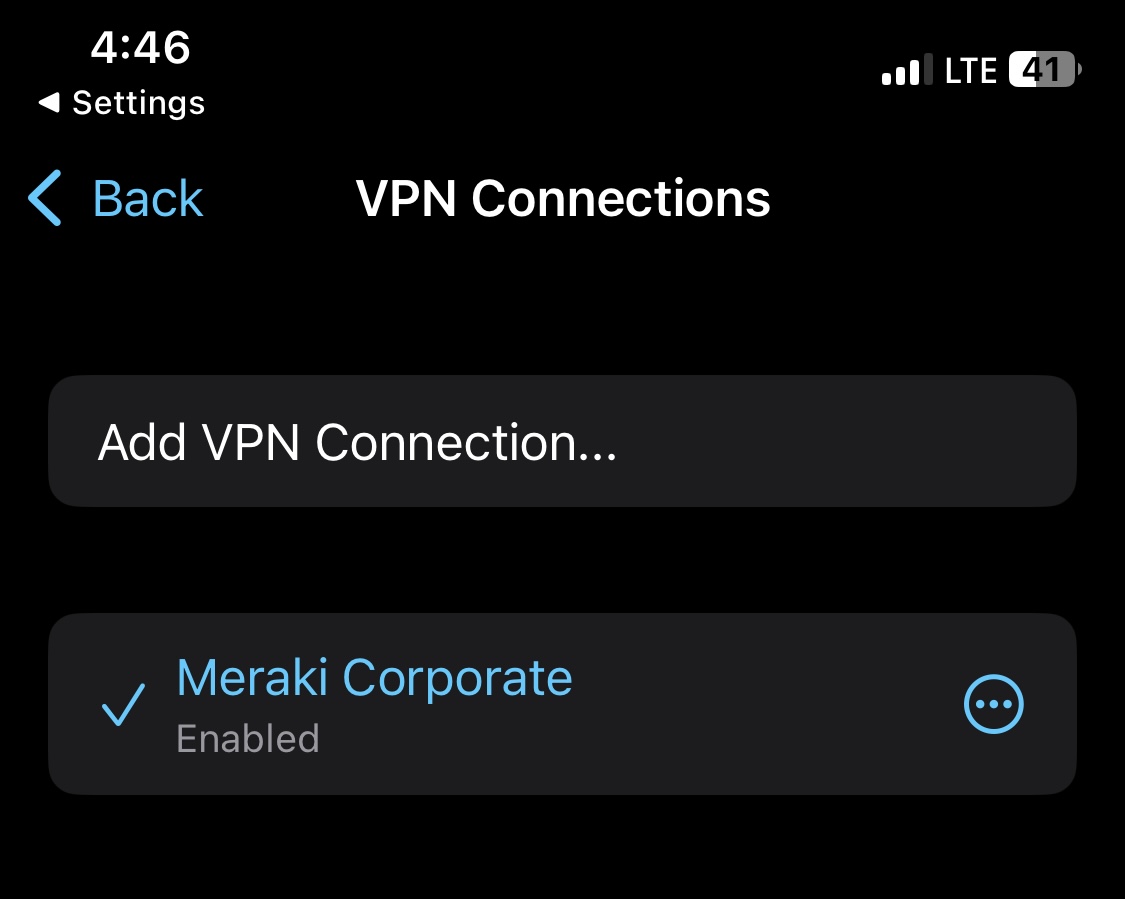
IOS ClientVPN Configuration
Overview:
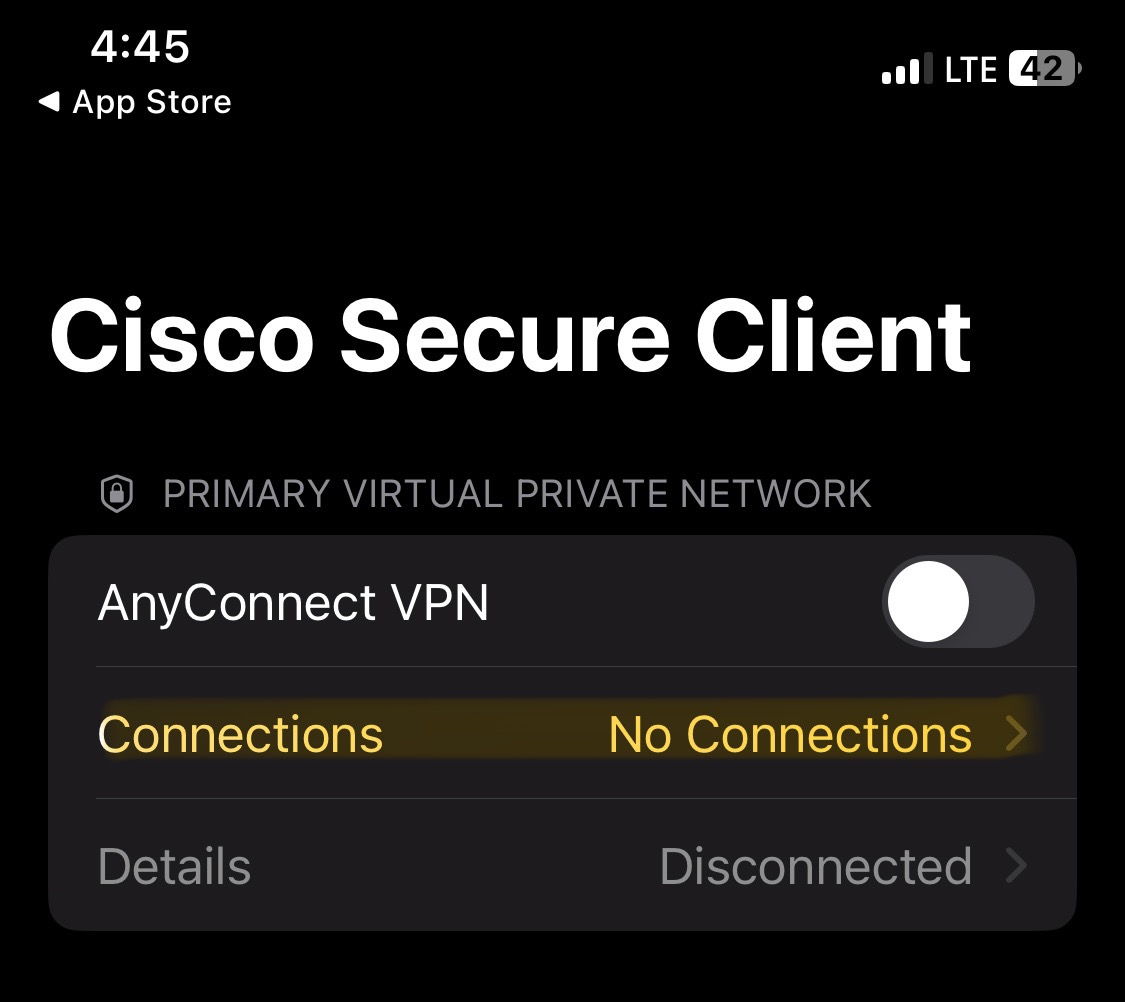
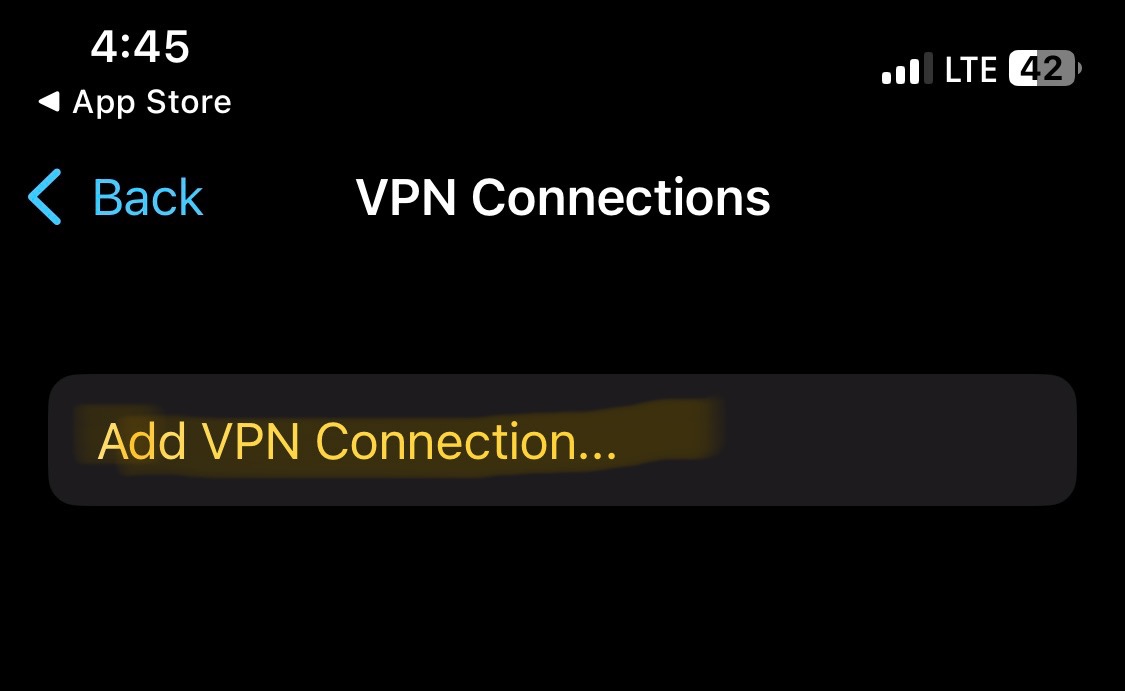
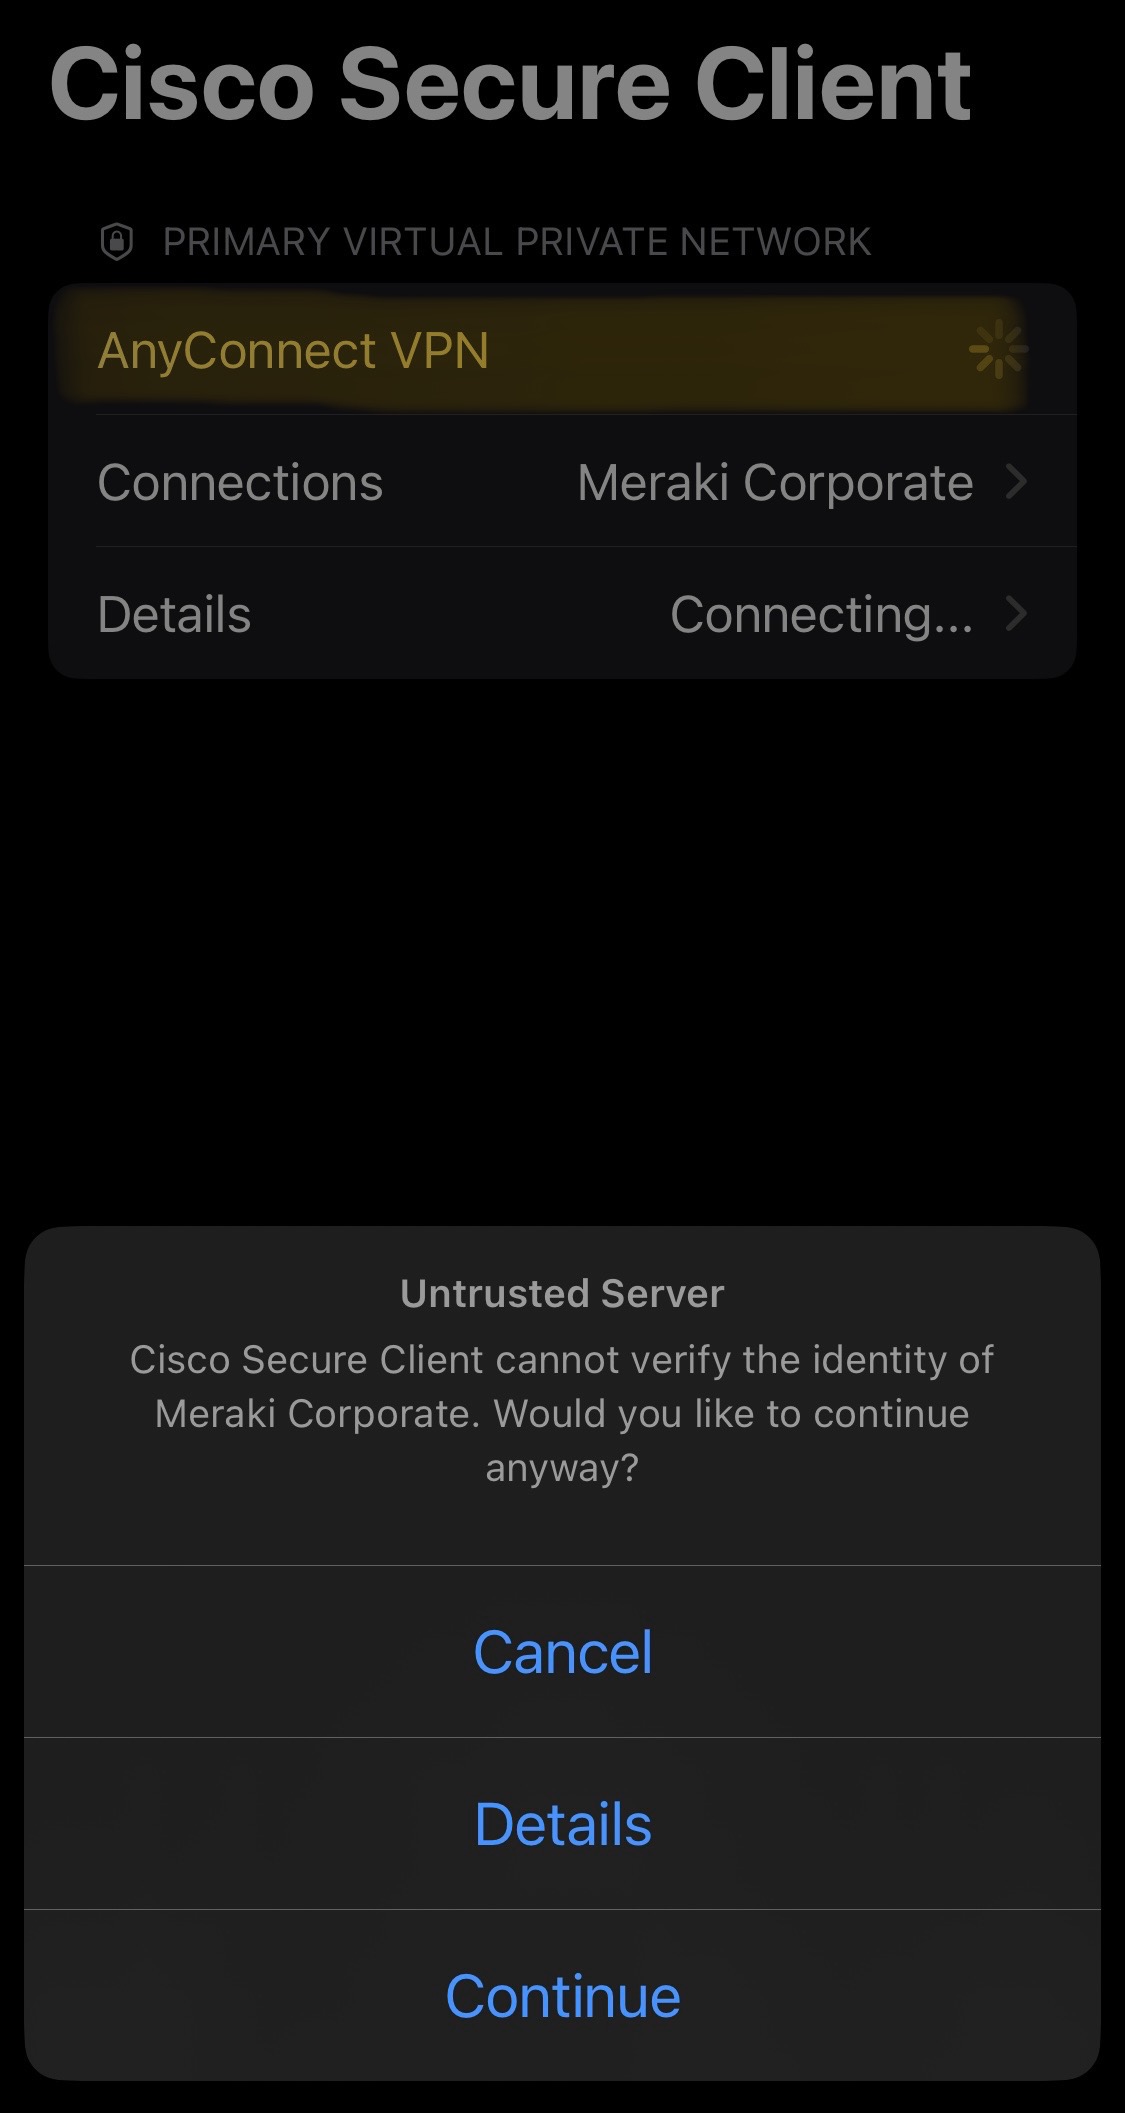
- In this section, I will be demonstrating setting up the Cisco AnyConnect client software on an IOS device
- The VPN software can be downloaded from the Apple Store
- The same rules apply comparing a Windows and IOS clientVPN configuration setup
Verification of the clientVPN working with full tunneling configured through the Meraki Dashboard
Port Forwarding for Downstream NAT Devices
Overview:
- In certain network deployment scenarios such as NAT devices located downstream of the ISP router, Port Forwarding is required to successfully allow external devices on the Internet to access specific services or applications on a local network, such as a private home or office network
- It works by forwarding traffic from a particular port on your router to a specific device or server inside your network with a private IP address
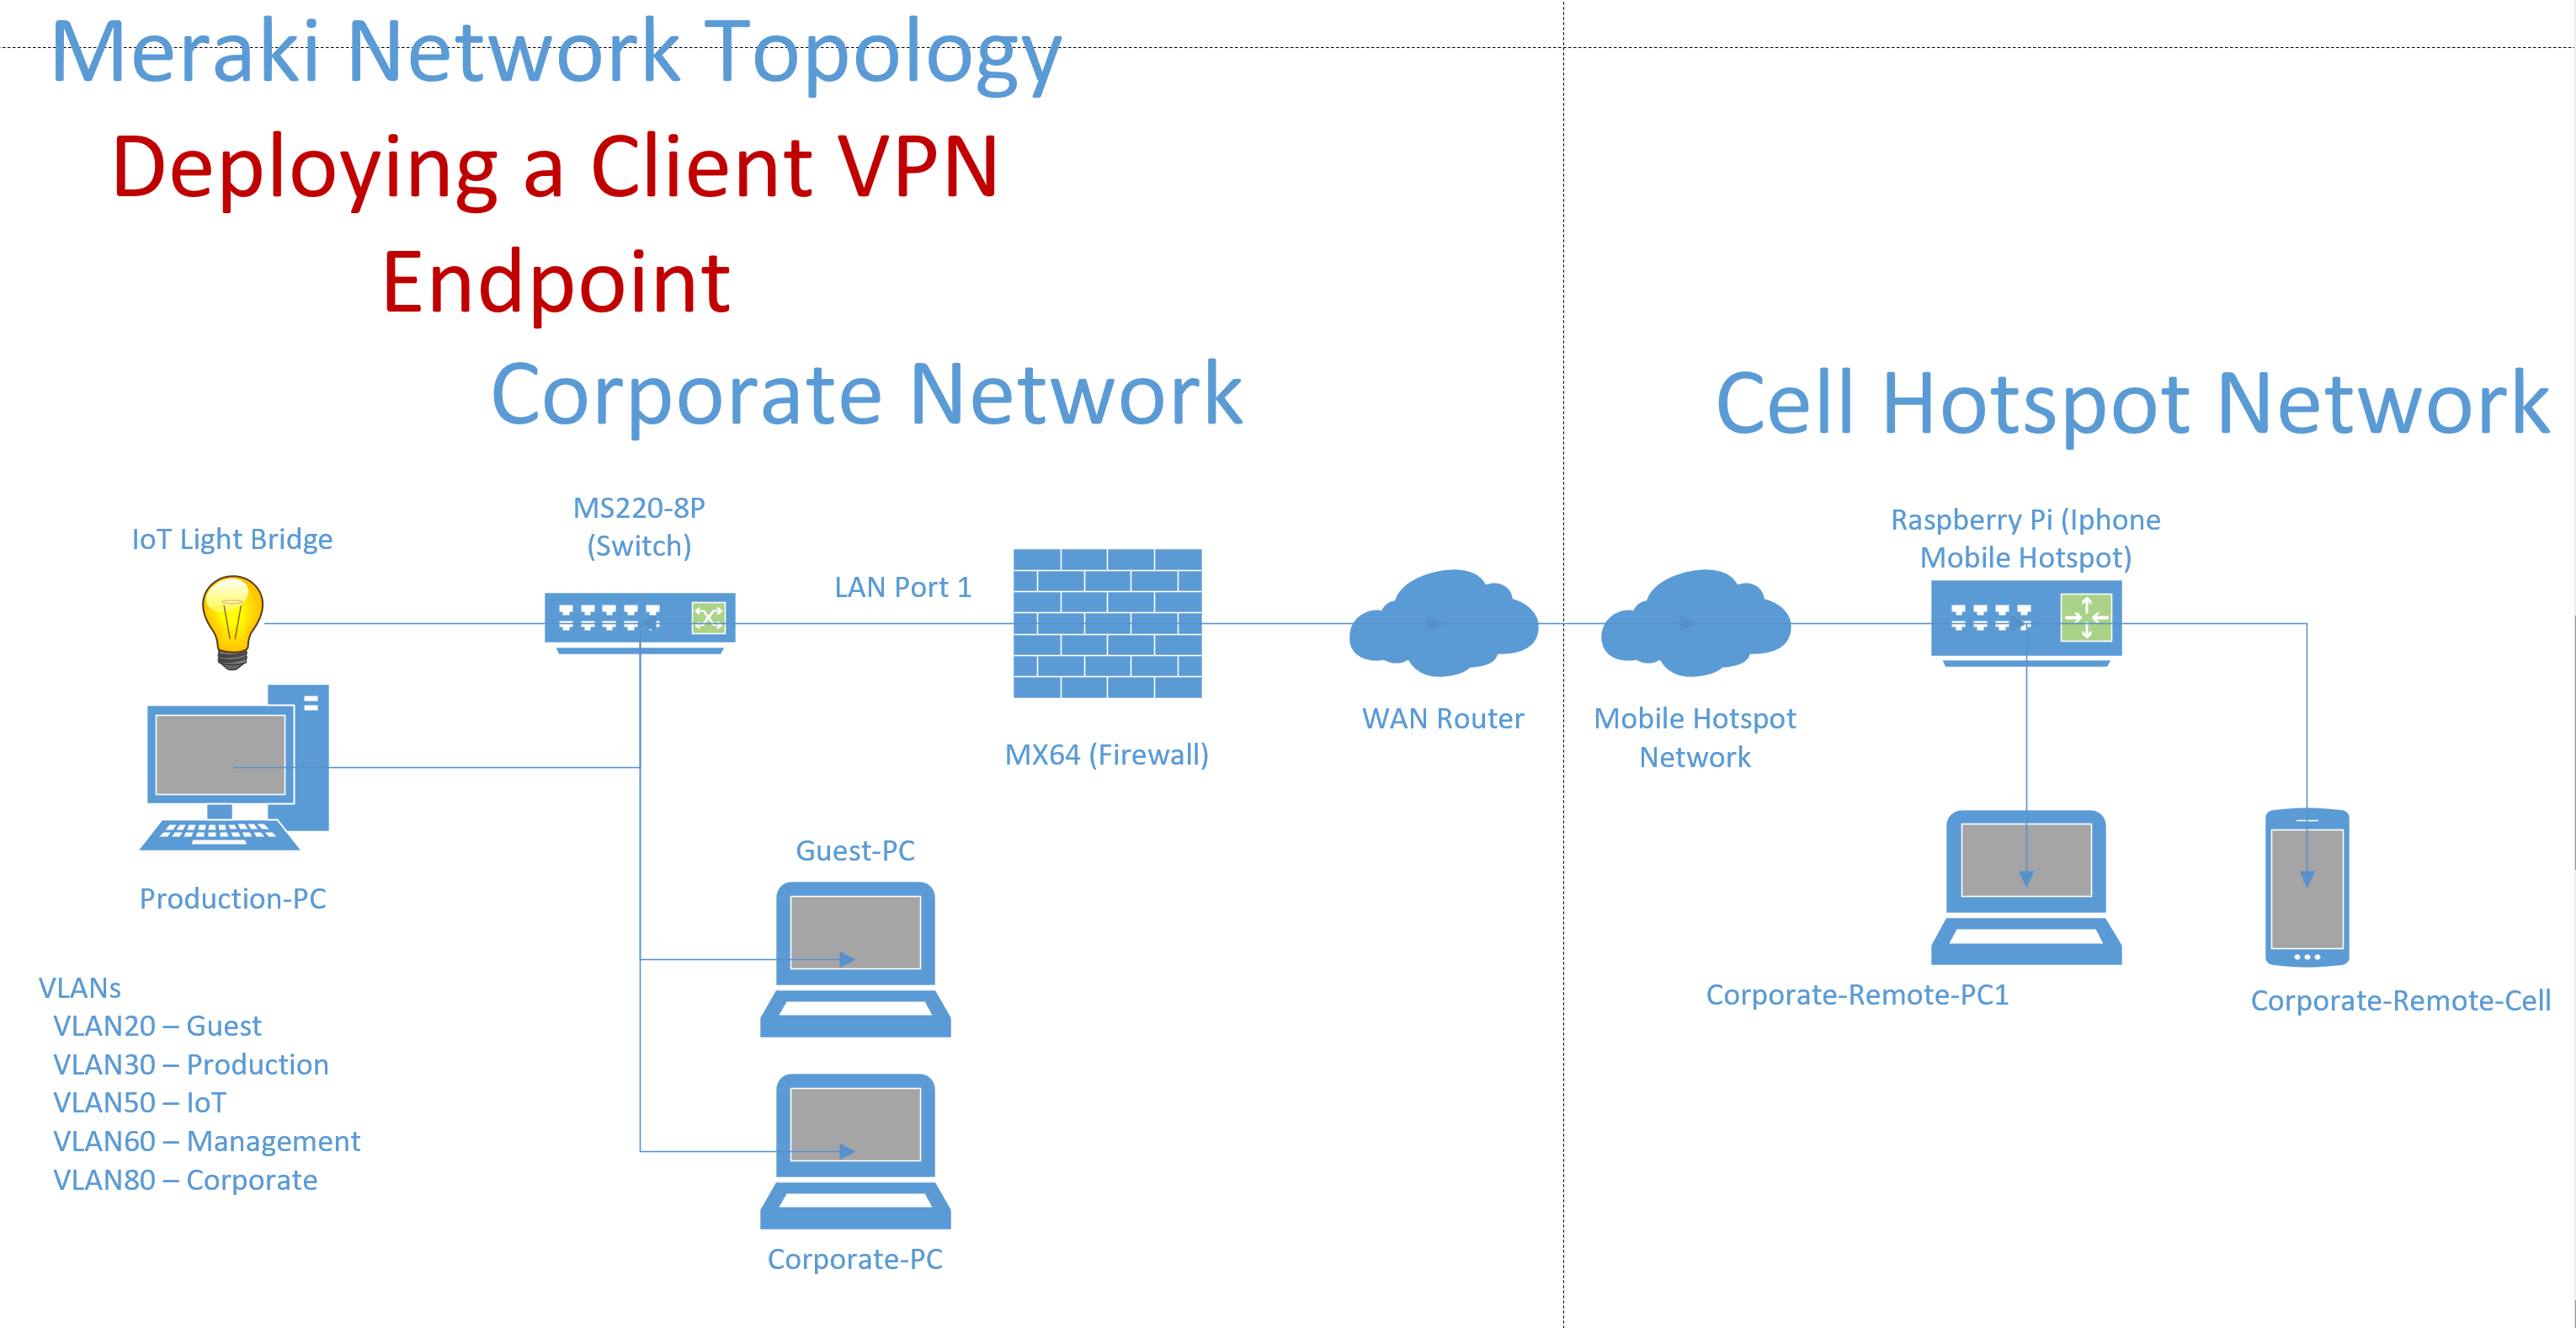
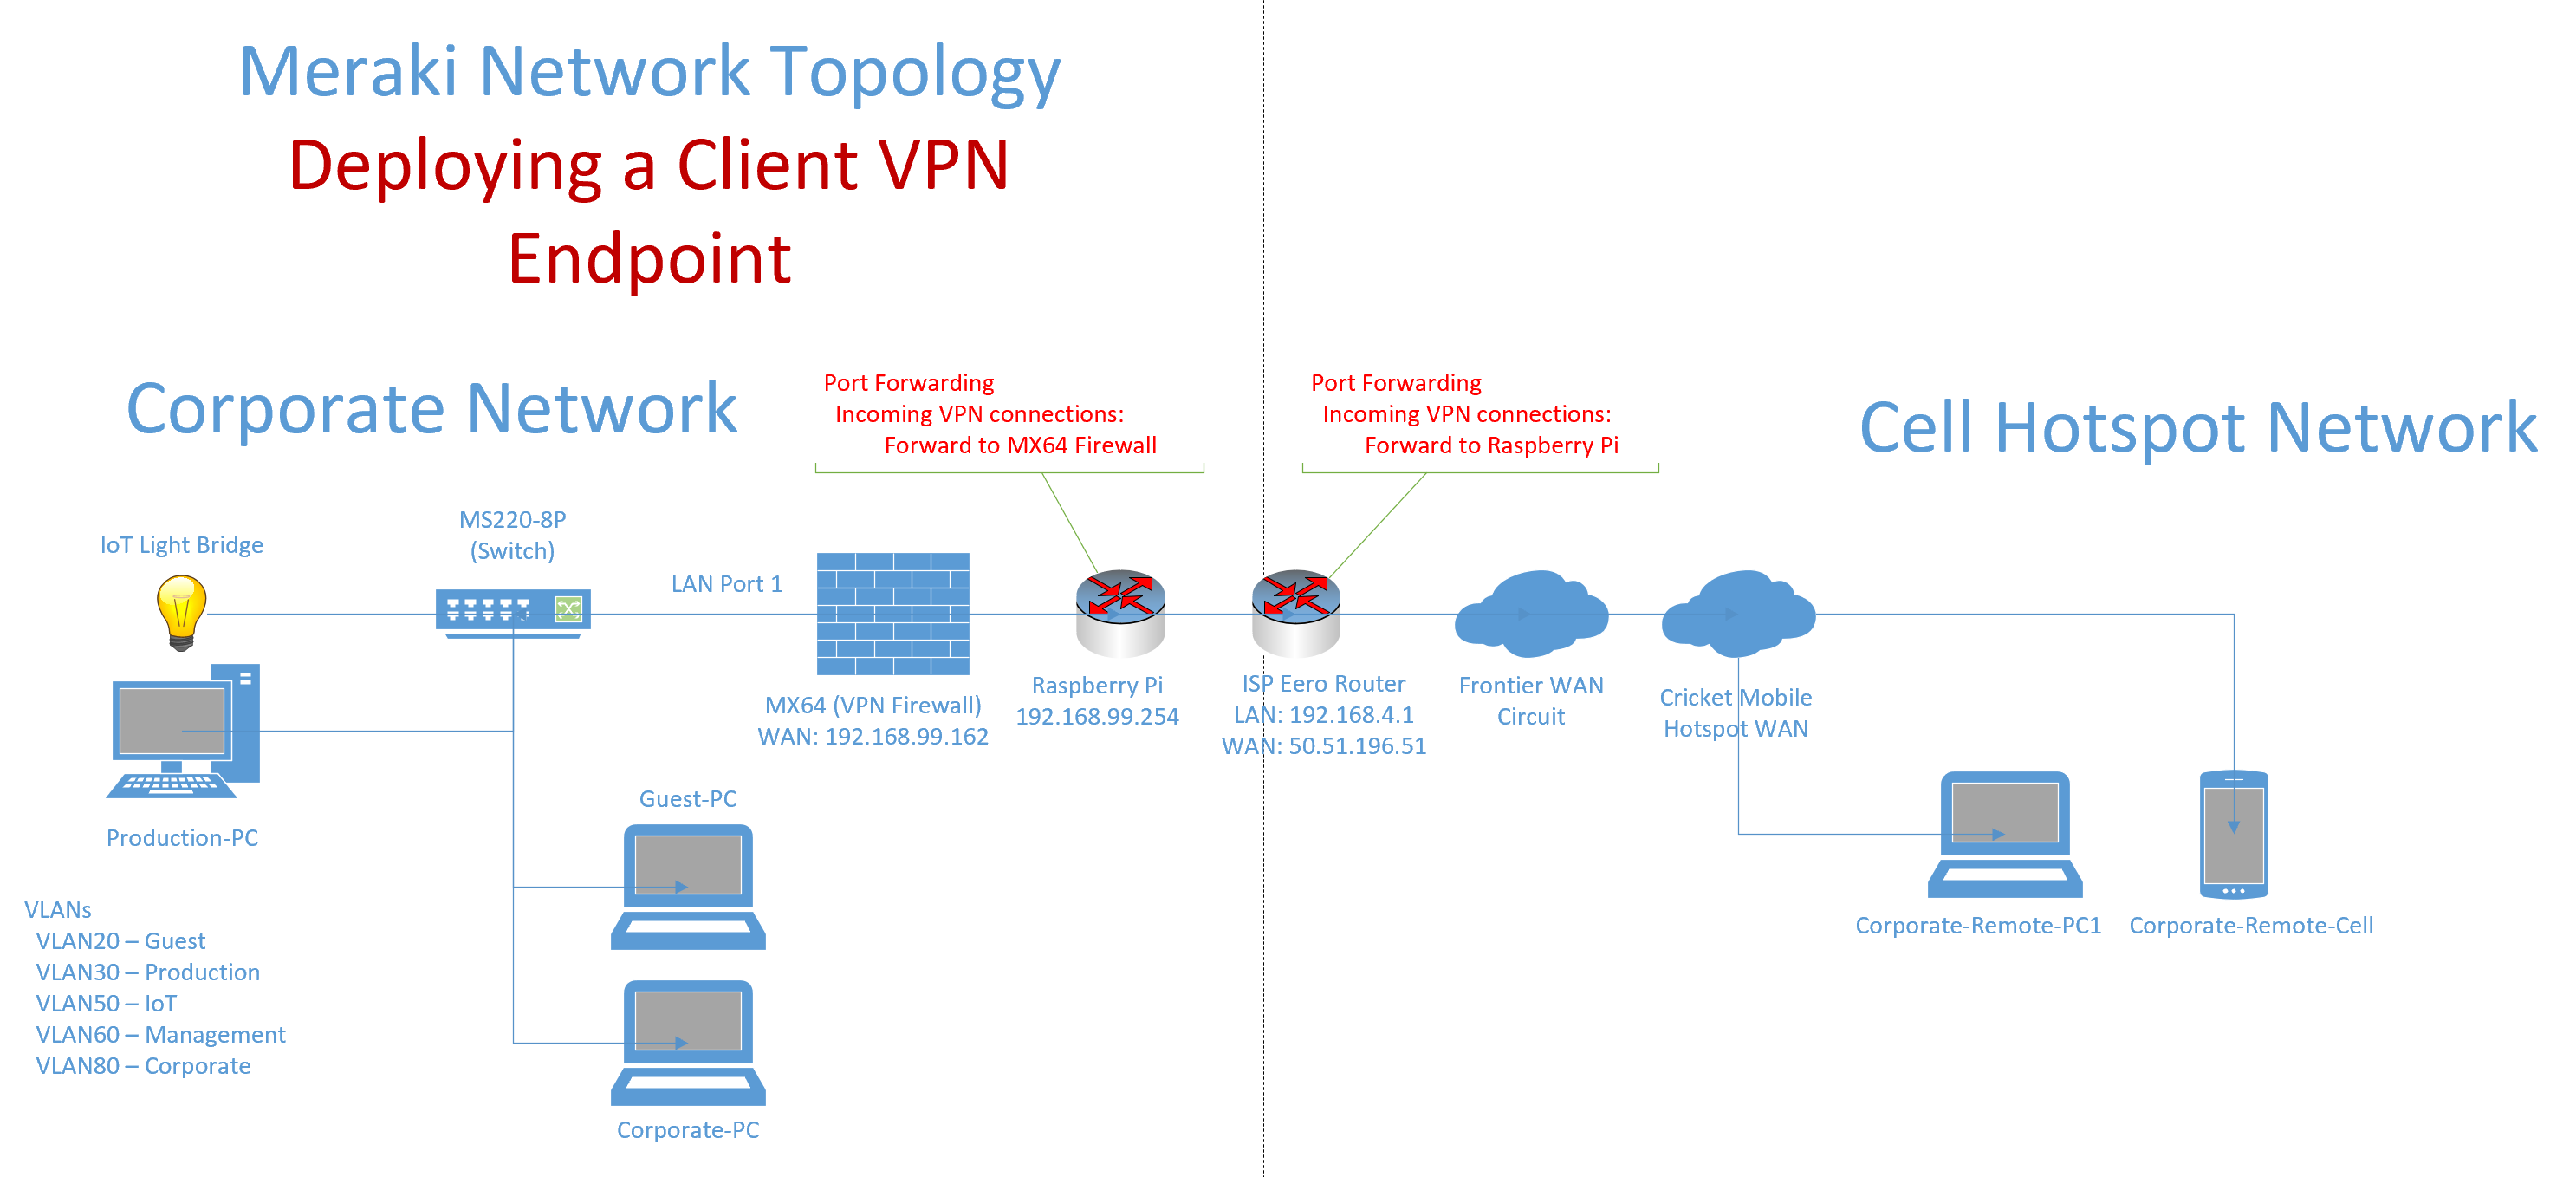
ClientVPN Topology:
Networking Fundamentals:
- In normal NAT translation services, when a device in your local network makes an outbound connection out to the Internet, the default gateway or router translates the private IP address to its own public IP address and keeps track of the connection. When a response comes back, the router knows which internal device requested it and forwards the response to the right device
- Now the issue with inbound connections, the router does not automatically know which device inside your network should receive the incoming request. The router only knows the external public IP, not which internal private IP to send the traffic to
- With Port Forwarding, it acts as a rule or map for the router, telling it, "When an inbound request arrives on this specific external port, forward it to this internal device's IP address and port." Essentially, port forwarding opens a 'gate' on your router for that traffic to get to the right internal device
- Without port forwarding, the router would block most inbound connections because it does not know where to send them. By setting up port forwarding, you allow certain types of inbound traffic from the Internet to reach specific devices inside the private network
My Lab Use Case:
- In my lab environment, it was required of me to set up port forwarding on my ISP equipment router in addition to the downstream raspberry pi serving as the default gateway for my Meraki network
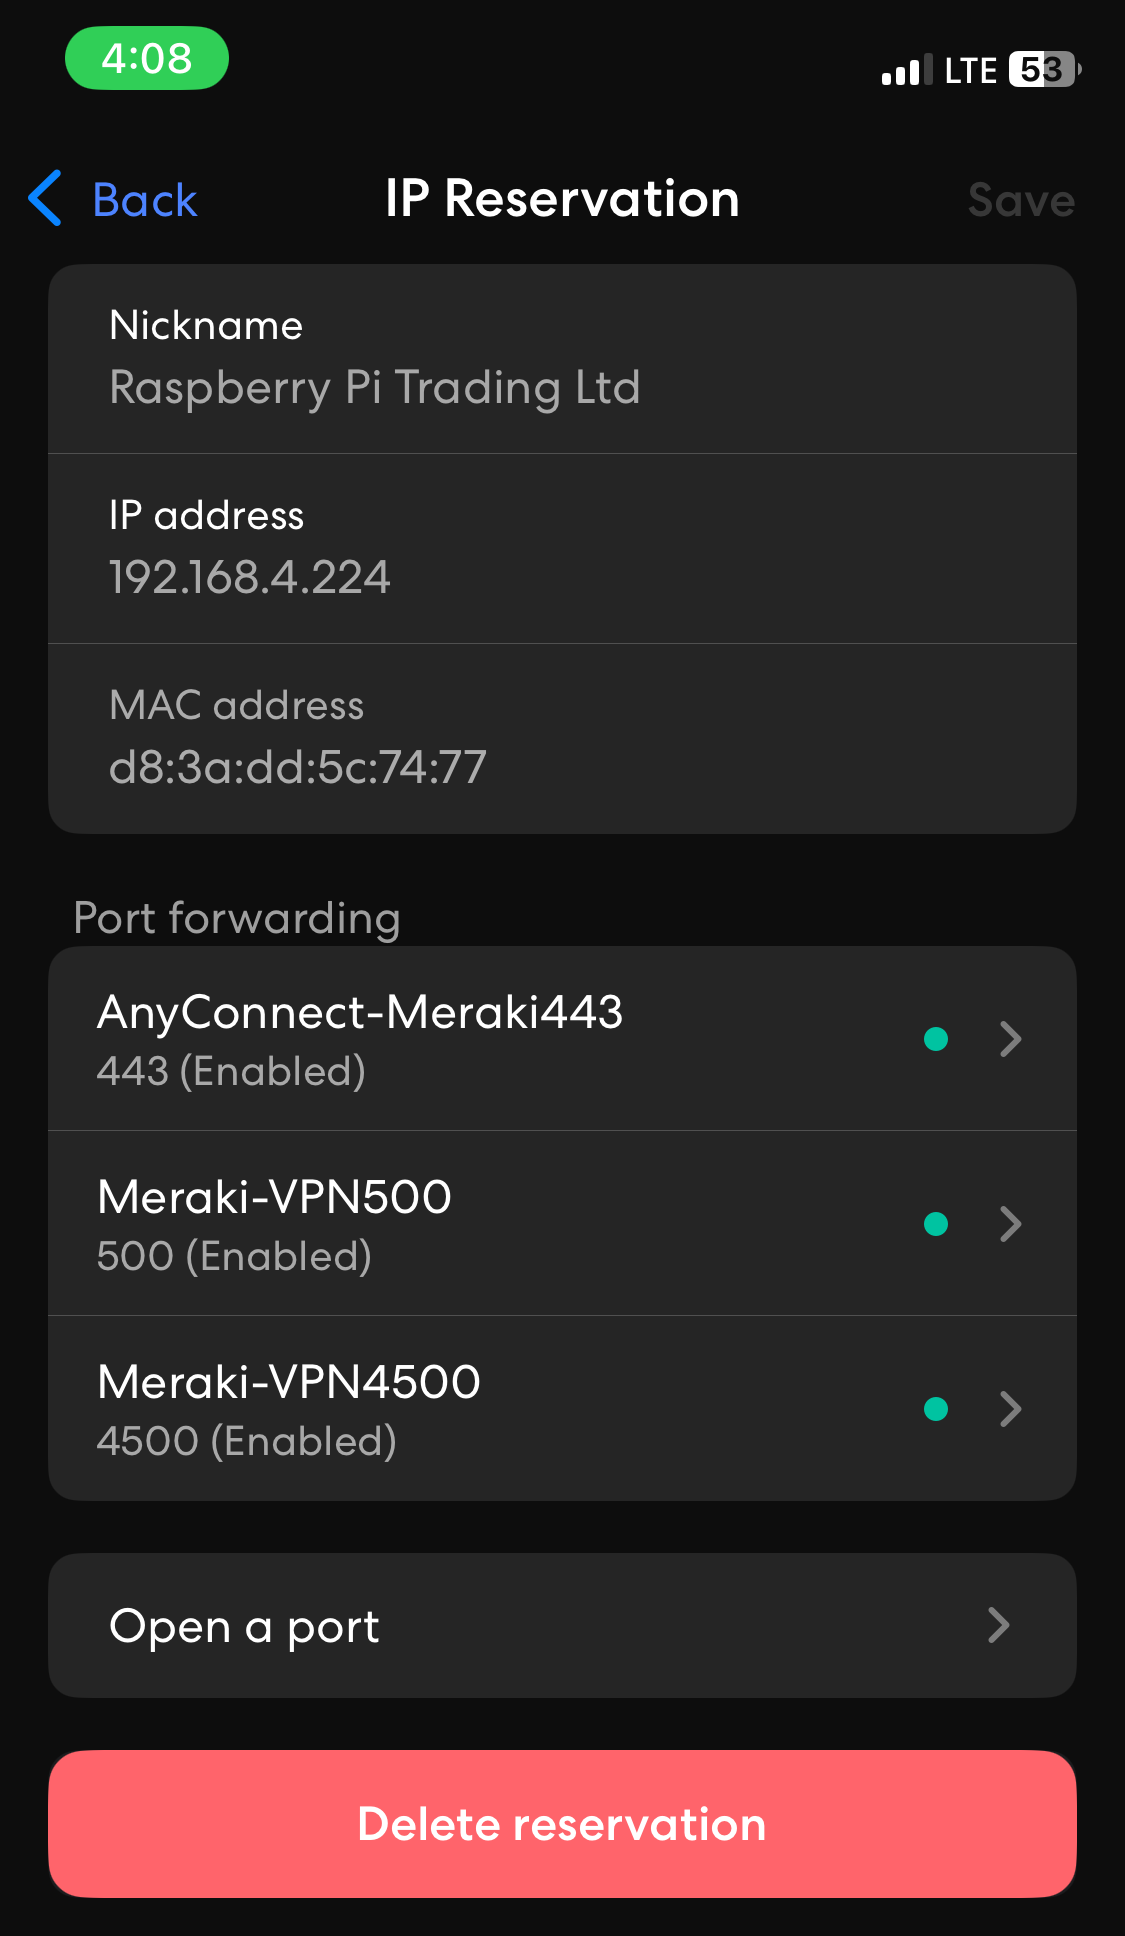
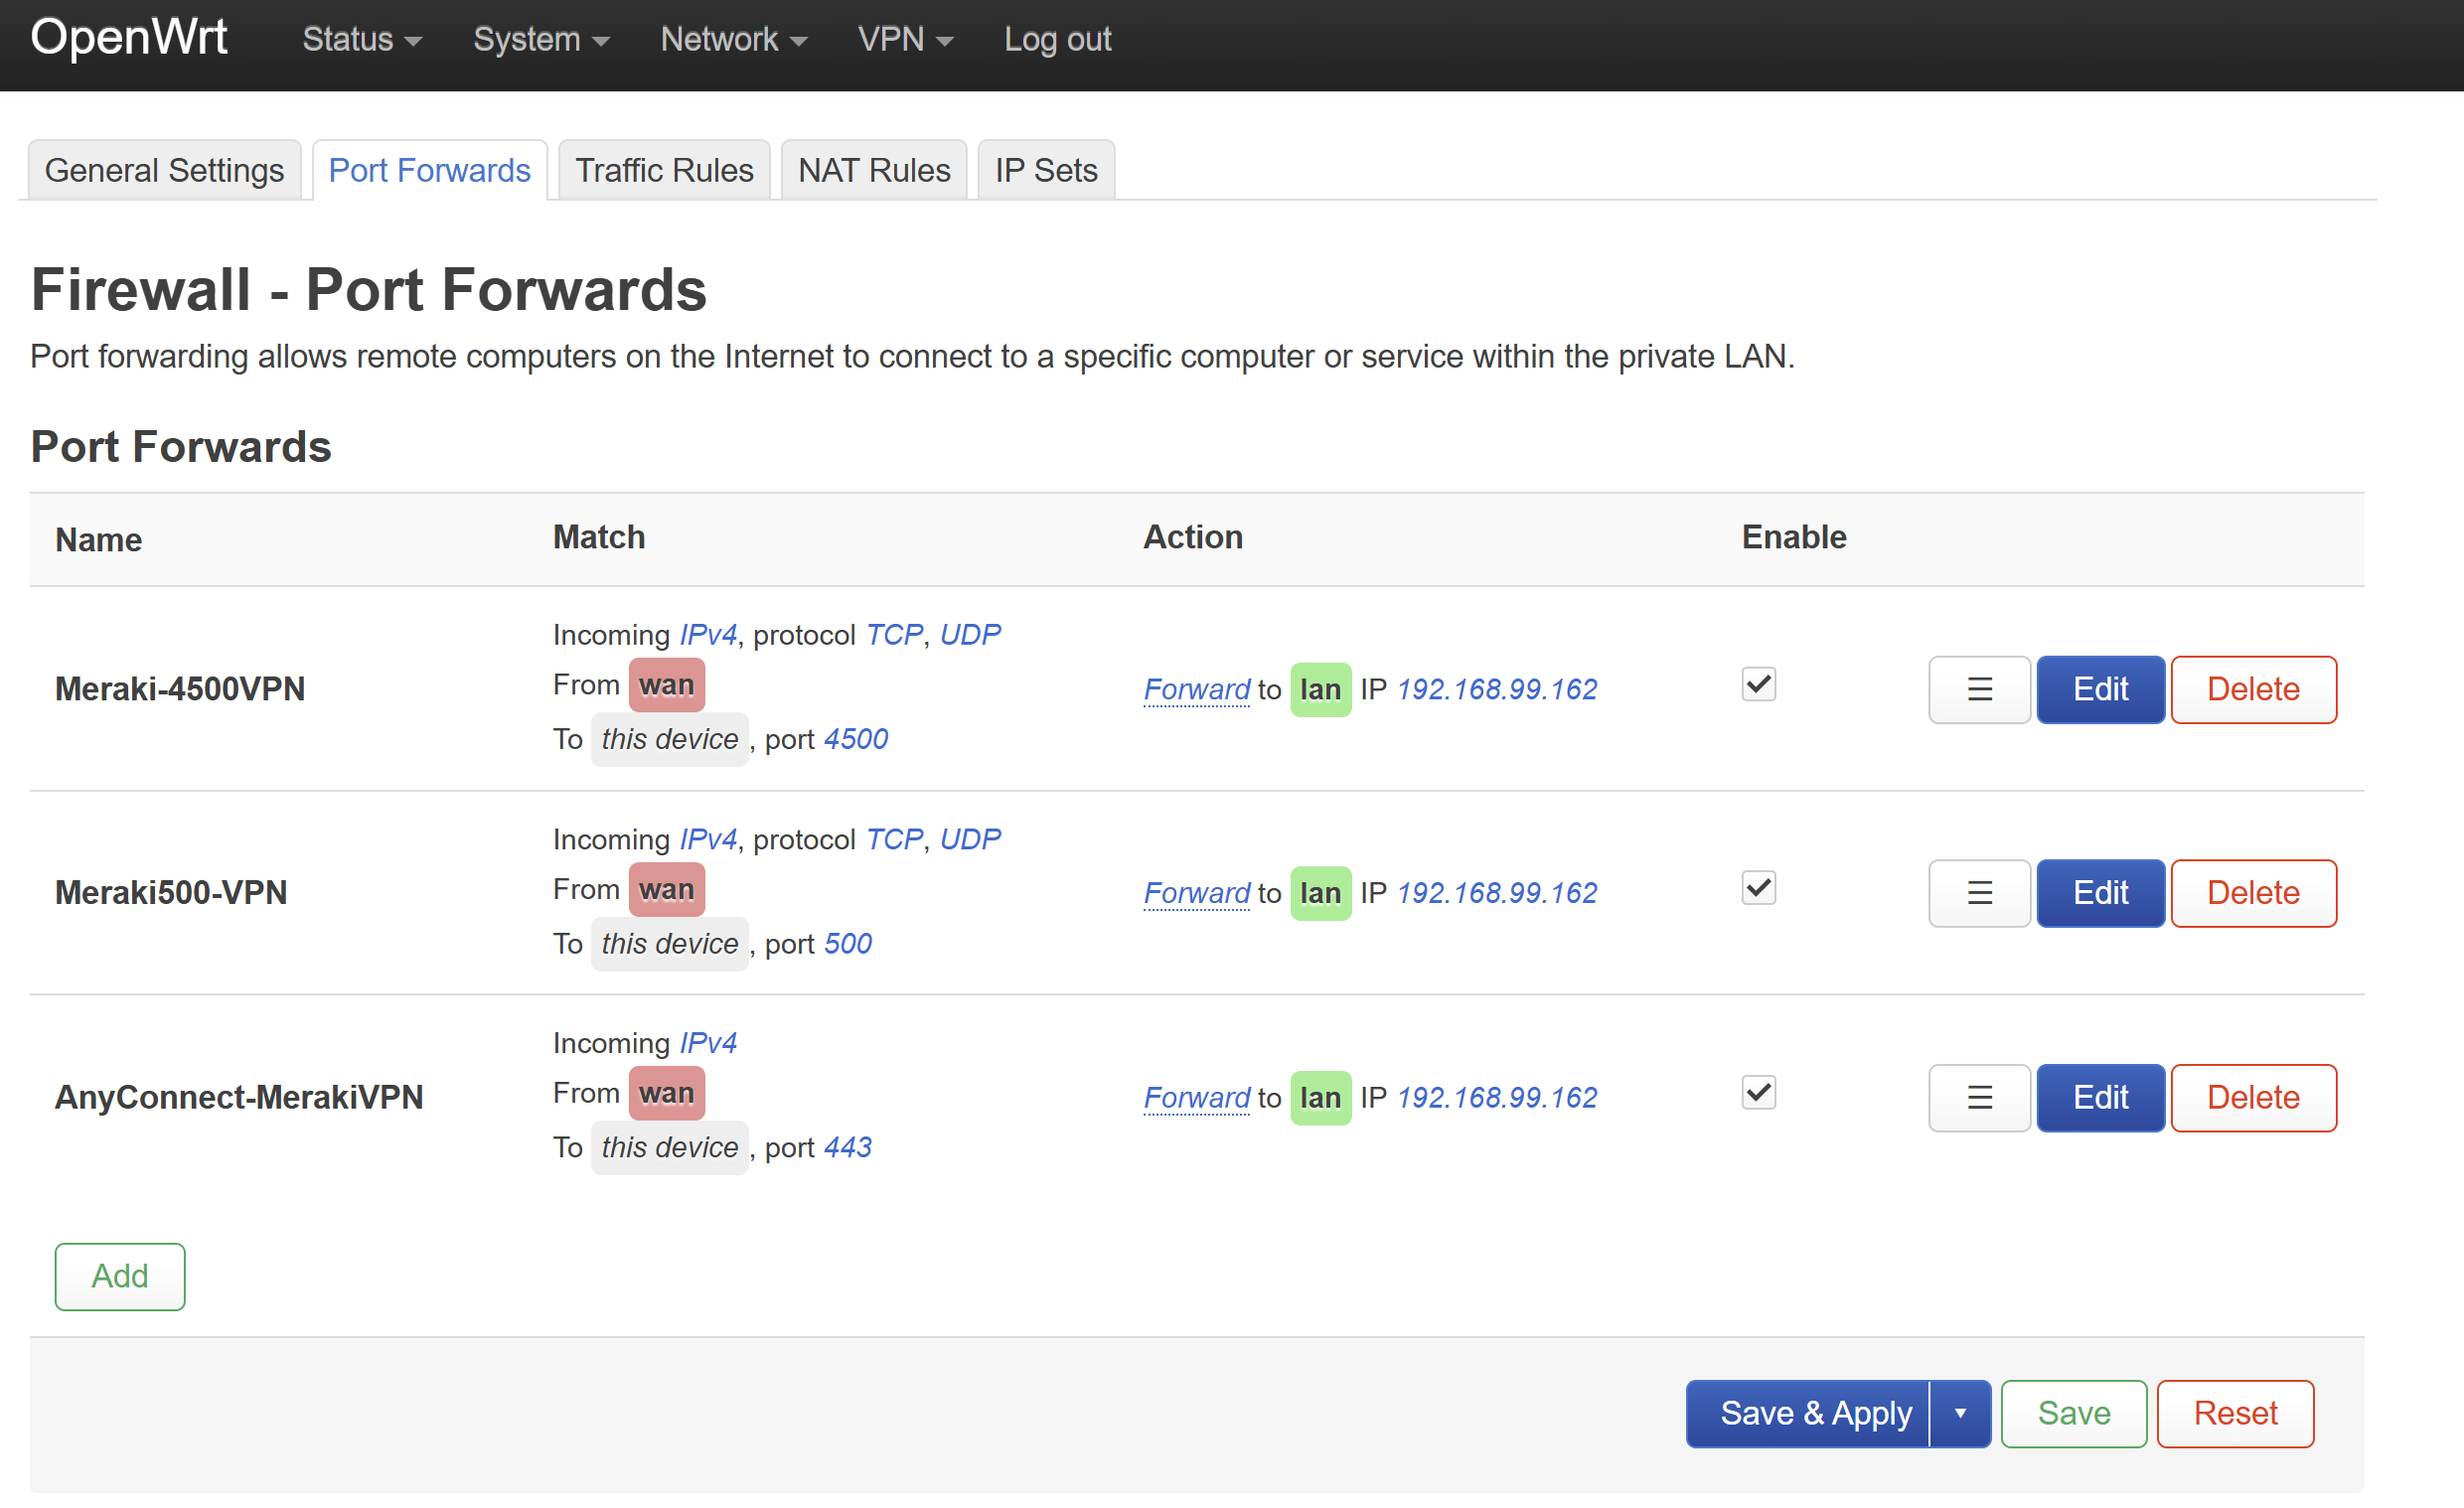
- I have illustrated the images below defining the Port forwarding rules configured on the ISP Eero router through the mobile application and my Raspberry Pi running the OpenWRT firmware
- For Meraki's ClientVPN solution, UDP ports 500, 4500, and (443 defined in the Meraki Dashboard) are opened and used by the AnyConnect VPN client
Eero Router
Raspberry Pi
ClientVPN Authentication Types
Overview:
- Cisco Meraki's Client VPN supports several authentication methods that can be used to control access to the VPN
- These authentication types allow you to define how users authenticate before they establish a VPN connection
Meraki Cloud Authentication
- The default authentication type and relies on the Meraki cloud for authentication
- Users authenticate using their Meraki Dashboard username and password credentials
- Solution if you're already using Meraki's cloud based system and want centralized user management through the Dashboard
Active Directory
- Option allows for seamless integration with AD for user management, especially in enterprise environments where AD is the primary source of user credentials
RADIUS
- This option allows you to integrate with external authentication systems like Active Directory, LDAP, or custom RADIUS servers
SAML
- SAML is a single sign on (SSO) protocol that allows users to authenticate once and then access multiple applications or services without needing to log in again for each one
- Commonly used in enterprise environments to streamline user authentication and improve security by centralizing the login process
Active Directory Authentication Configuration
Overview:
- In this lab exercise, I will demonstrate integrating an Active Directory controller to test with the client VPN feature of a Cisco Meraki security appliance
- For the Active Directory controller, I will be using a Windows Server virtual machine that will be directly connected to the MX security appliance on the Servers VLAN off of LAN port two
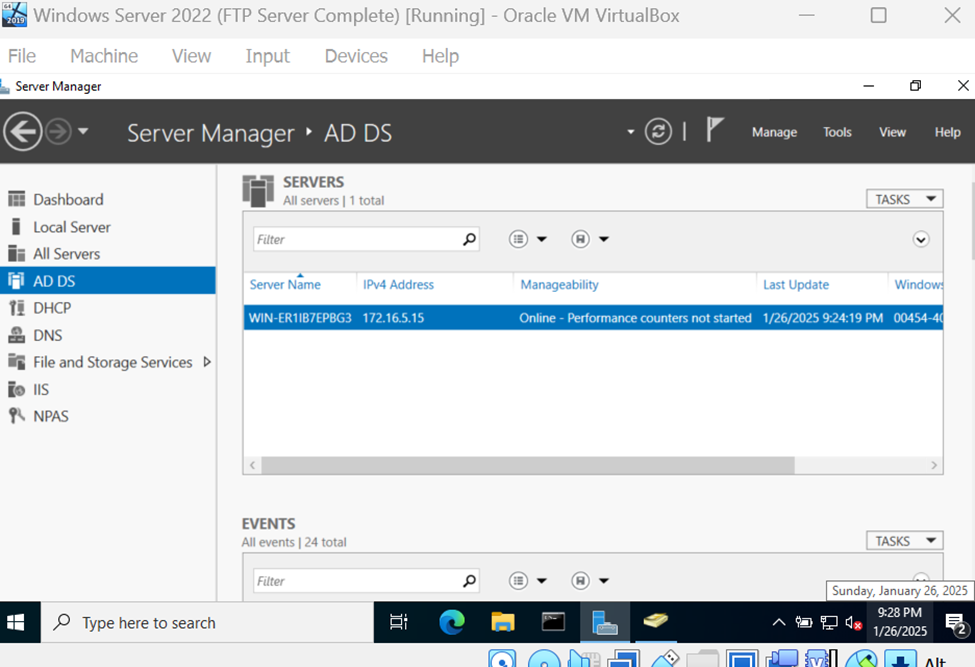
Windows Server Active Directory Verification
IP Address of AD Server - 172.16.5.15
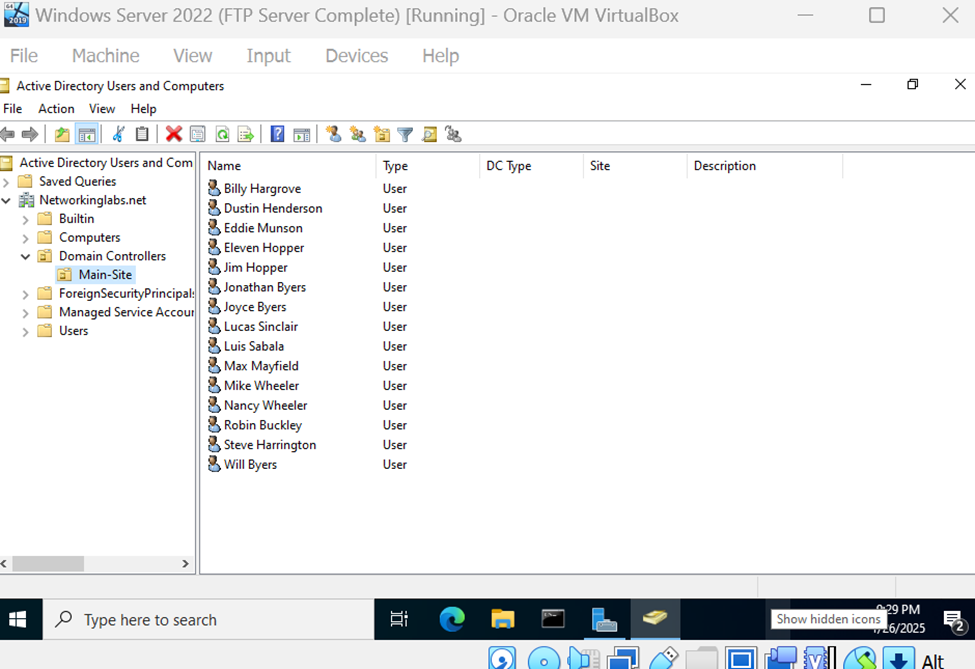
Active Directory Users
Configuration
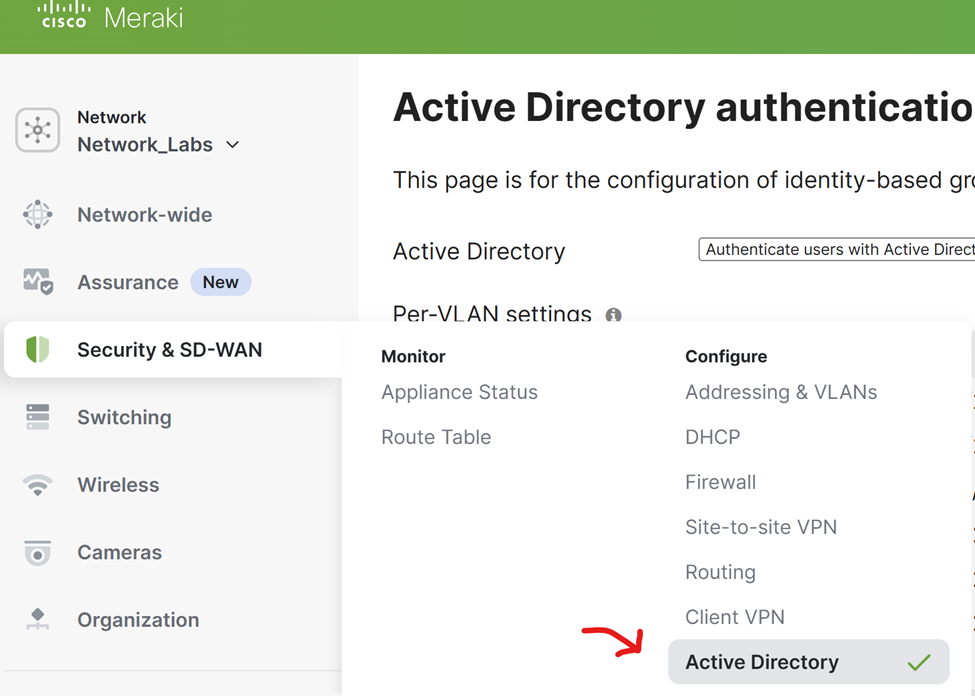
- In the following screenshots, defining the Active Directory server from the Meraki Dashboard is the initial step to implement AD to client VPN services
- The Active Directory server will be defined in the Security & SD-WAN setting under 'Active Directory' and 'Client VPN'
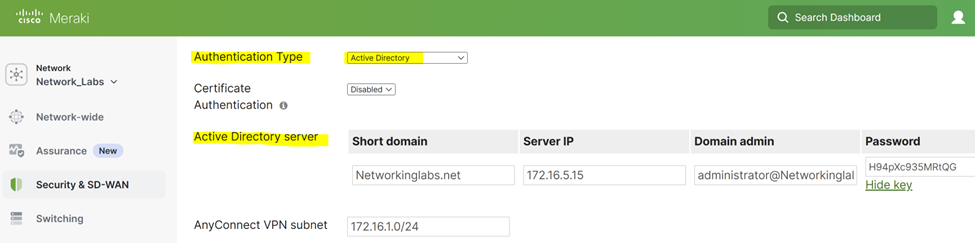
Active Directory Required Options
Short Domain
- The short name of the Active Directory domain
Server IP
- The IP address of an Active Directory server on the MX LAN
Domain Admin
- The domain administrator account the MX should use to query the server
Password
- The password for the domain administrator account

Active Directory server and Authentication Type defined in the Client VPN section under Cisco AnyConnect
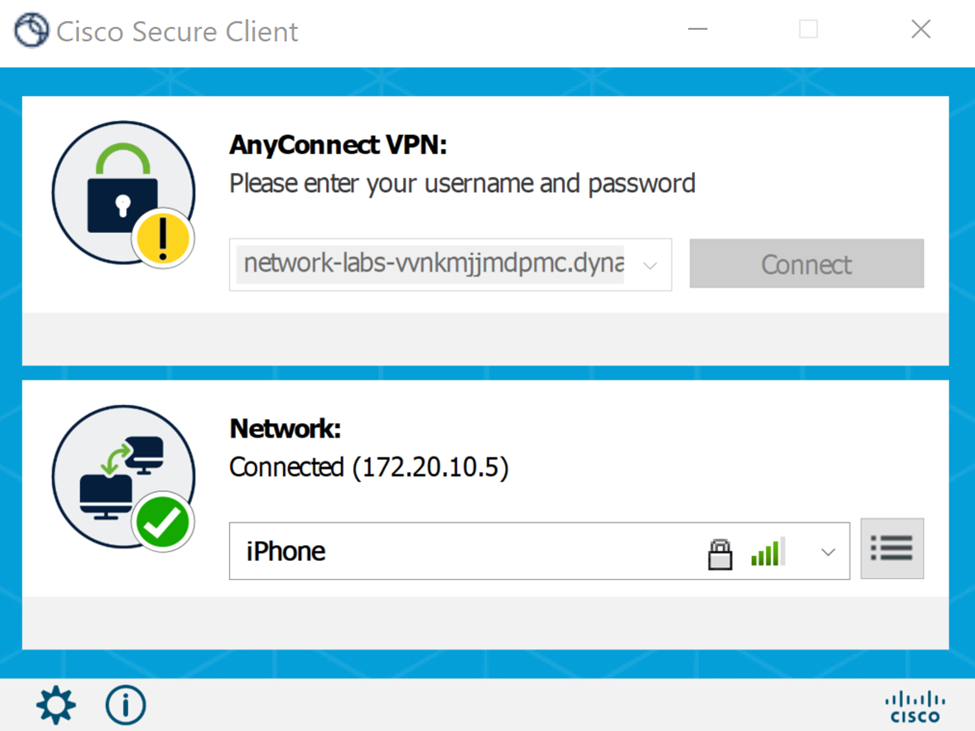
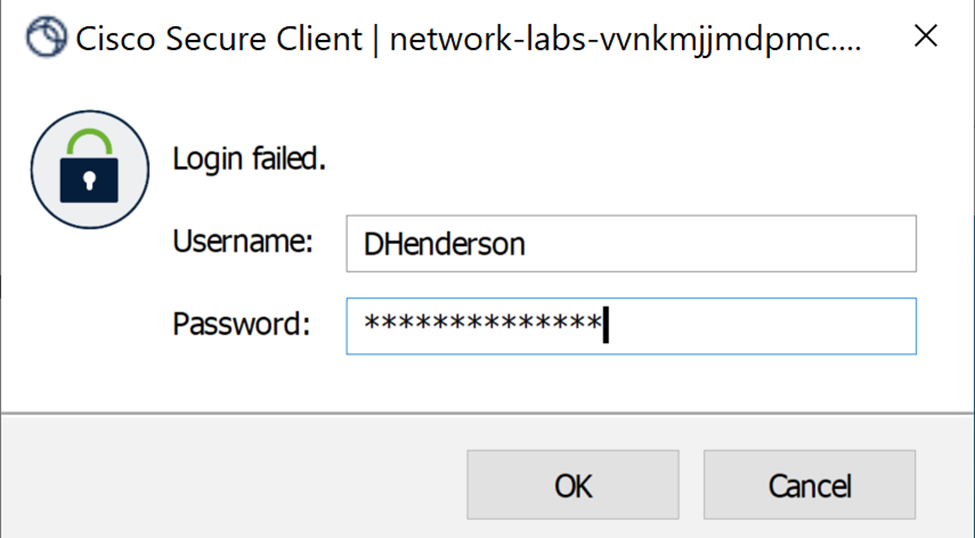
Testing Client VPN Authentication using Cisco AnyConnect Client via Windows
Testing Client VPN Authentication using Cisco AnyConnect Client via IOS