Secure Meraki Switches
Sections:
- Lab Topology
- (ACL) Access Control Lists Configuration
- (ACL) Access Control Lists Verification
- Port Schedule Configuration
- Port Schedule Verification
- Access Policies Overview
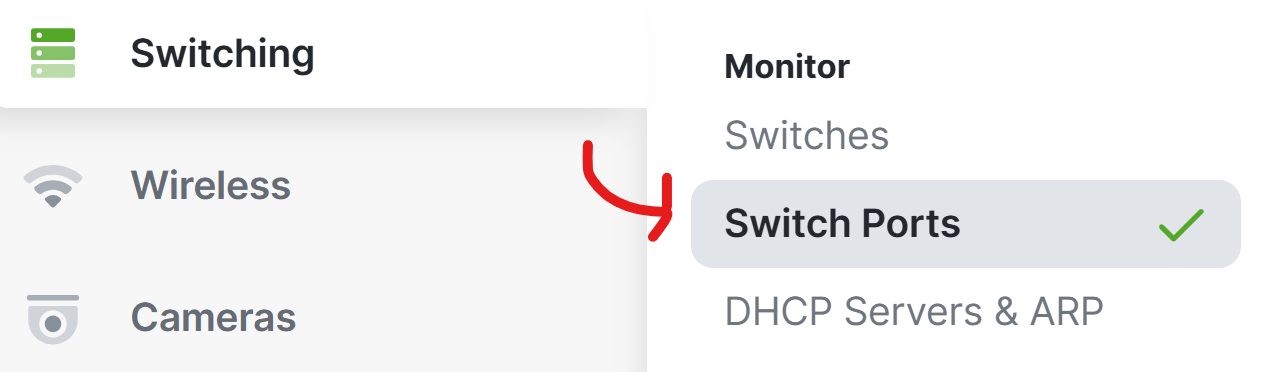
- Port Profile Configuration
Resources:
- Switch ACL Operation
- Configuring ACLs
- Port Schedules
- Access Policies
- Windows 802.1X Supplicant
- Configuring 802.1X Access Policies using Windows NPS
- MAC Authentication with AD Complex Password Requirements
- Configure Fine Grained Password Policies for AD
- Configuring MAB Access Policies using Windows NPS
- Port Profiles (Smart-Ports)
Overview:
- Implementing and securing Cisco Meraki switches is a multi-step process that involves planning the network, configuring the switches, securing the configuration, and ensuring ongoing monitoring and management
- Cisco Meraki switches offer a wide range of features and in this section, I will demonstrate the available Meraki features to secure Meraki switches
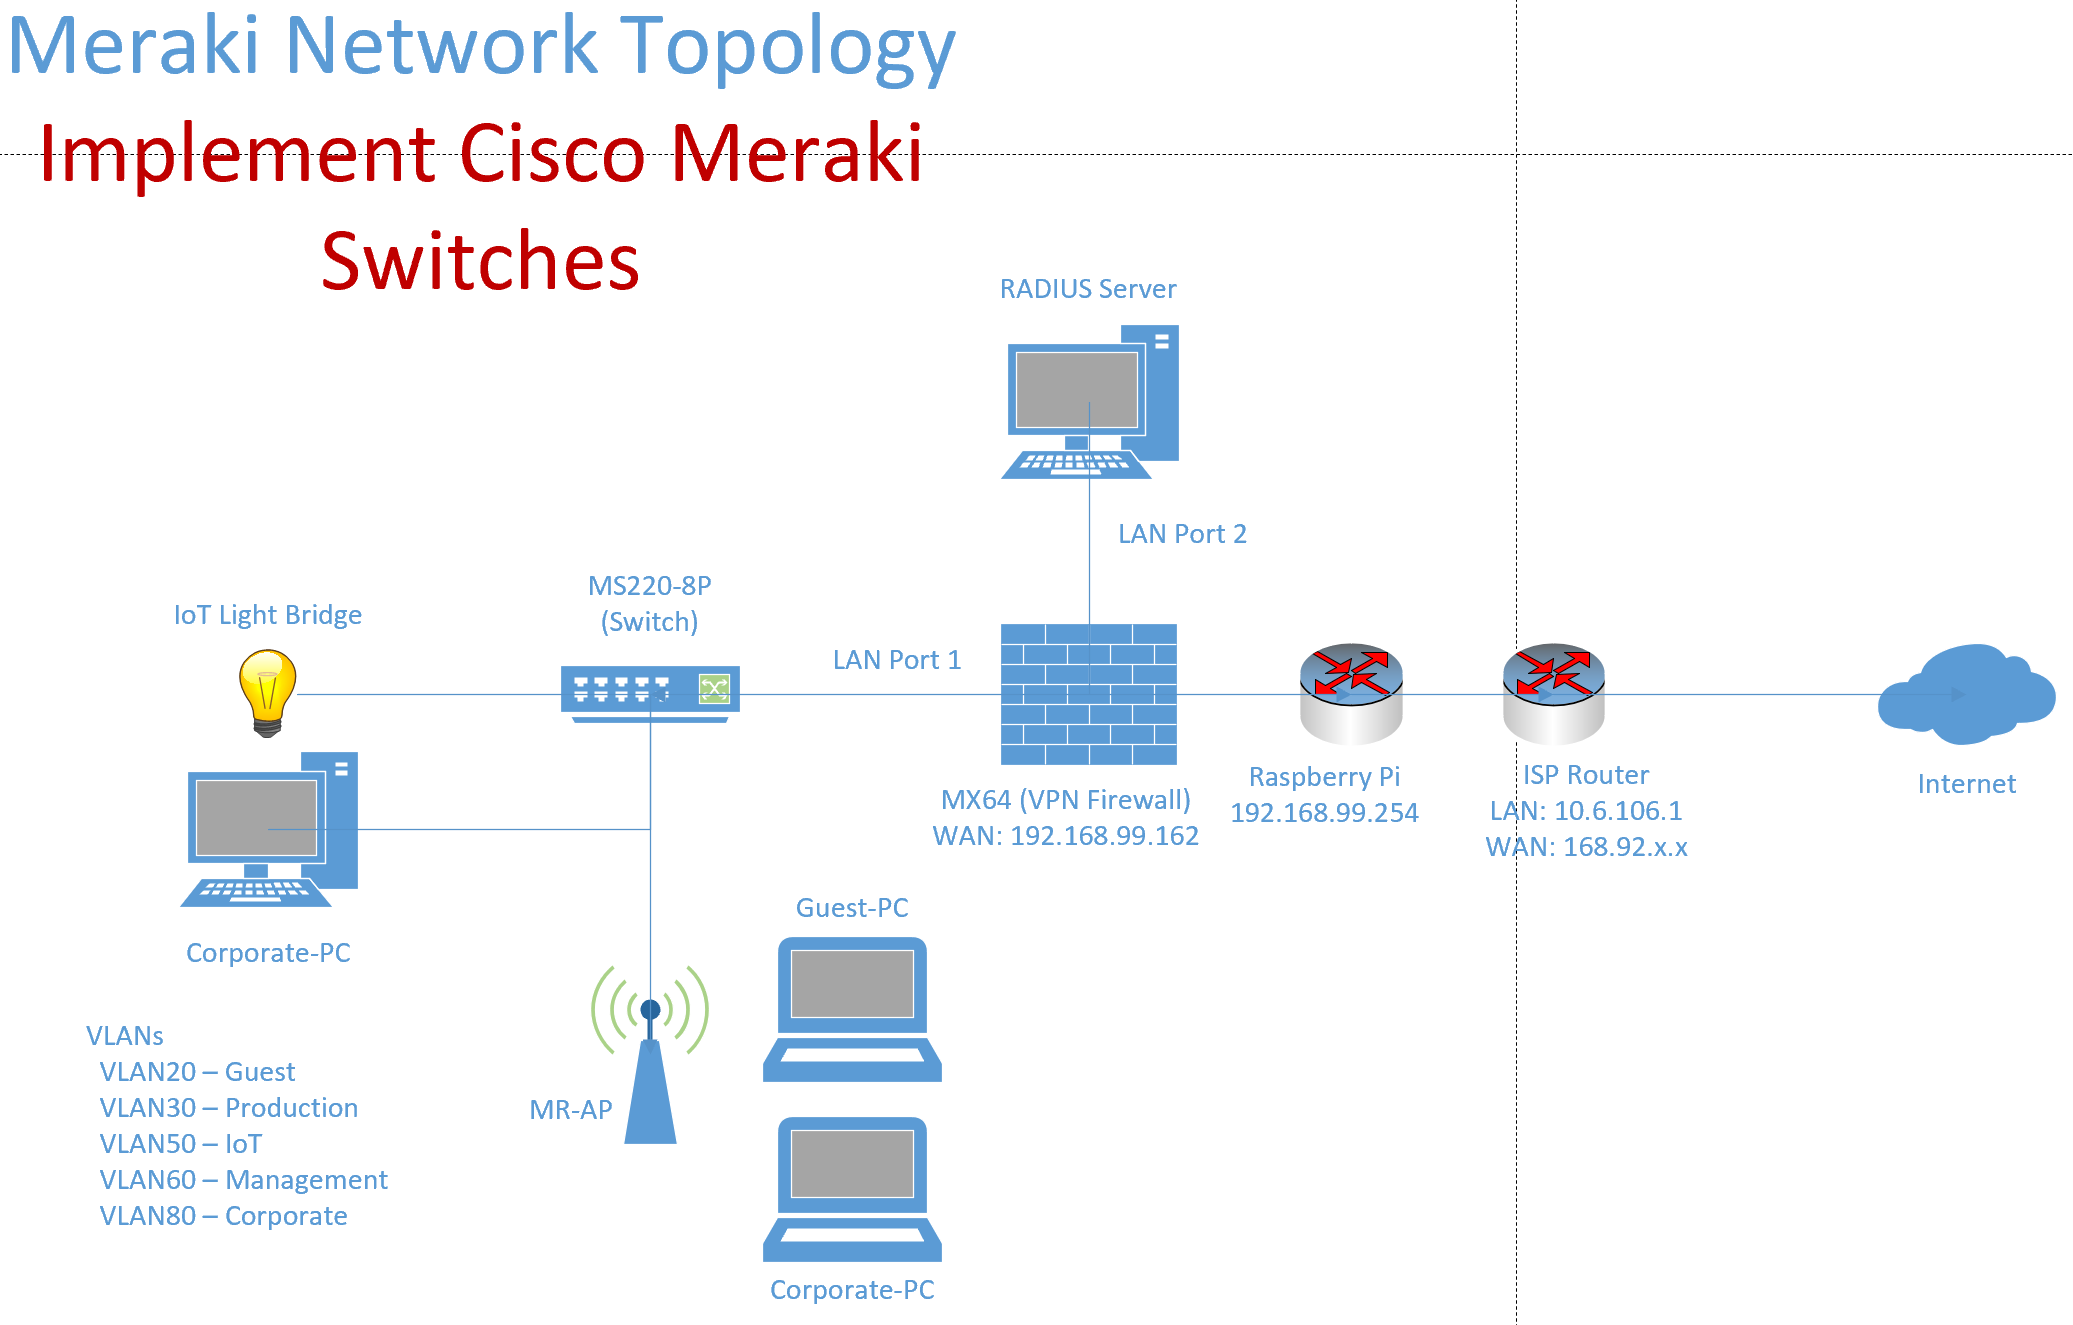
Lab Topology
(ACL) Access Control Lists
Overview:
- ACLs are used to filter network traffic by controlling which devices or users can access specific network resources by defining rules that allow or deny traffic based on various criteria such as IP addresses, VLAN, port numbers, or protocols
- Per Cisco, ACLs configured on a Meraki switch are stateless in nature with each packet evaluated individually. As a result, traffic may be allowed in one direction but the response can still be blocked
- Analyzing the order of processing, traffic is evaluated in a top-down approach and will use the first rule that matches
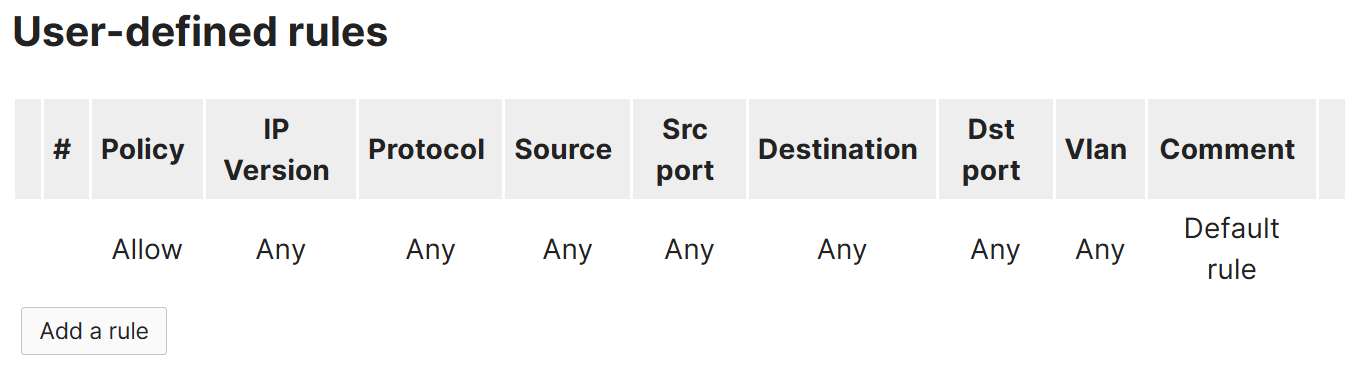
- Meraki by default incorporates an allow 'Any Any' rule located at the end of the ACL list
- In this section, I will demonstrate configuring ACLs on my lab Meraki MS switch
ACL Menu

ACL Menu Overview
ACL Configuration
Overview:
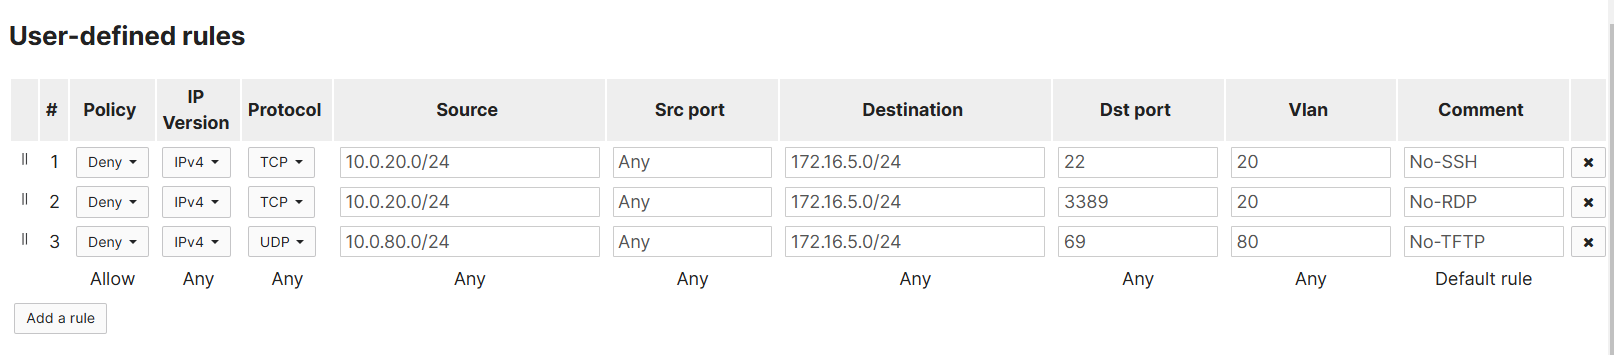
- In this lab exercise, I have defined some deny rules destined to the Servers VLAN network on 172.16.5.0/24
- ACL Summary
- The Guest VLAN network is denied SSH and RDP access to the servers network
- The Corporate VLAN network is denied TFTP access to the servers network
- Any traffic that does not match the first three rules are allowed by default with the permit 'Any Any' rule
ACL Verification
Corporate VLAN
- Allow SSH Access to the Servers Network
- Allow RDP Access to the Servers Network
- Deny TFTP Access to the Servers Network
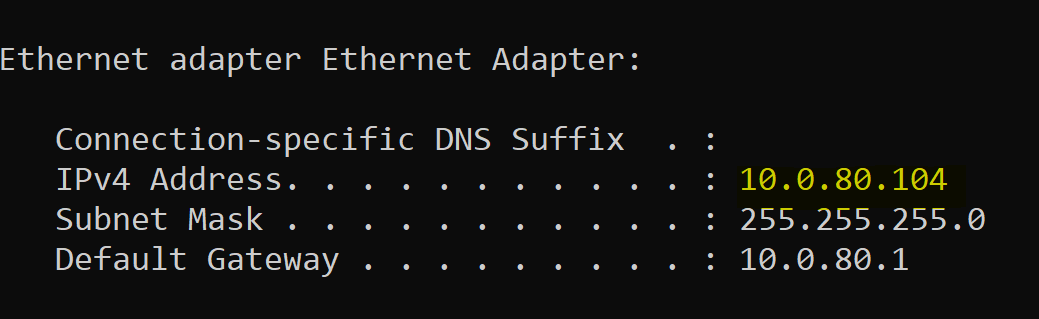
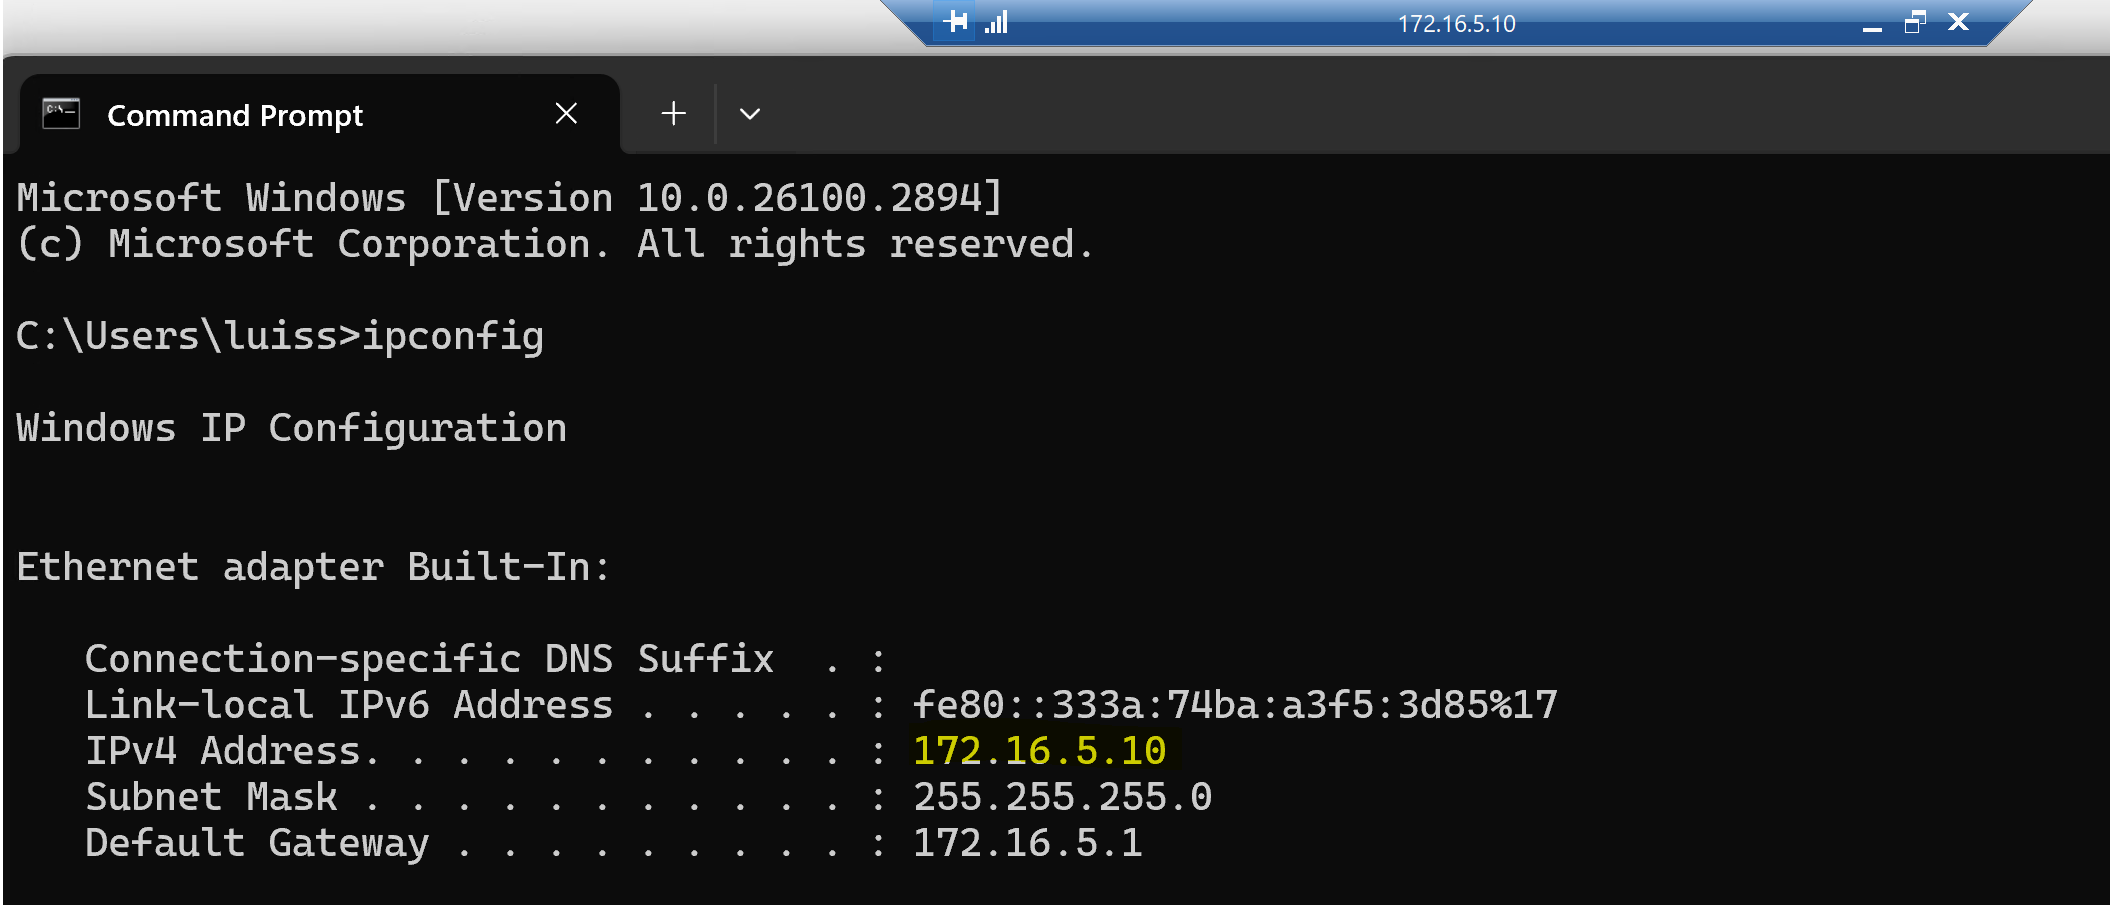
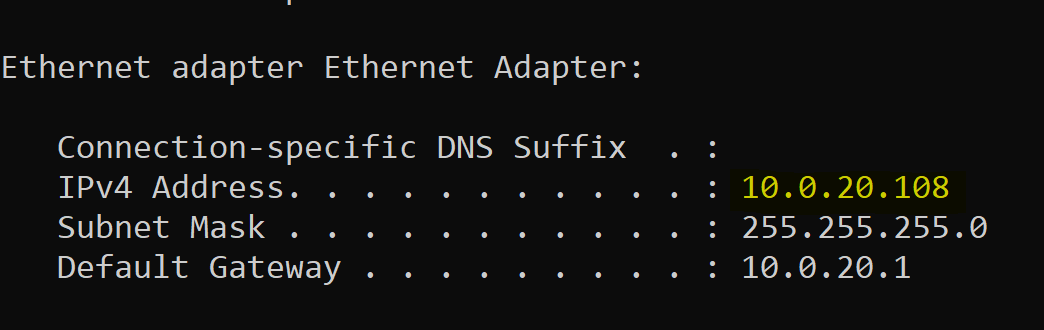
IP Verification in Corporate Network Range
SSH Putty Client
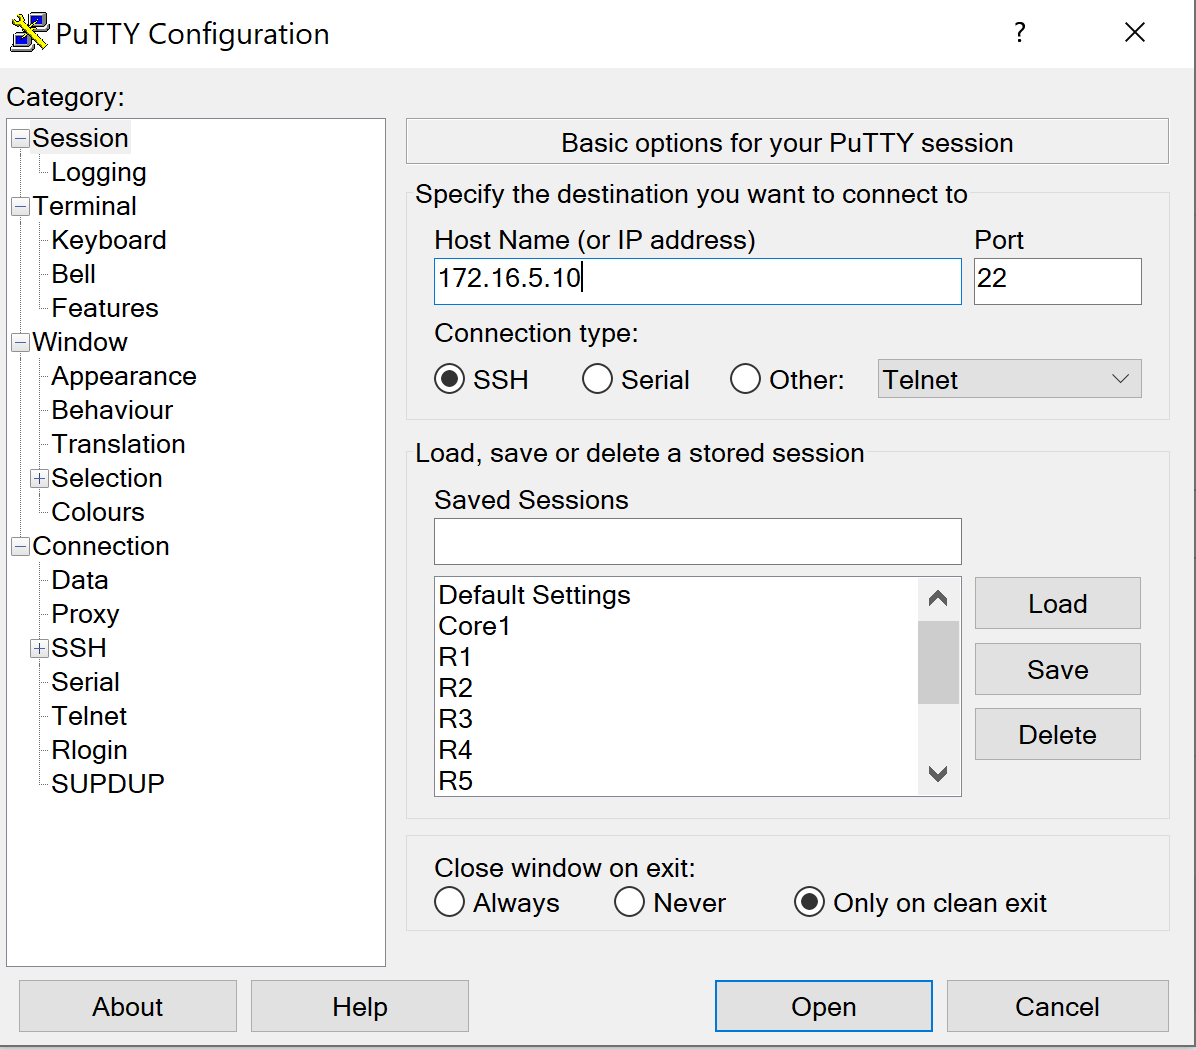
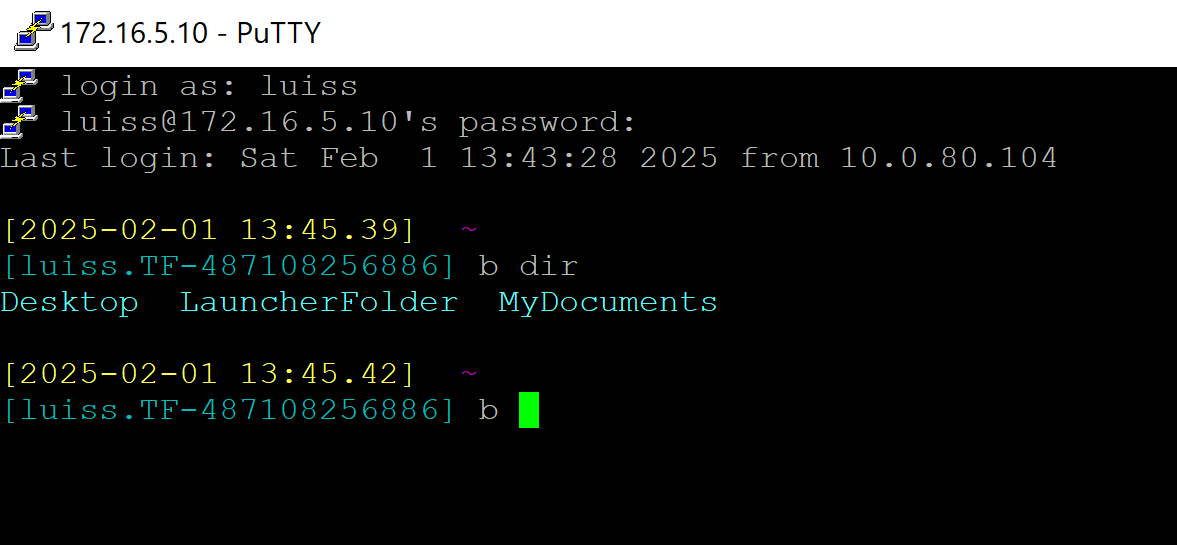
Successful SSH - Matches Rule 4: Allow 'Any Any'
RDP Client
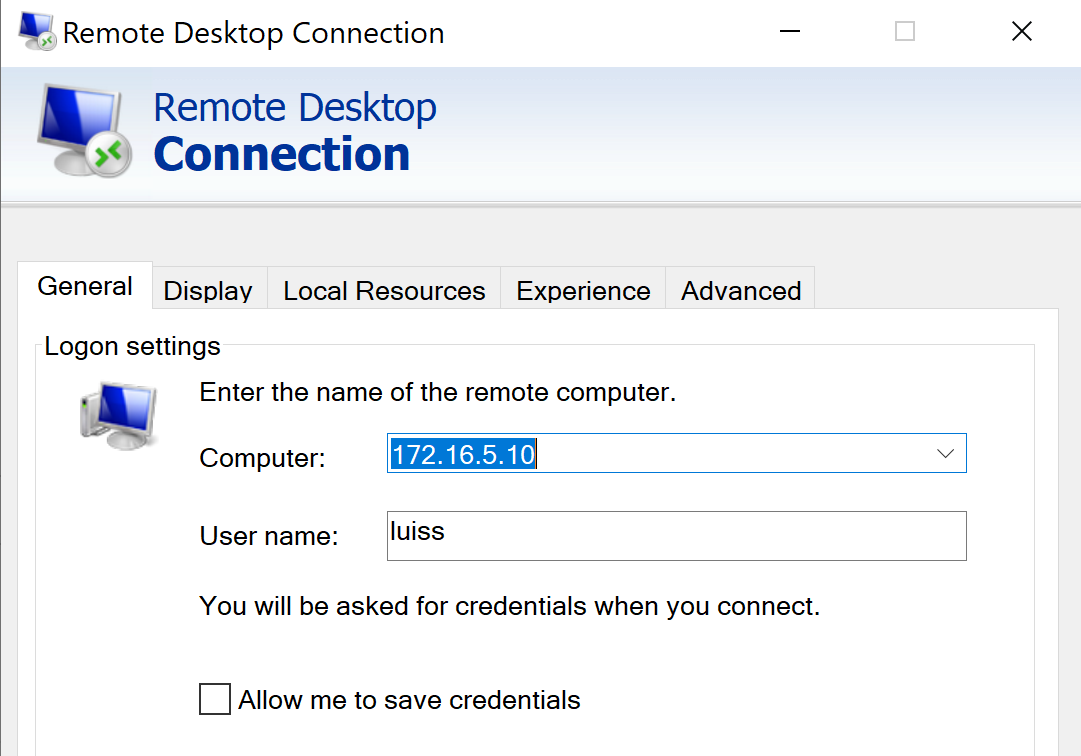
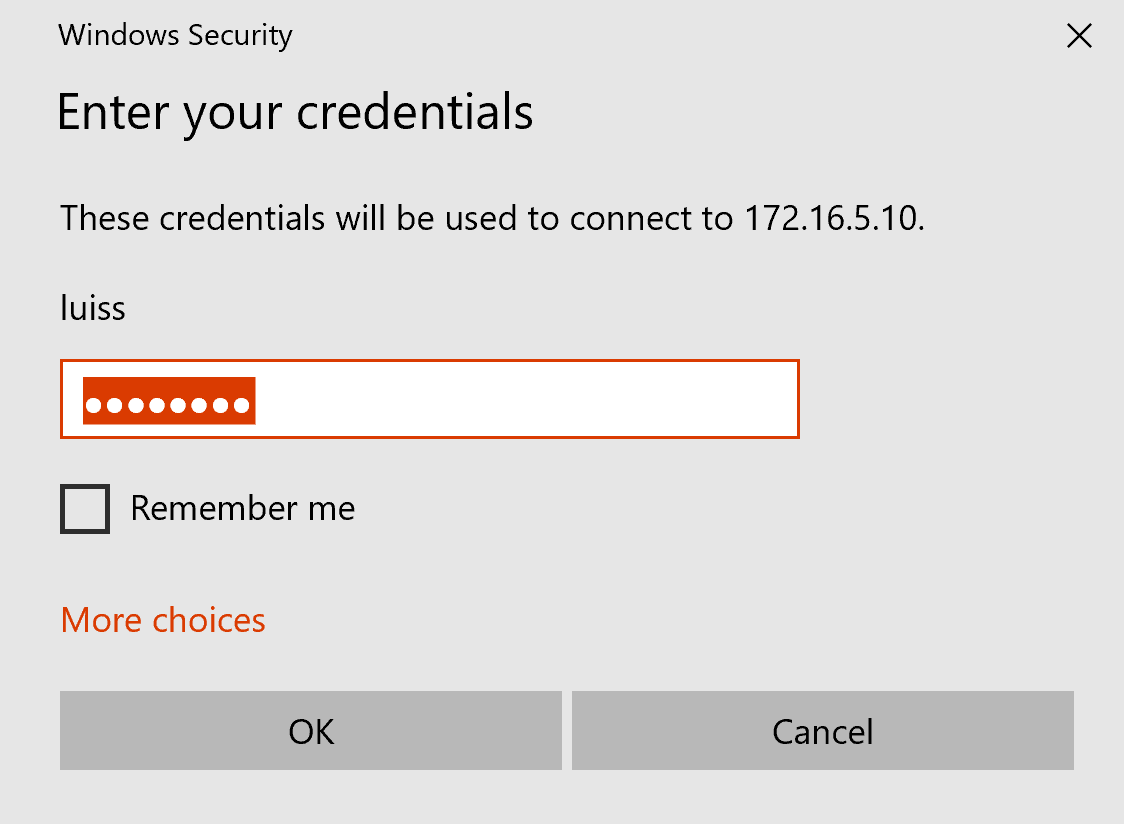
Successful RDP - Matches Rule 4: Allow 'Any Any'
TFTP Client
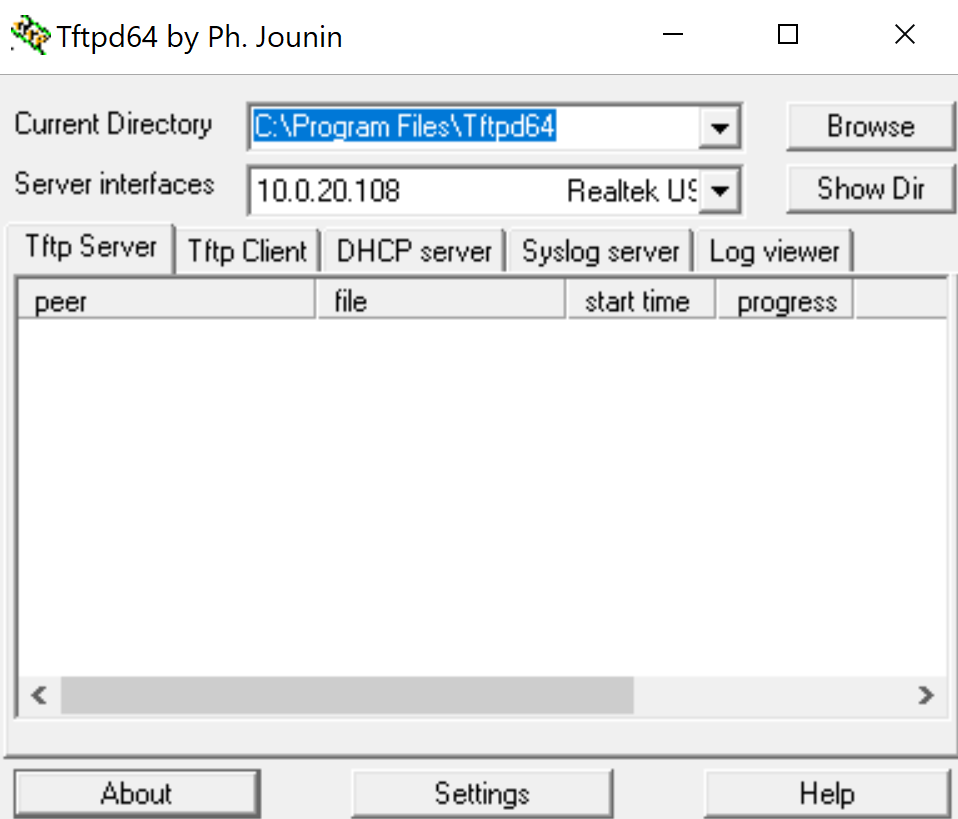
Unsuccessful TFTP - Matches Rule 3: Deny TFTP Access

Guest VLAN
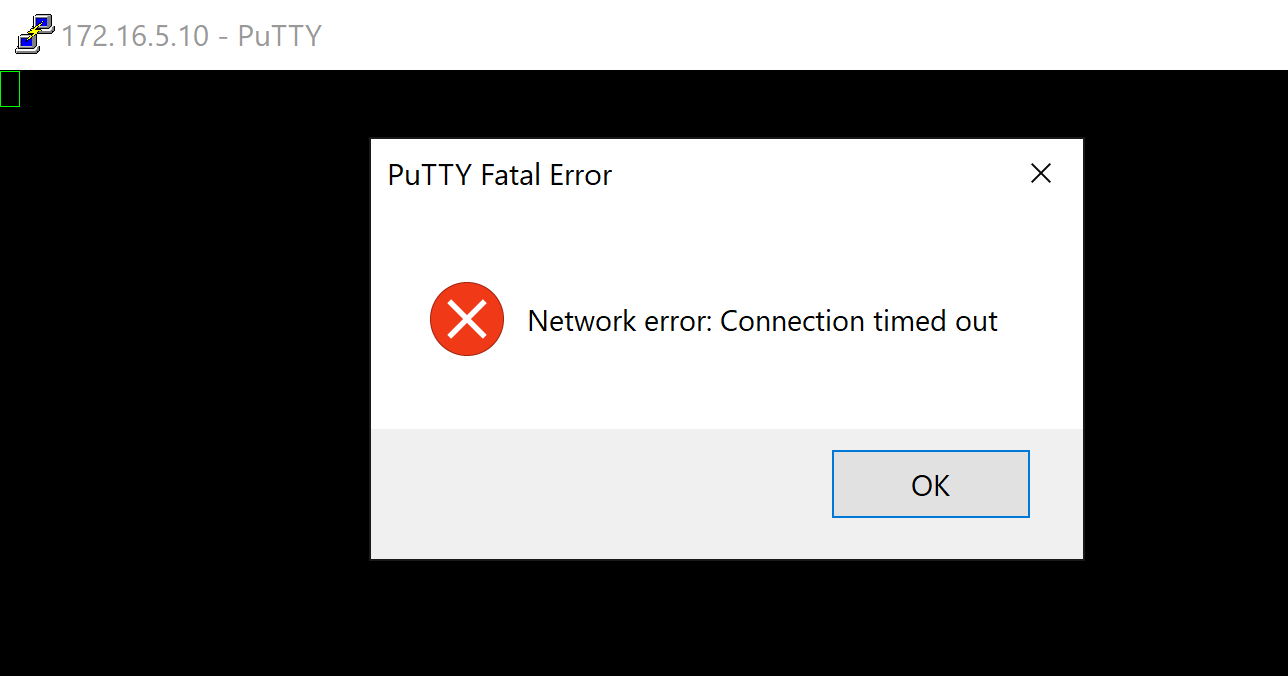
- Deny SSH Access to the Servers Network
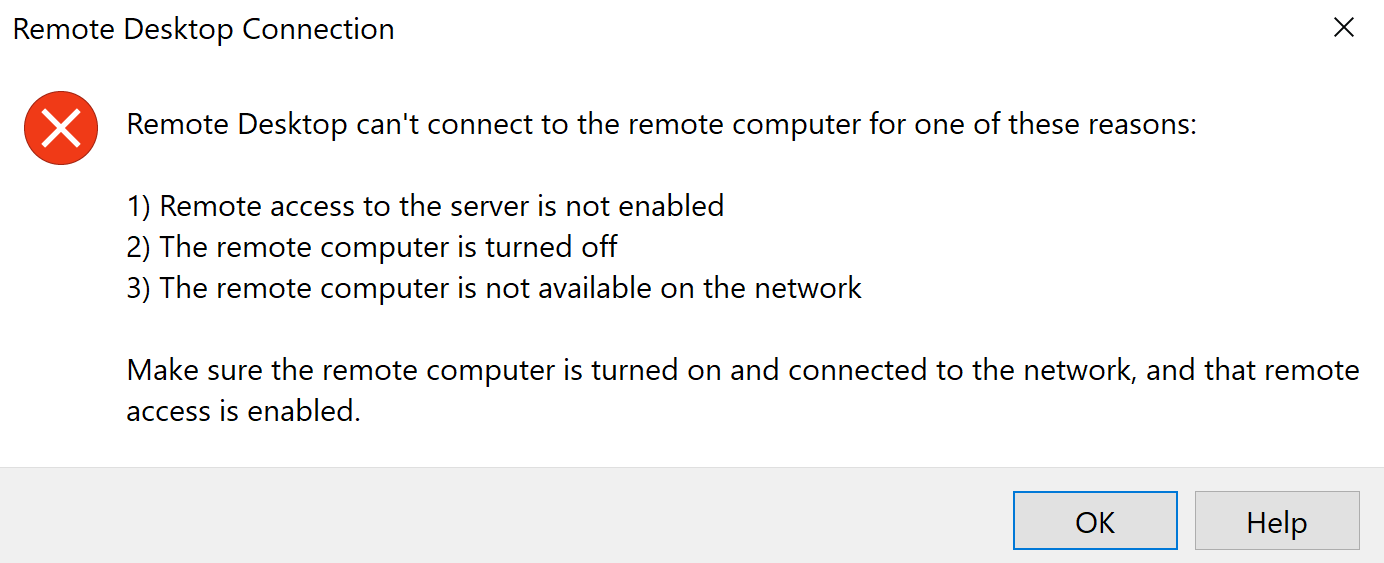
- Deny RDP Access to the Servers Network
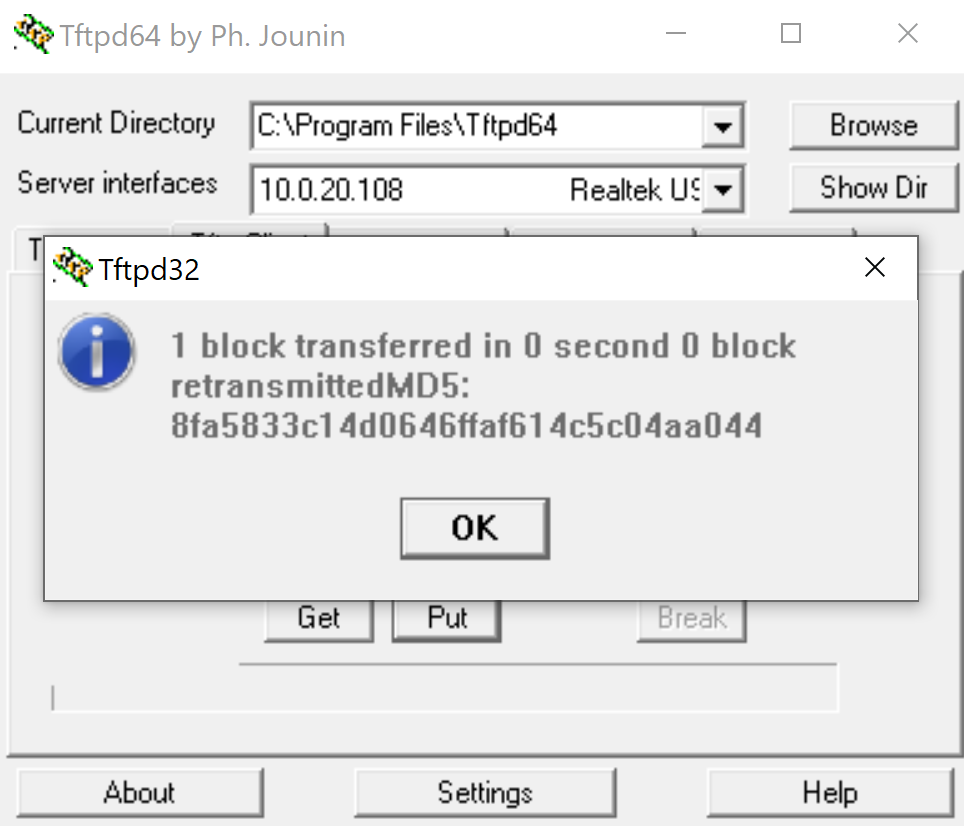
- Allow TFTP Access to the Servers Network
IP Verification of Guest Network Range
Unsuccessful SSH - Matches Rule 1: Deny SSH Access
Unsuccessful RDP - Matches Rule 2: Deny RDP Access
Successful TFTP - Matches Rule 4: Allow 'Any Any'
Port Schedules
Overview:
- Port Schedules allow admins to automate the enablement or disablement of specific switch ports based on a defined schedule
- This feature is useful for controlling network access, especially in scenarios where ports should only be active during certain times, restricting device(s) or services outside business hours
- Per Cisco, admins can configure up to five custom port schedules
- Per Cisco, a manually disabled port takes precedence over any port schedule applied
- In this lab exercise, I will configure & apply a port schedule to restrict a Corporate client from accessing the network during off hours
Port Schedules Menu
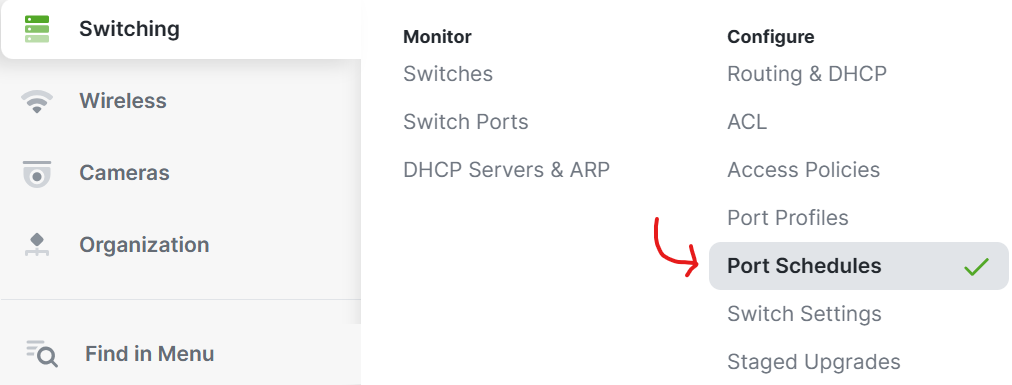
Port Schedule Menu Overview
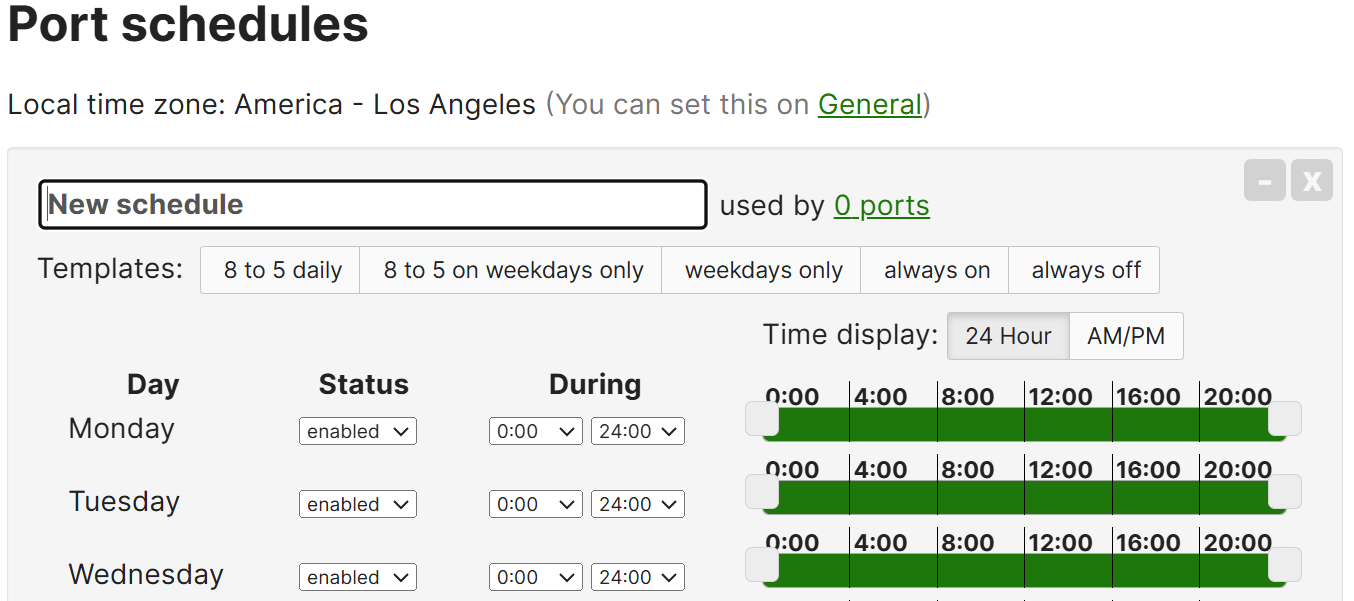
Configuration
Applying Port Schedules
Overview:
- With defined port schedules, admins have the ability to associate the port schedule to one or multiple switch ports on a switch
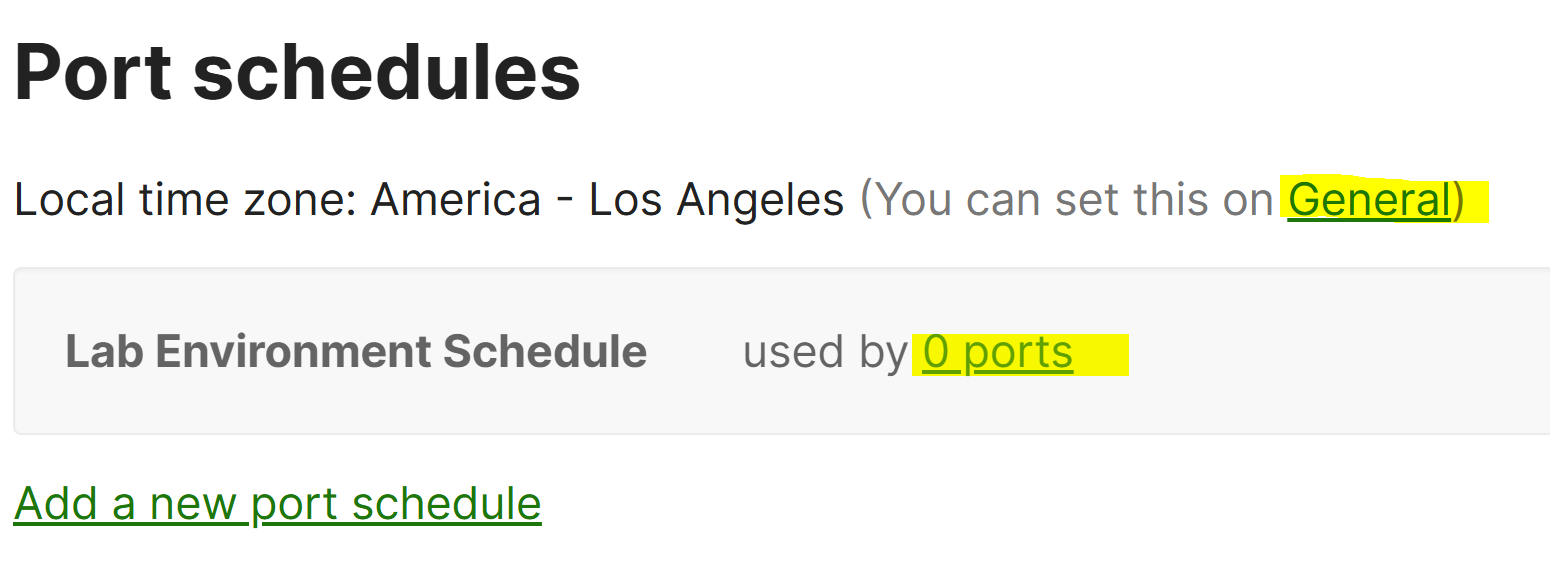
- It is important to set the Local Time Zone under the Network-Wide 'General' configuration section to ensure port schedules are implemented correctly
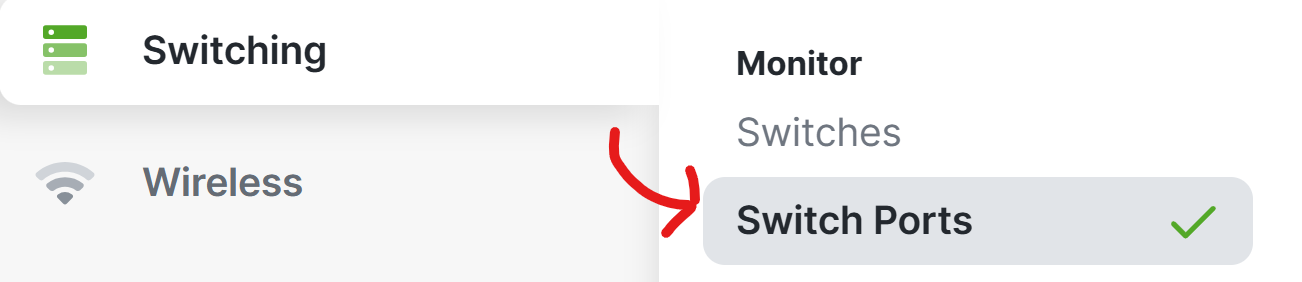
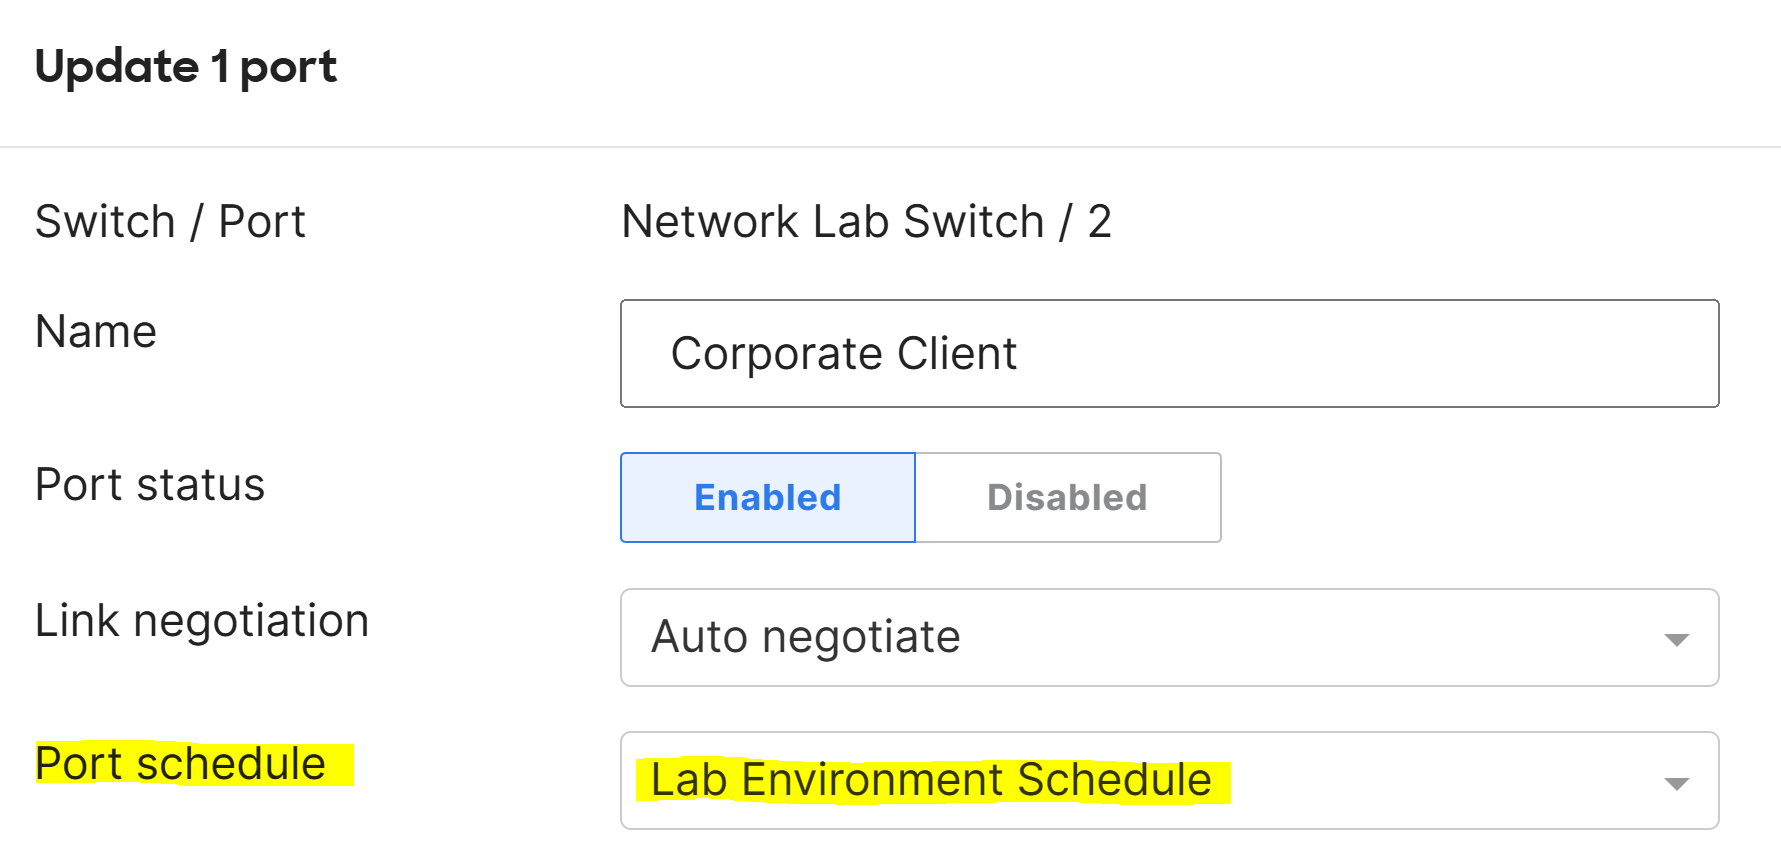
- In this exercise, I will apply the port schedule to switch port 'two' on the Corporate VLAN and verify

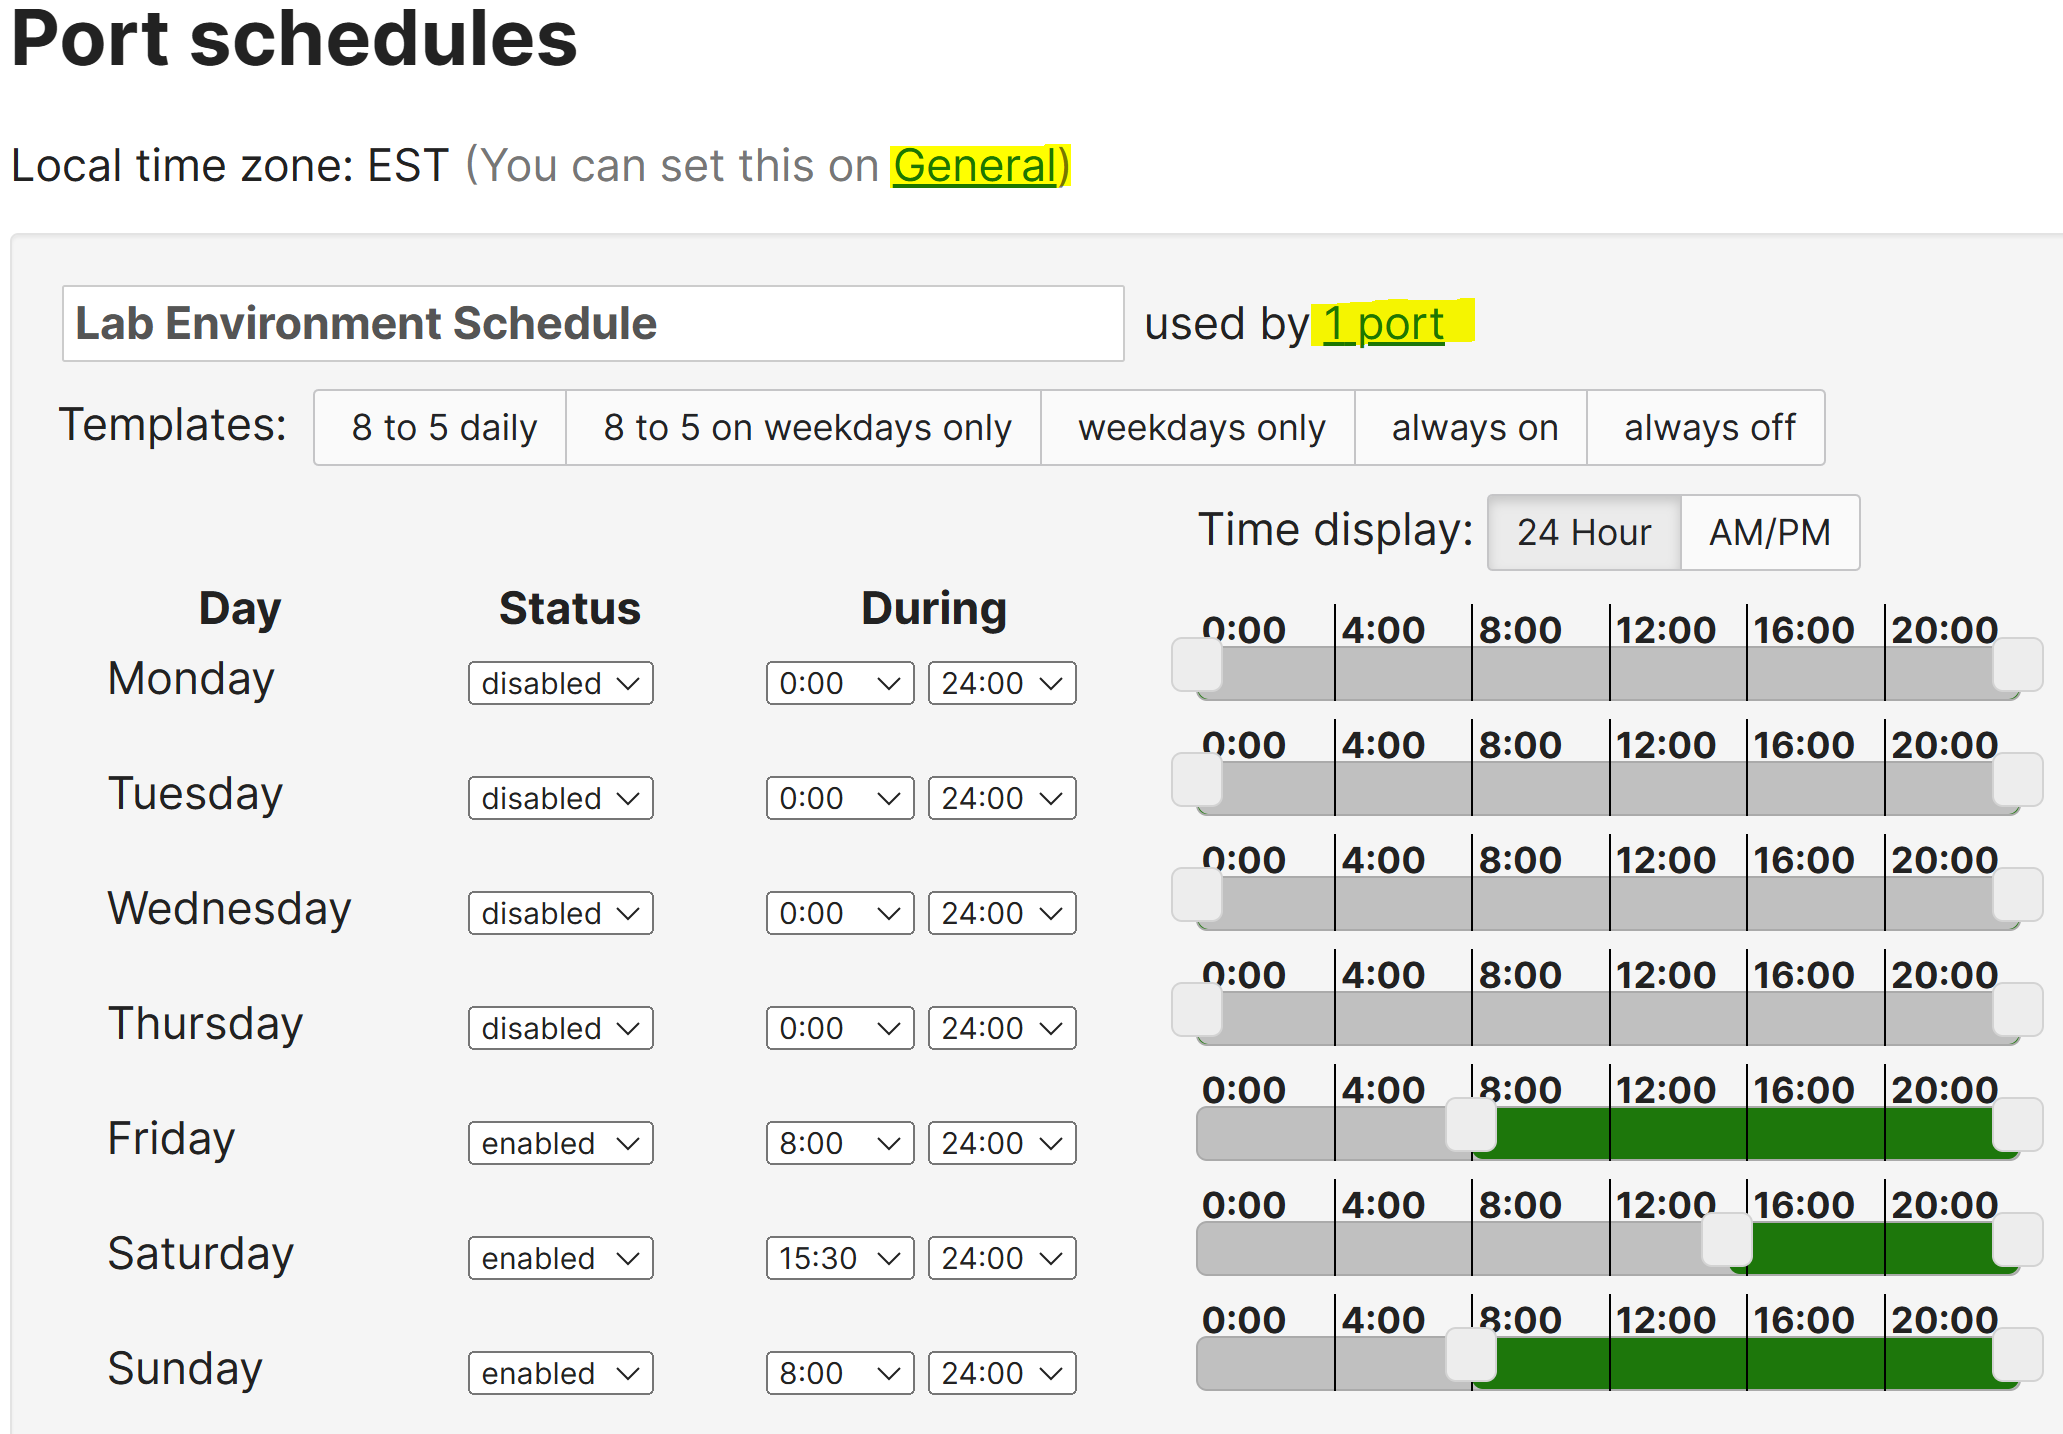
Port Schedule Verification
Overview:
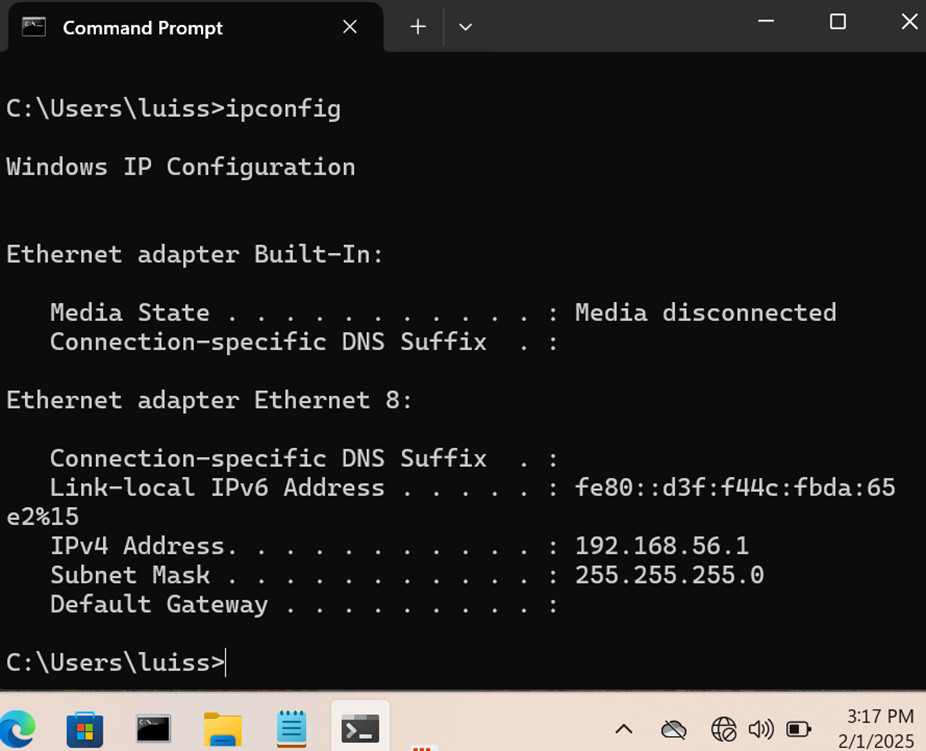
- In this demonstration, the Corporate PC client is restricted from accessing the network between the hours of 12am - 3:30pm on Saturdays
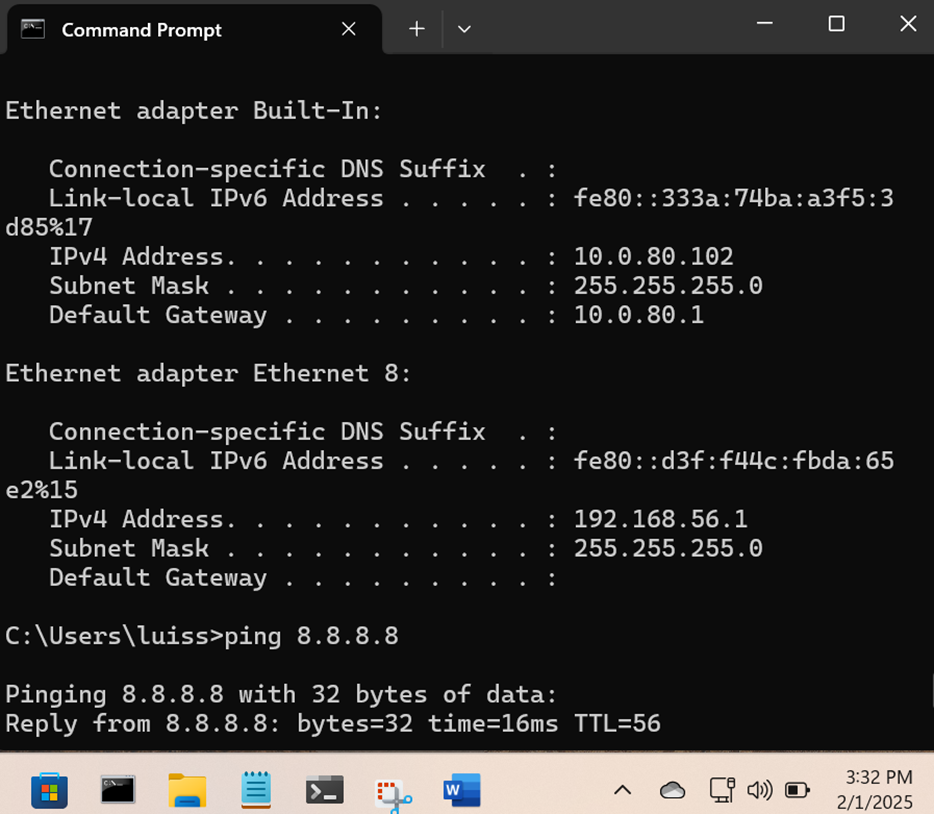
- Once the clock is set to 3:30pm, the port schedule will allow the client to access the network
Access Policies
Overview:
- Access Policies provide a way to control and manage the behavior of network ports based on specific criteria
- These policies are used to enhance security, streamline network access, and ensure client devices connect to the network in a controlled manner
- Cisco Meraki's Access Policy solution require connecting devices to authenticate against a RADIUS server or through Meraki Authentication before they are granted network access
- These policies are typically applied to ports on access layer switches to prevent unauthorized devices from connecting to the network
Access Policies Menu

Access Policies Menu Overview

Access Policy Setting Parameters
Authentication Methods
- Access Policies for clients can be configured using 'Meraki Authentication' or through an external RADIUS server before they are granted access to the network
Organization-Wide RADIUS Servers
- This section provides the ability to define RADIUS servers and re-use the configuration across the organization for additional access polices
Access Policy Types
- 802.1X (Default)
- Using this type, a client that connects to the switch port will be prompted to provide their domain credentials
- If the credentails match on the RADIUS server, client is granted access to the network
- If no authentiation is attempted, client will be placed on the Guest VLAN if one is defined
- Deployment common for enterprises with an existing domain user base such as Active Directory
- MAC Authentication Bypass (MAB)
- Using this type, the client's MAC address is authenticated against the RADIUS server without requiring credentials
- If the RADIUS server accepts the MAC as valid credentials for the network, the device will be granted access to the network
- Deployment common for devices that do not support 802.1X supplicant software such as printers or other IoT devices
- Hybrid Authentication
- Using this type, the client will first be prompted to provide their domain credentials using 802.1X authentication
- If 802.1X authentication fails, the access policy type will fallback to MAB
- If MAB fails, the client will be placed on the Guest VLAN if one is defined
- Deployment common for varying devices that support 802.1X or MAB exclusively
Host Modes
- Single-Host (Default)
- Per Cisco, a connected device will attempt to authenticate and if it fails to authenticate, the client will be denied access
- Mode is recommended for switch ports with only one client attached
- Multi-Domain
- Per Cisco, one device can be authenticated on each of the data and voice VLANs
- In this mode, Hybrid Authentication is used and Voice VLAN authentication is required
- Mode is recommended for switch ports connected to a phone with a device behind the phone
- Multi-Auth
- Per Cisco, each connected device is required to authenticate with multiple devices being supported on each port
- After a VLAN is assigned to a host on the port, subsequent hosts must have matching VLAN information or be denied access to the port
- Only one client is supported on the voice VLAN
- Guest clients are not supported on this mode
- Multi-Host
- Per Cisco, a single successful authentication will put the port into a forwarding state with subsequent auth attempts being ignored
- Mode is recommended where the authenticated device acts as a point of access to the network such as access point devices
802.1X Control Direction (Wake-on-LAN)
- Per Cisco, this feature is set by default to 'both' directions
- In this mode, the switch port does not allow ingress or egress traffic through the switch port until after the port is authenticated via 802.1X or MAB
- By setting the direction to 'inbound only', this is often used to allow Wake on LAN magic packets to wake a sleeping host on the connected port, at which point the host can attempt a normal 802.1X or MAB authentication to authorize the switch port for full ingress and egress traffic
- WoL is a technology that allows you to remotely power on a computer or device over a network connection via a magic packet. It's often used for managing systems remotely, automating processes, or waking devices without having to physically press the power button
Re-authentication Interval
- This interval (time in seconds) refers to the period of time after which a client device must reauthenticate to the network
- This interval is typically set to ensure that devices regularly prove their identity or credentials which can help maintain security
- Per Cisco, the re-authentication timer also enables the recovery of clients placed in the Failed authentication VLAN because of incomplete provisioning of credentials
Concurrent Authentication (Hybrid Policy)
- Enabling this feature allows the 802.1X and MAB access requests to send in parallel, which allows for MAB devices with no 802.1X supplicant software to gain access to the network without waiting for the 802.1X process to timeout
Suspend Port Bounce
- Per Cisco, when connectivity between the switch and any of the RADIUS servers is restored, the switch will attempt to authenticate the clients which have been placed in the critical authentication VLAN
- The switch performs this by effectively cycling the switch ports on which these clients are connected
- If required, this feature can be disabled by enabling this feature
- When port-bounce is suspended, the clients will be retained in the critical authentication VLAN until a re-authentication for these clients is manually triggered
Critical Auth VLAN
- Per Cisco, the critical authentication VLAN can be used to provide network connectivity to client devices connecting on switch ports controlled by an access policy when all of the RADIUS servers for that policy are unreachable or fail to respond to the authentication request on time
- Per Cisco, the critical data and critical voice VLANs should not be the same
- RADIUS monitoring must be enabled to track RADIUS server reachability to limit Guest or Critical Auth VLAN placement
Guest VLAN
- Guest VLANs can be used to allow unauthorized devices access to limited network resources
- Per Cisco, this is not supported on the voice VLAN/domain
Failed Auth VLAN
- Per Cisco, a client device connecting to a switch port controlled by an access policy can be placed on the failed authentication VLAN if the RADIUS server denies its access request
- The failed authentication VLAN provides clients with limited access to the network for remediation purposes
Radius Caching & Caching Timeout
- This feature (for MS390 & C9300-M) allows for clients to authenticate against a RADIUS server and for the switch to cache the auth result for that session
- If the connection to the RADIUS server is severed, the switch will use the cached entry to reauthorize the endpoint
- By default, the switch will cache the authorization result for 24 hours
Other RADIUS Features
- Enable RADIUS Accounting Servers
- This feature can be enabled to send interim-update and stop messages to a RADIUS accounting server for tracking connected clients
- RADIUS Accounting is a tool used for tracking and managing network resource usage, providing insights into session durations and network performance as well as for troubleshooting issues
- RADIUS Server Testing
- Per Cisco, meraki switches will periodically send Access-Request messages to RADIUS servers using identity 'meraki_802x_test' to ensure that the RADIUS servers are reachable
- If the RADIUS server becomes unreachable, the switch will transition into an alerting status to indicate a failure
- Failover RADIUS servers can be configured within the Meraki Dashboard
- RADIUS CoA Support
- This feature allows the Meraki switch to interact dynamically with a RADIUS server to change the authorization or access level of a device that is already connected to the network, without needing to disconnect or re-authenticate that device
- URL Redirect Walled Garden
- By default, URL redirect is enabled with CoA, redirecting clients to a webpage for authentication
Meraki Authentication Access Policy Configuration
Overview
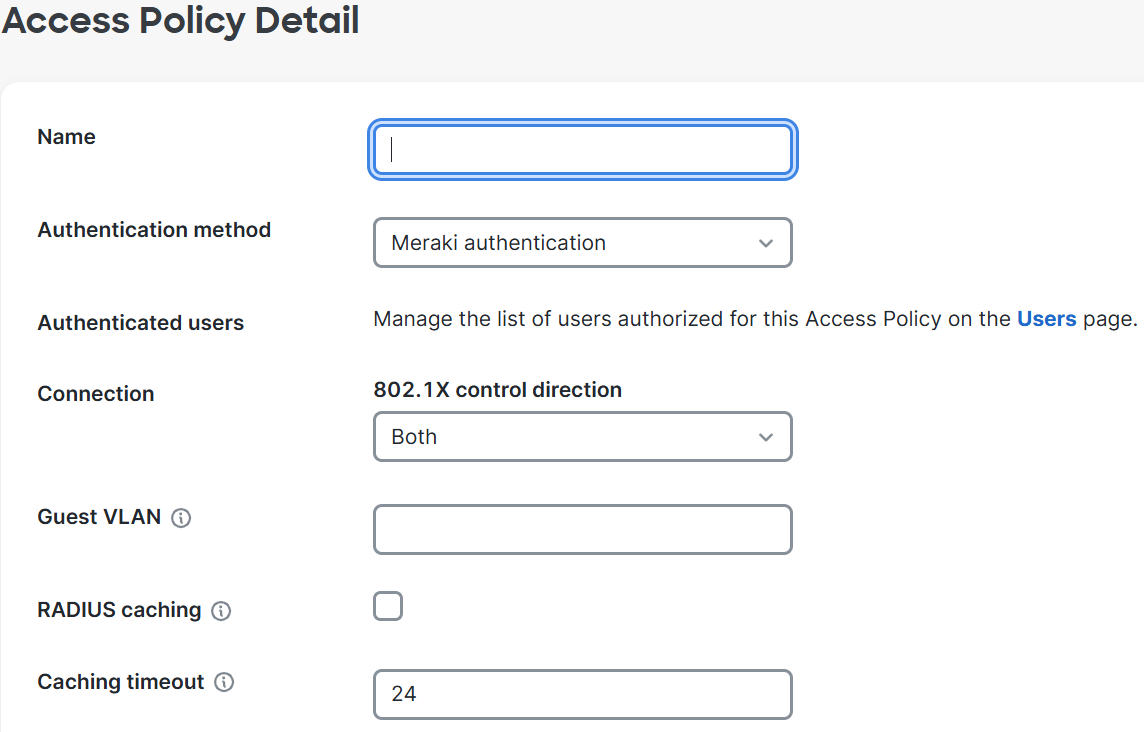
- In this lab exercise, I will be configuring an 802.1X Access Policy using Meraki Authentication
- By using Meraki Authentication, you will need to configure Meraki users for clients to successfully access the network
- This solution is an option if there is no RADIUS server accessible but still require a 802.1X security solution
Overview of Defined Policy
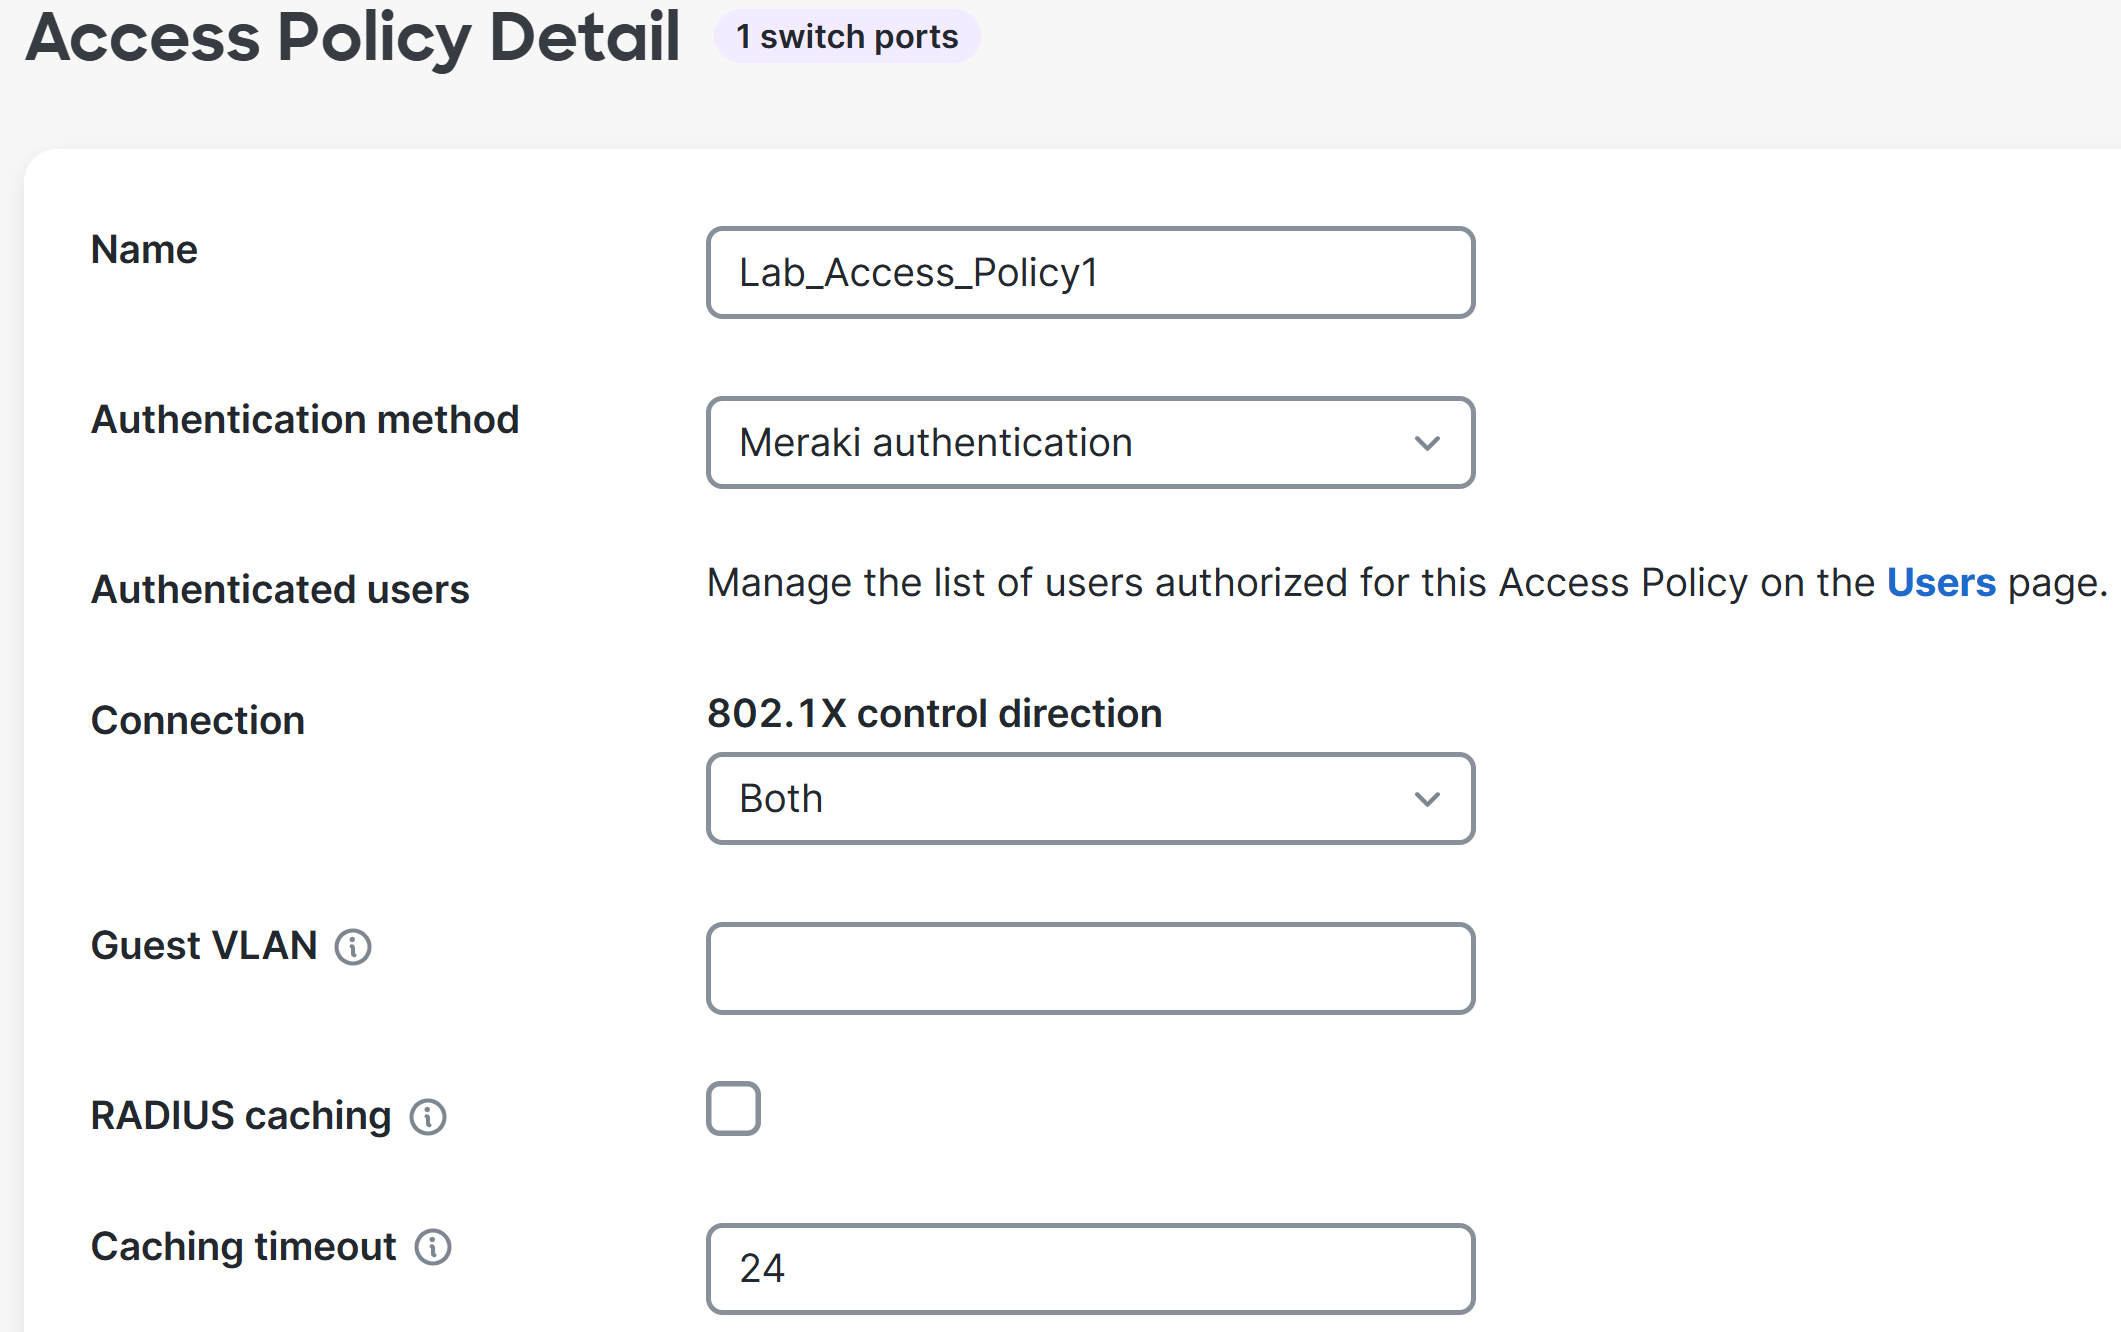
Configuring Meraki Auth User
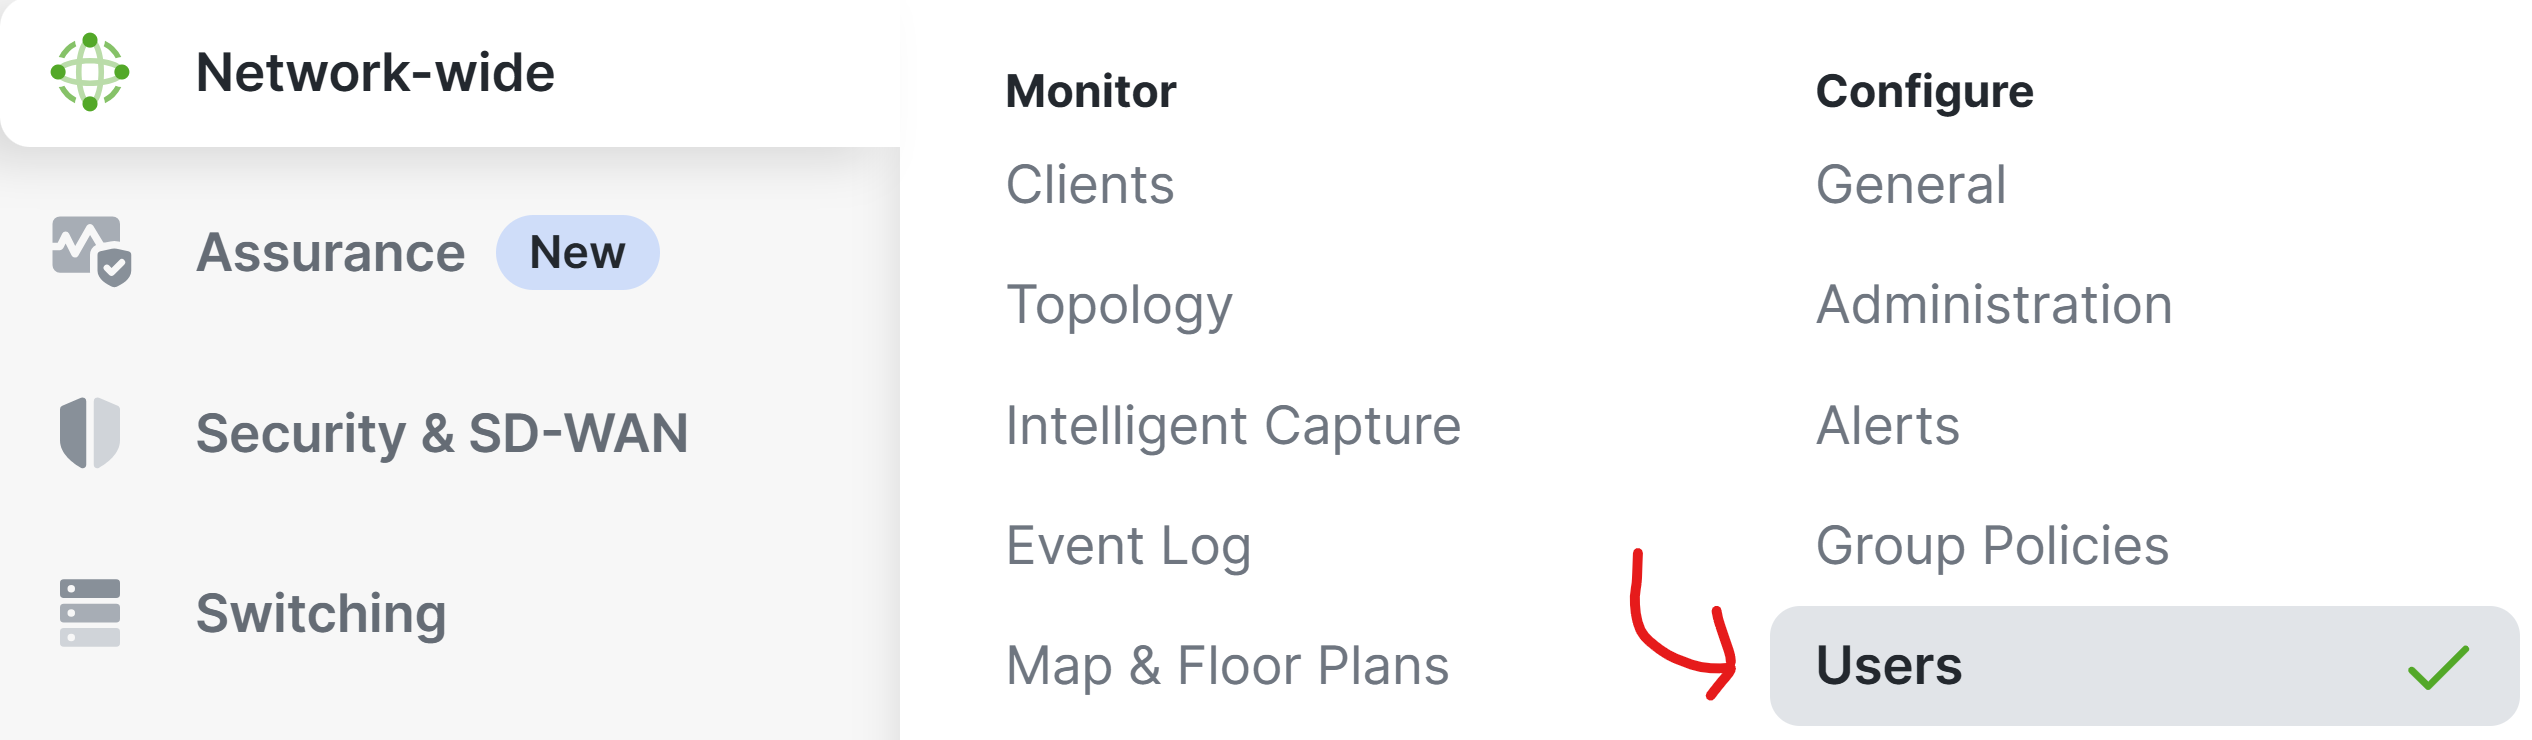
Configuring Meraki Auth User for the Access Policy Zone
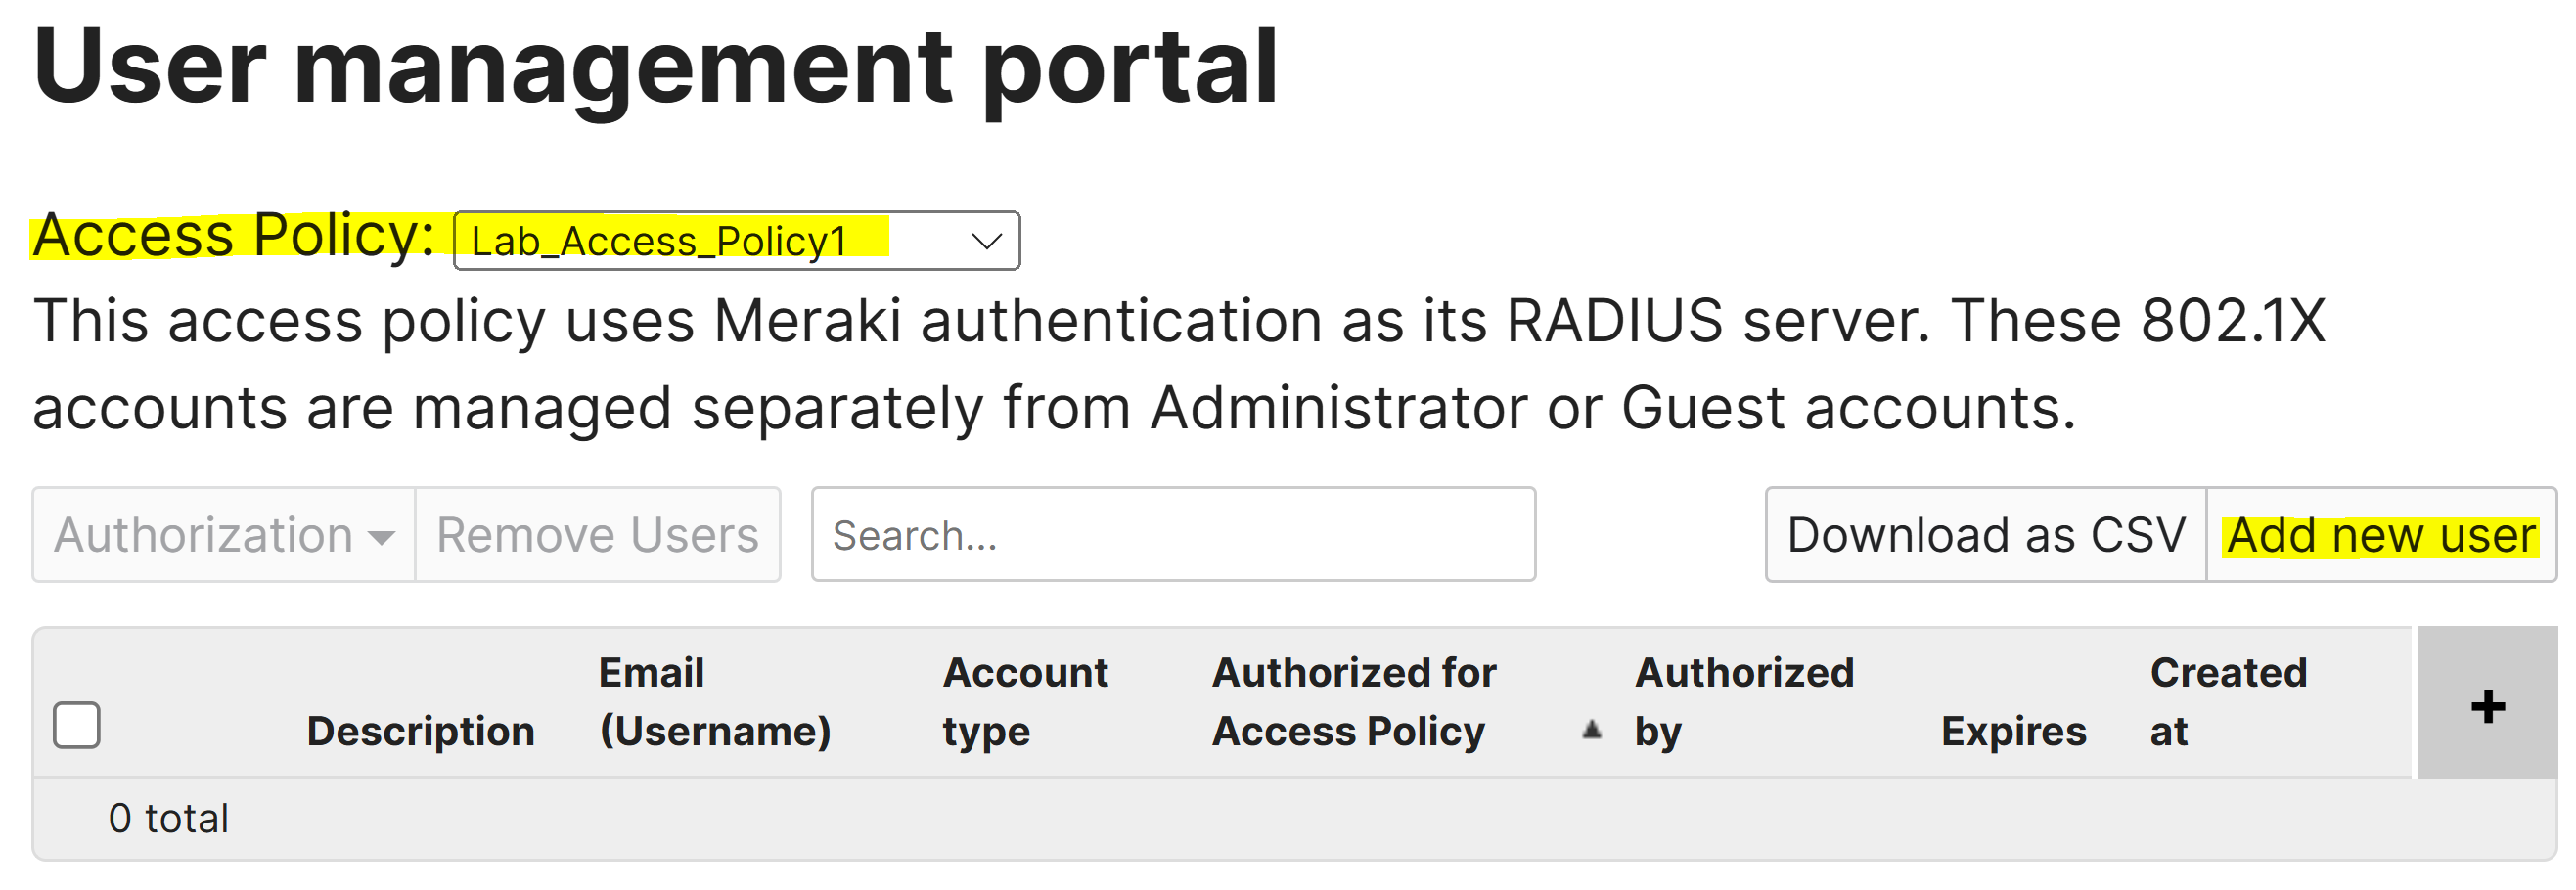
Configuring Meraki Auth User
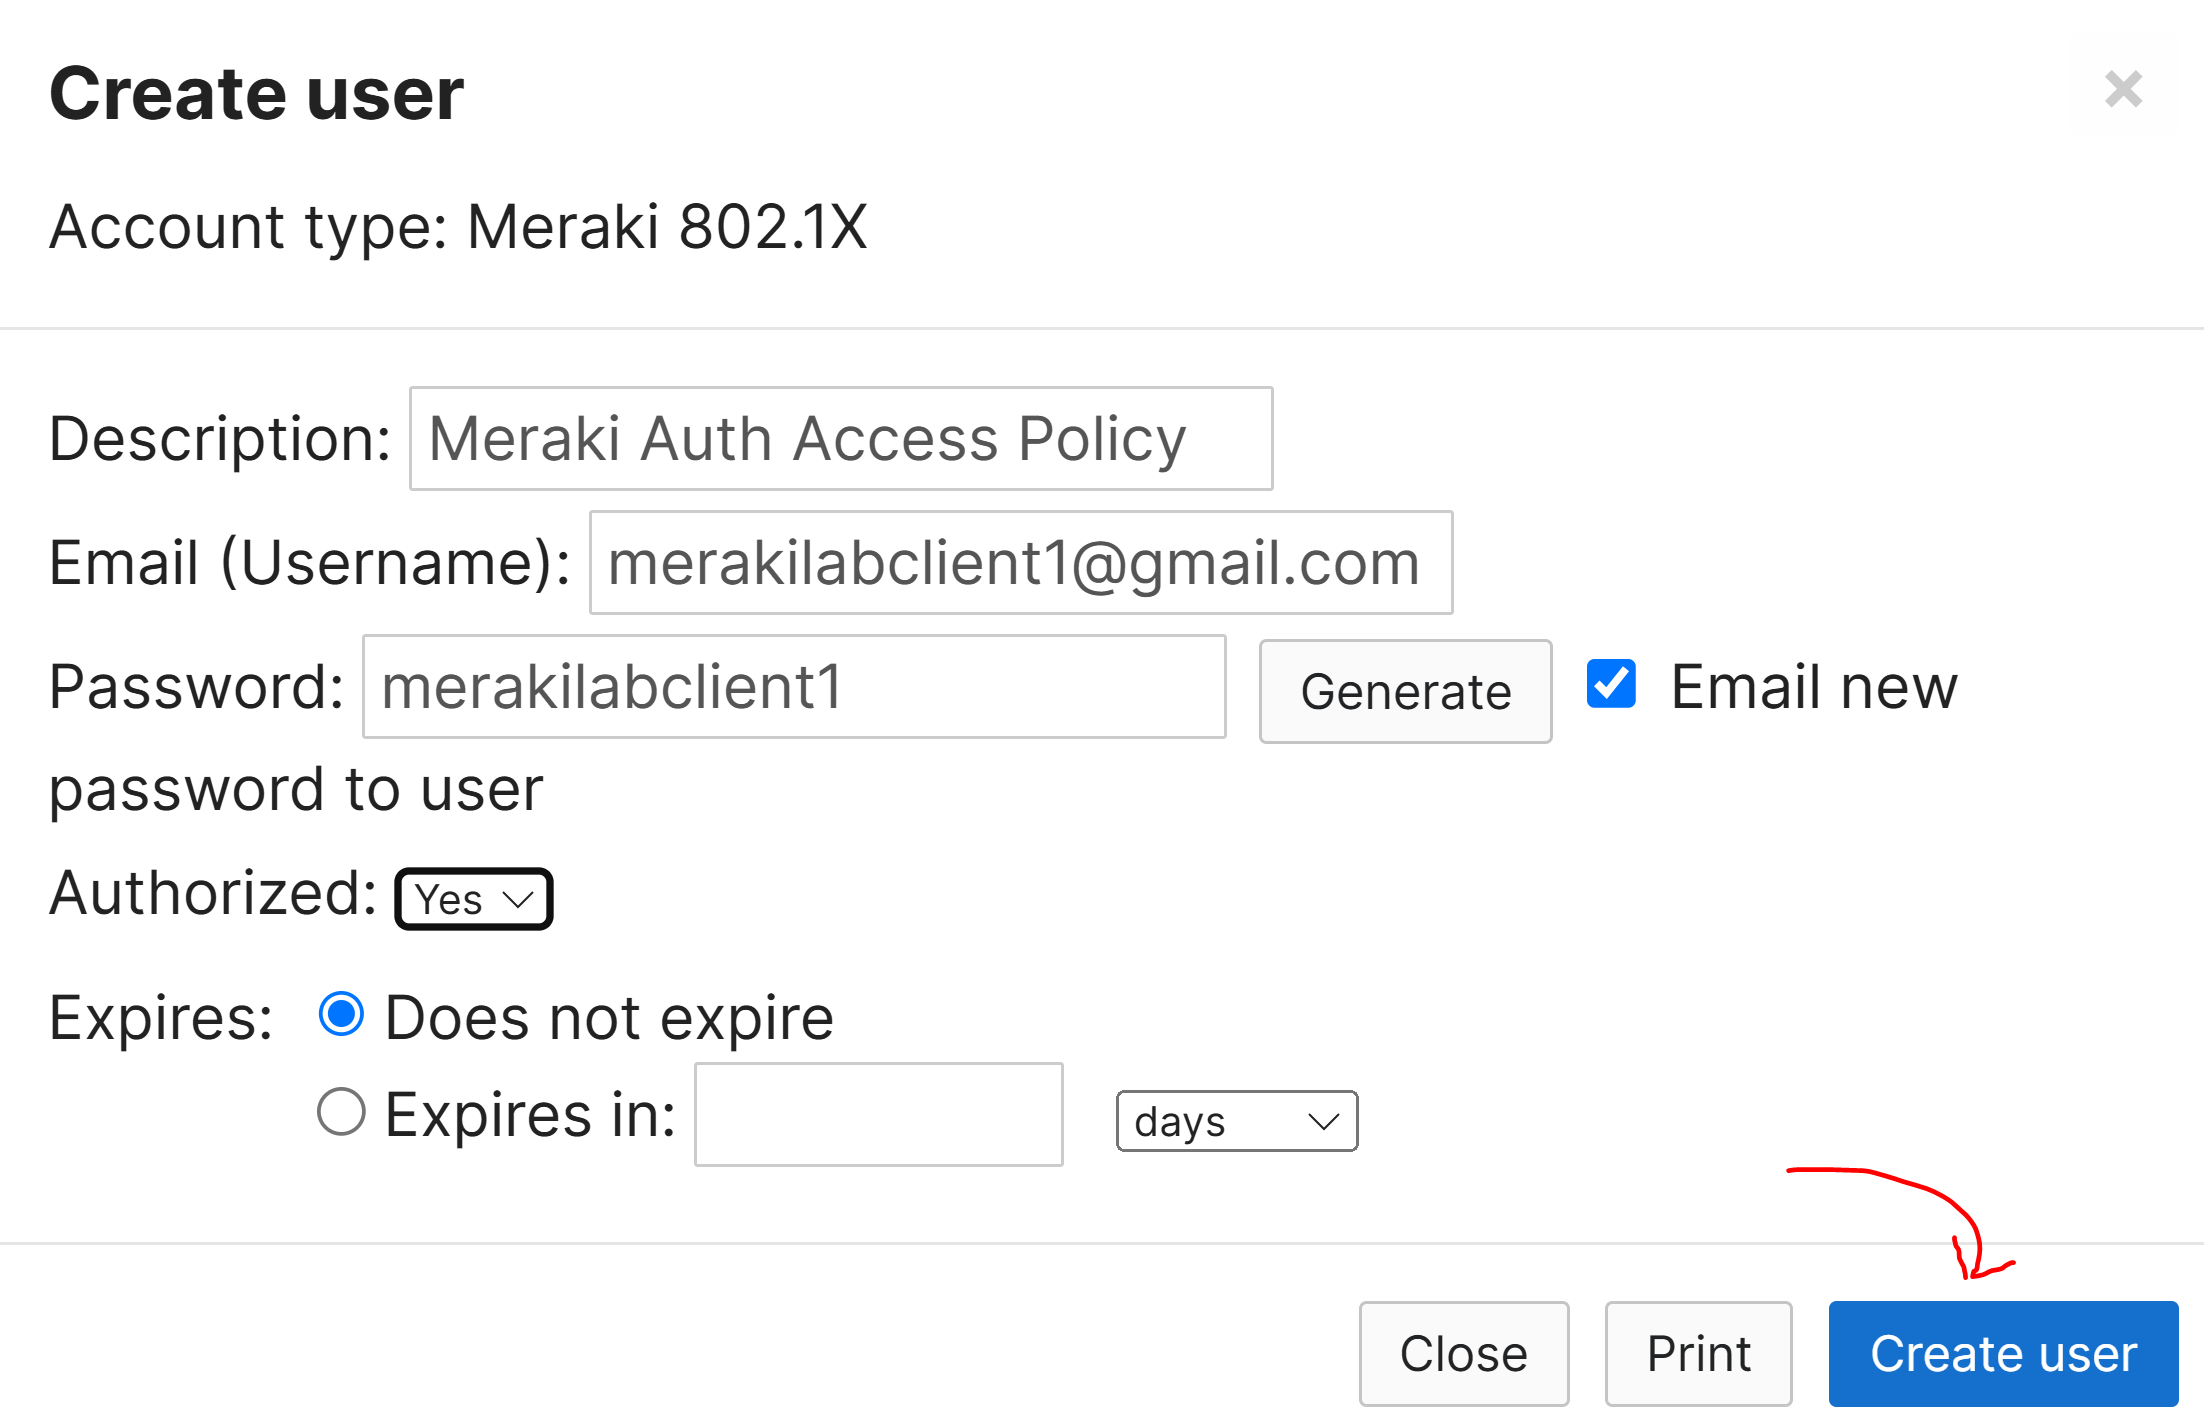
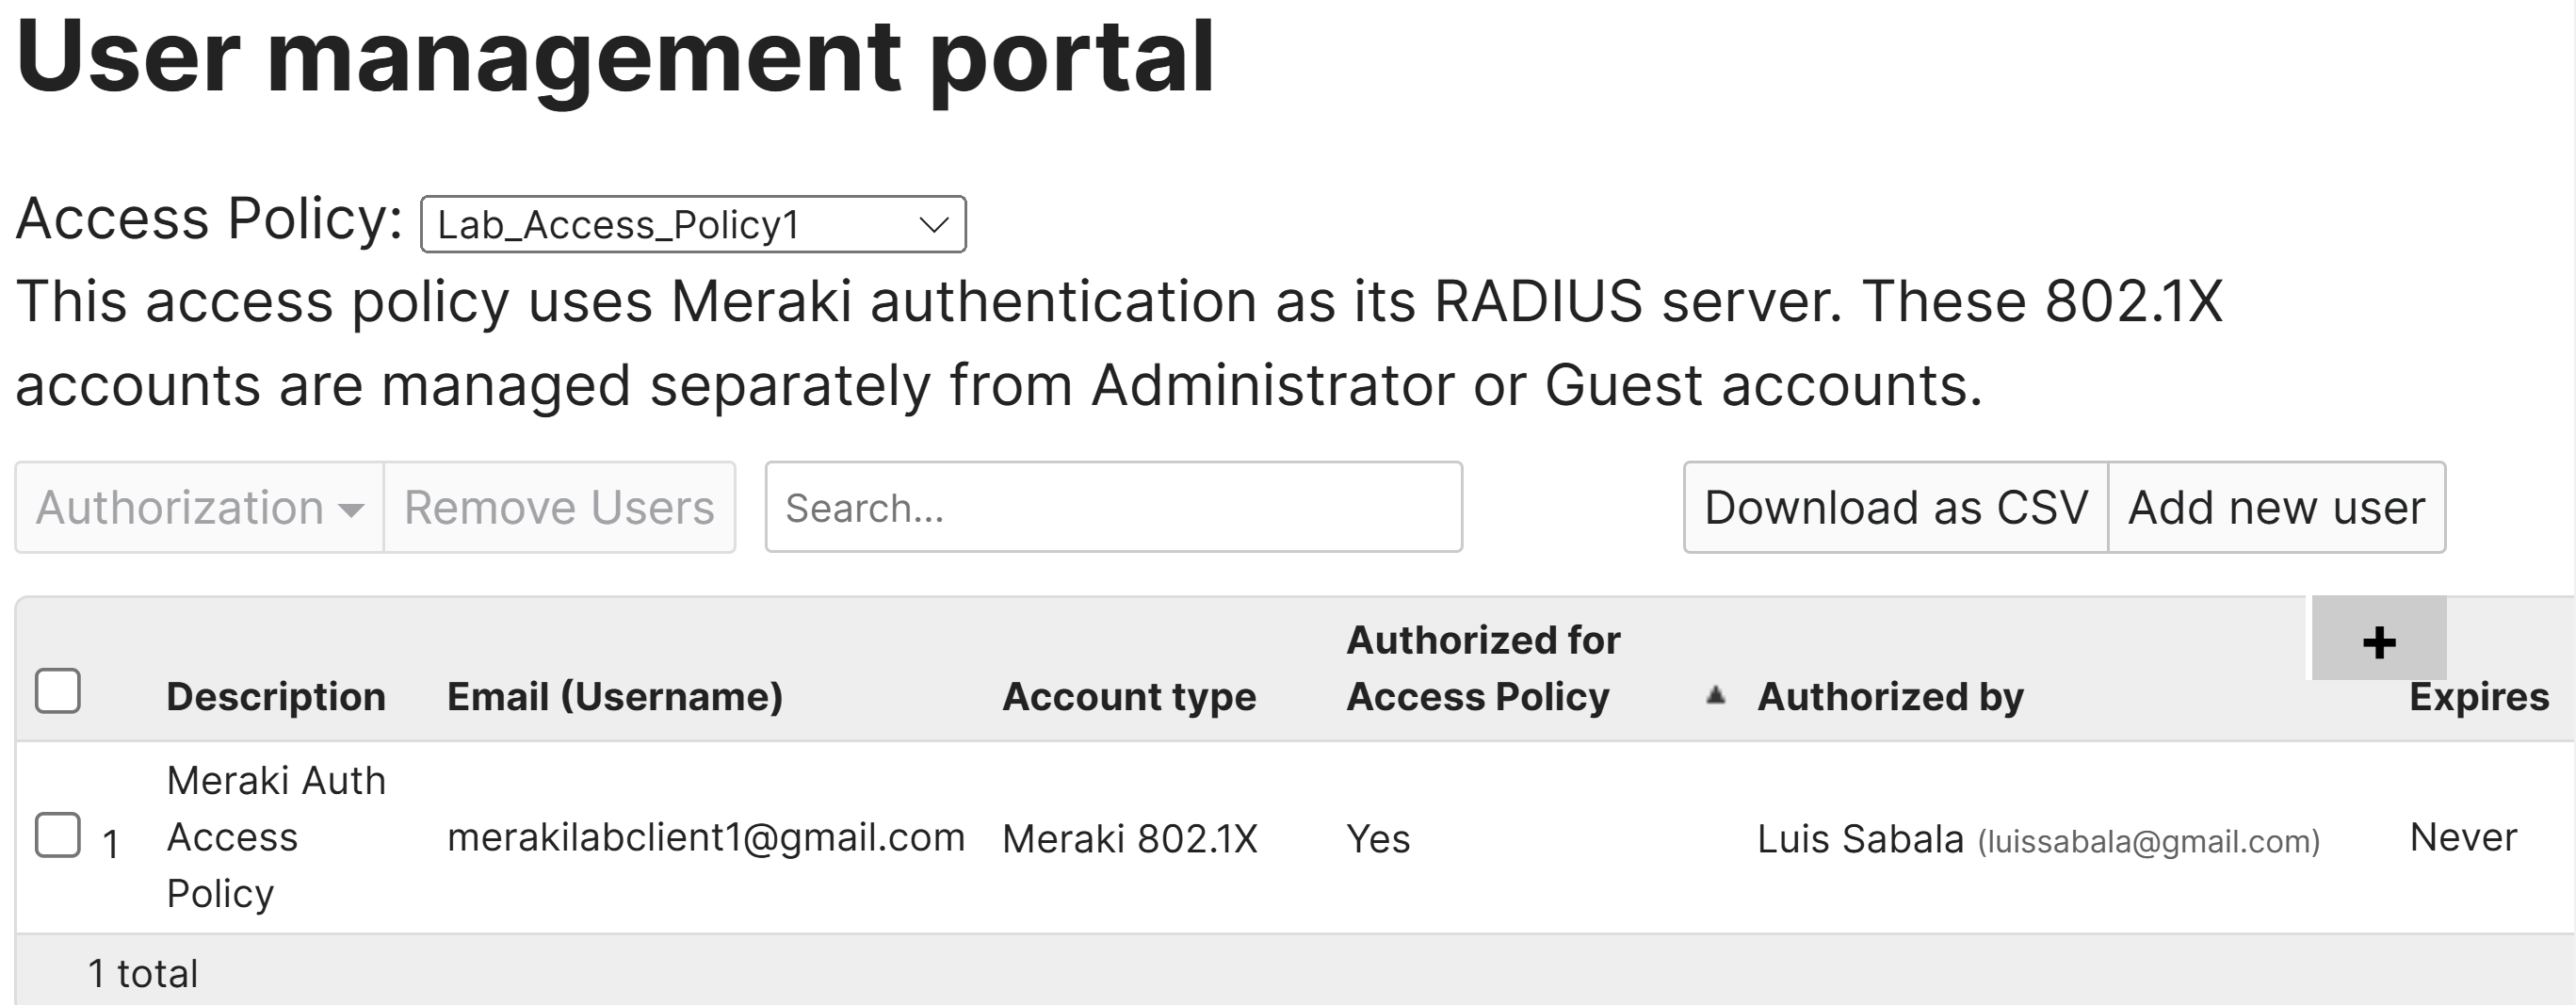
Verification of Defined Meraki Auth User
Associating Policy to LAN Port
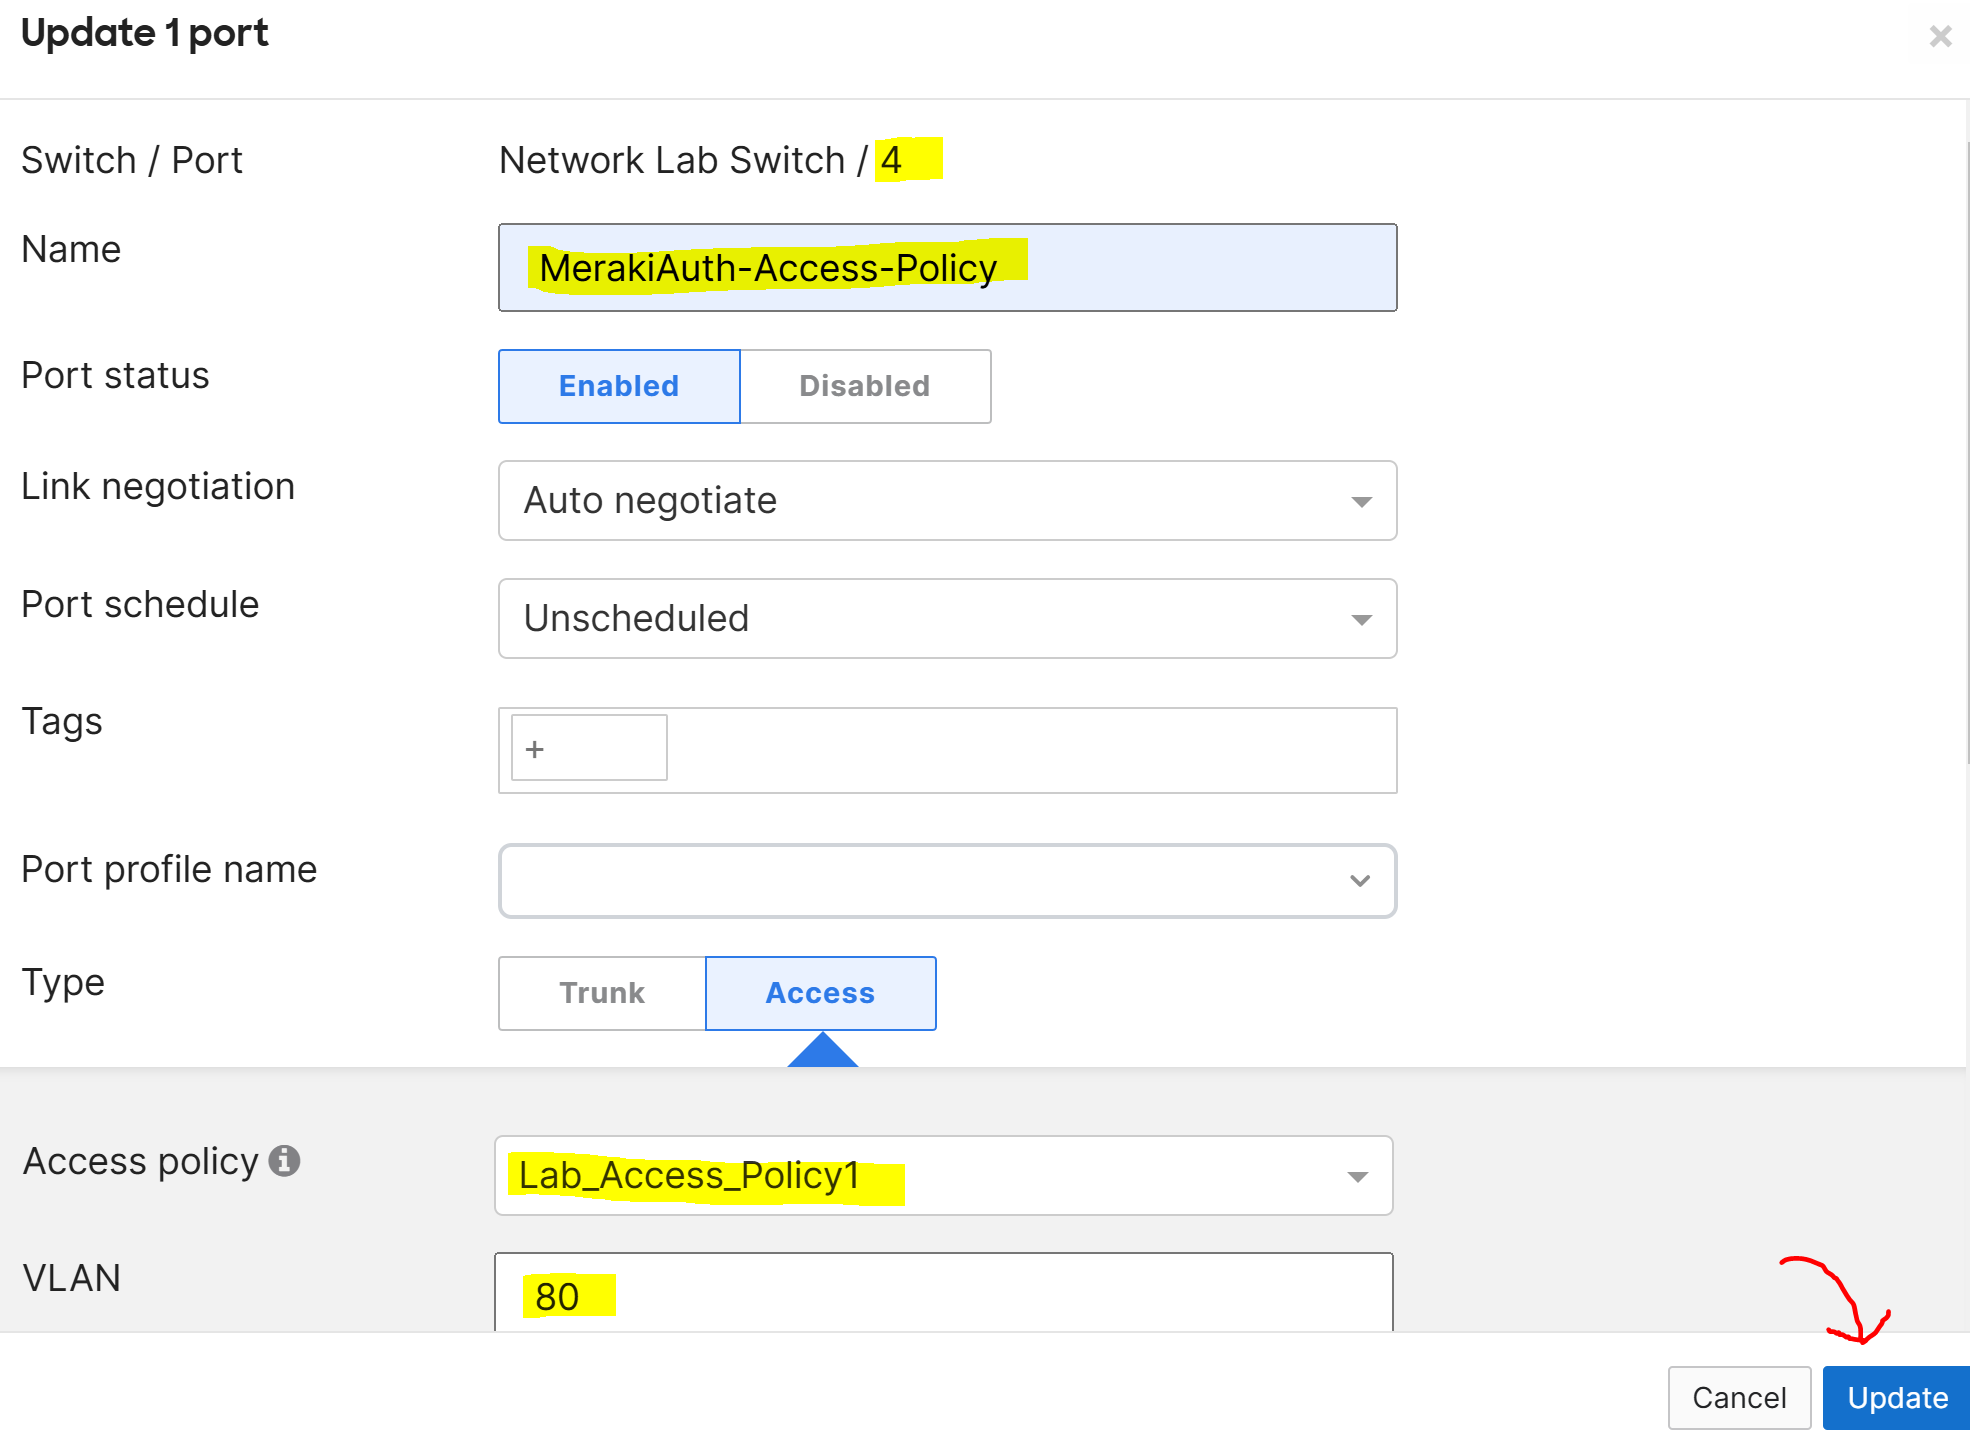
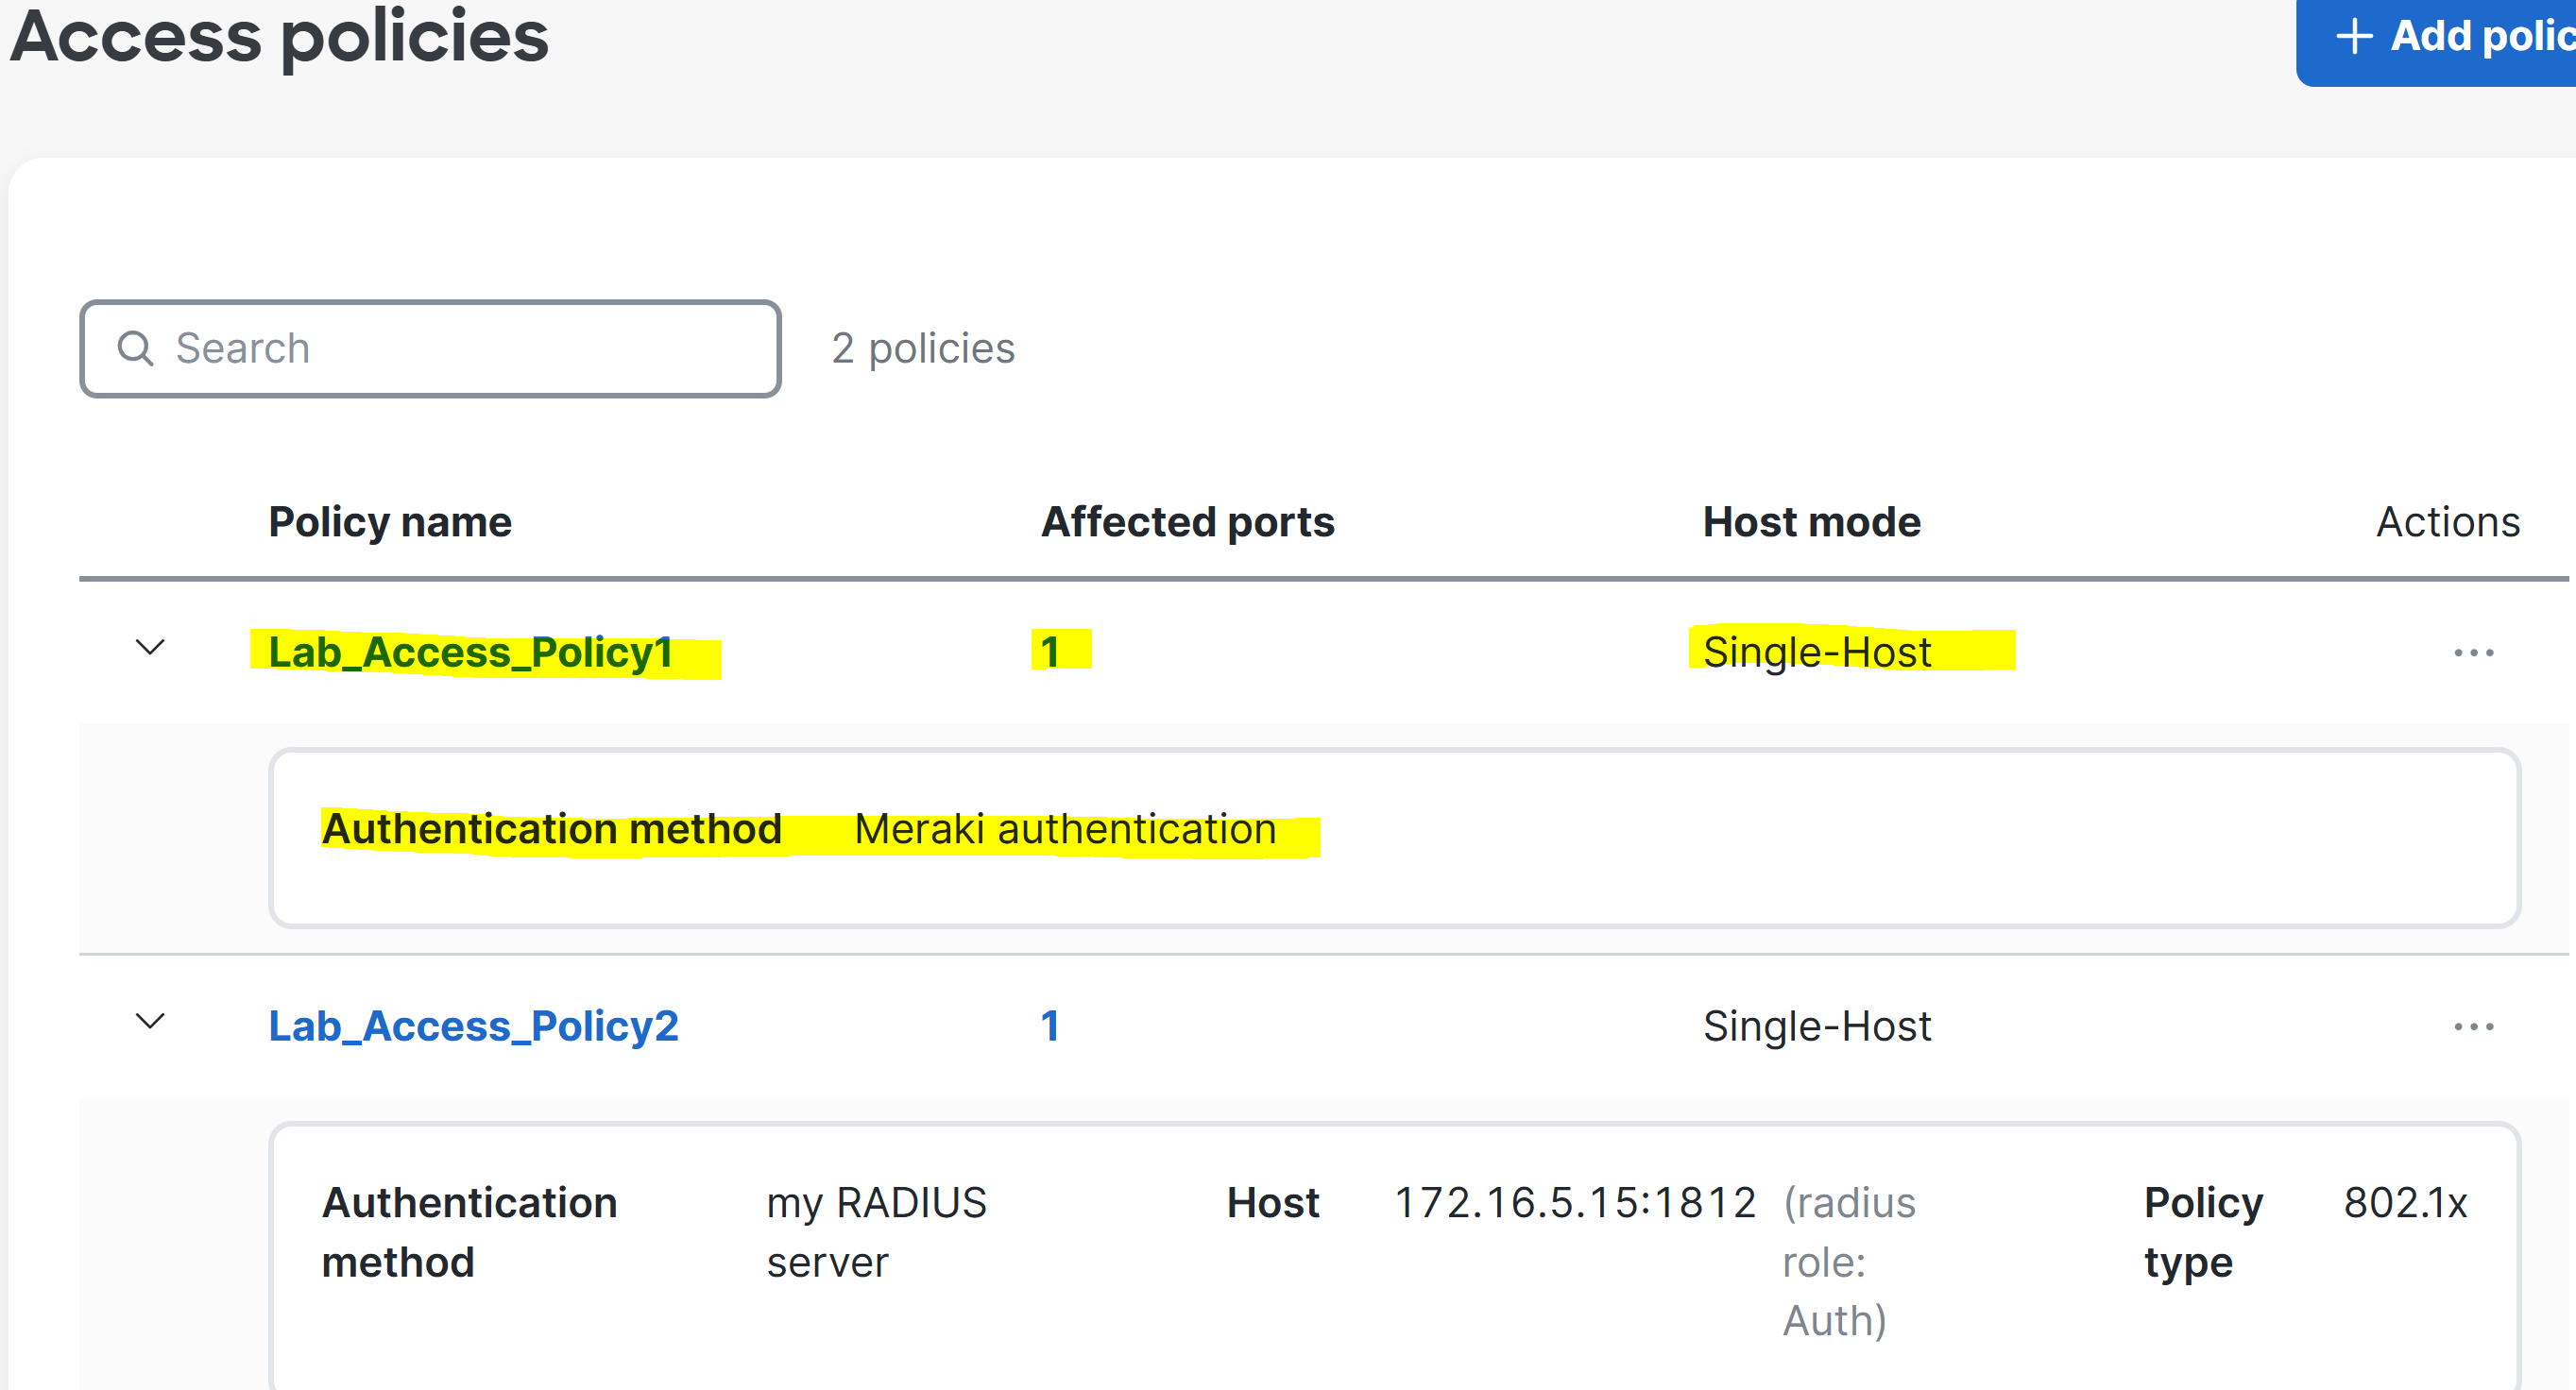
Overview of Configured Policy
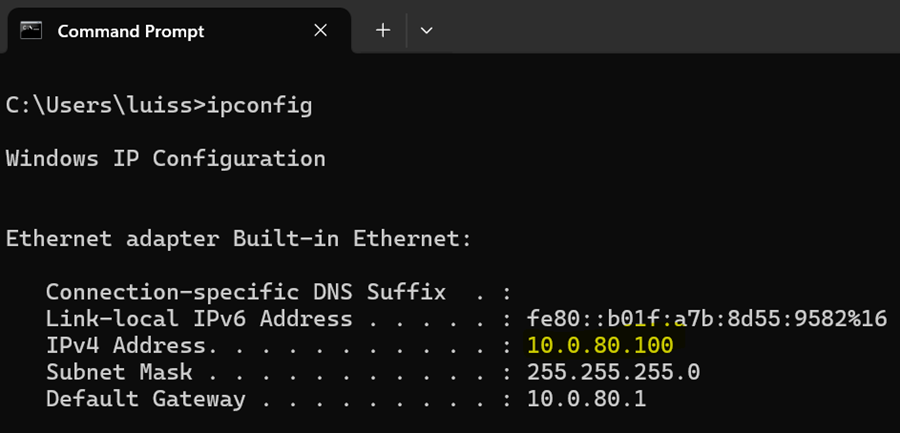
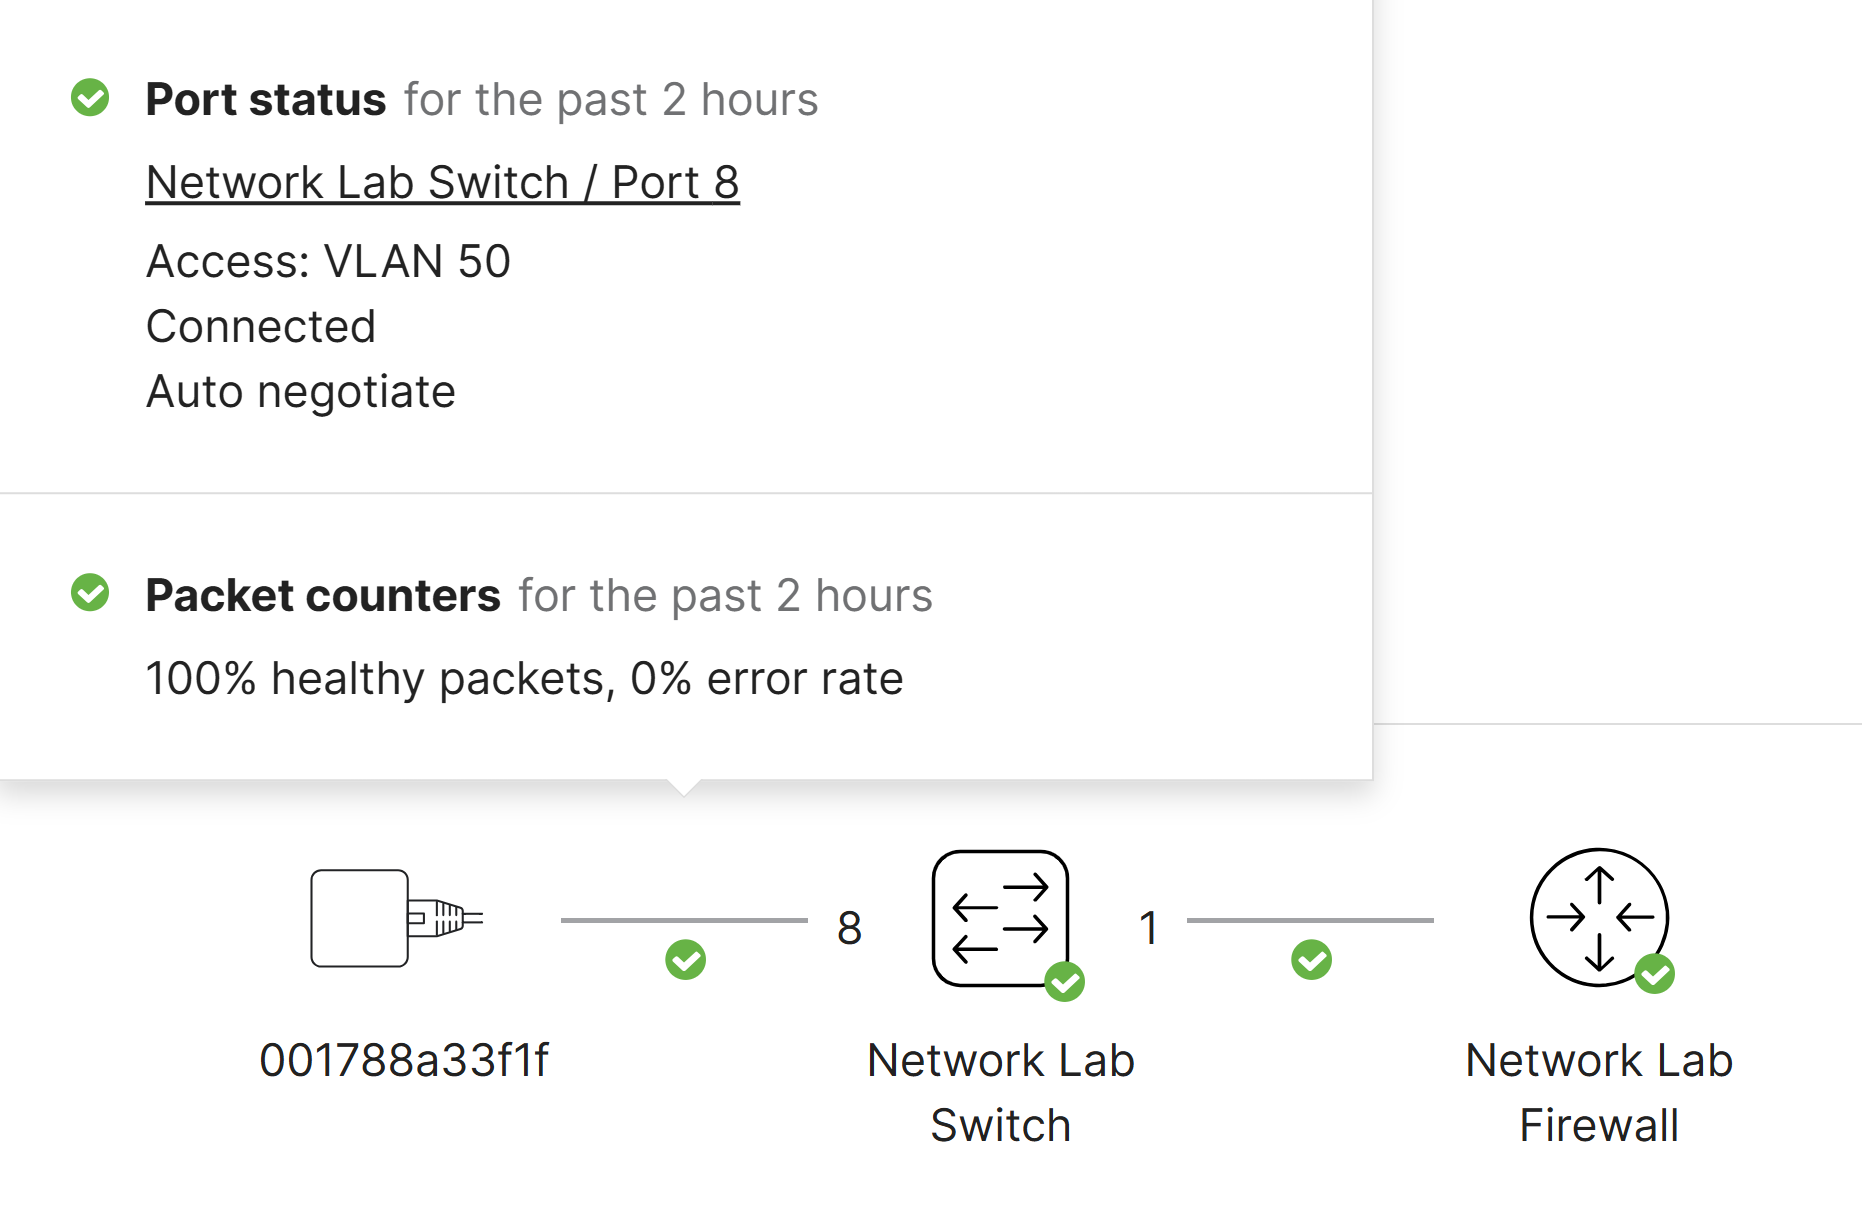
IP Verification of Corporate Client on Network
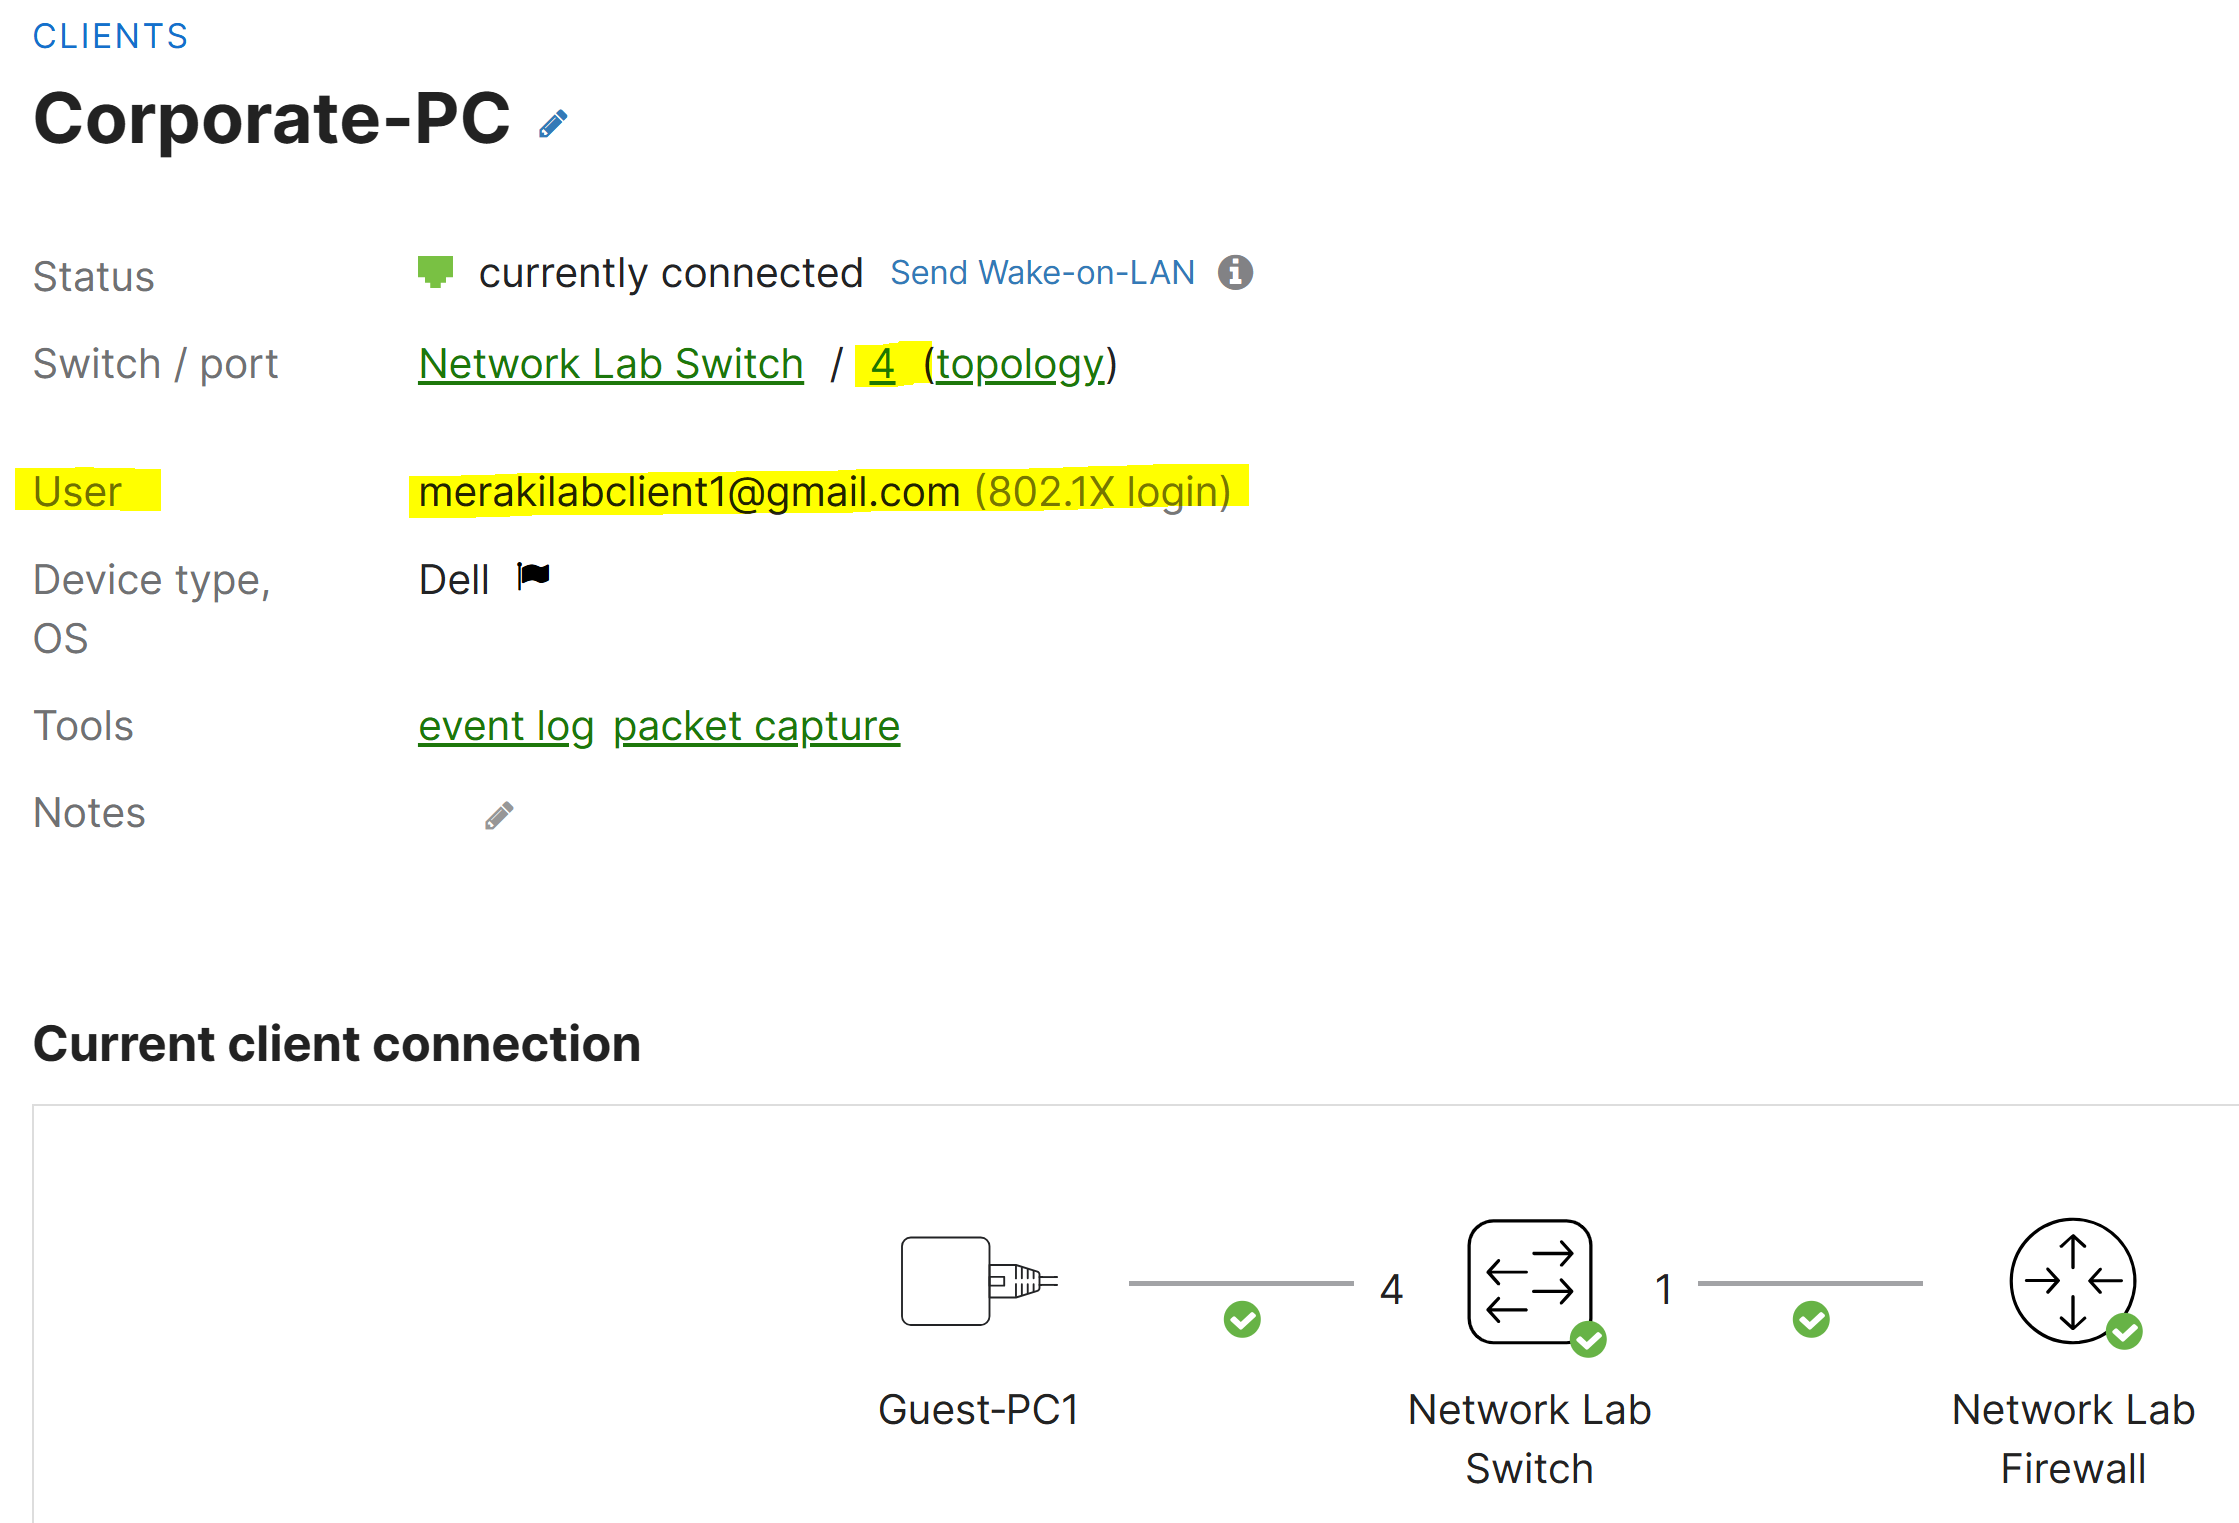
Verification of Successful 802.1X Login
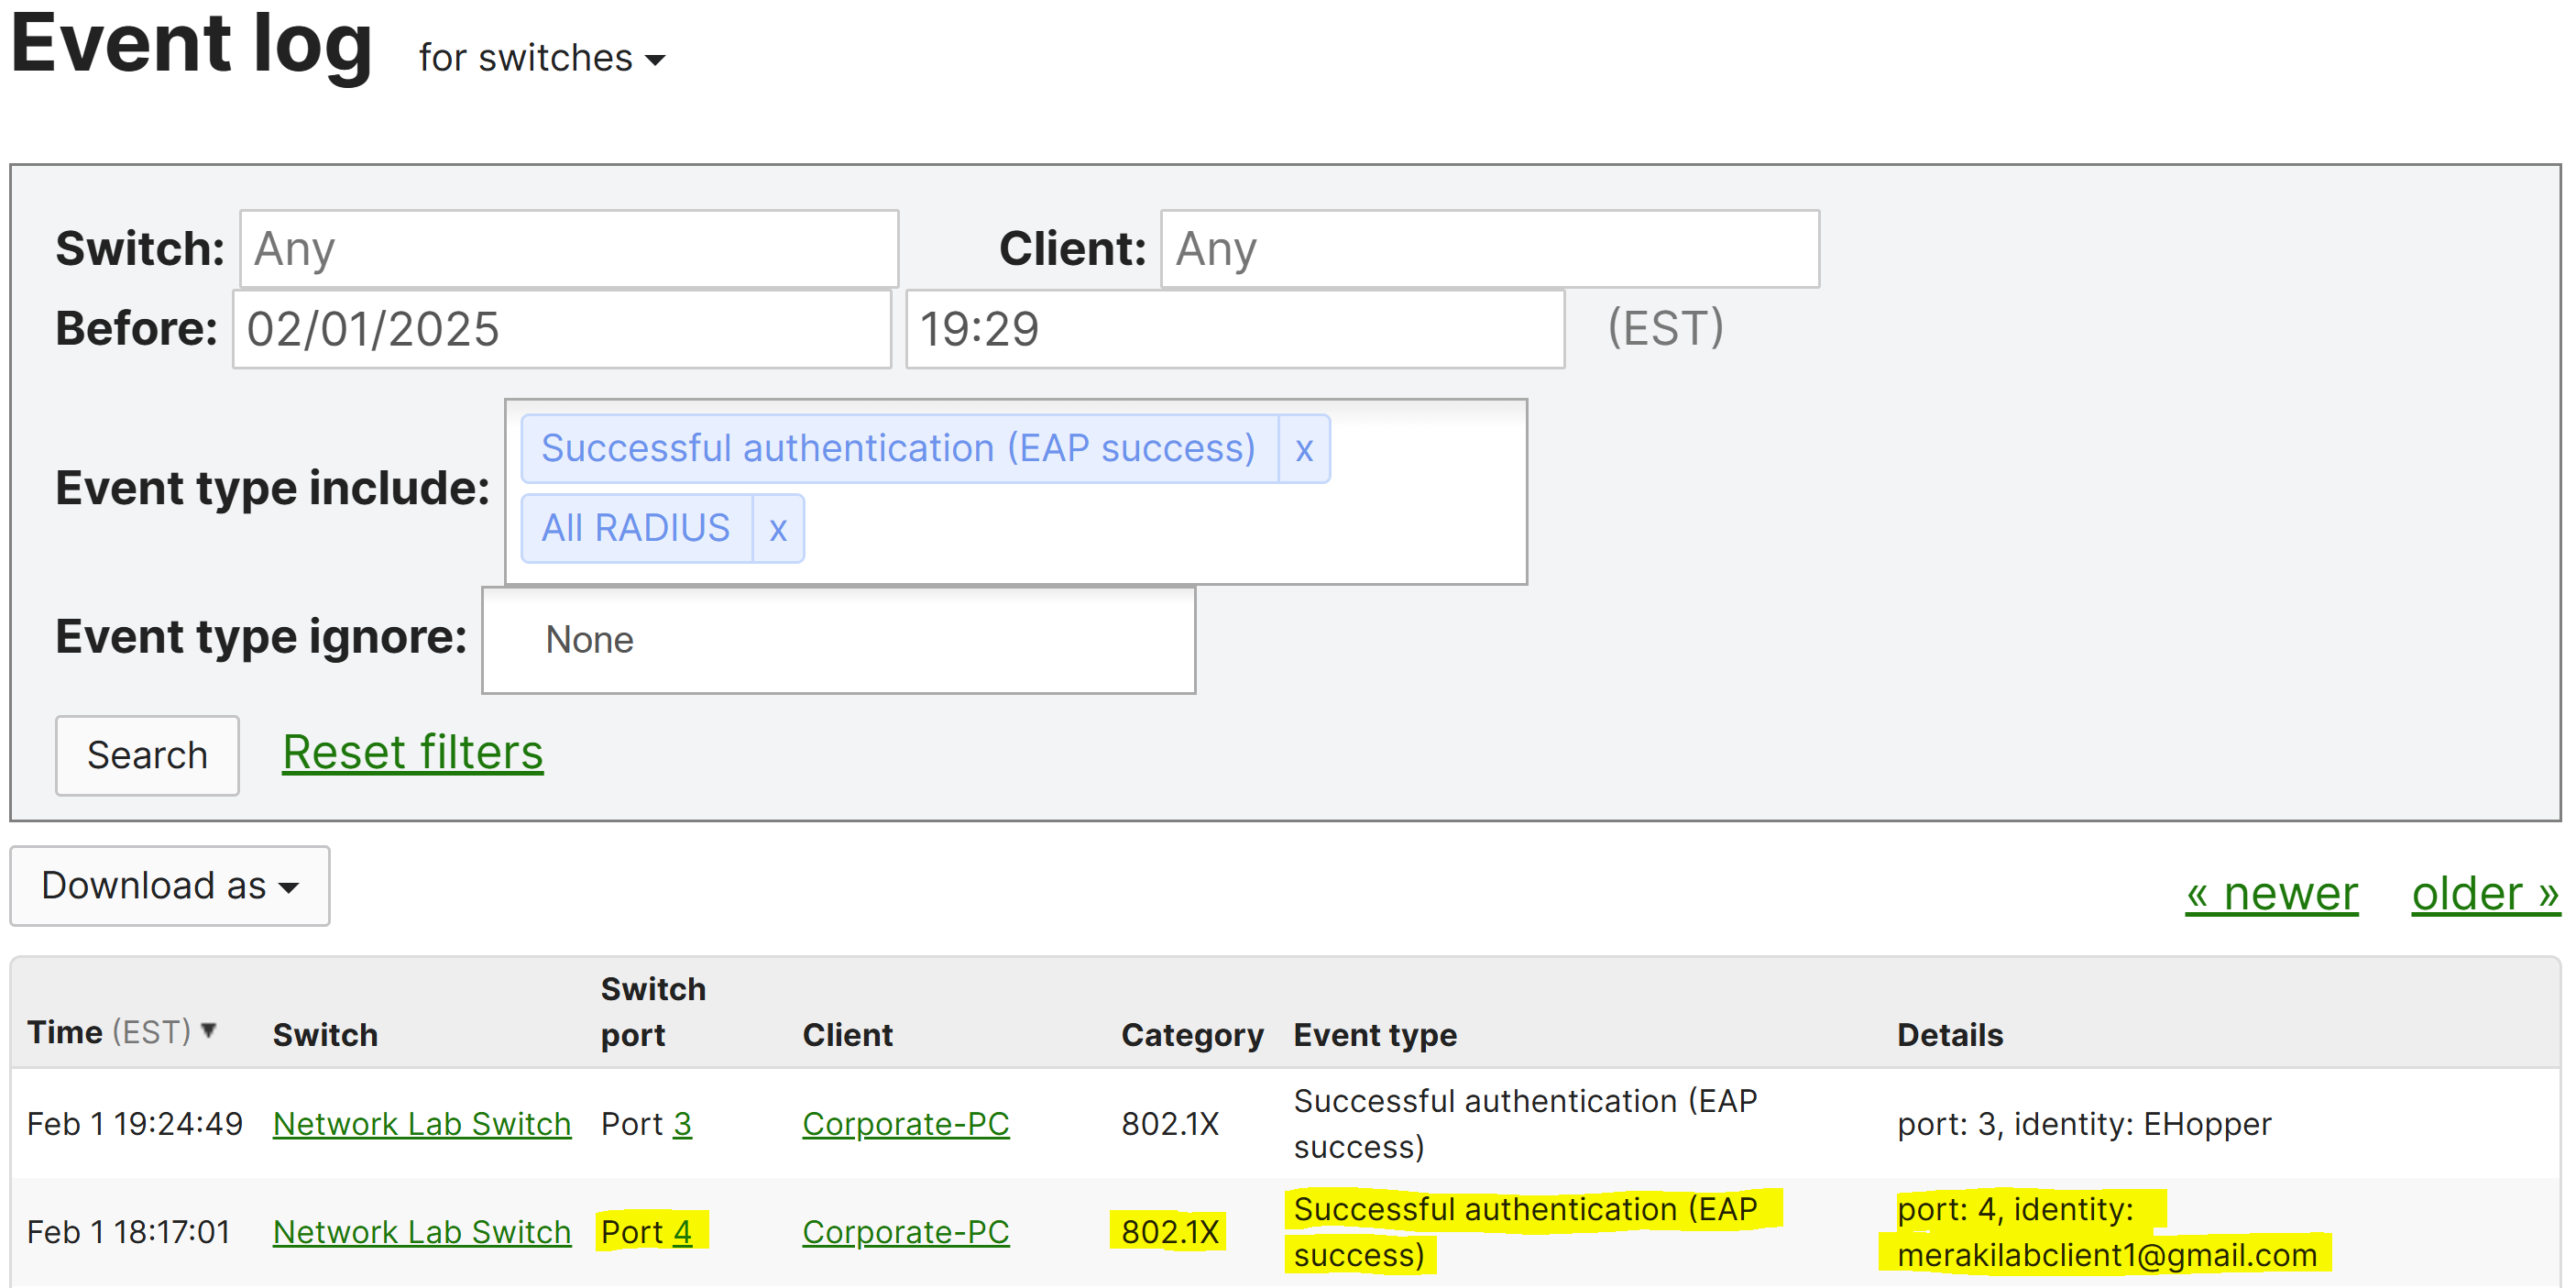
Verification of Successful 802.1X Login via Event Log
Windows 802.1X Supplicant Configuration
Overview
- By utilizing 802.1X using Access Policies, clients must be configured with the client side supplicant software to request authentication from the network when it tries to connect
- In simple terms, the supplicant is the device or software that sends authentication requests to the network infrastructure
- 802.1X is supported by Windows but it needs to be configured manually
- Organizations typically configure 802.1X via group policies or other administrative tools to enable across all client machines in the network
- In this lab exercise, I will manually configure 802.1X on my home PC using the reference guides located at the reference list at the beginning of this lesson
Accessing Windows Services
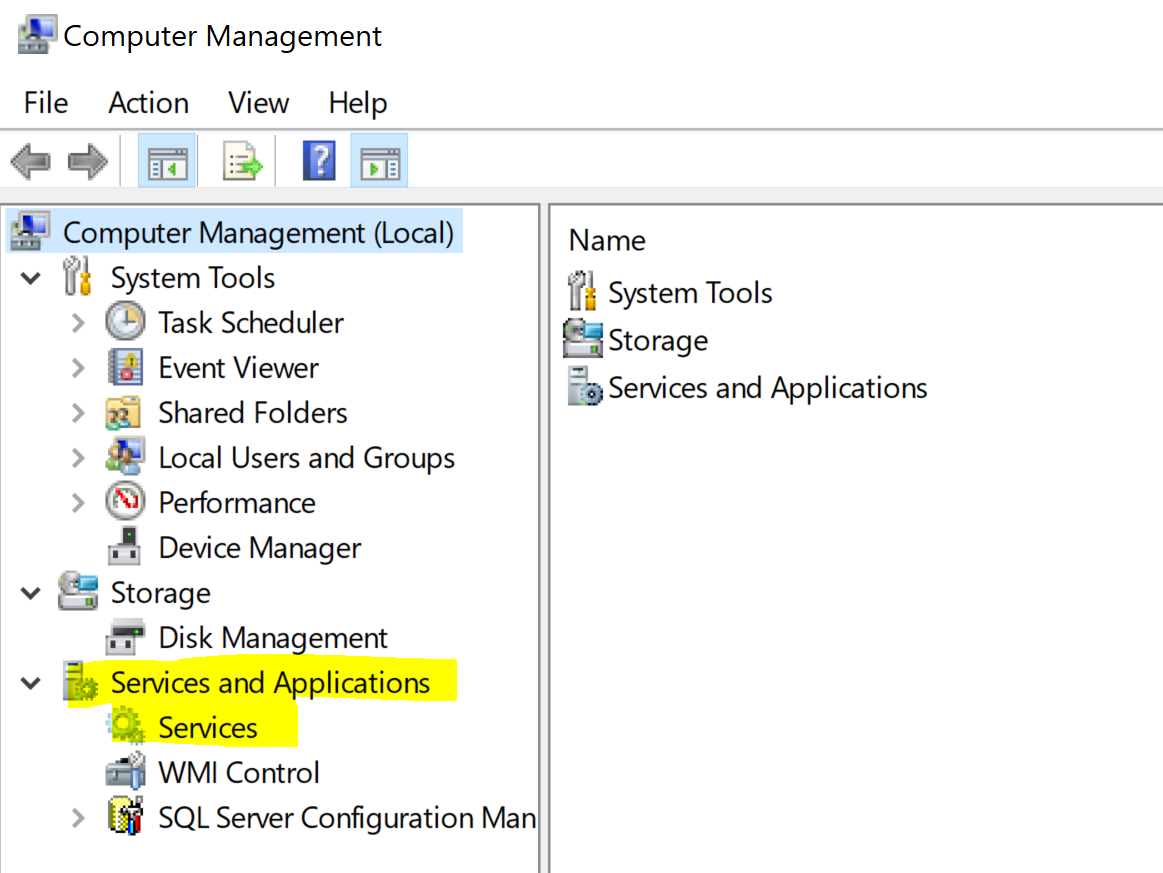
Locating 'Wired AutoConfig' Service
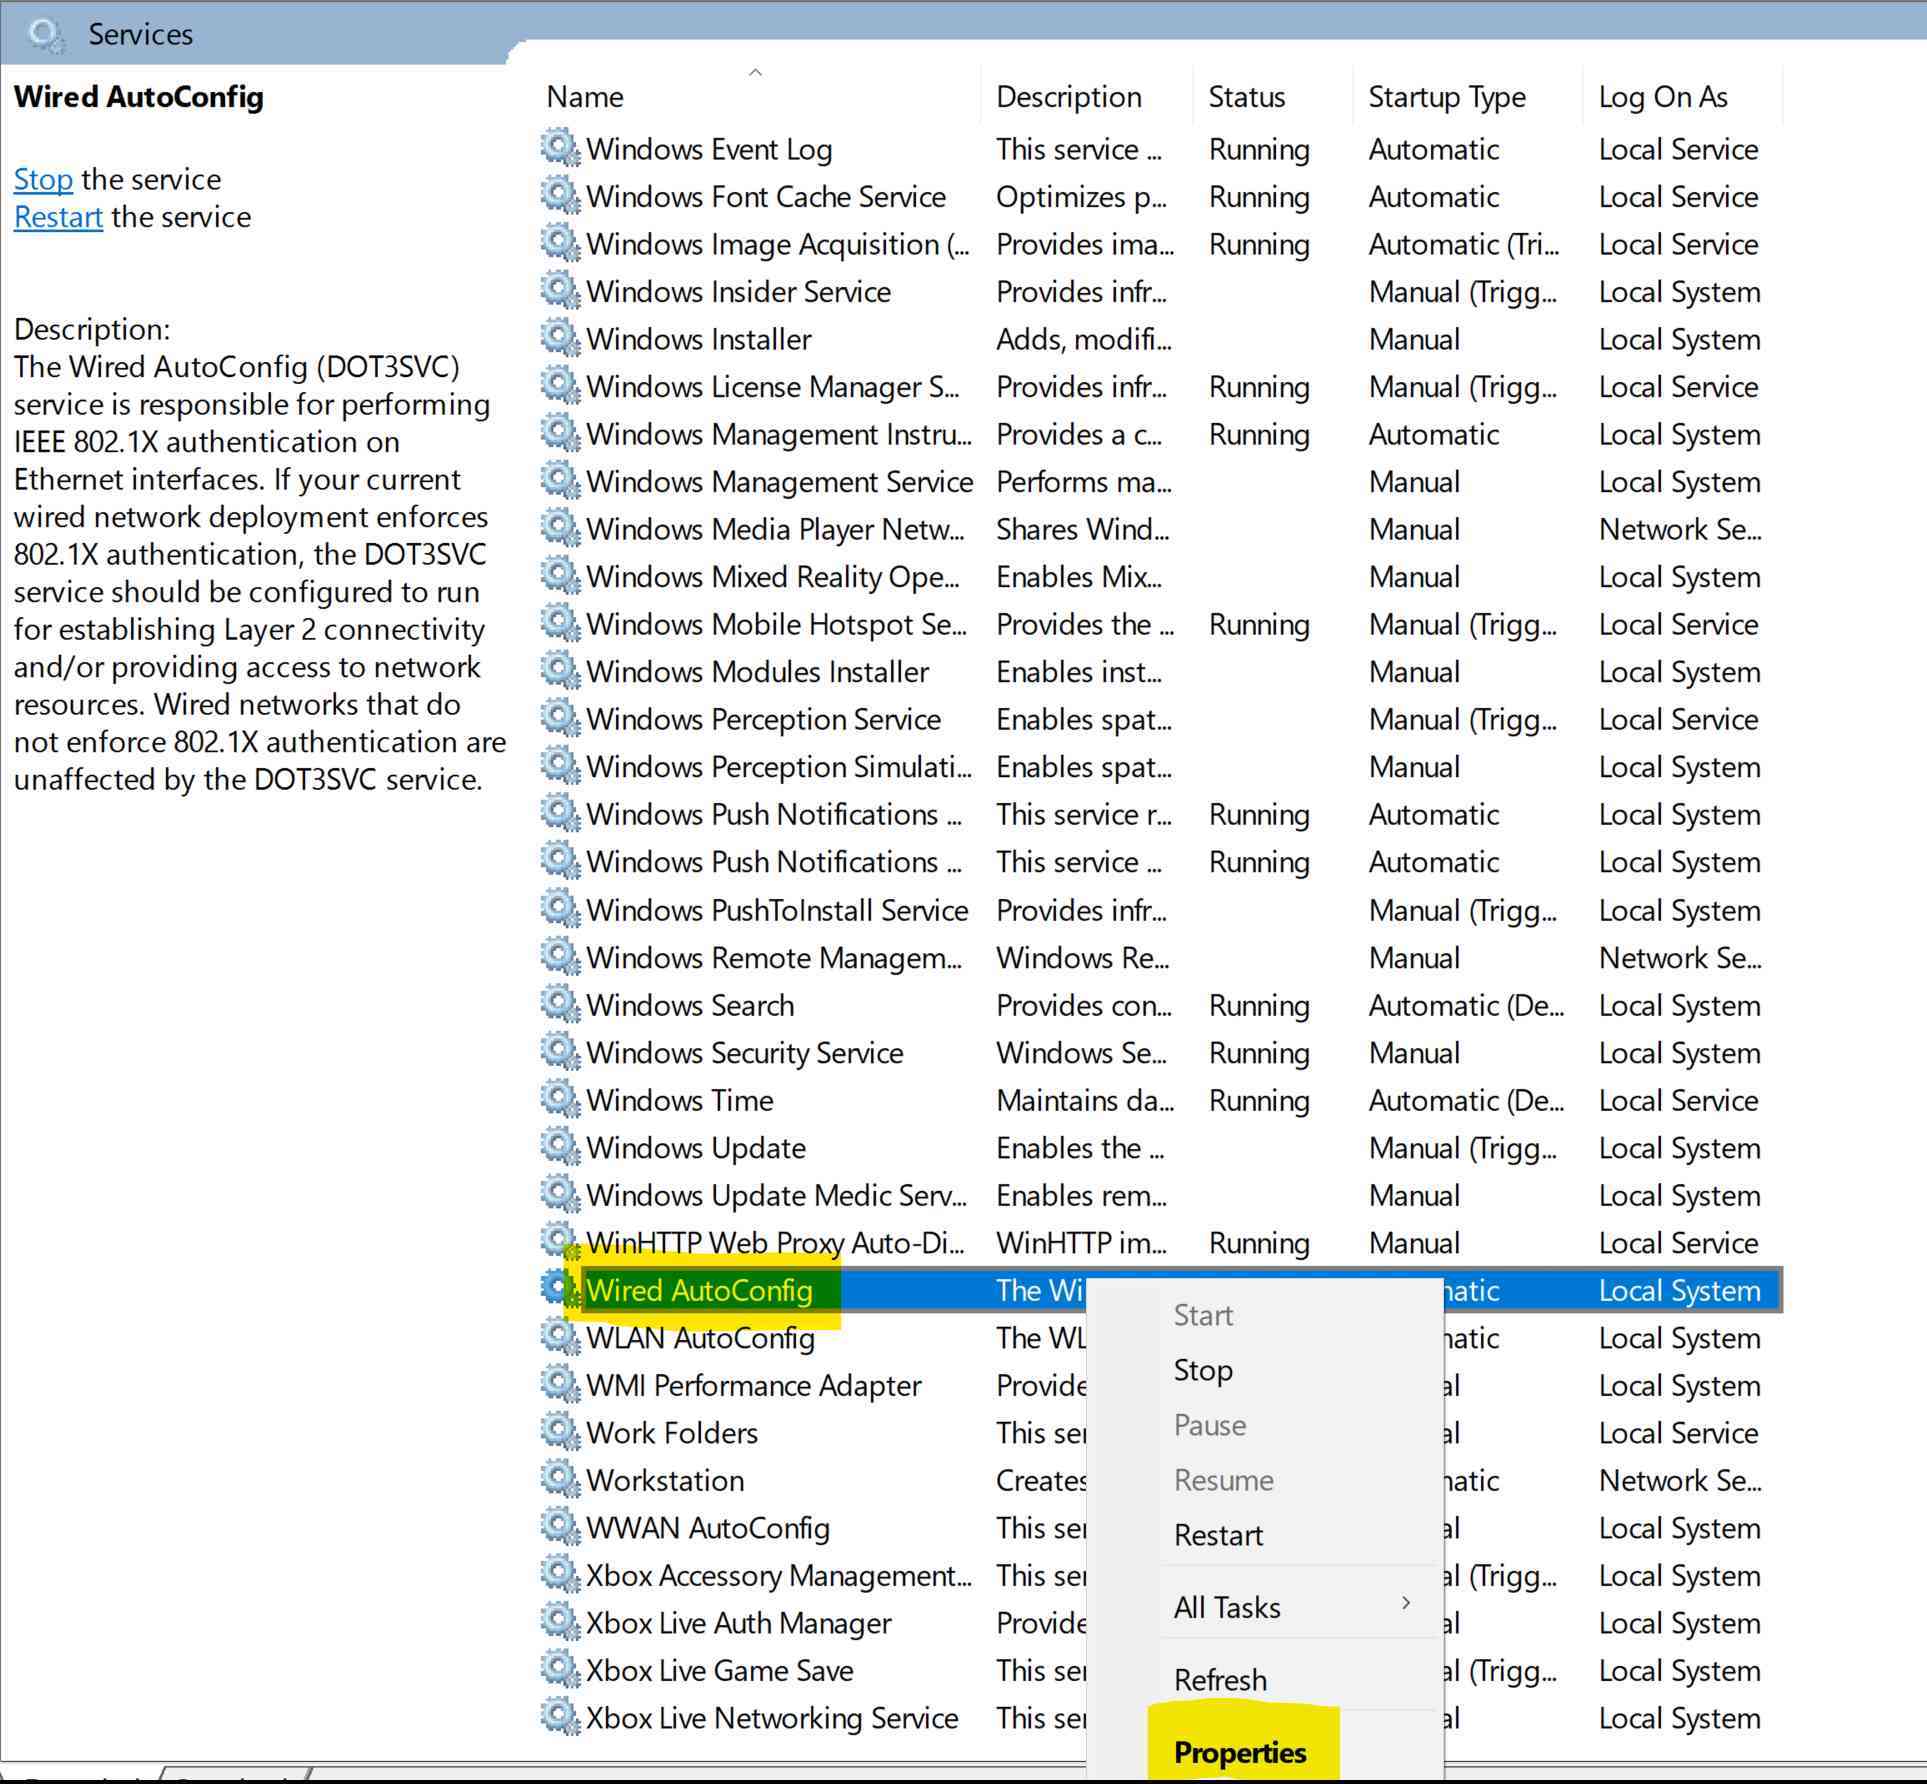
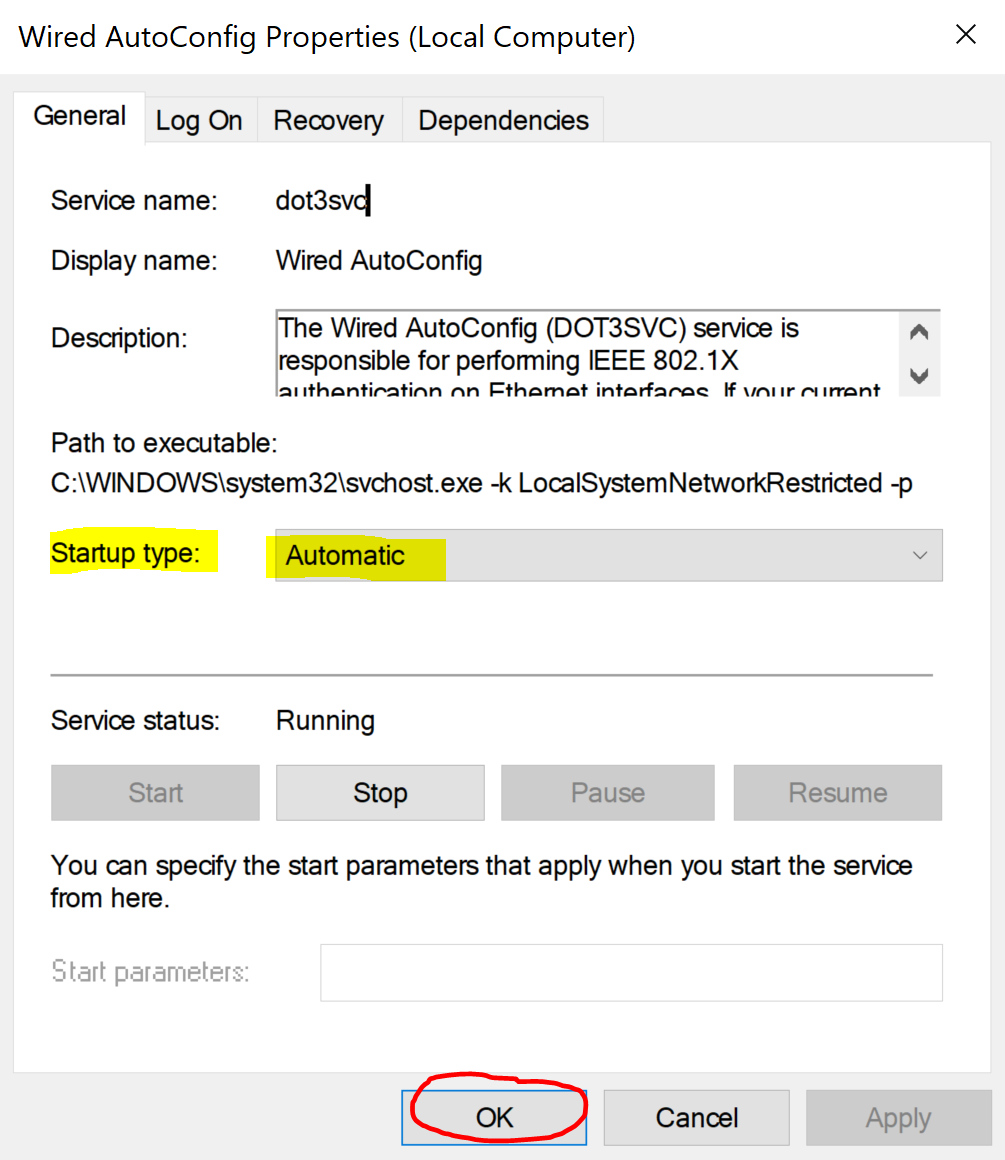
Changing Startup Type to 'Automatic'
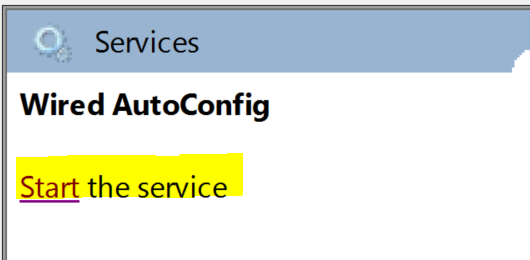
Start 'Wired AutoConfig' Service
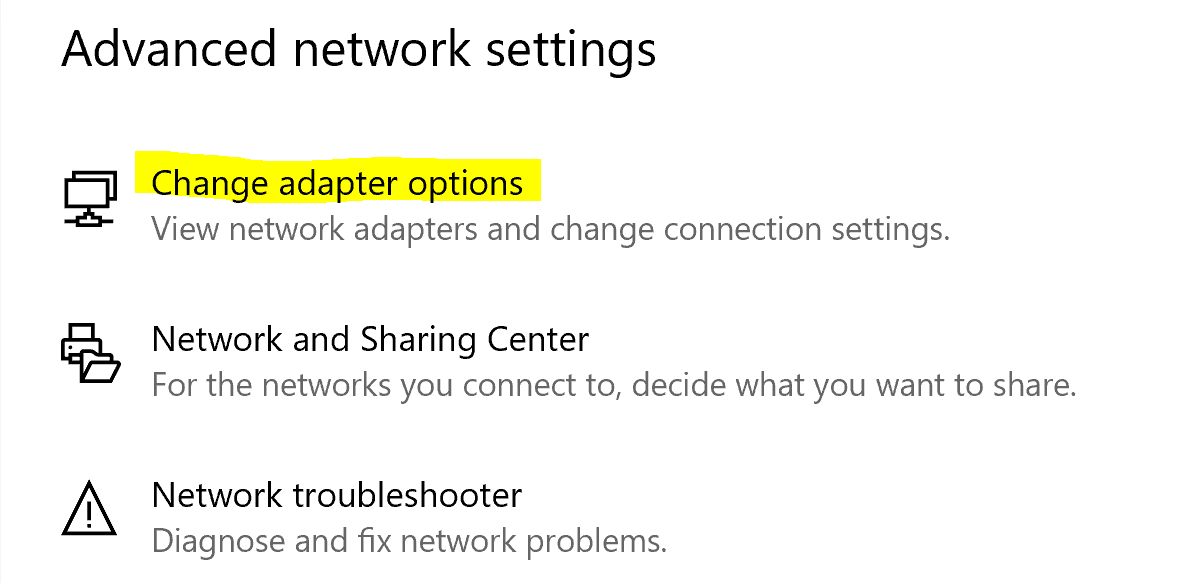
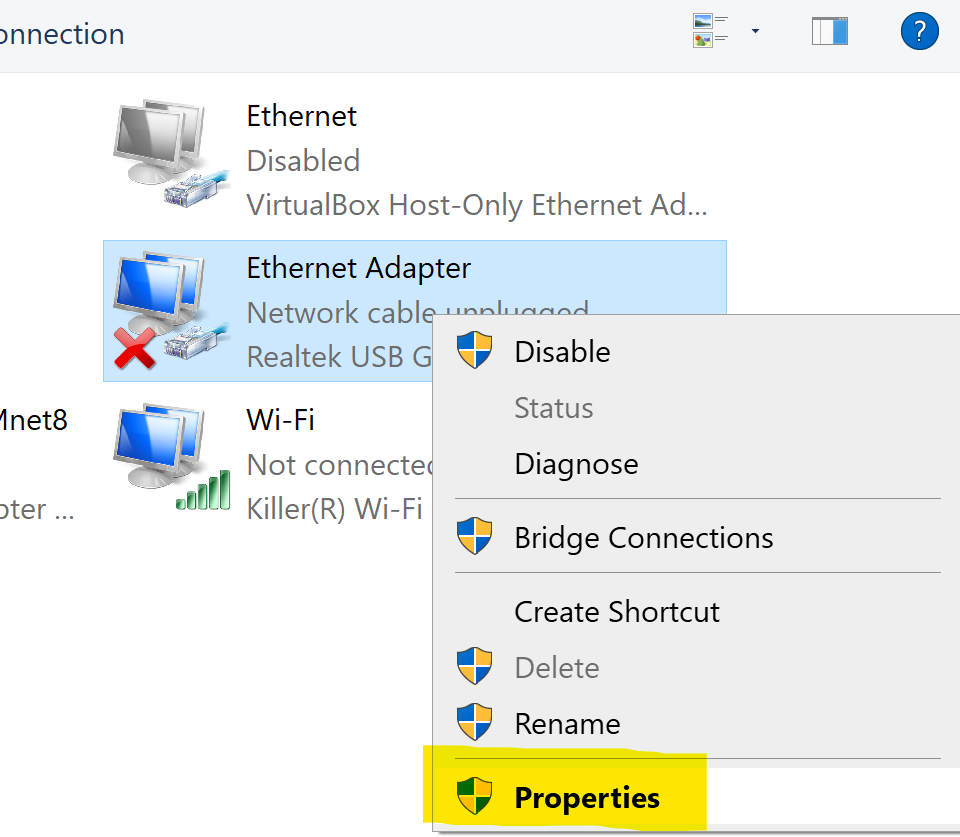
Accessing Network Adapter Settings
Accessing Properties of Ethernet Adapter
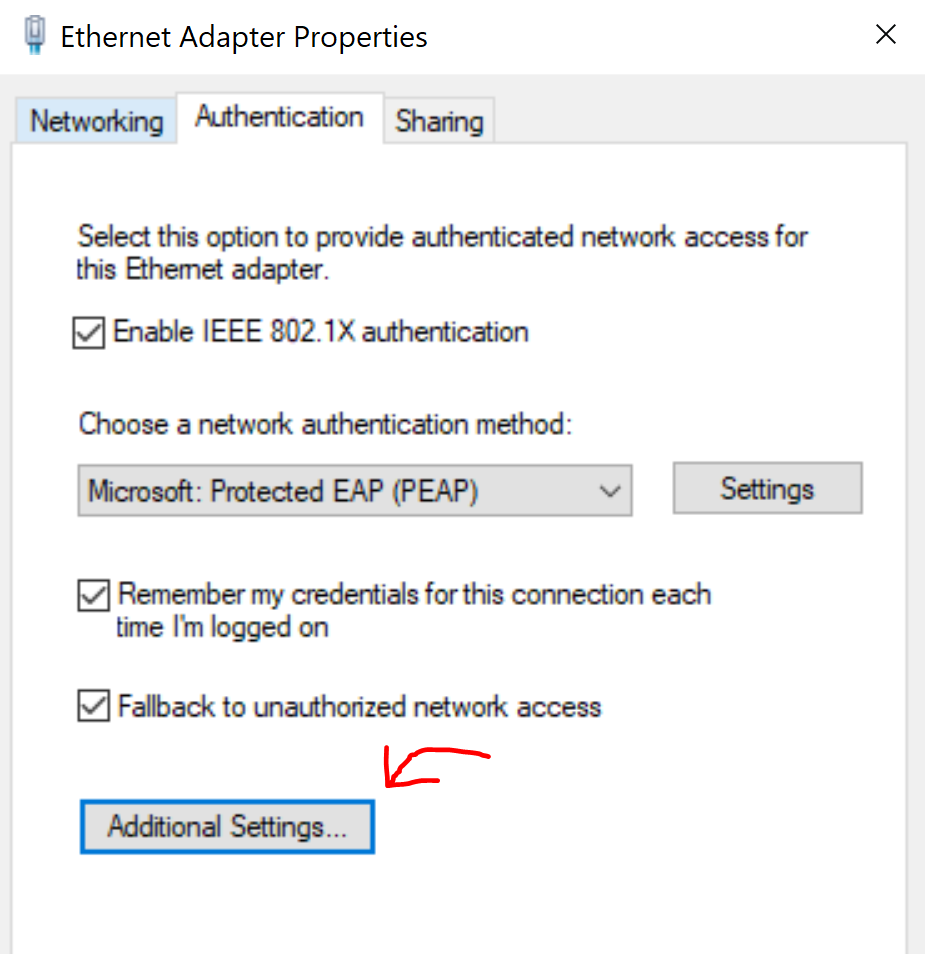
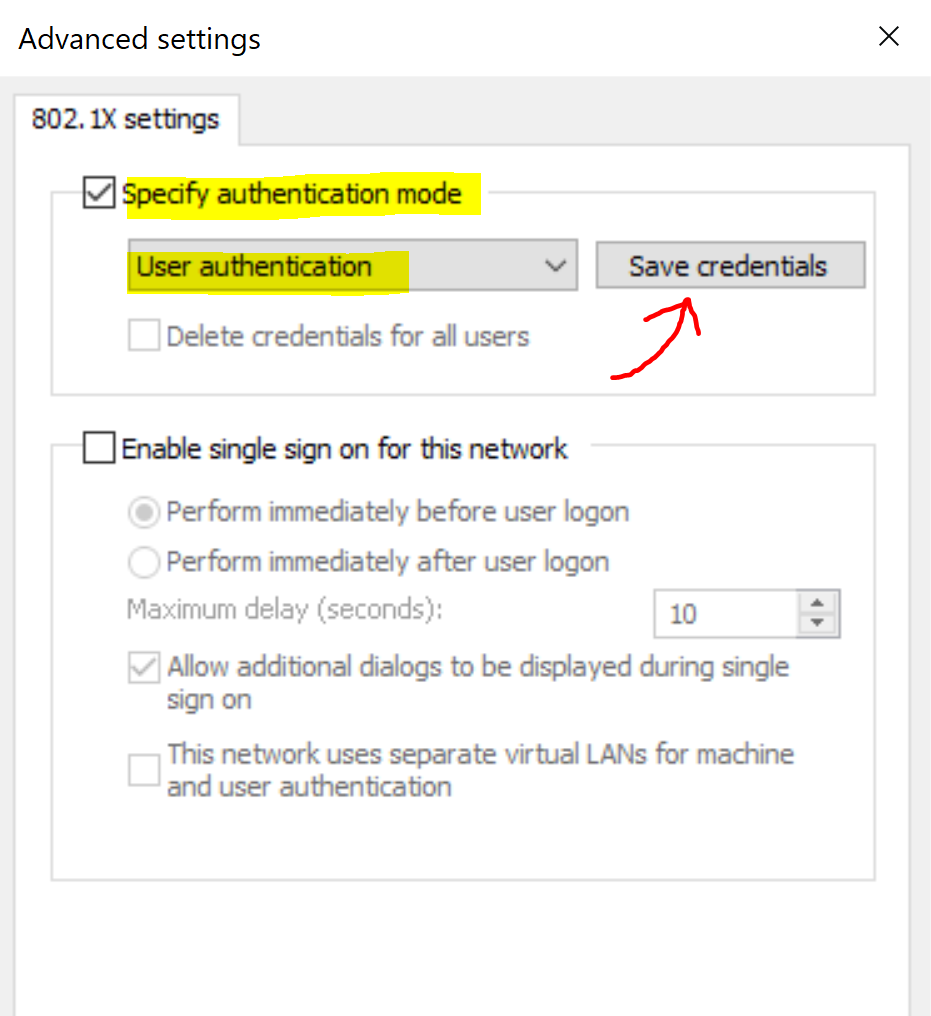
'Authentication' Parameters for 802.1X
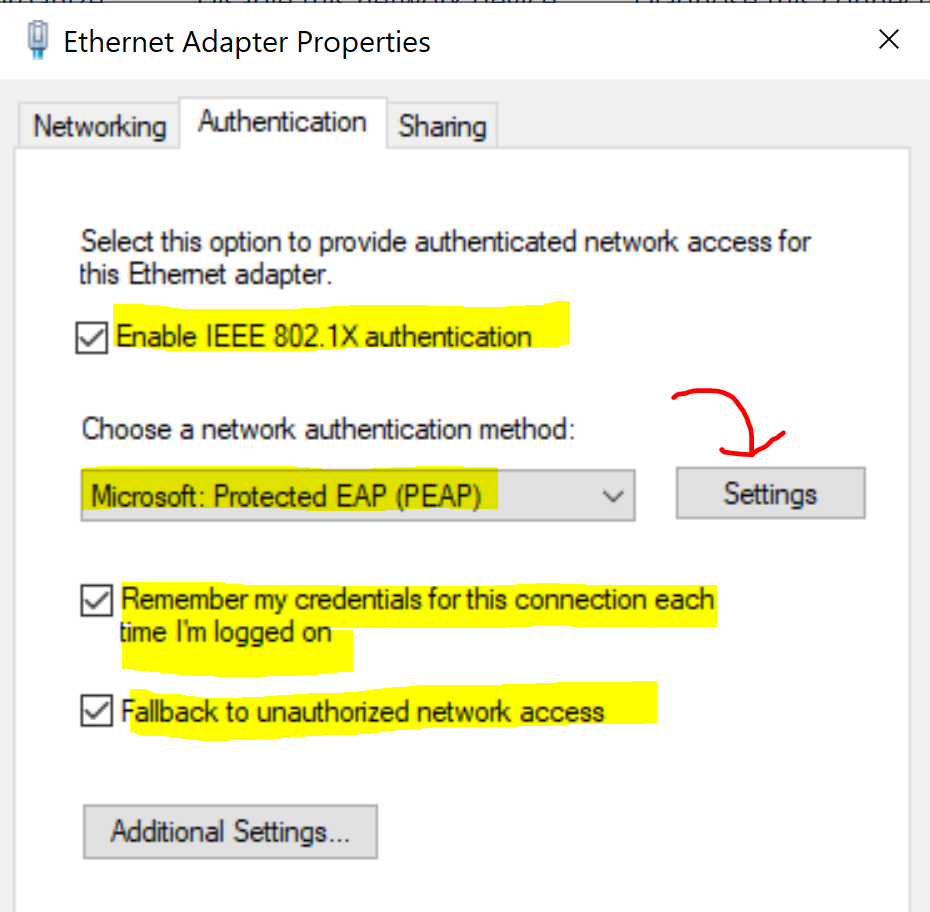
'Authentication' Parameters for 802.1X
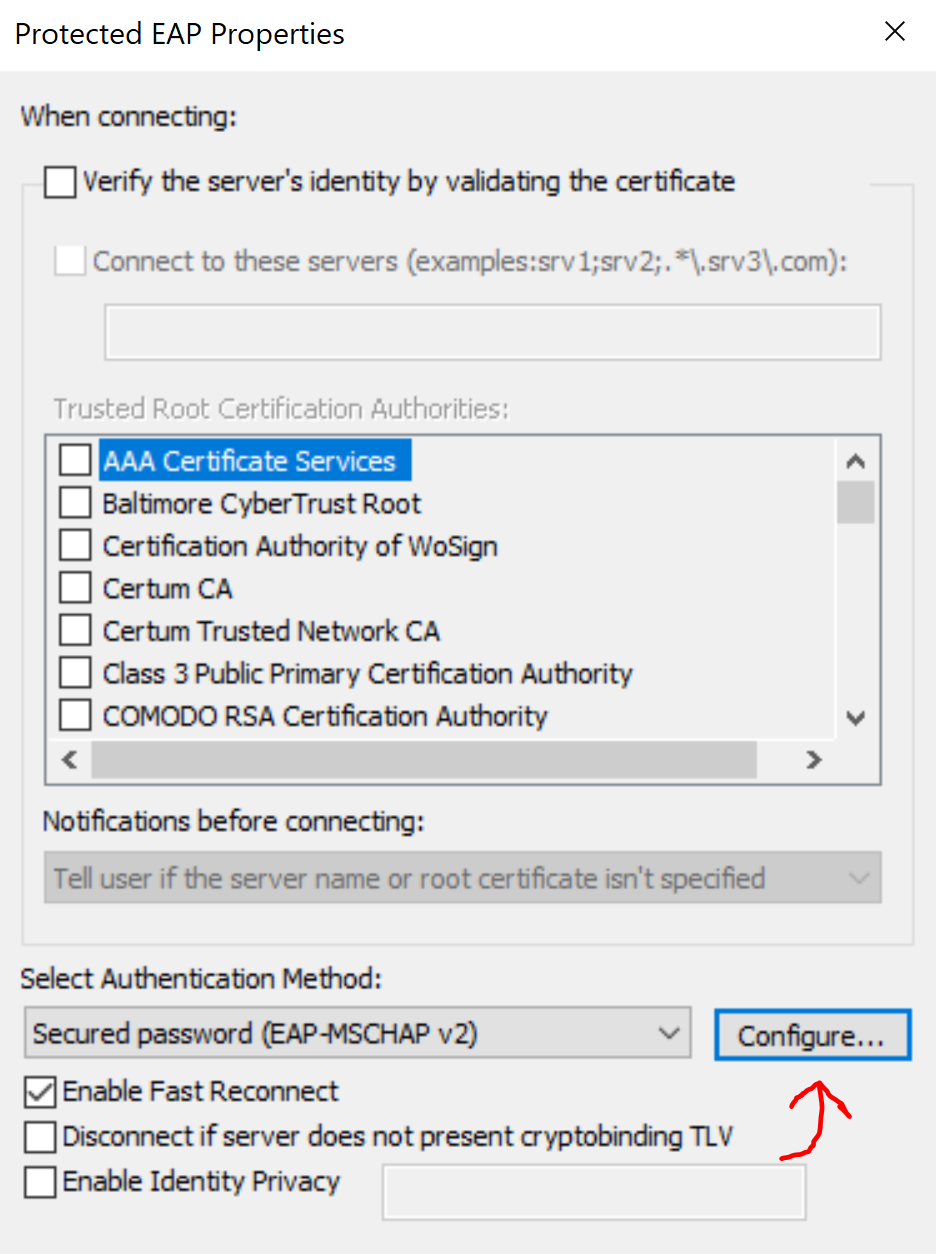
'Authentication' Parameters for 802.1X
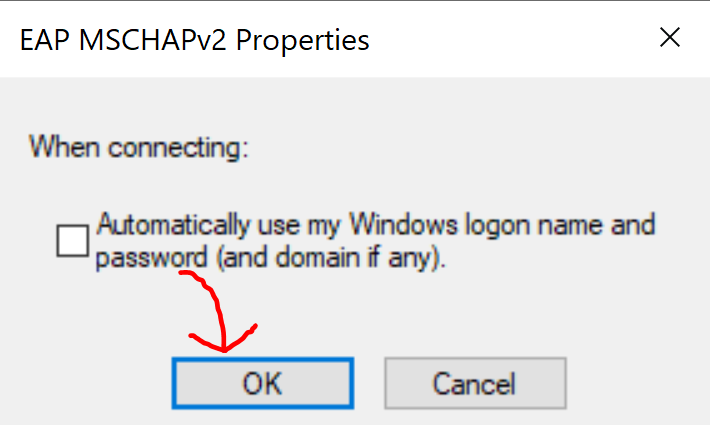
'Authentication' Parameters for 802.1X
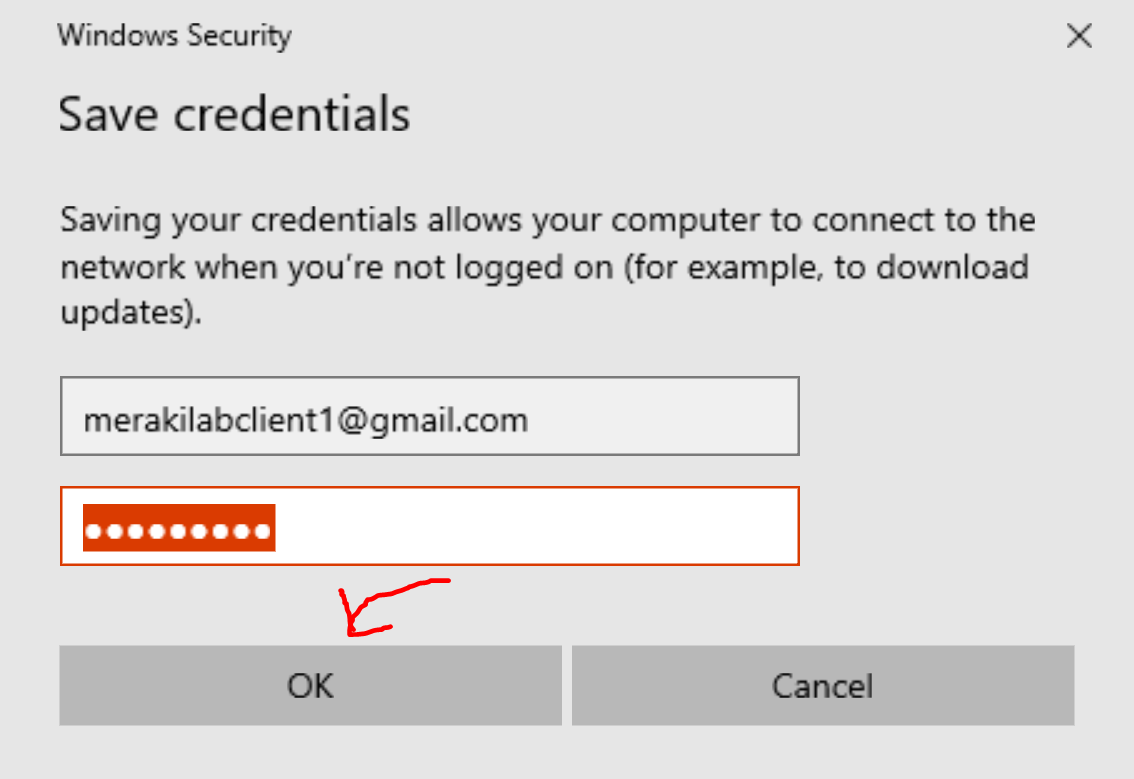
Accessing Meraki Authentication Credentials
Saving Meraki Authentication Credentials
RADIUS Authentication Configuration
Overview
- In this lab exercise, I will be configuring an 802.1X Access Policy using RADIUS Authentication
- By using RADIUS Authentication, you will need an external RADIUS server integrated with a user database
- This solution is a more common deployment method as enterprises typically integrate RADIUS on a Windows Server
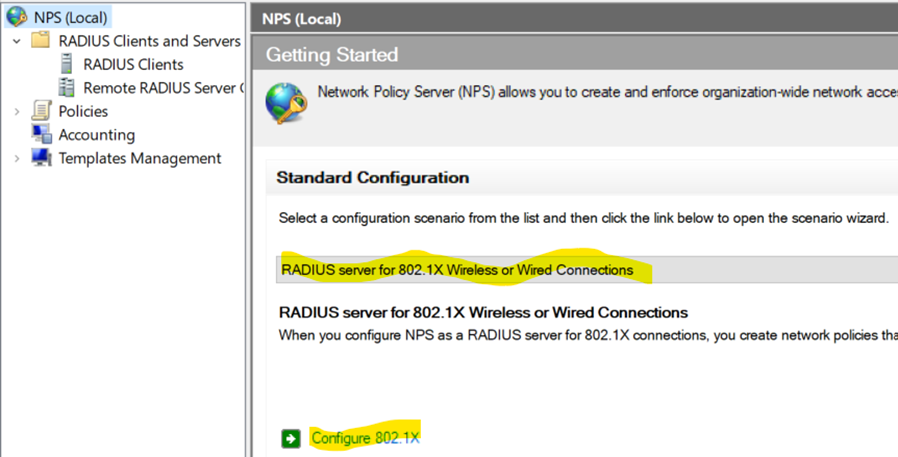
- For my lab scenario, I will be utilizing a Windows Server virtual machine and will be using 'Network Policy Server' or 'NPS' as my RADIUS solution
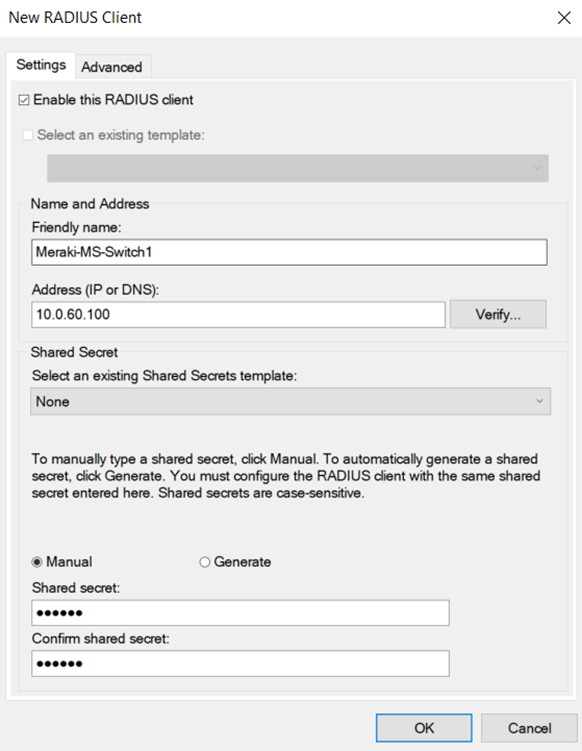
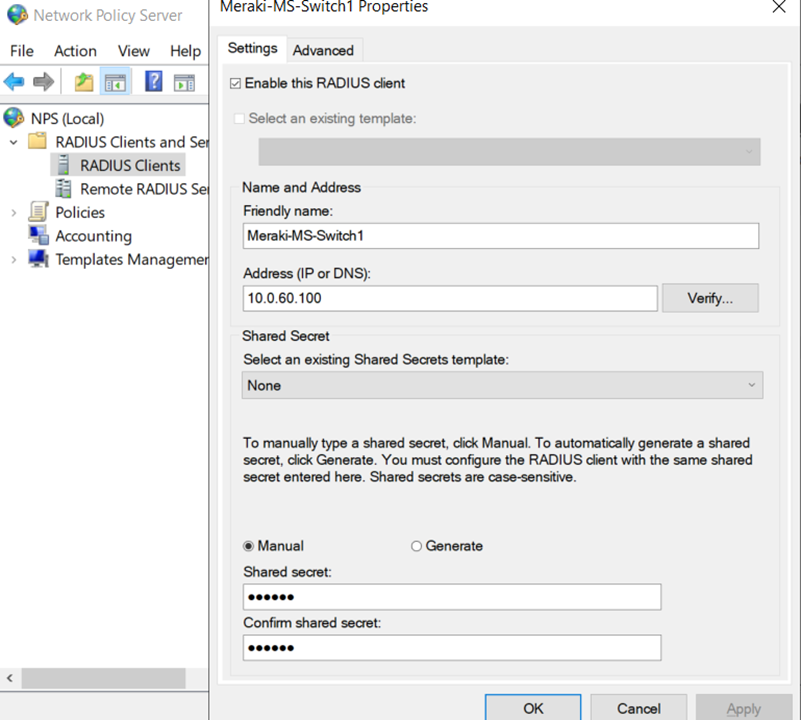
Creating a New RADIUS Client
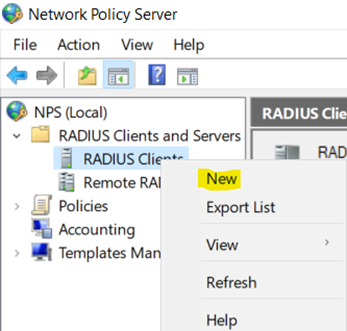
Configuring Meraki Switch RADIUS Client with Shared Secret
Configuring 802.1X Policy for Wired or Wireless Connections
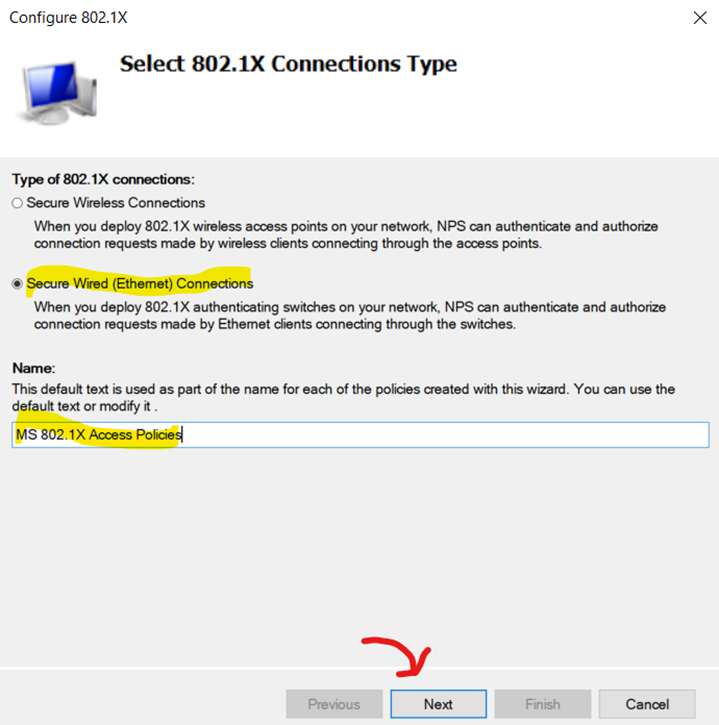
Configuring 802.1X Policy - Defining Ethernet 802.1X Connection Type
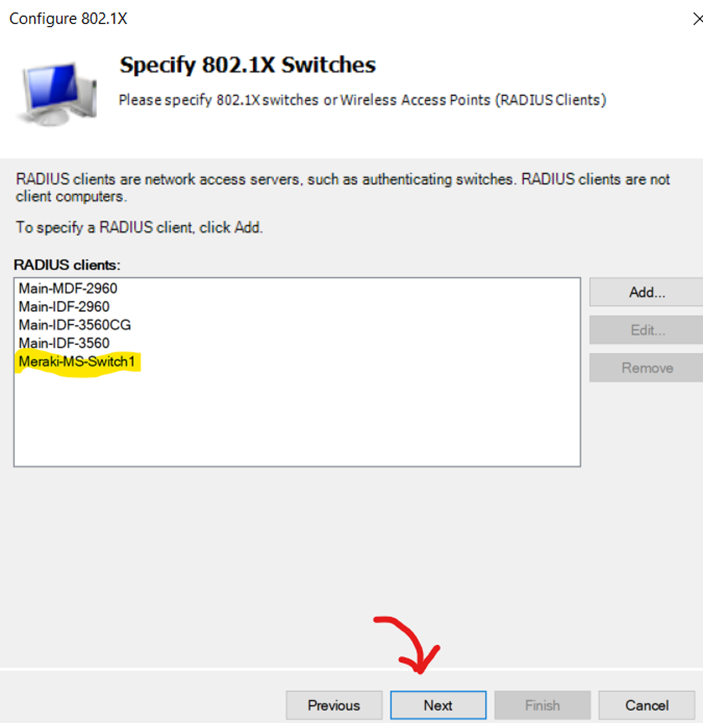
Configuring 802.1X Policy - Verifying Switch RADIUS Client
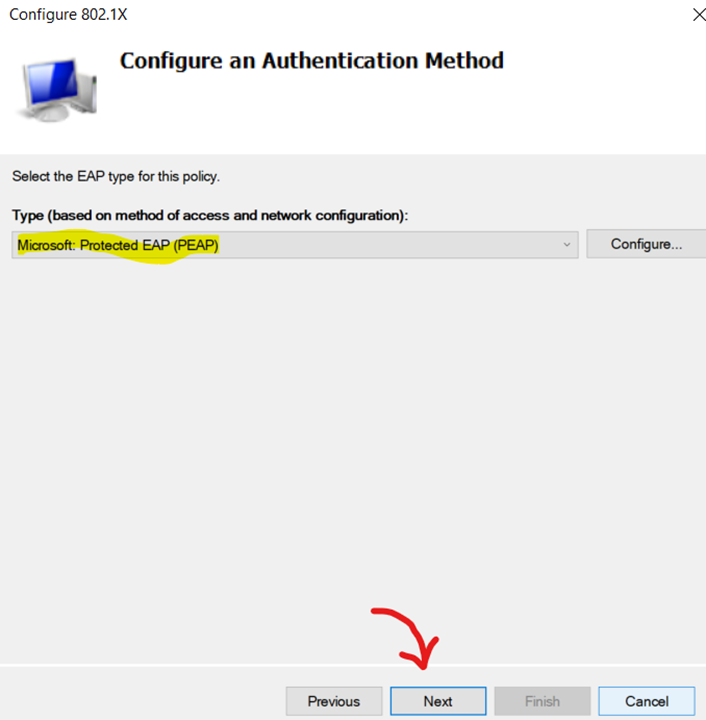
Configuring 802.1X Policy - Setting EAP Authentication Method for Policy
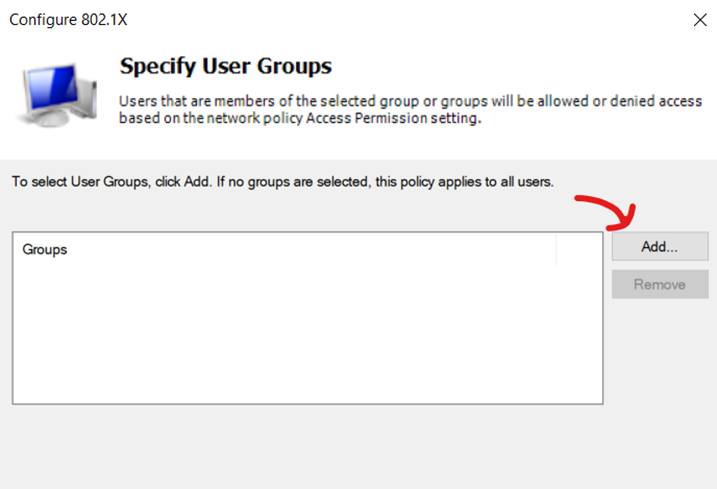
Configuring 802.1X Policy - Adding an AD User Group for 802.1X Authentication
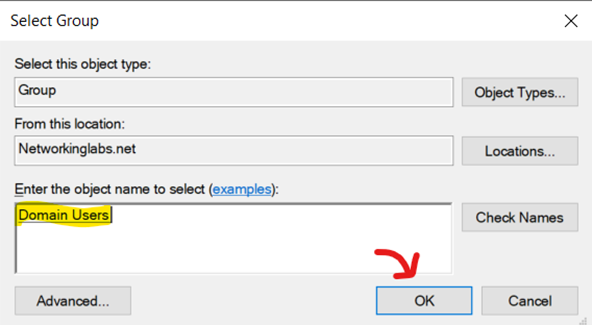
Configuring 802.1X Policy - Specifying AD User Group for 802.1X Authentication
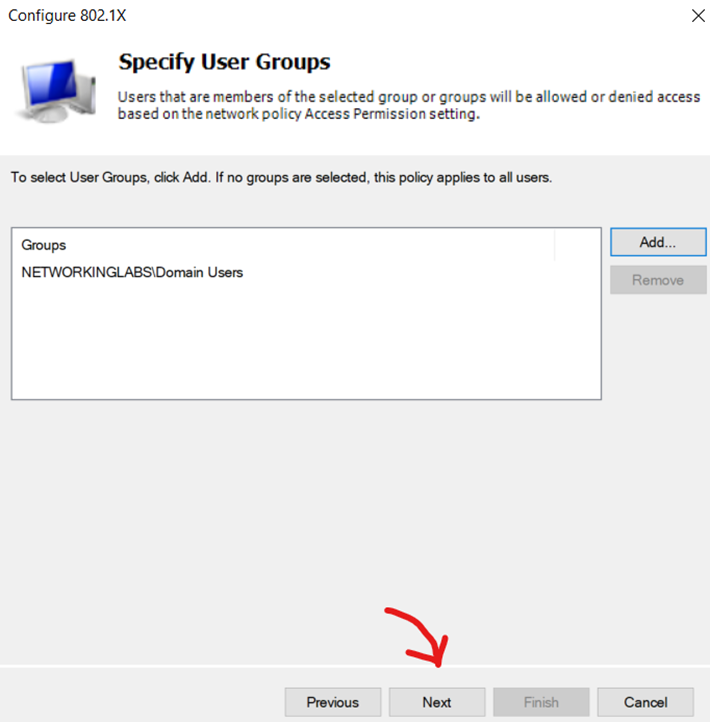
Configuring 802.1X Policy - Verify AD Group is Specified
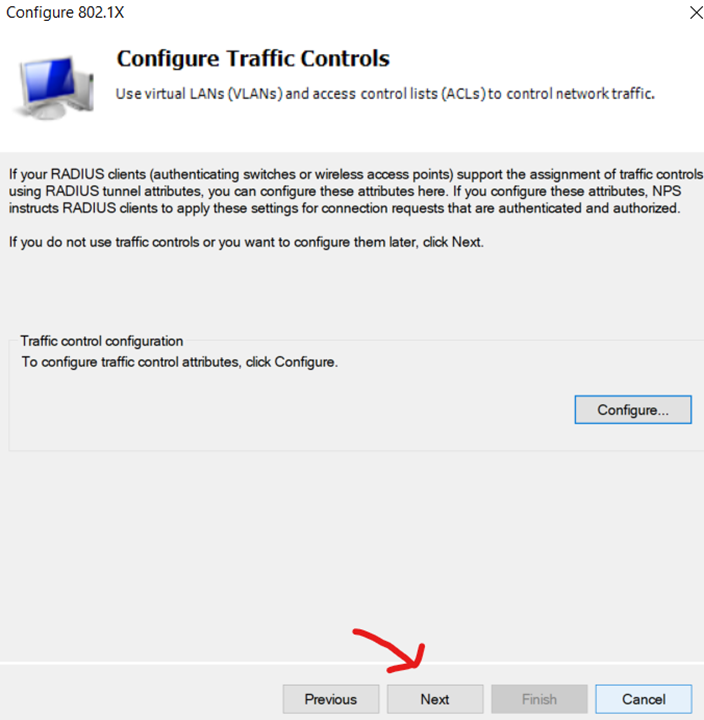
Configuring 802.1X Policy - Leave Default Traffic Controls
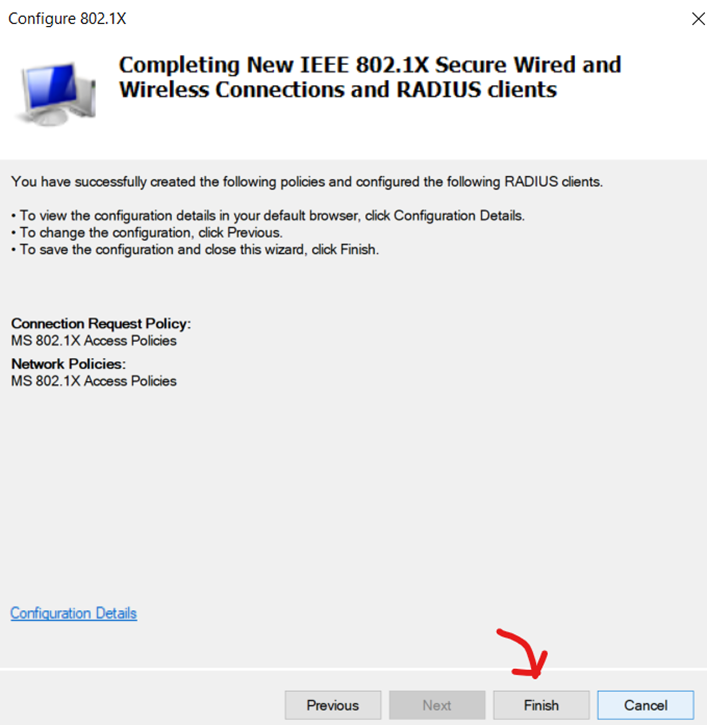
Configuring 802.1X Policy - Finish Policy
Verification of Completed 802.1X Policy
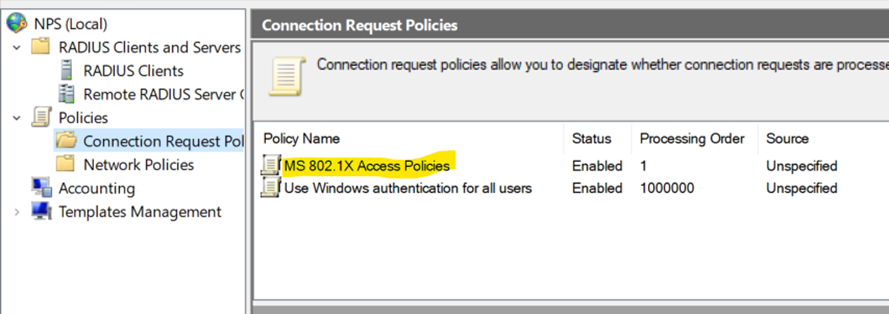
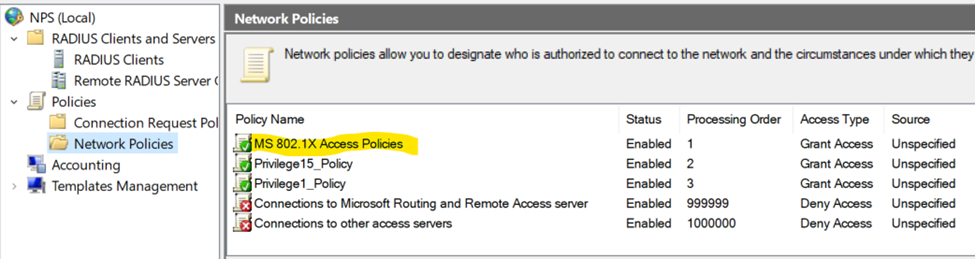
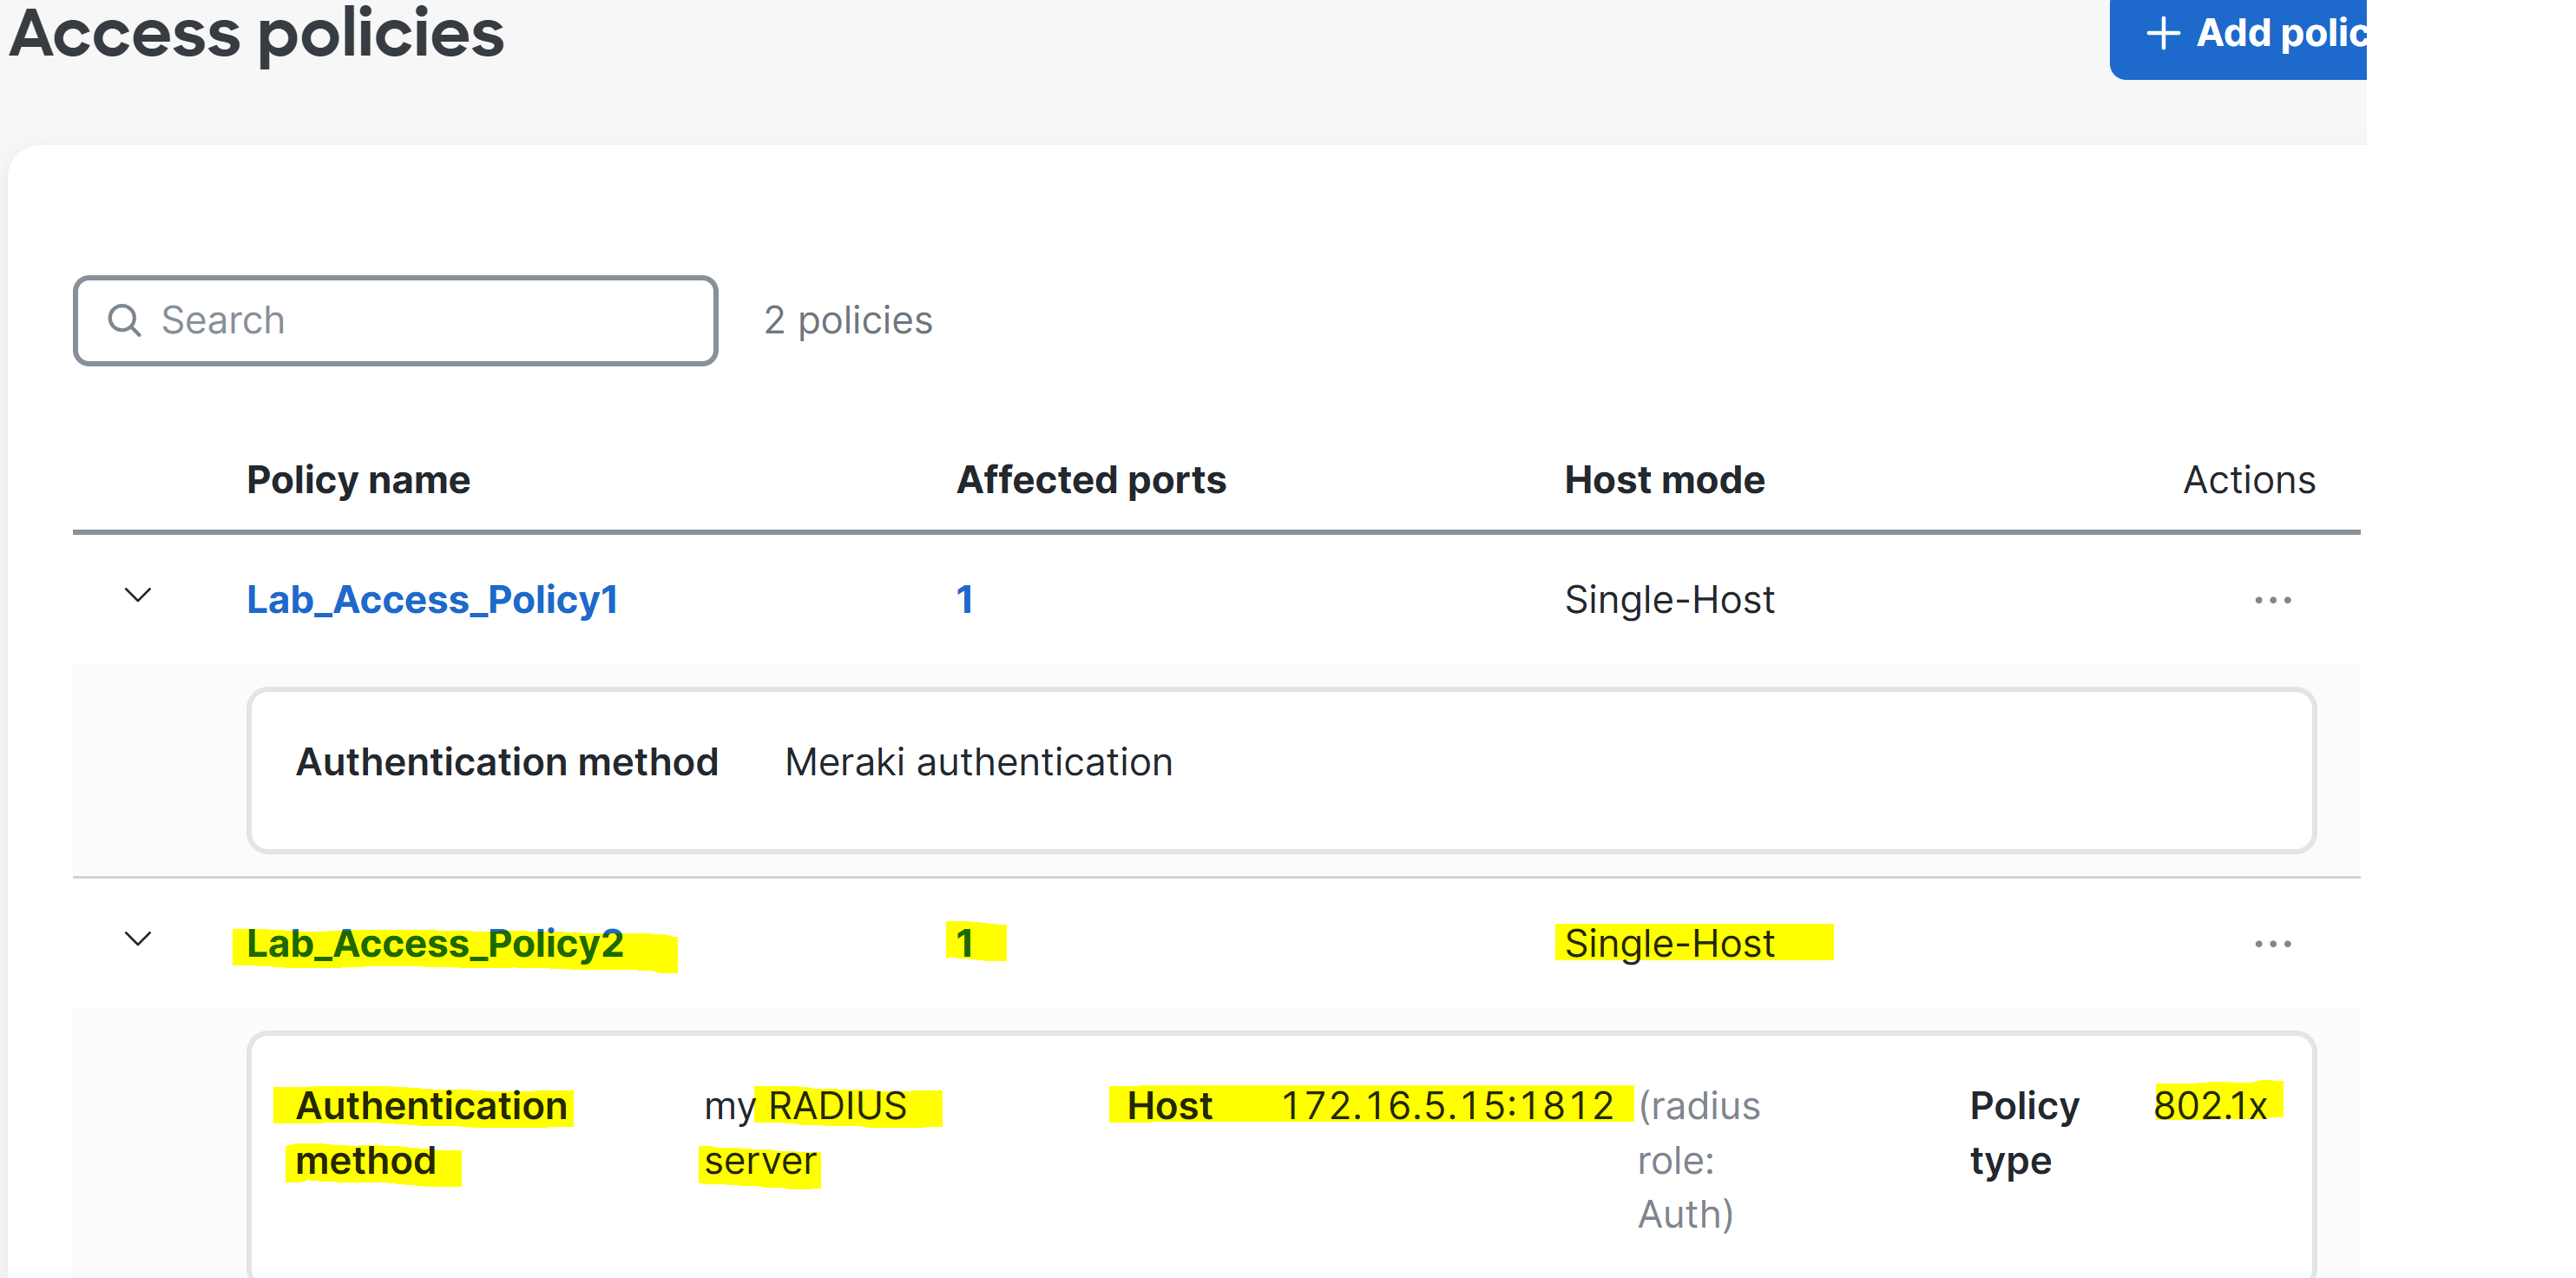
Overview of Configured RADIUS Access Policy
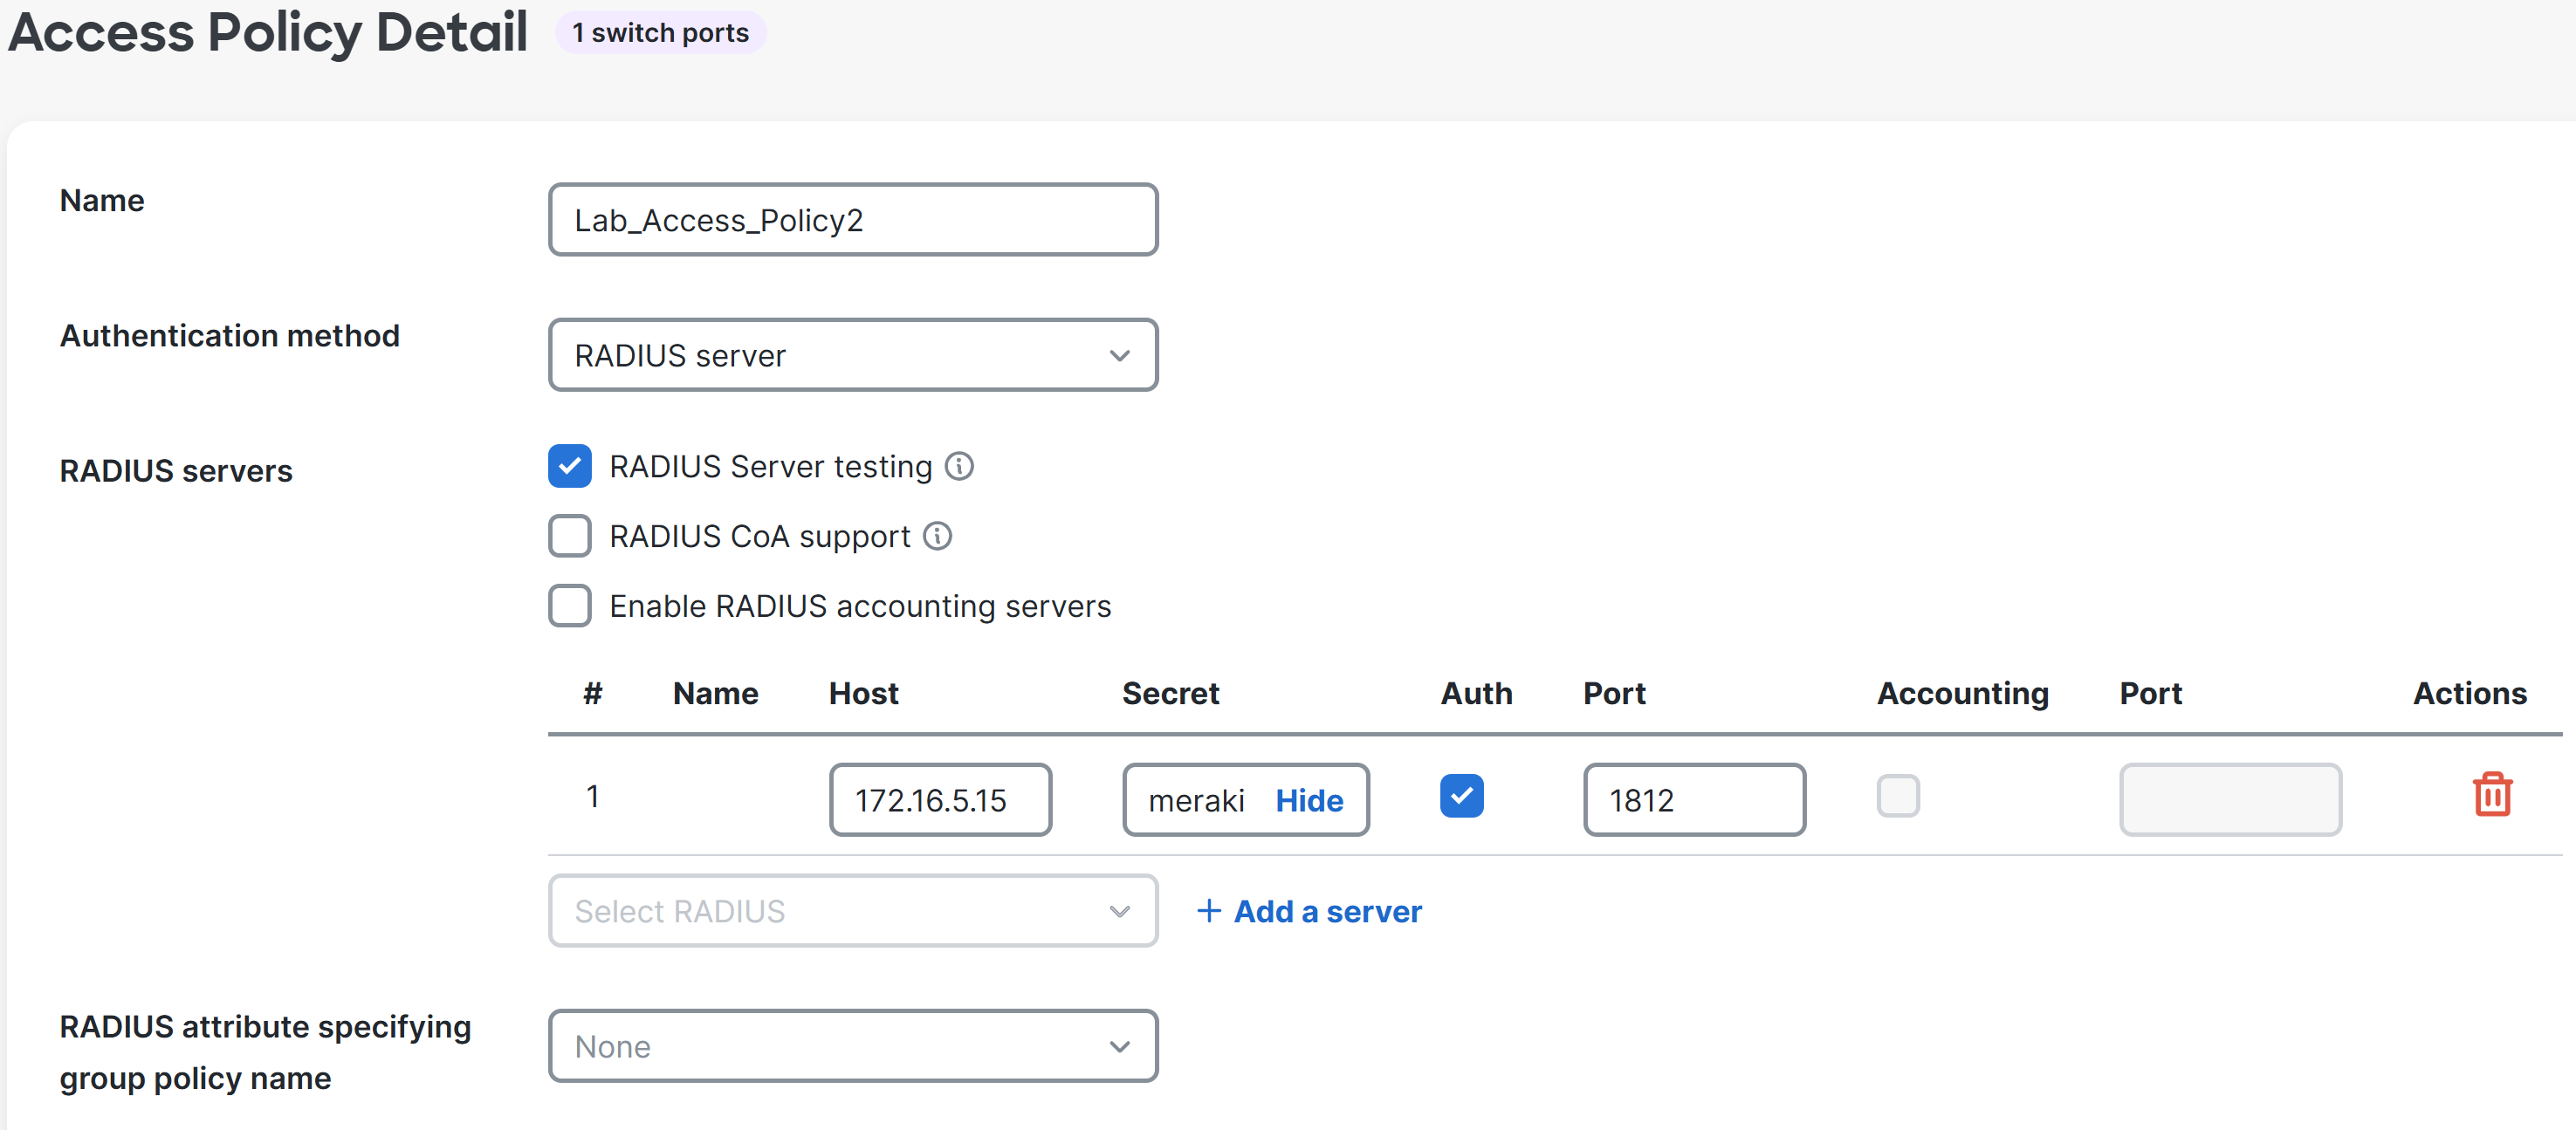
Overview of Configured RADIUS Access Policy

Overview of Configured RADIUS Access Policy
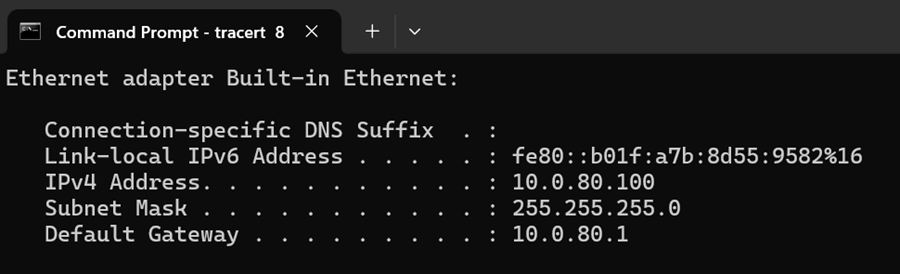
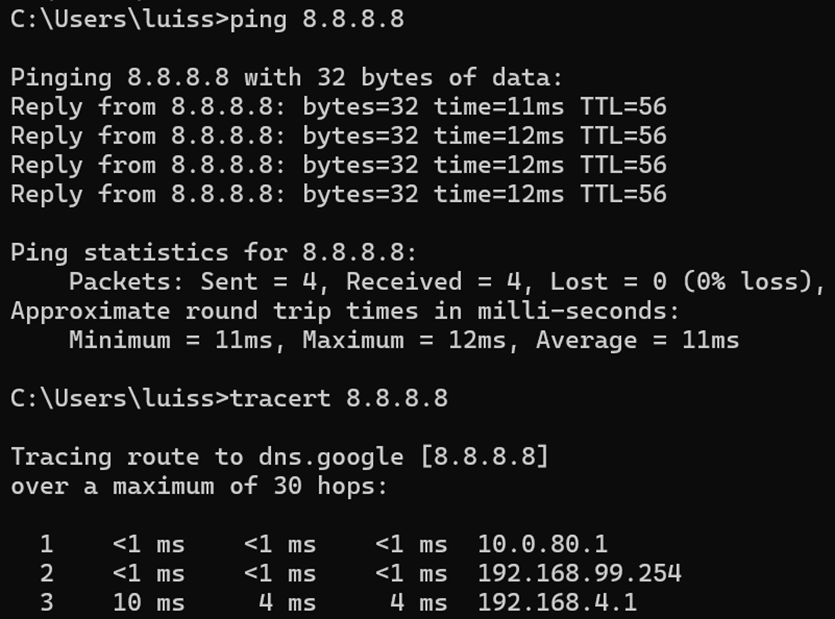
IP Verification of Corporate Client on Network
Corporate Client Successful 802.1X using Saved AD Credentials
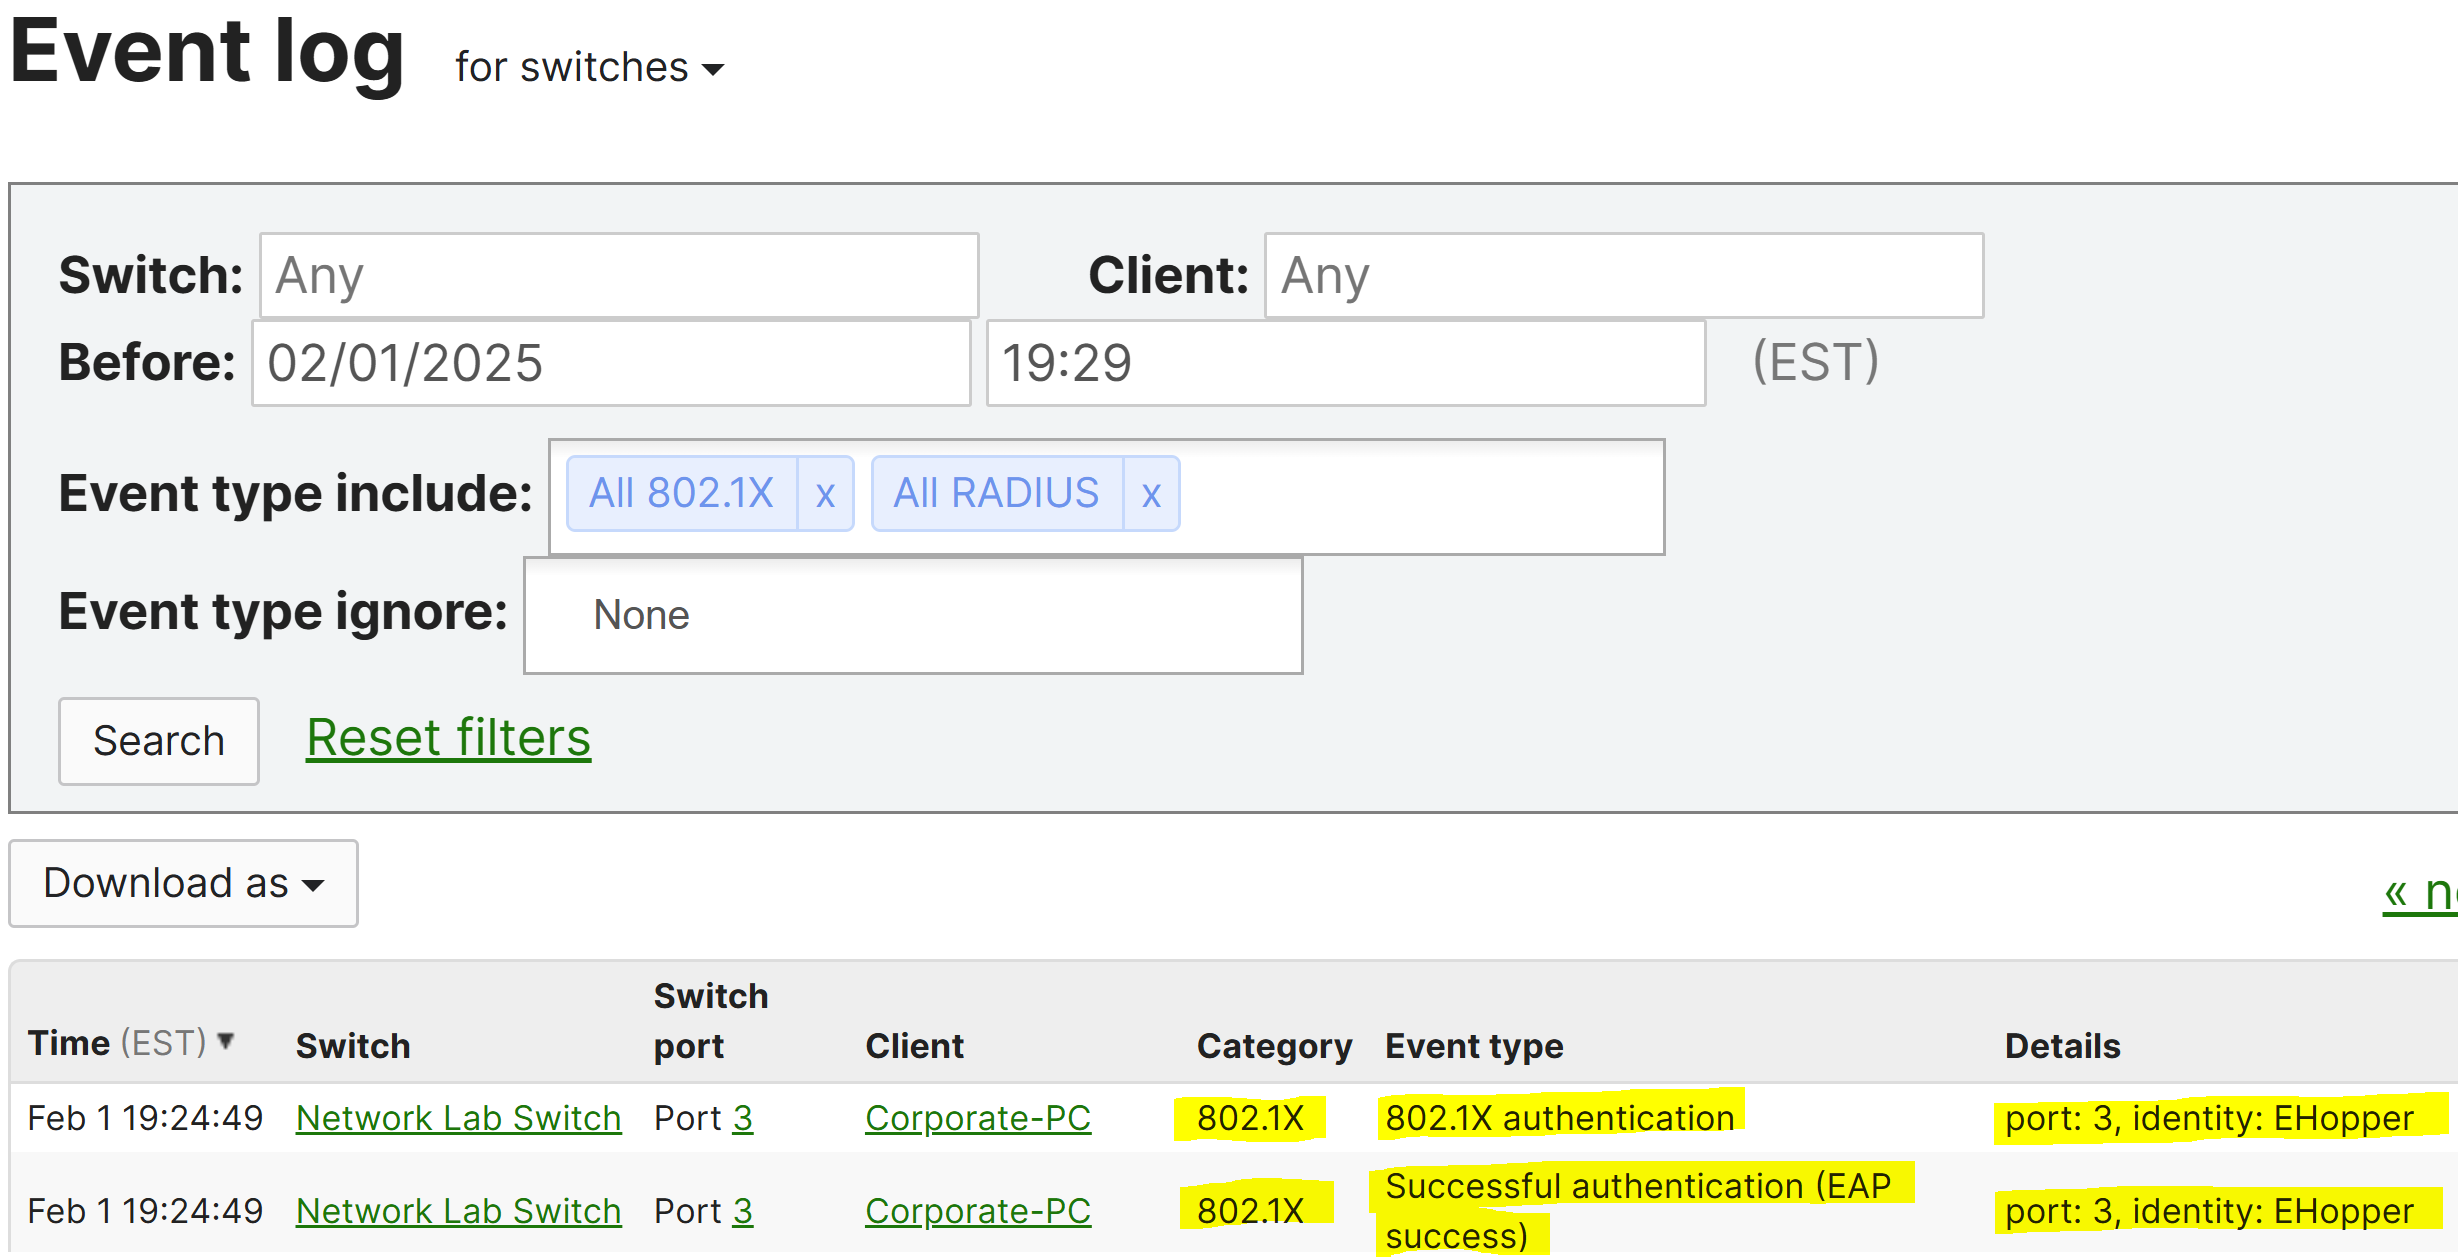
Verification of Successful 802.1X Login via Meraki Event Log
MAB Authentication Configuration
Overview
- In this lab exercise, I will be configuring an 802.1X Access Policy using MAB Authentication
- MAB (MAC Authentication Bypass) Authentication is a method used to authenticate devices on the network that do not support 802.1X authentication, such as older devices or network equipment such as IoT devices or printers
- This Access Policy type is often used in conjunction with 802.1X to provide an alternative authentication method for devices that cannot perform full 802.1X authentication, relying on the device's MAC address as the authentication credential
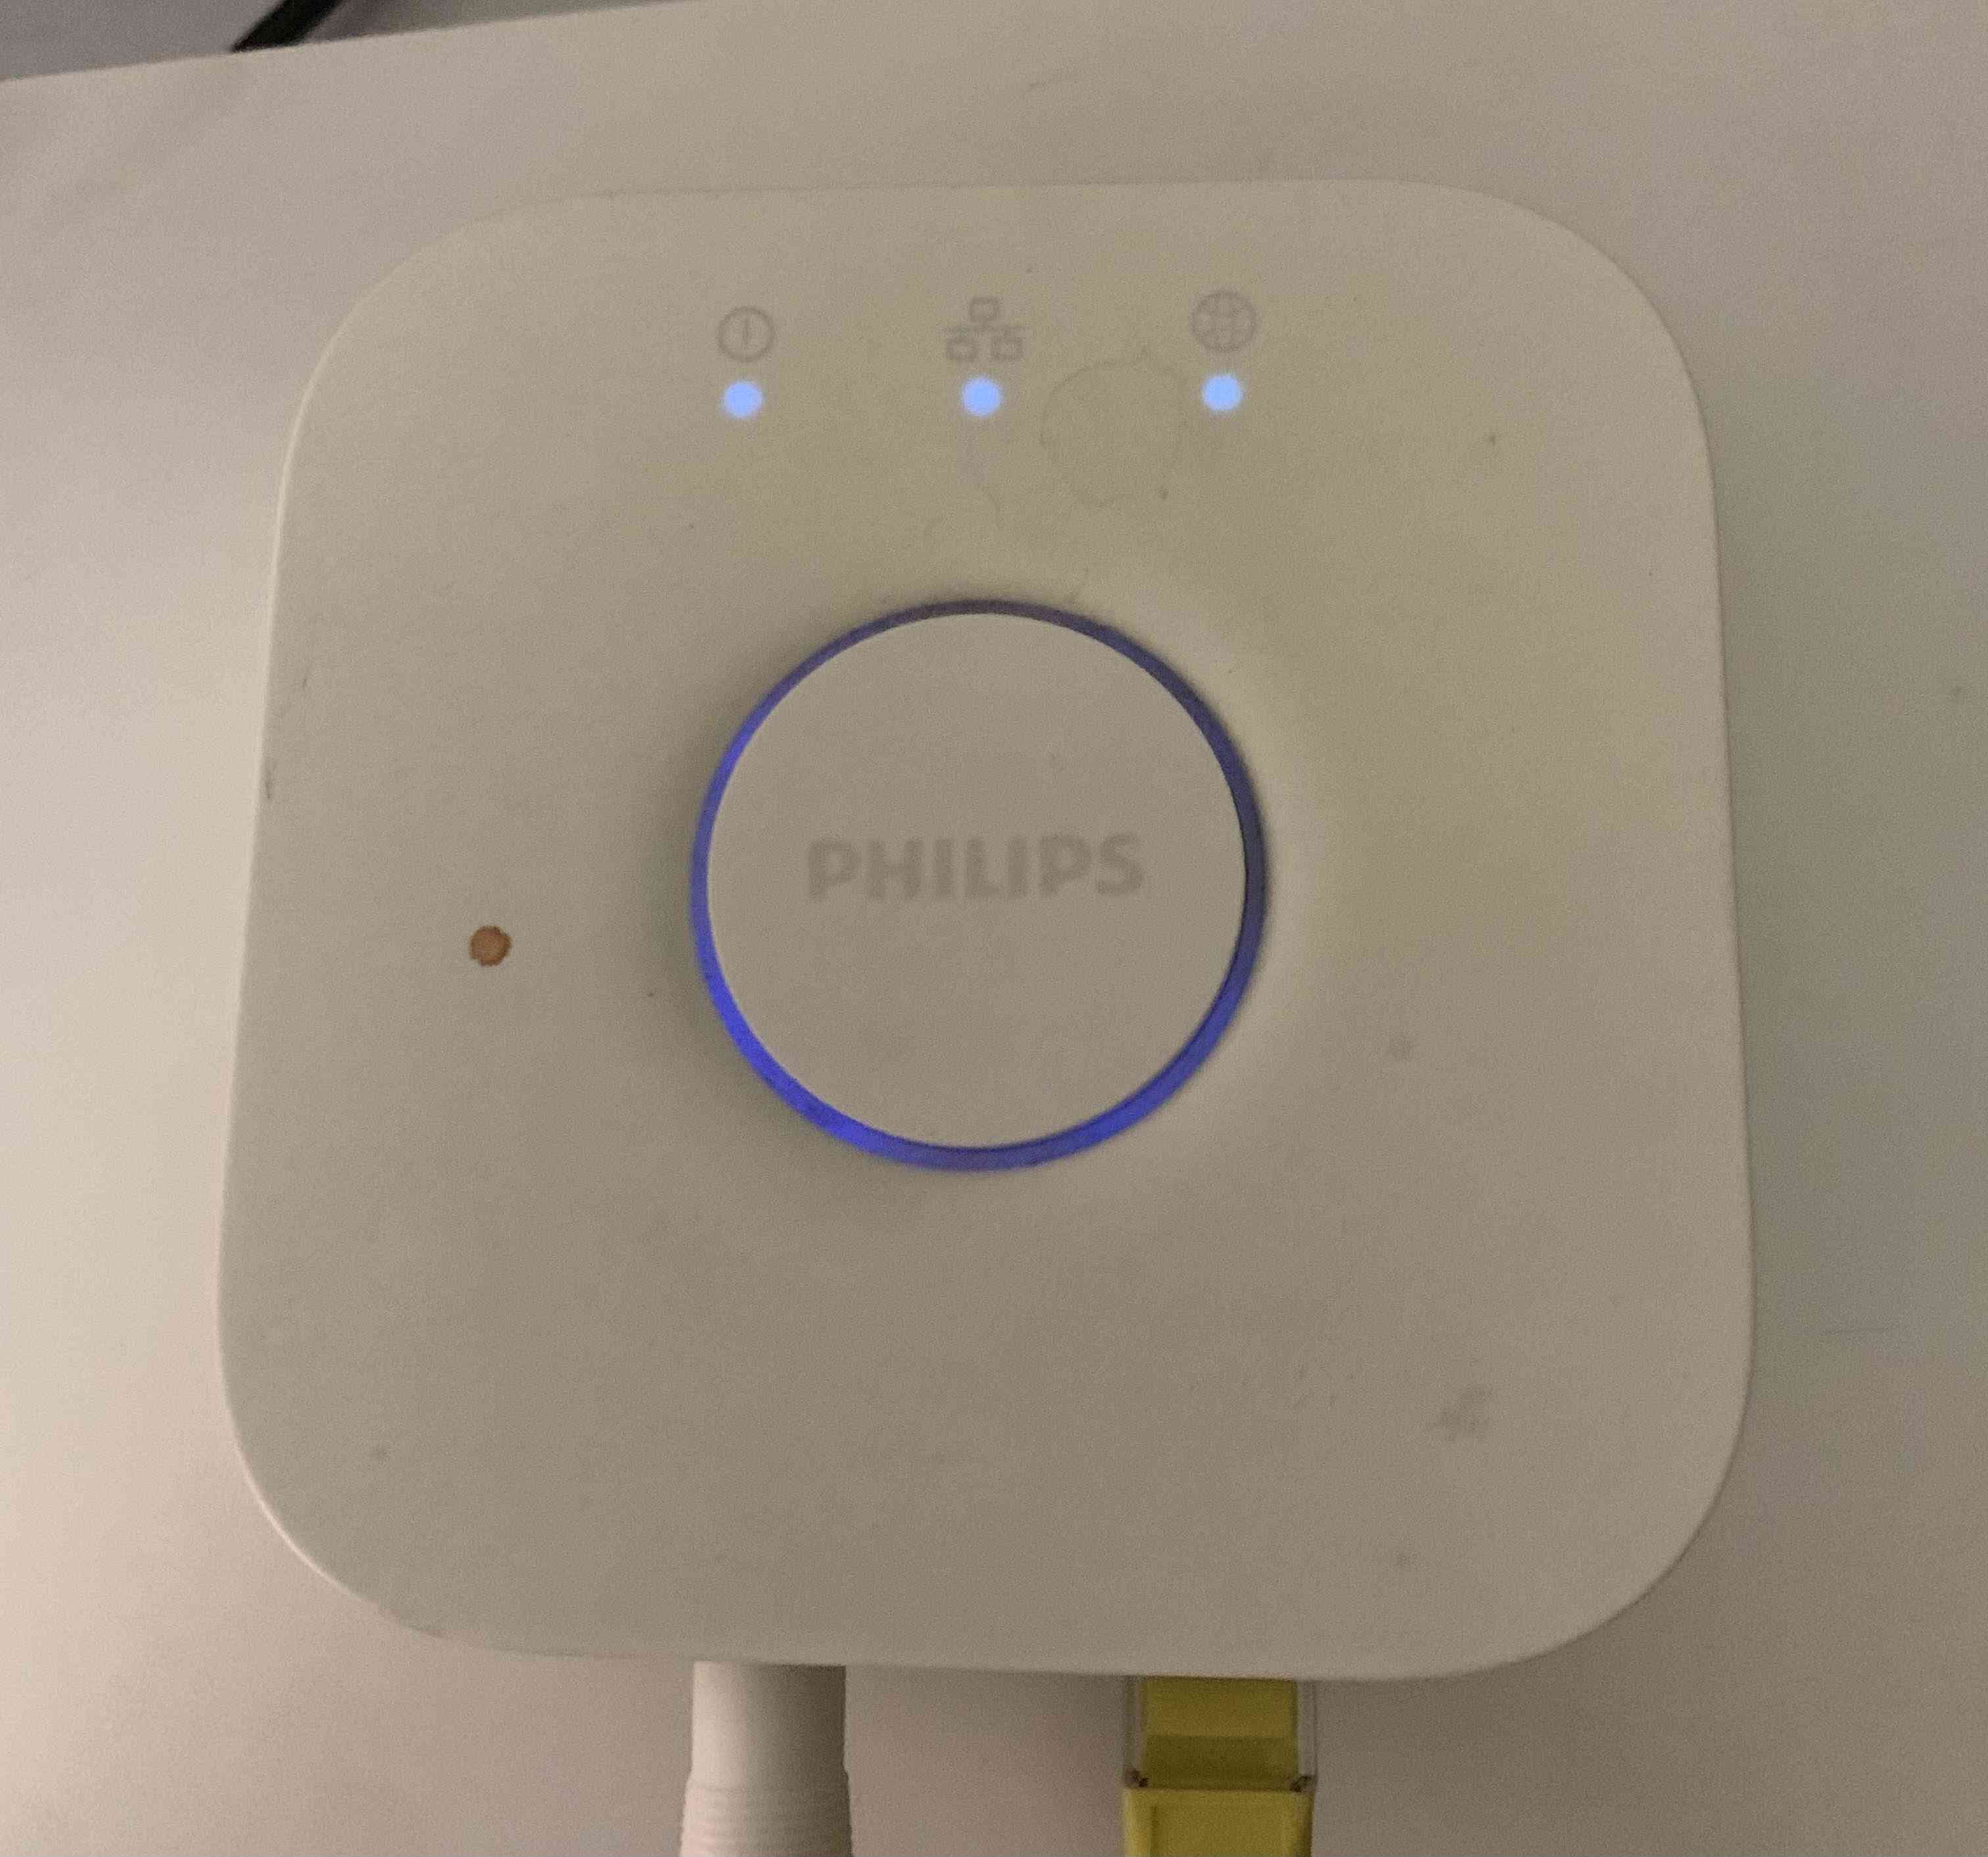
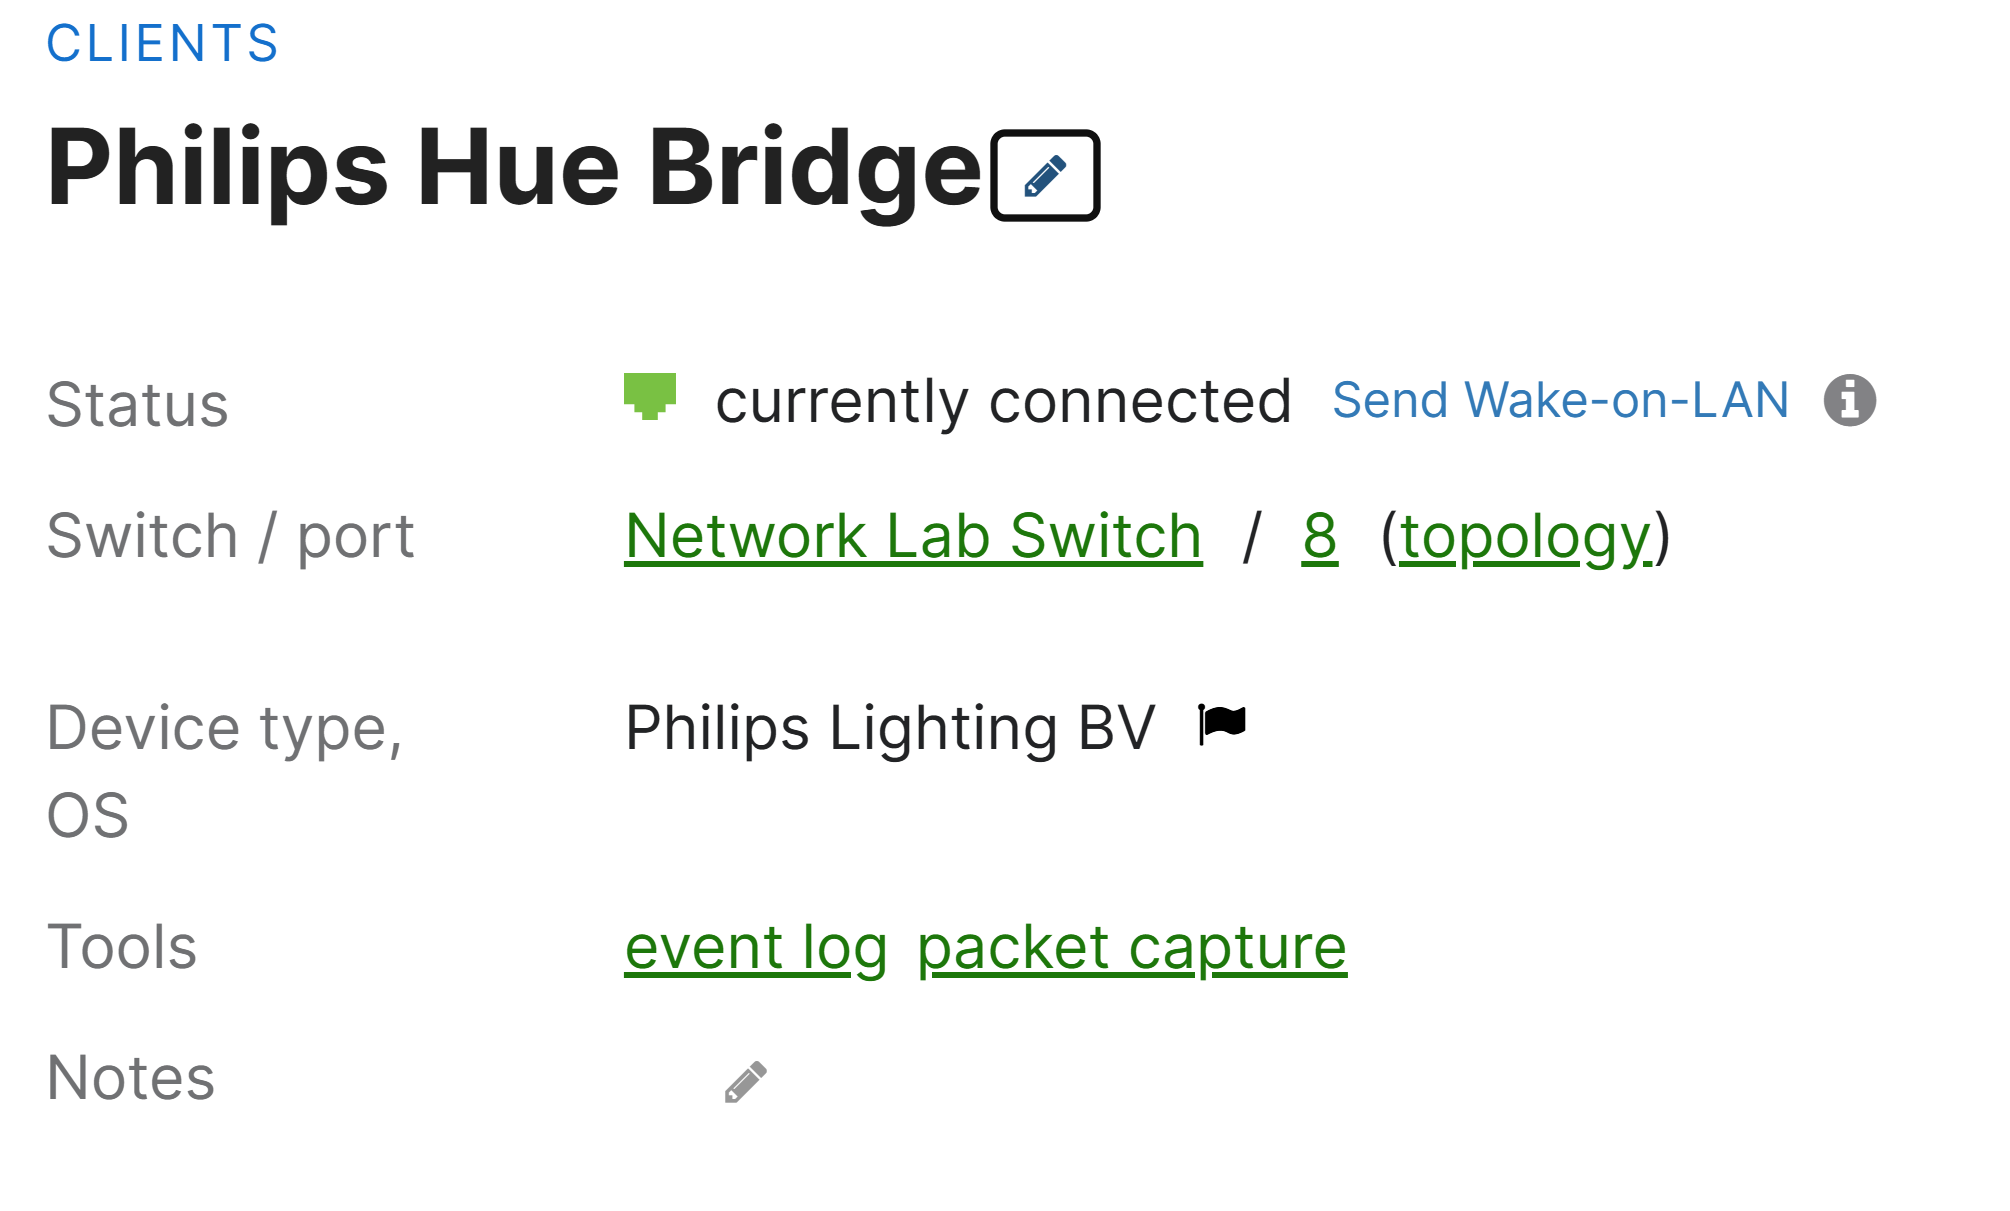
- In my lab scenario, I will be using Windows Server's NPS RADIUS solution and a Phillips Hue IoT device supporting the smart lights in my home as the MAB client
Phillips Hue IoT Device
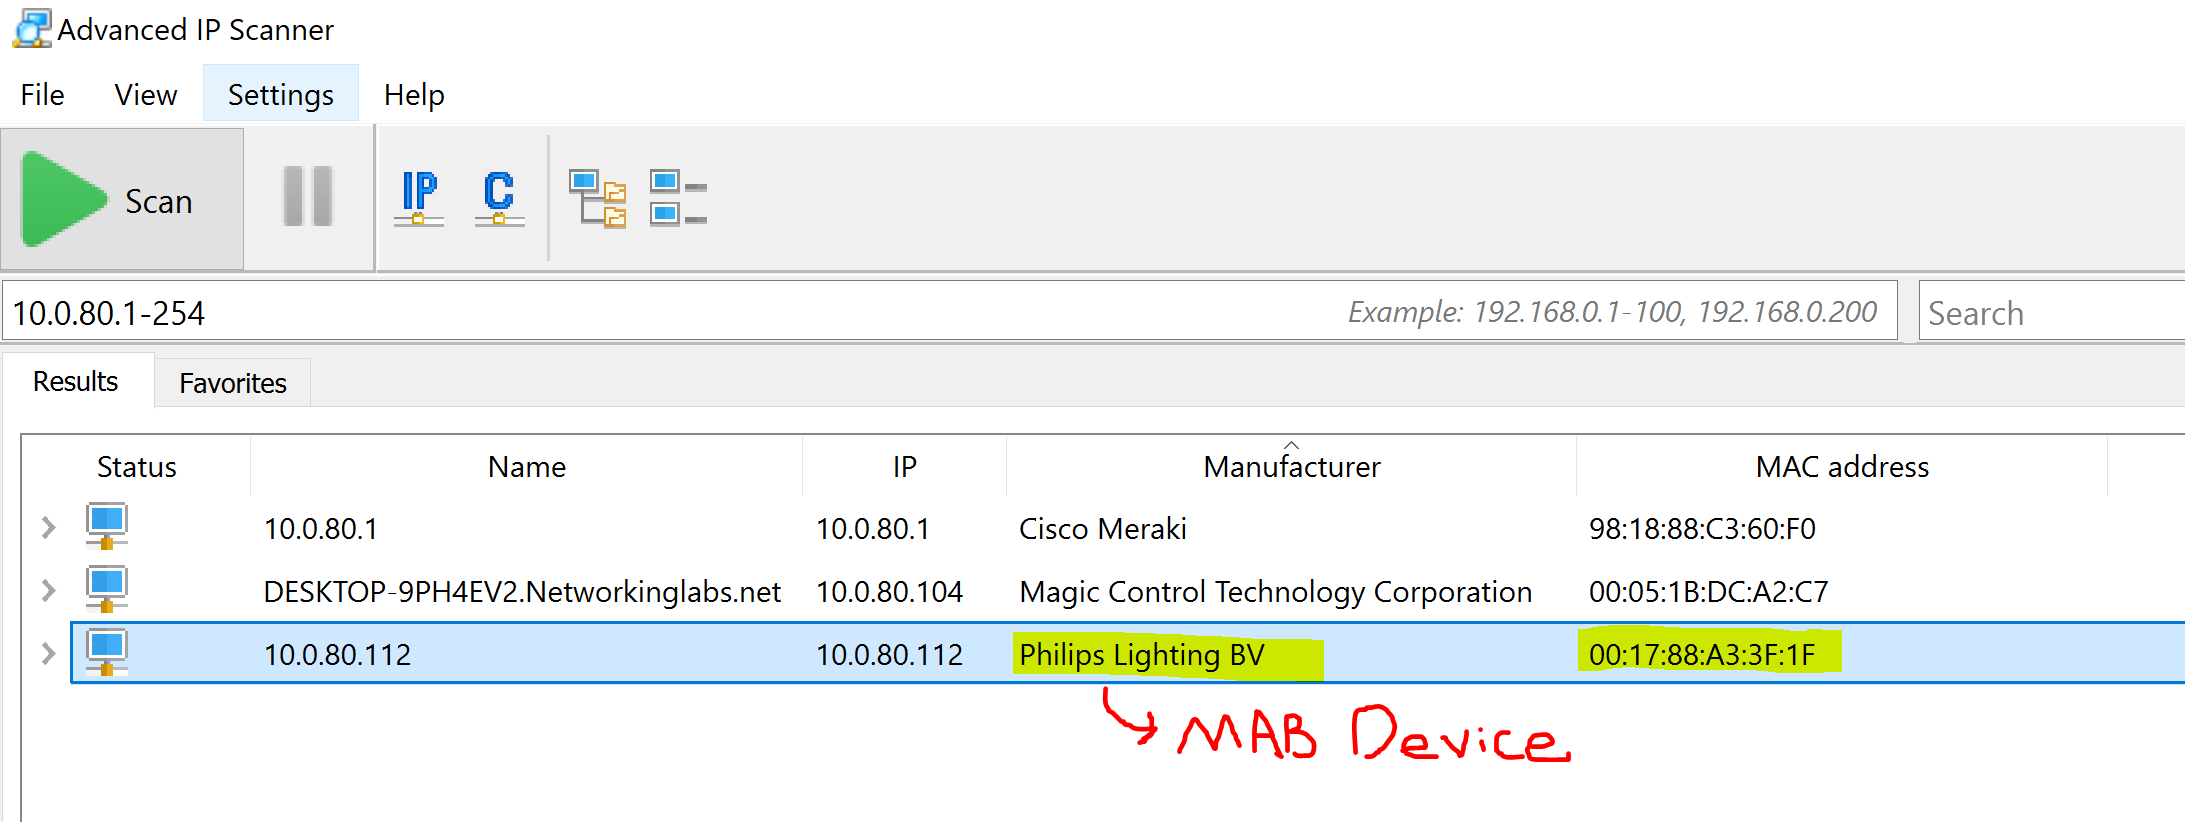
Acquiring the MAC Address of the IoT Device using an IP Scanner
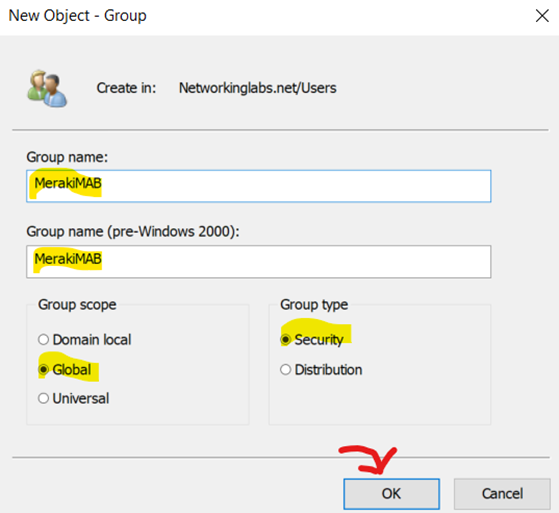
Defining a New AD Group for MAB Devices
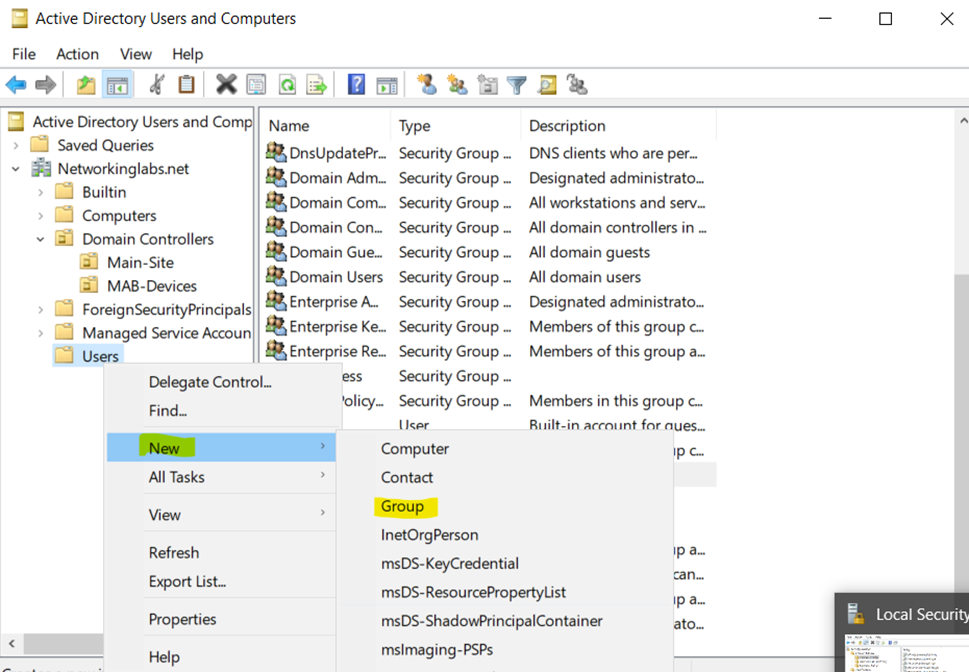
Specifying New Group Name & Scope/Type
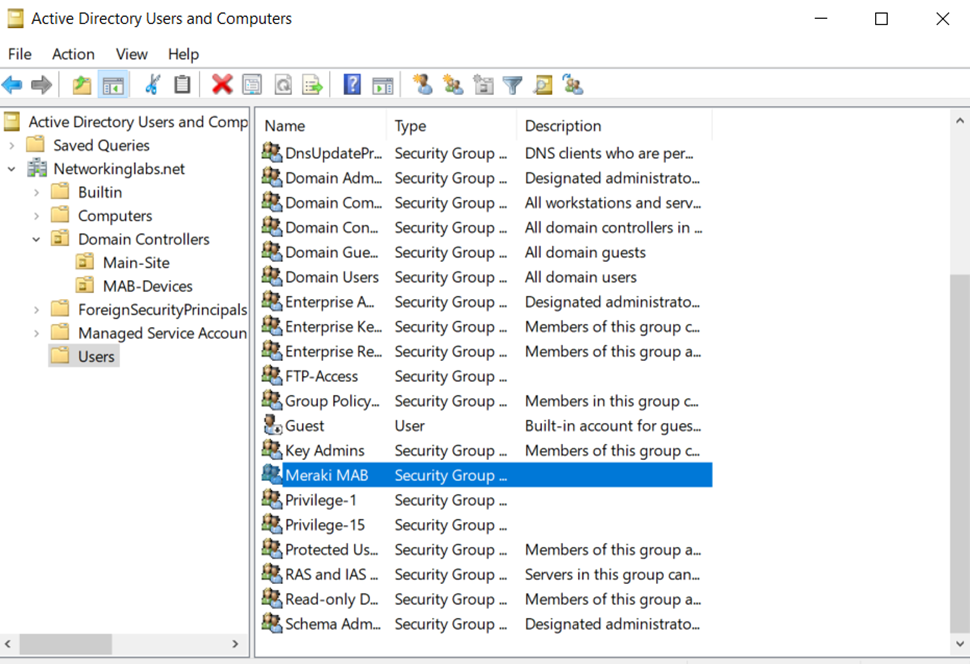
Verifying Defined New Group
Using PowerShell to Define a Custom Fine Grained Password Policy for the Meraki MAB AD Group to Allow MAC Addresses to be used as Passwords of MAB Device Clients
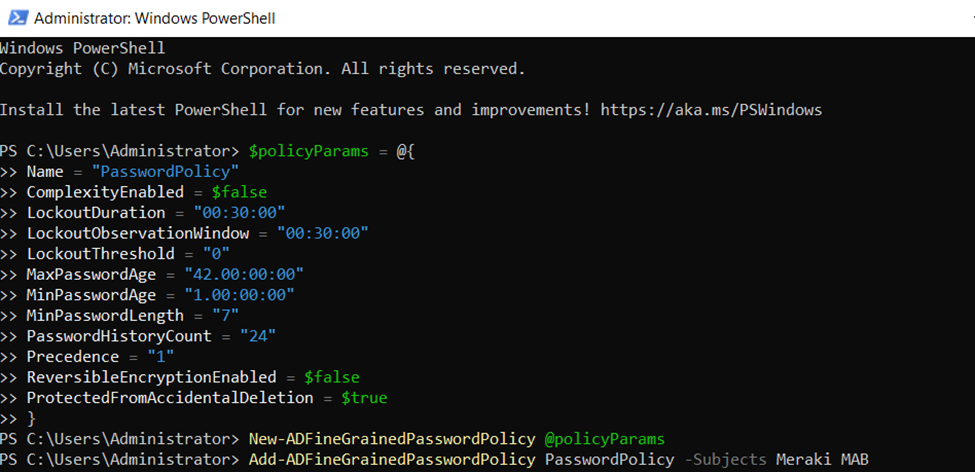
Adding an AD Group (Meraki MAB) to the Defined Custom Password Policy

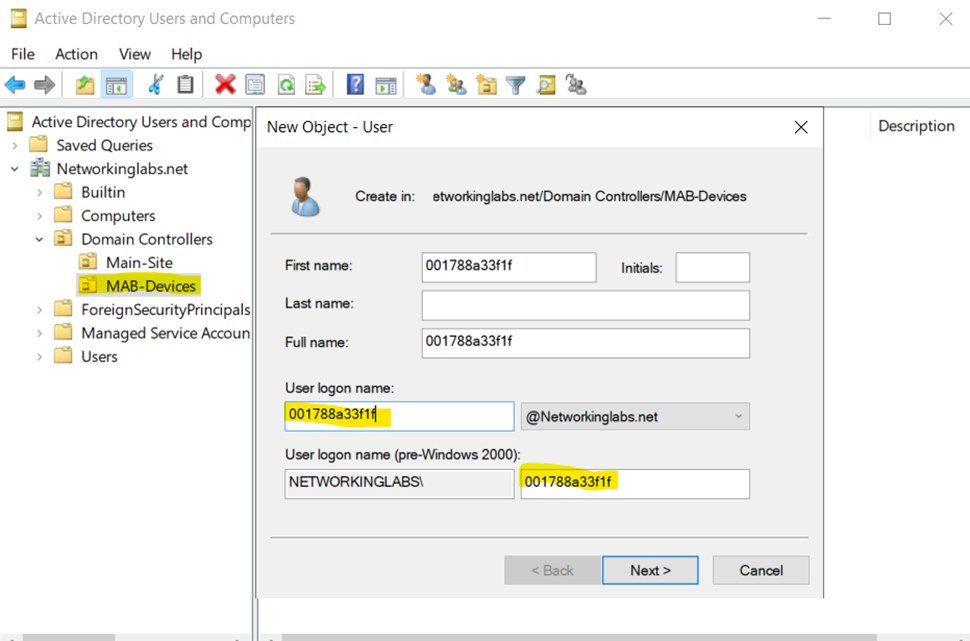
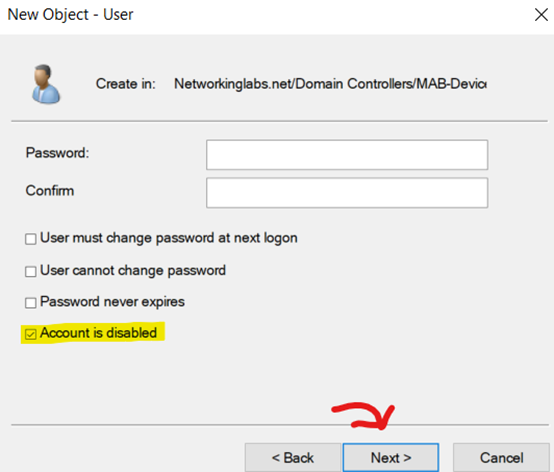
Defining MAB Client (Phillips Hue Device) by Setting the Username as the MAC Address
Will Need to Add User to the Meraki MAB Group Before Specifying MAC Address as the Password
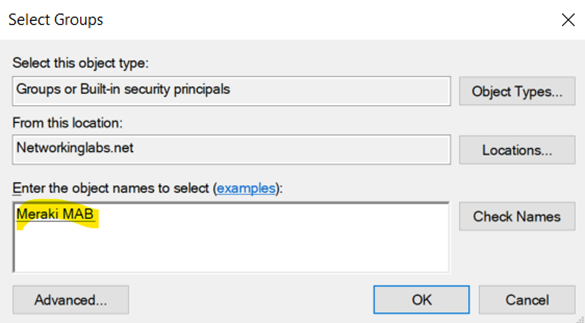
Add MAB Client to the Meraki MAB Group so that it inherits the Custom Password Policy
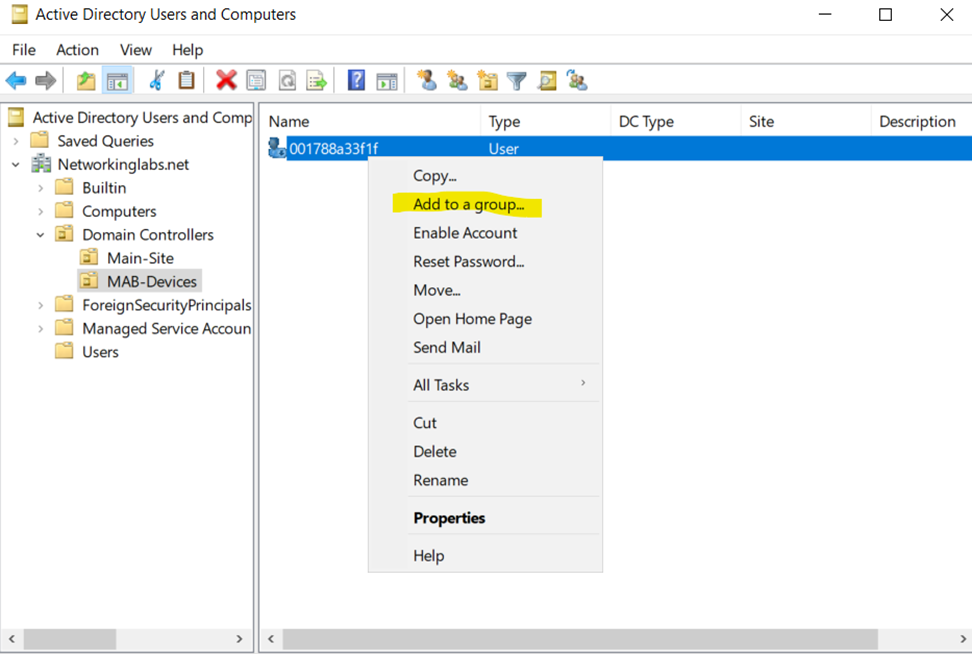
Adding MAB Client to the Meraki MAB Group
Reset Password of MAB Client & Specify the MAC Address as the Password
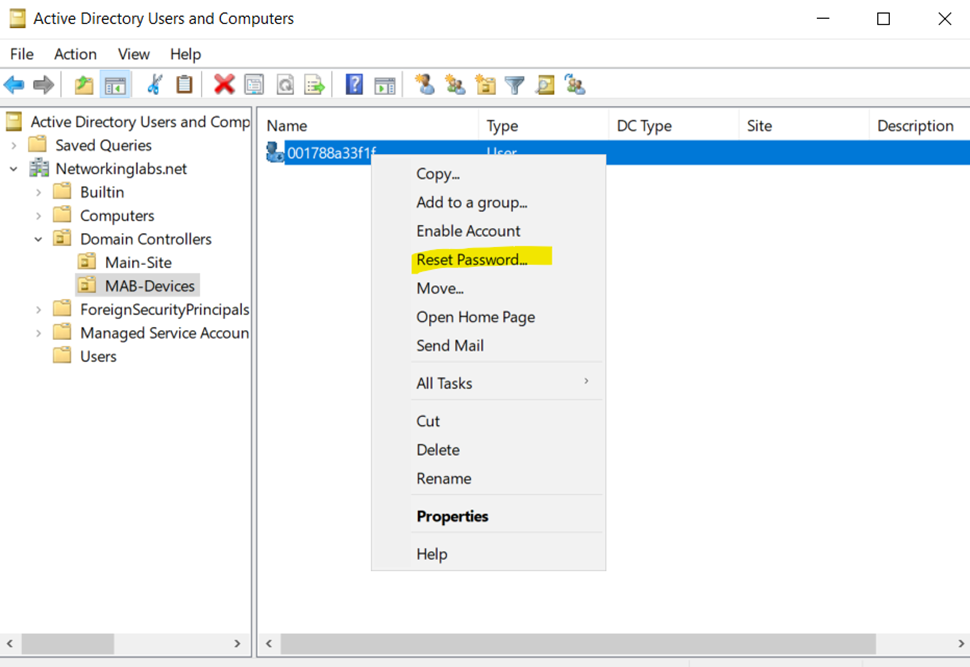
MAB Client MAC Address as the Password
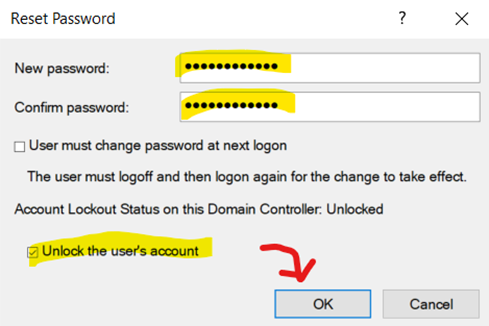
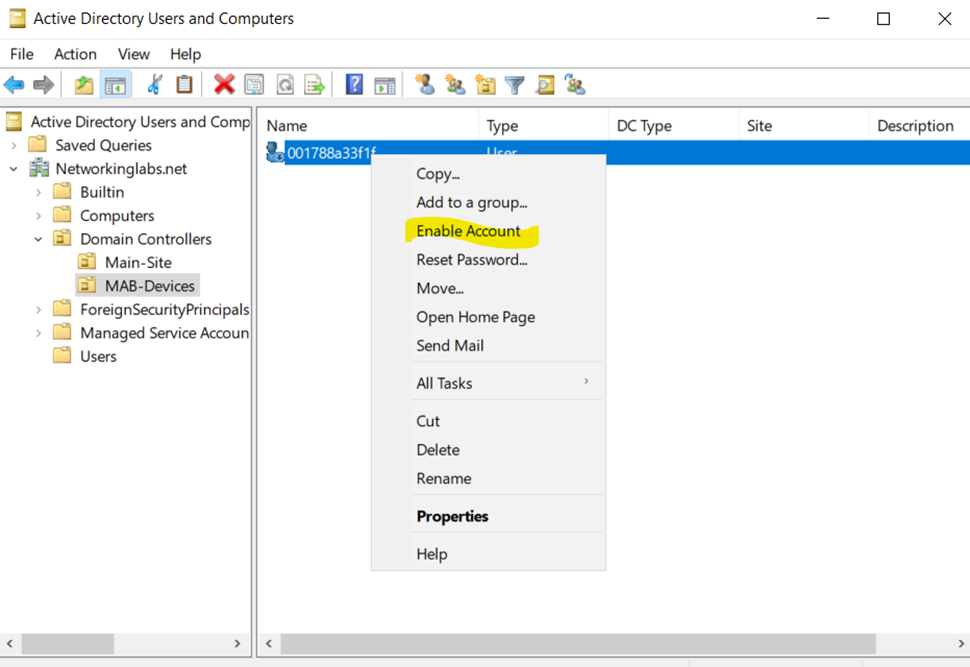
Last Step is to Enable Account of MAB Client
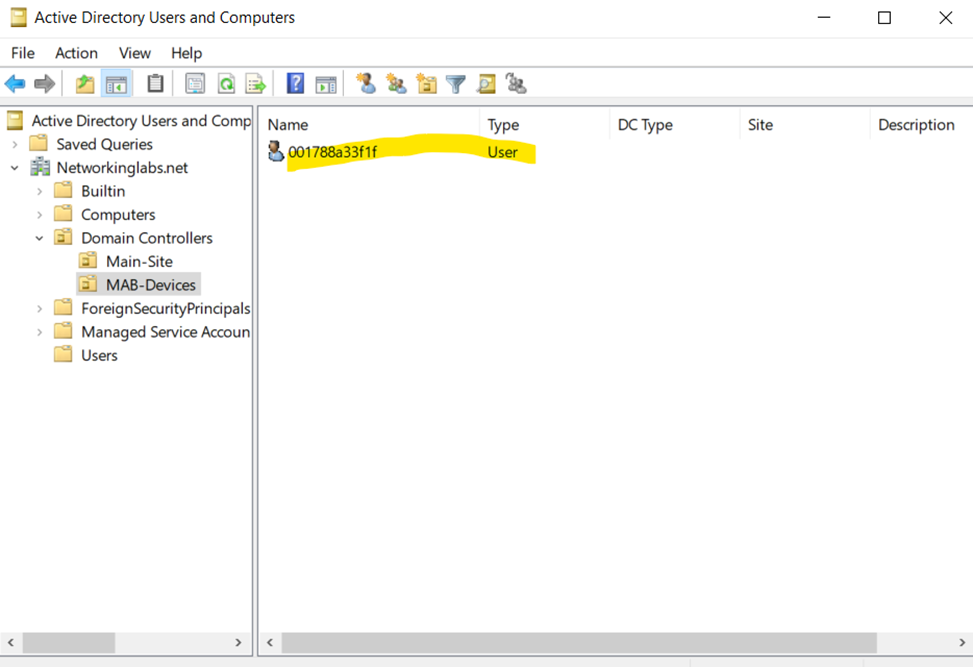
Verification of Defined MAB Client
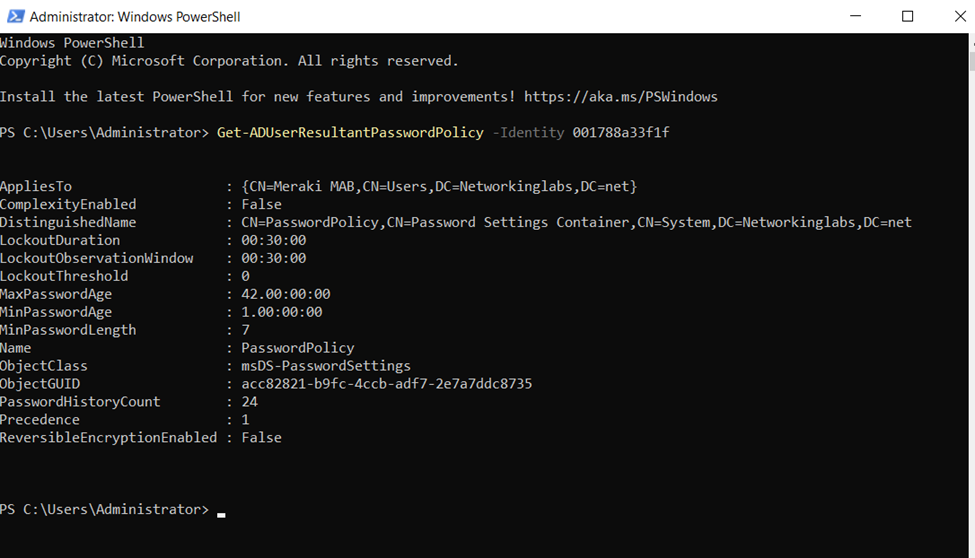
Verification Check of MAB Client Inheriting the Custom Password Policy Defined In Previous Steps Using PowerShell
Defining Meraki Switch as a RADIUS Client via Network Policy Server
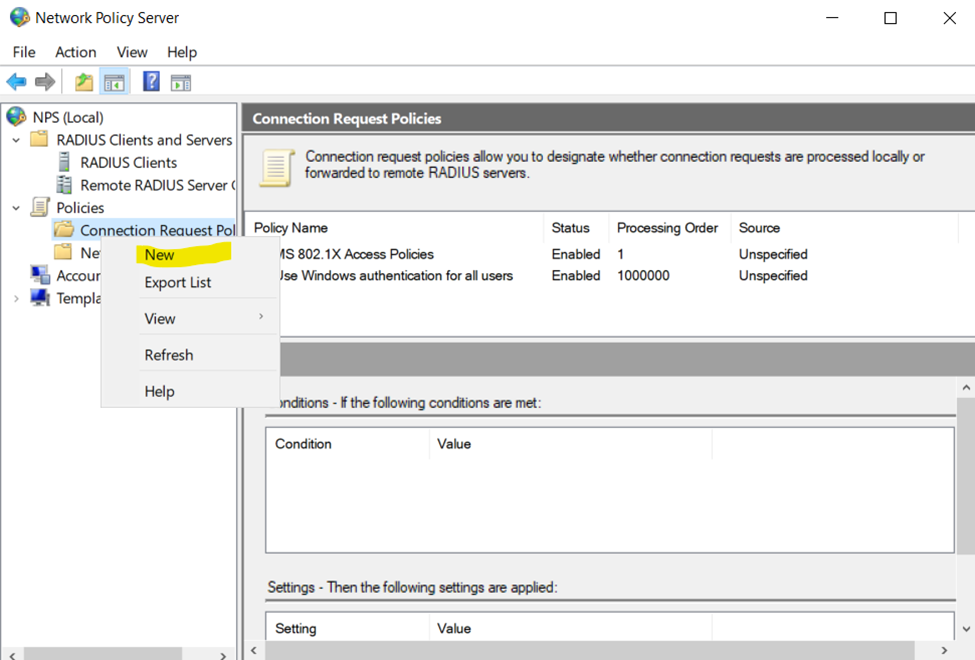
Defining New Connection Request Policy
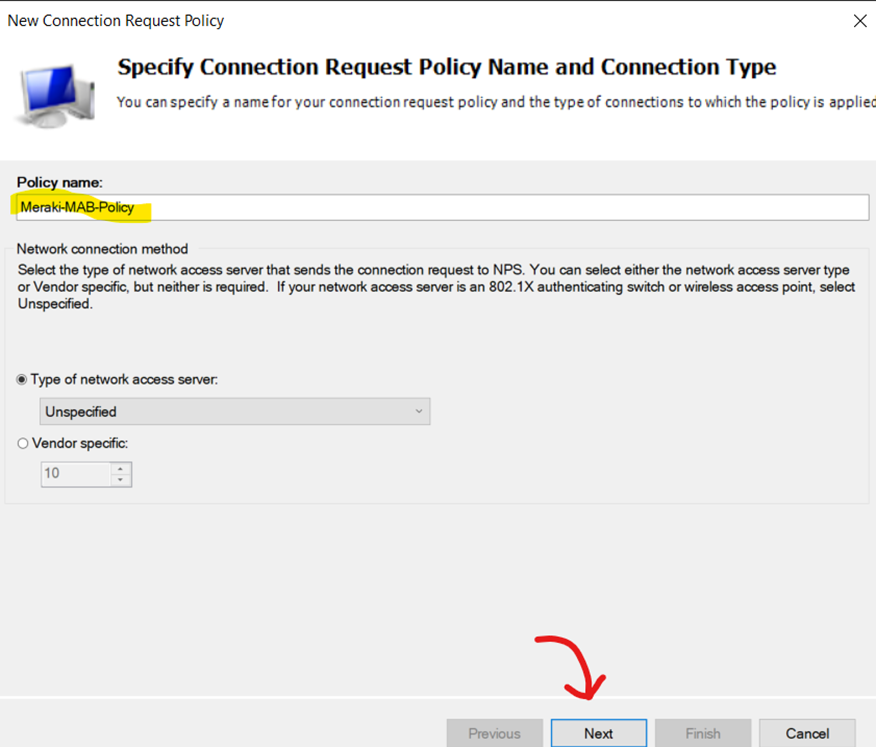
Naming Connection Request Policy
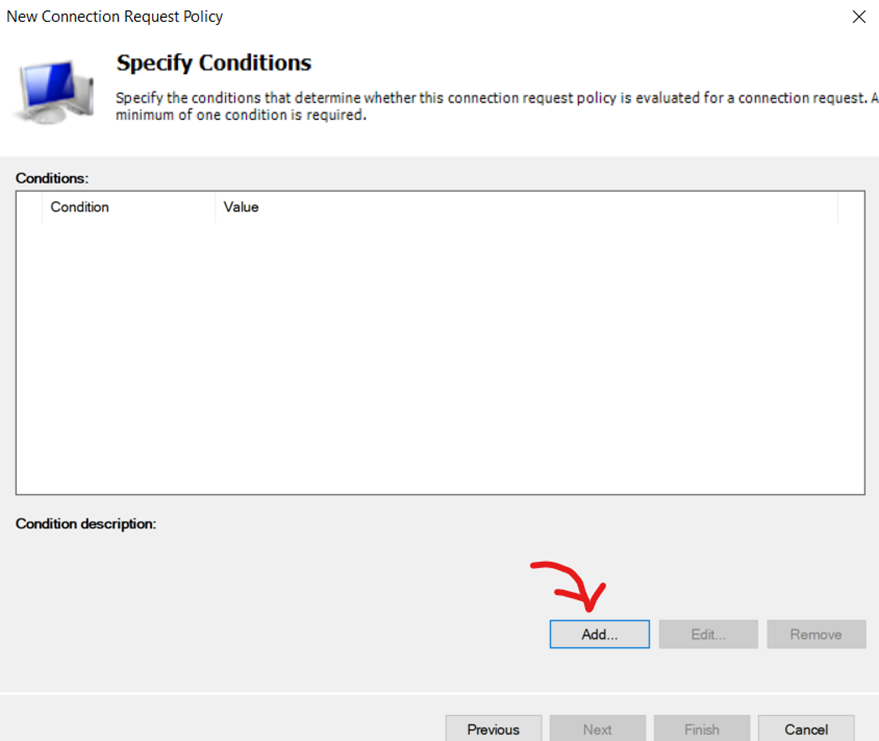
Adding Condition for Connection Request Policy
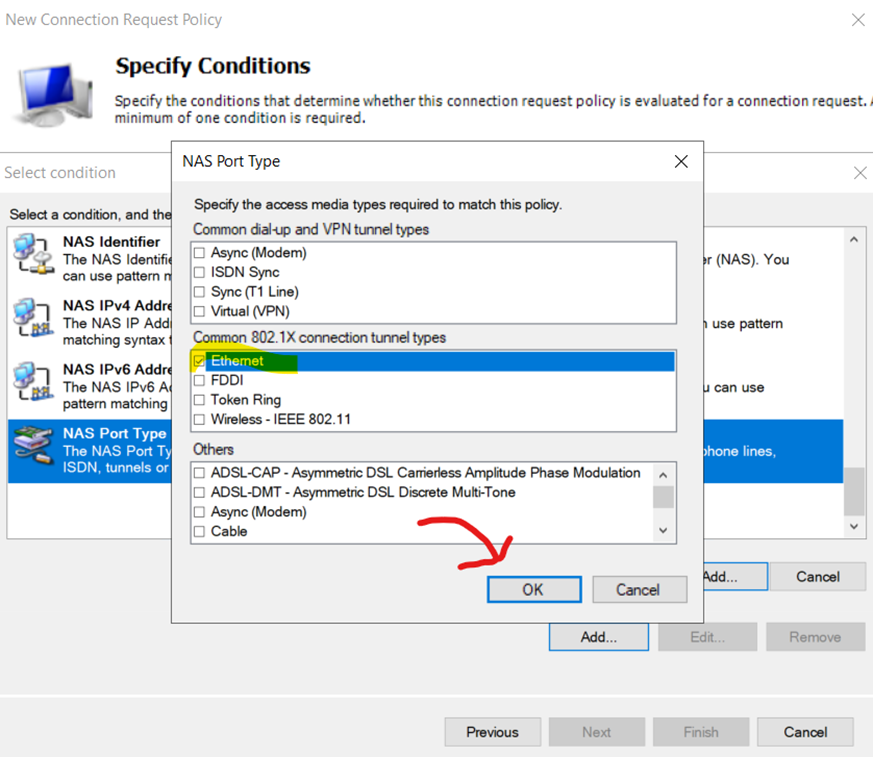
Adding 'NAS Port Type Ethernet' as the Condition for the Connection Request Policy
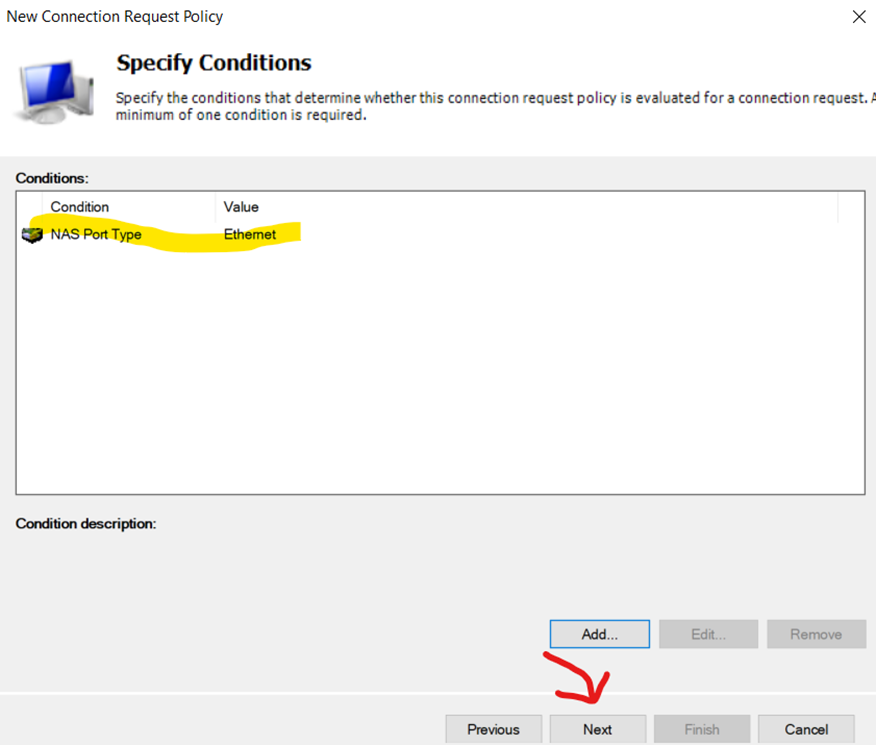
Verifying Condition for Connection Request Policy
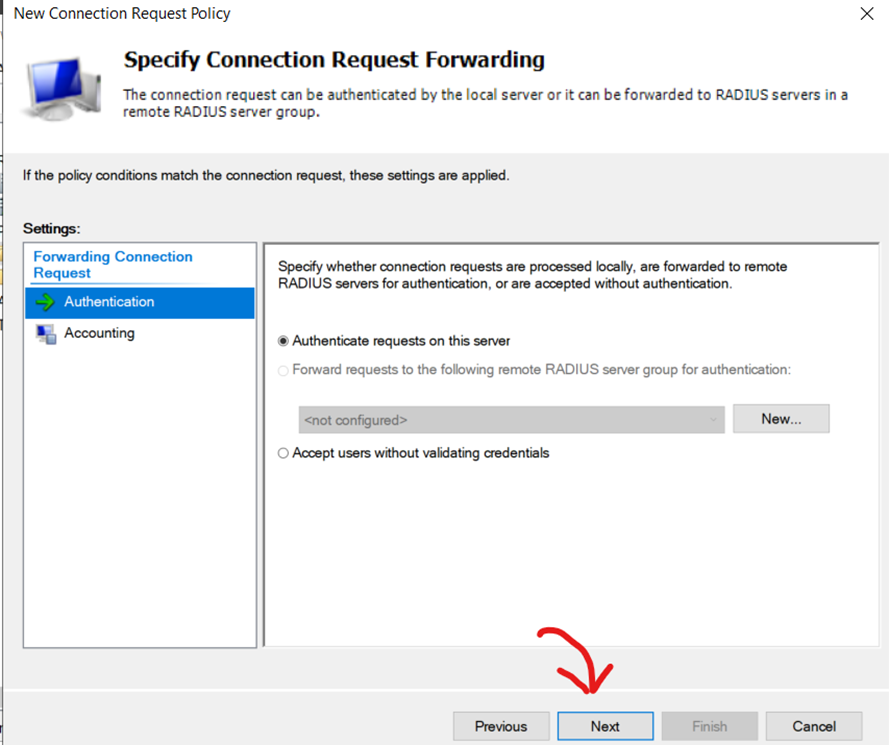
Leave 'Connection Request Forwarding' at Defaults
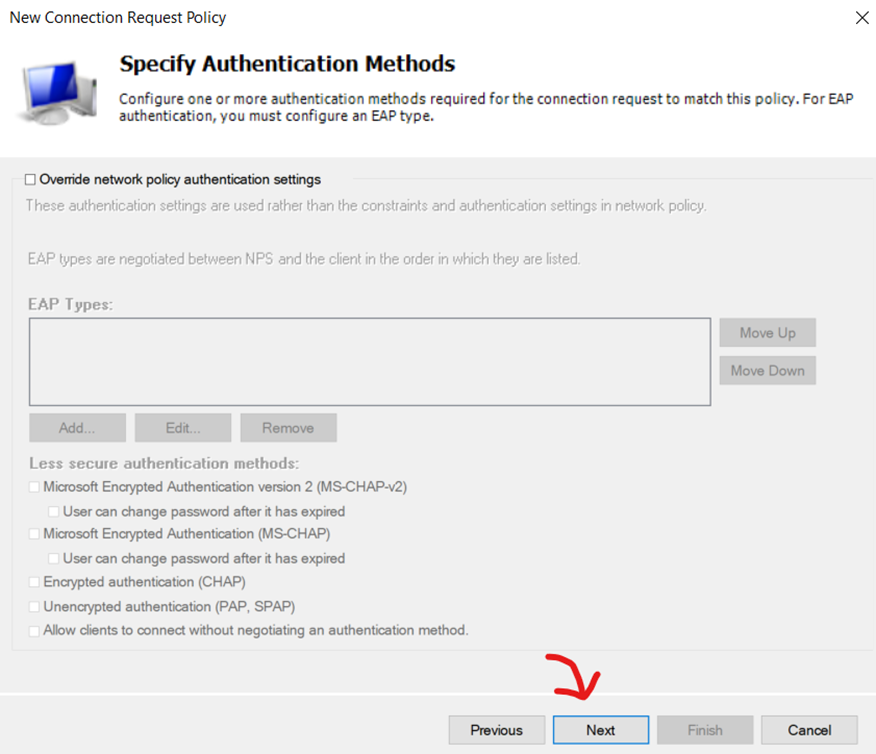
Leave 'Authentication Methods' at Defaults
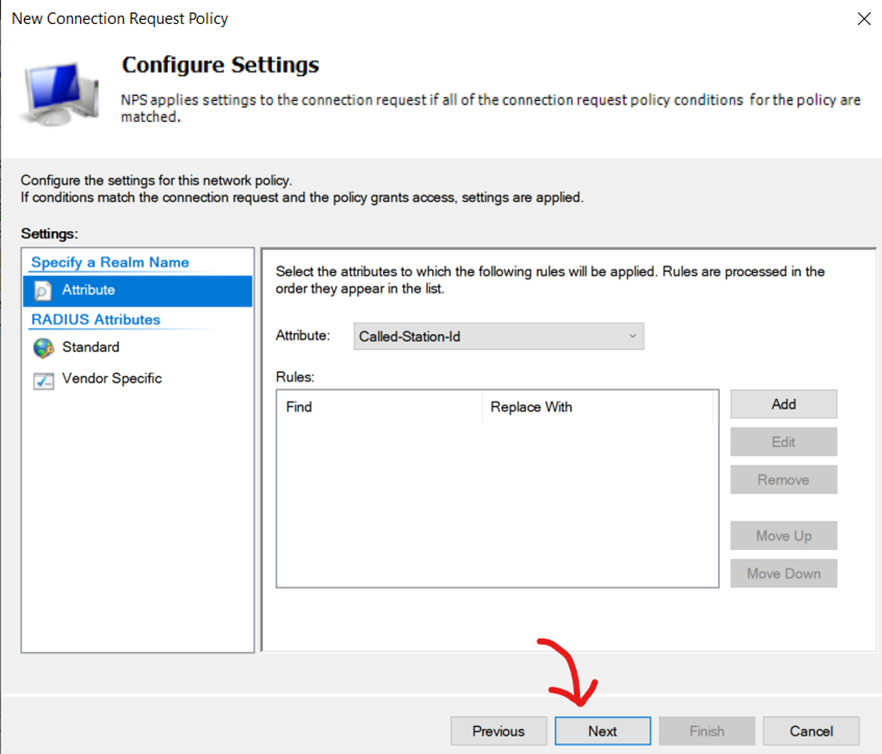
Leave 'Configure Settings' at Defaults
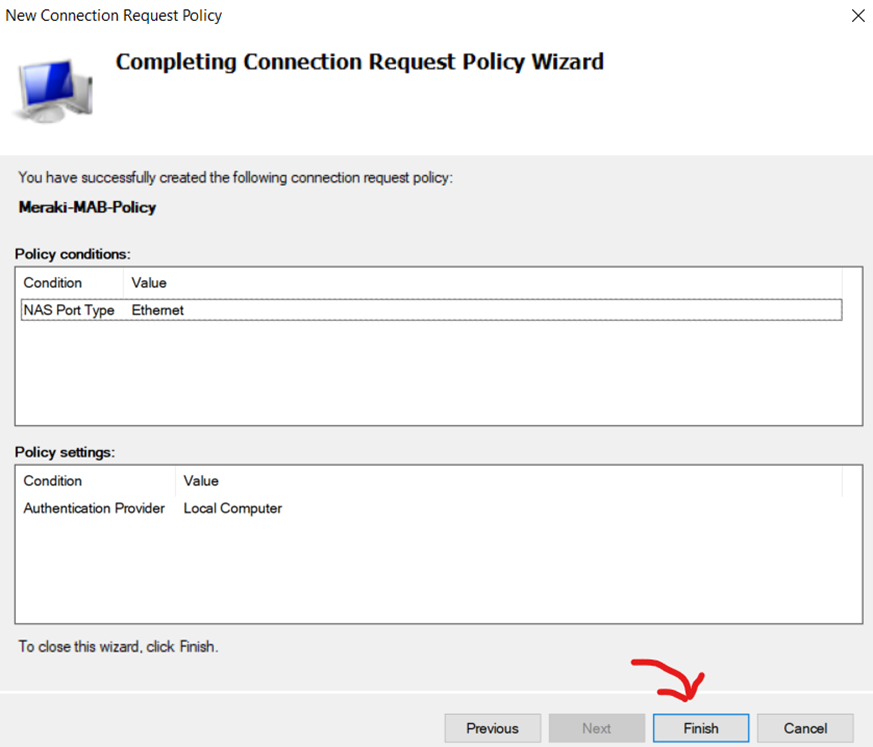
Finish Connection Request Policy
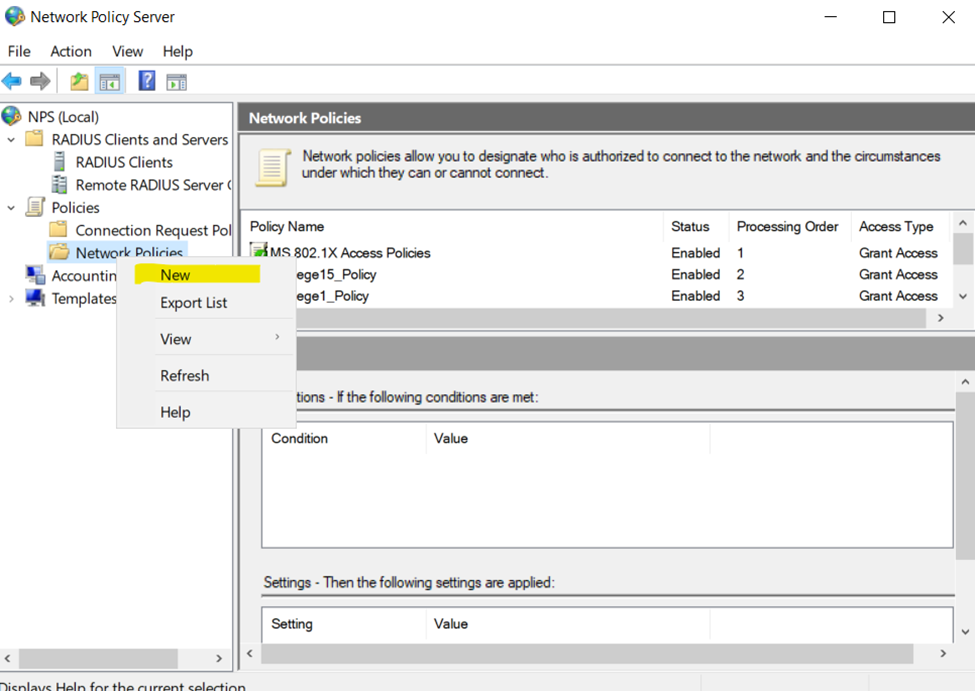
Define a New Network Policy
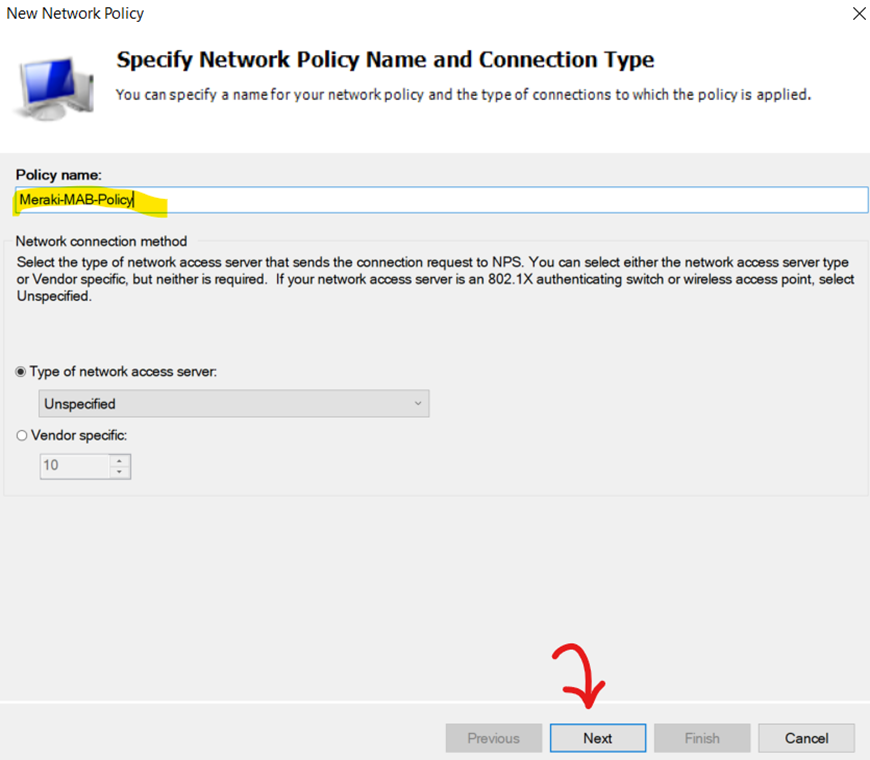
Name Network Policy
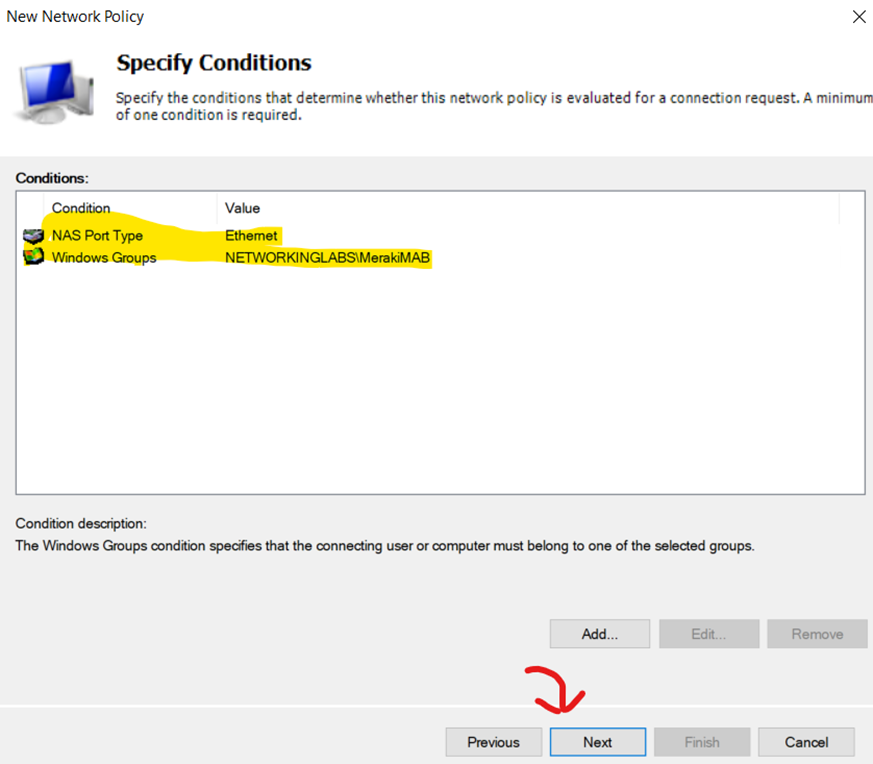
Define Conditions for Network Policy
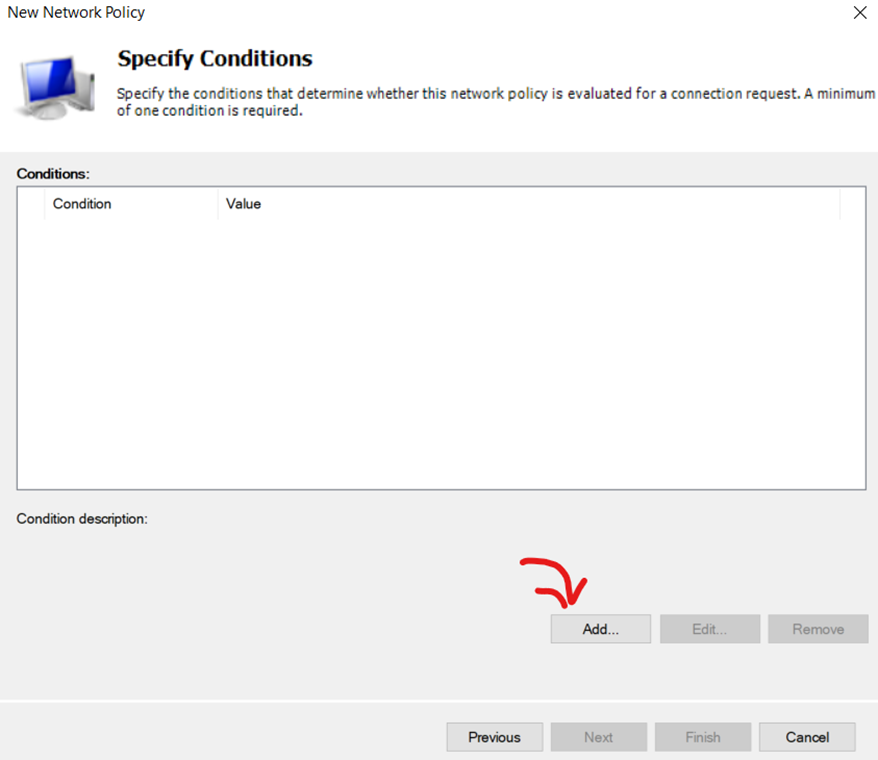
Add 'NAS Port Type Ethernet' & 'Meraki MAB' Windows Group as Conditions for Network Policy
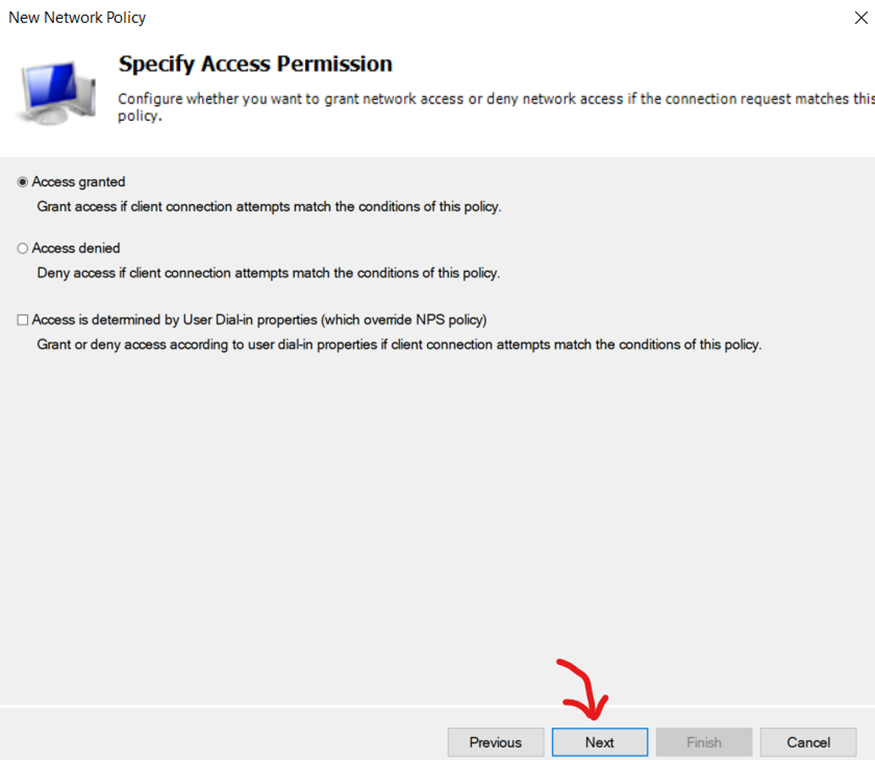
Leave 'Specific Access Permission' at Default
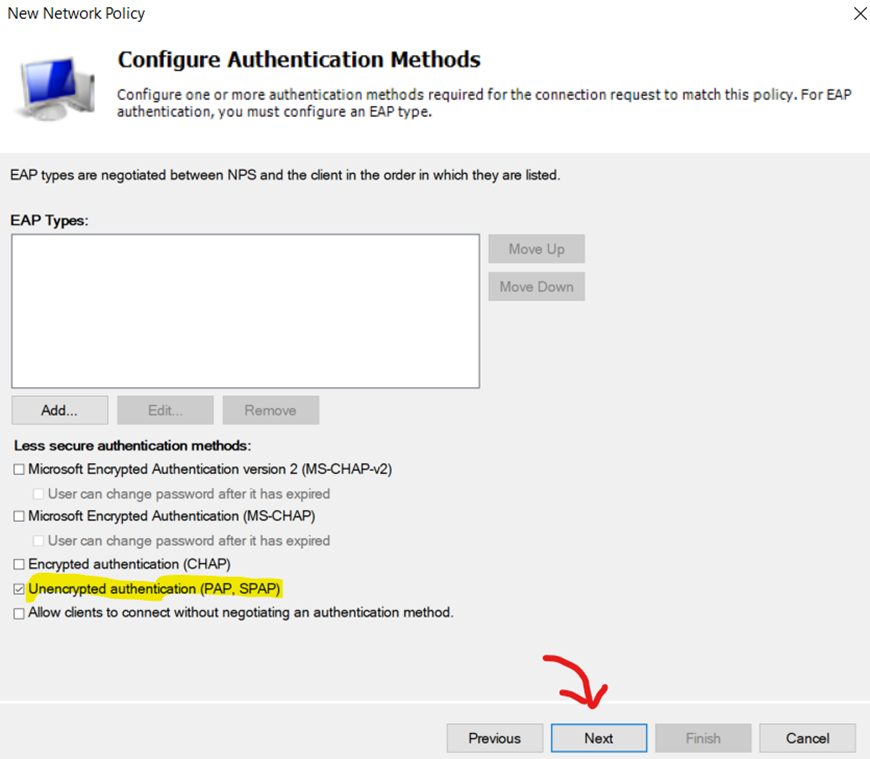
Enable 'Unencrypted Authentication (PAP, SPAP) as Authentication Methods for Network Policy
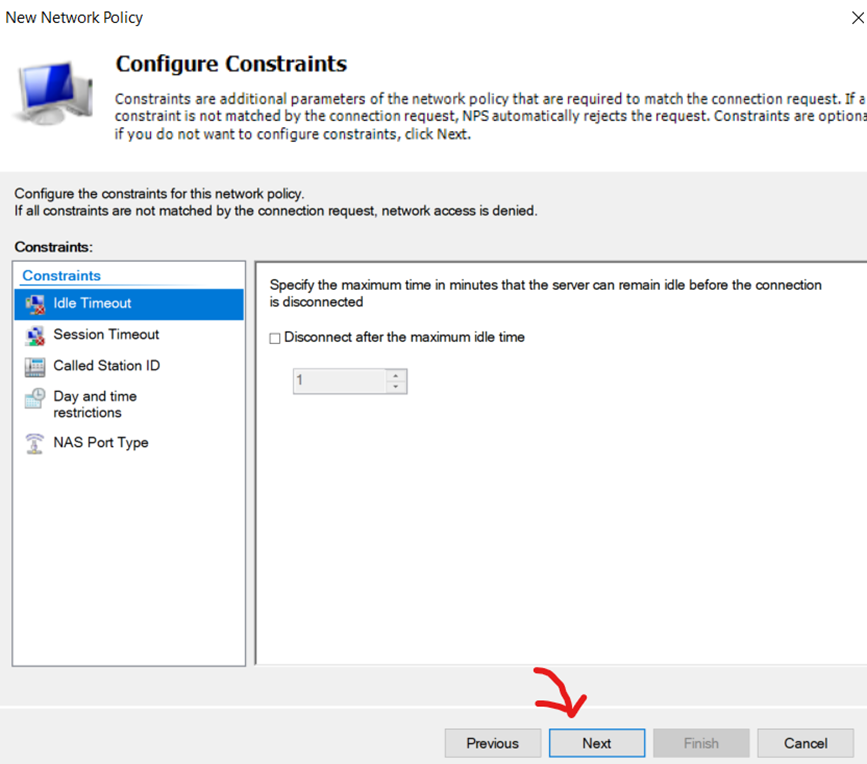
Leave 'Configure Constraints' at Default
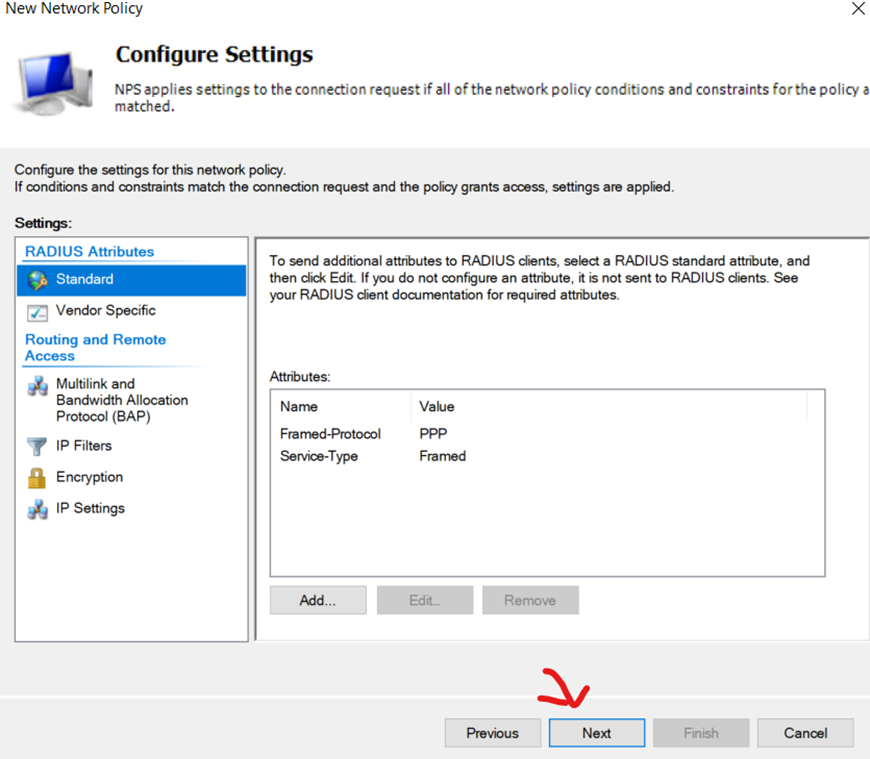
Leave 'Configure Settings' at Default
Finish the Network Policy

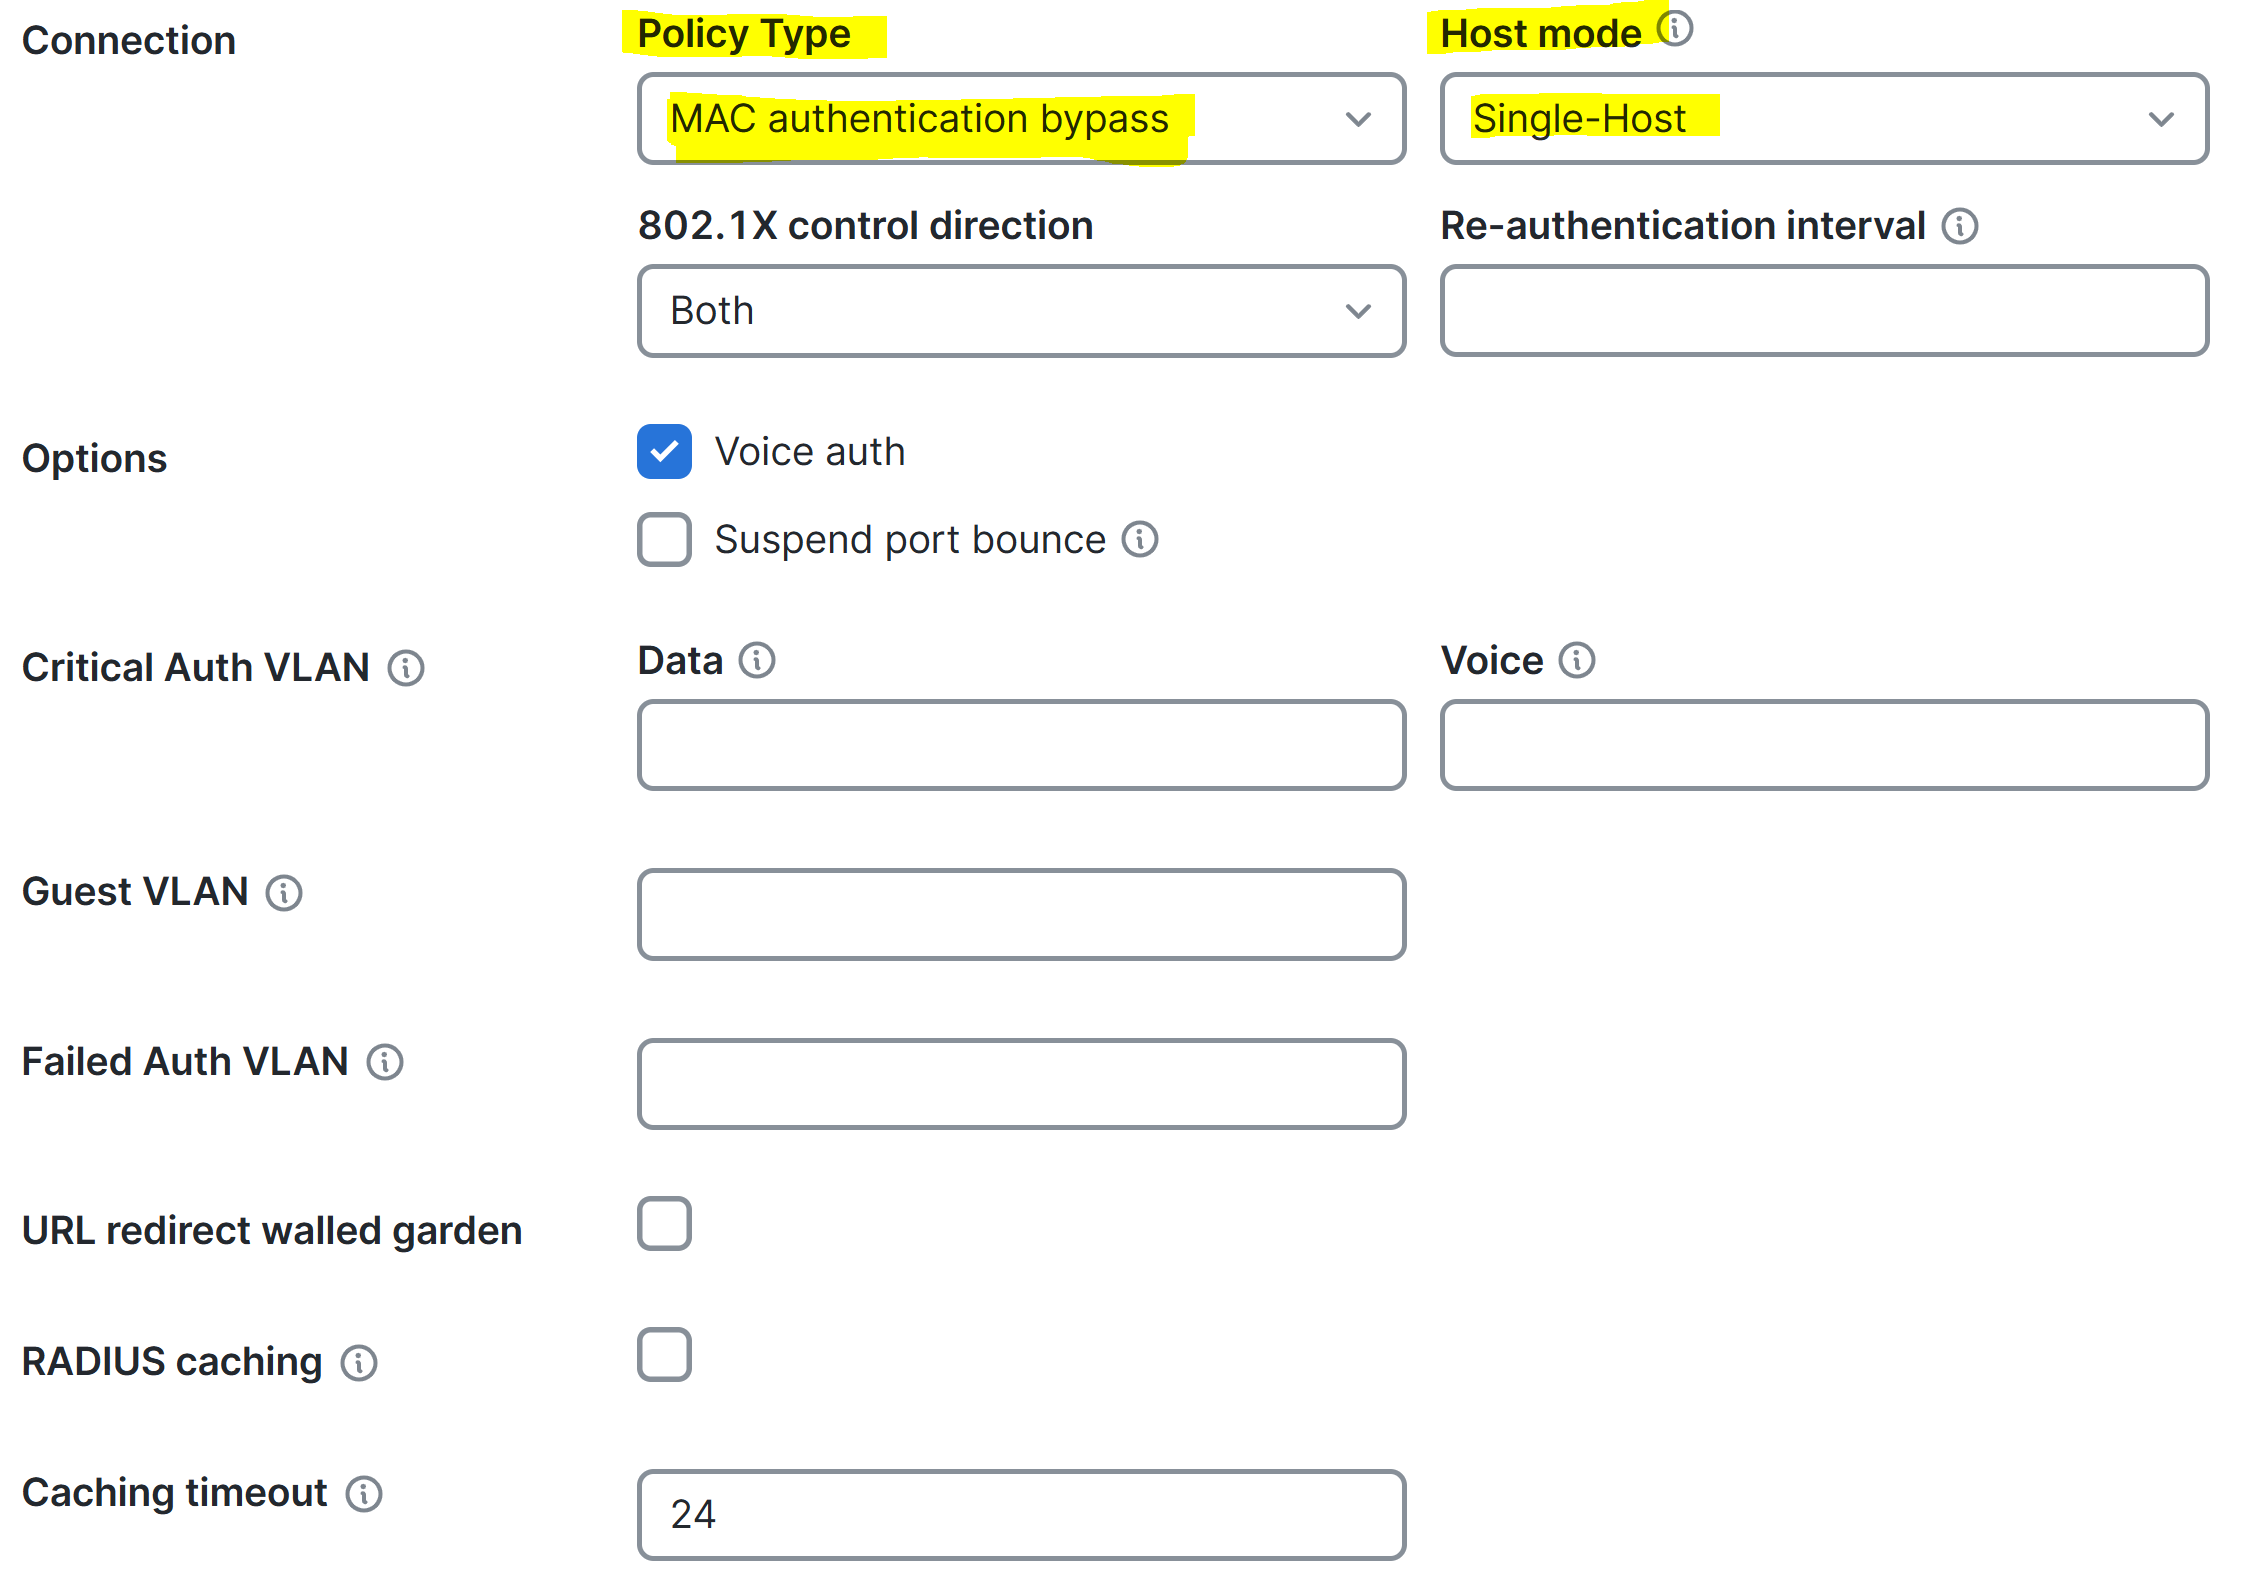
Overview of the Defined Meraki Access Policy
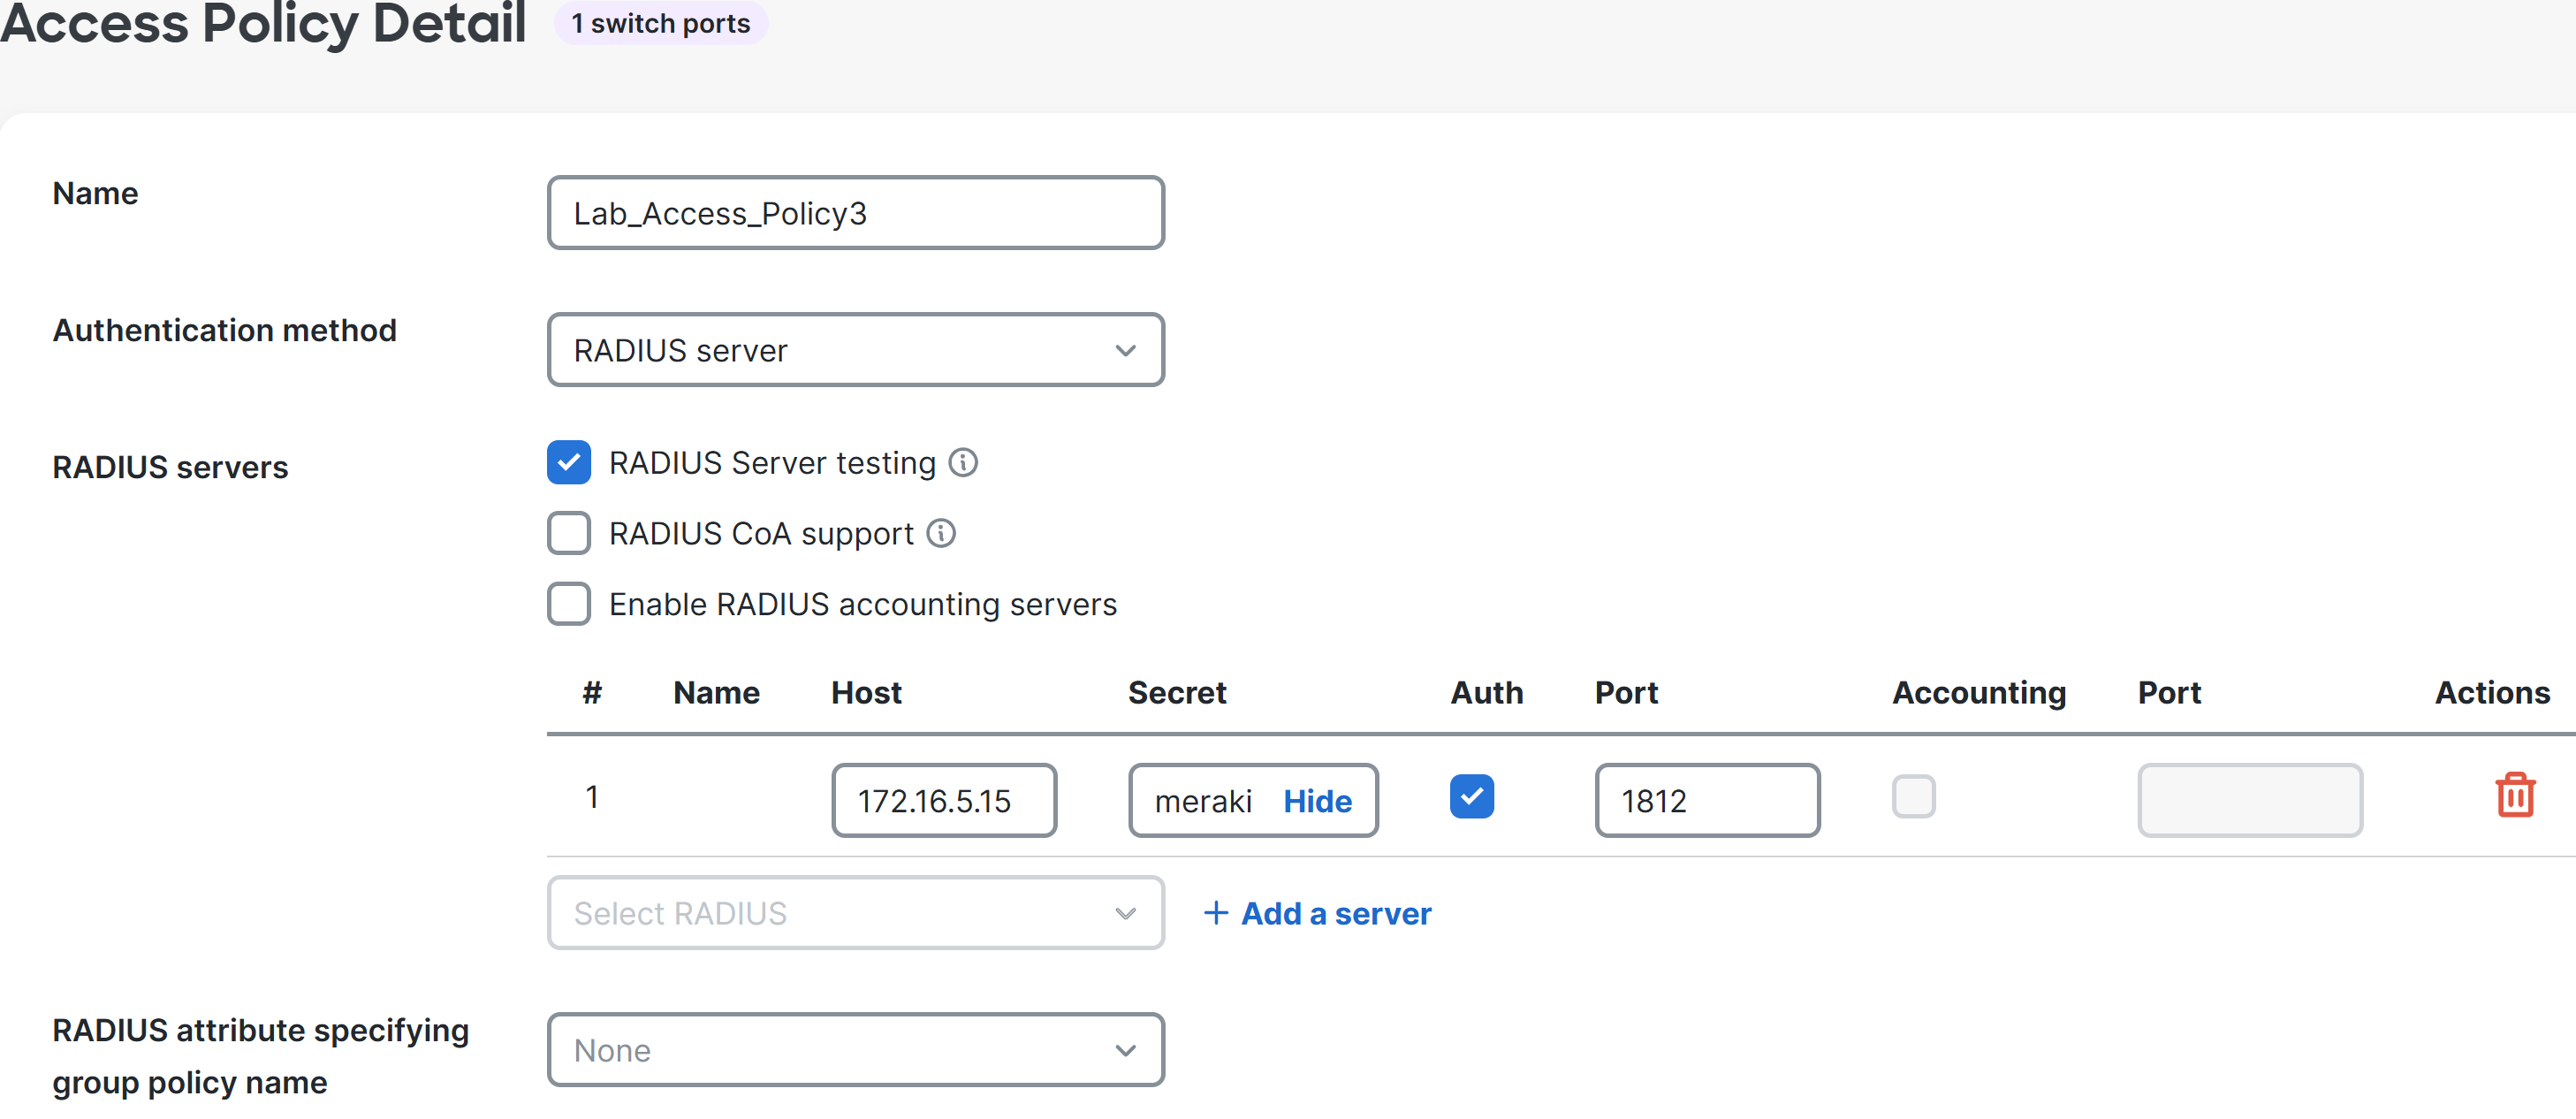
Overview of the Defined Meraki Access Policy
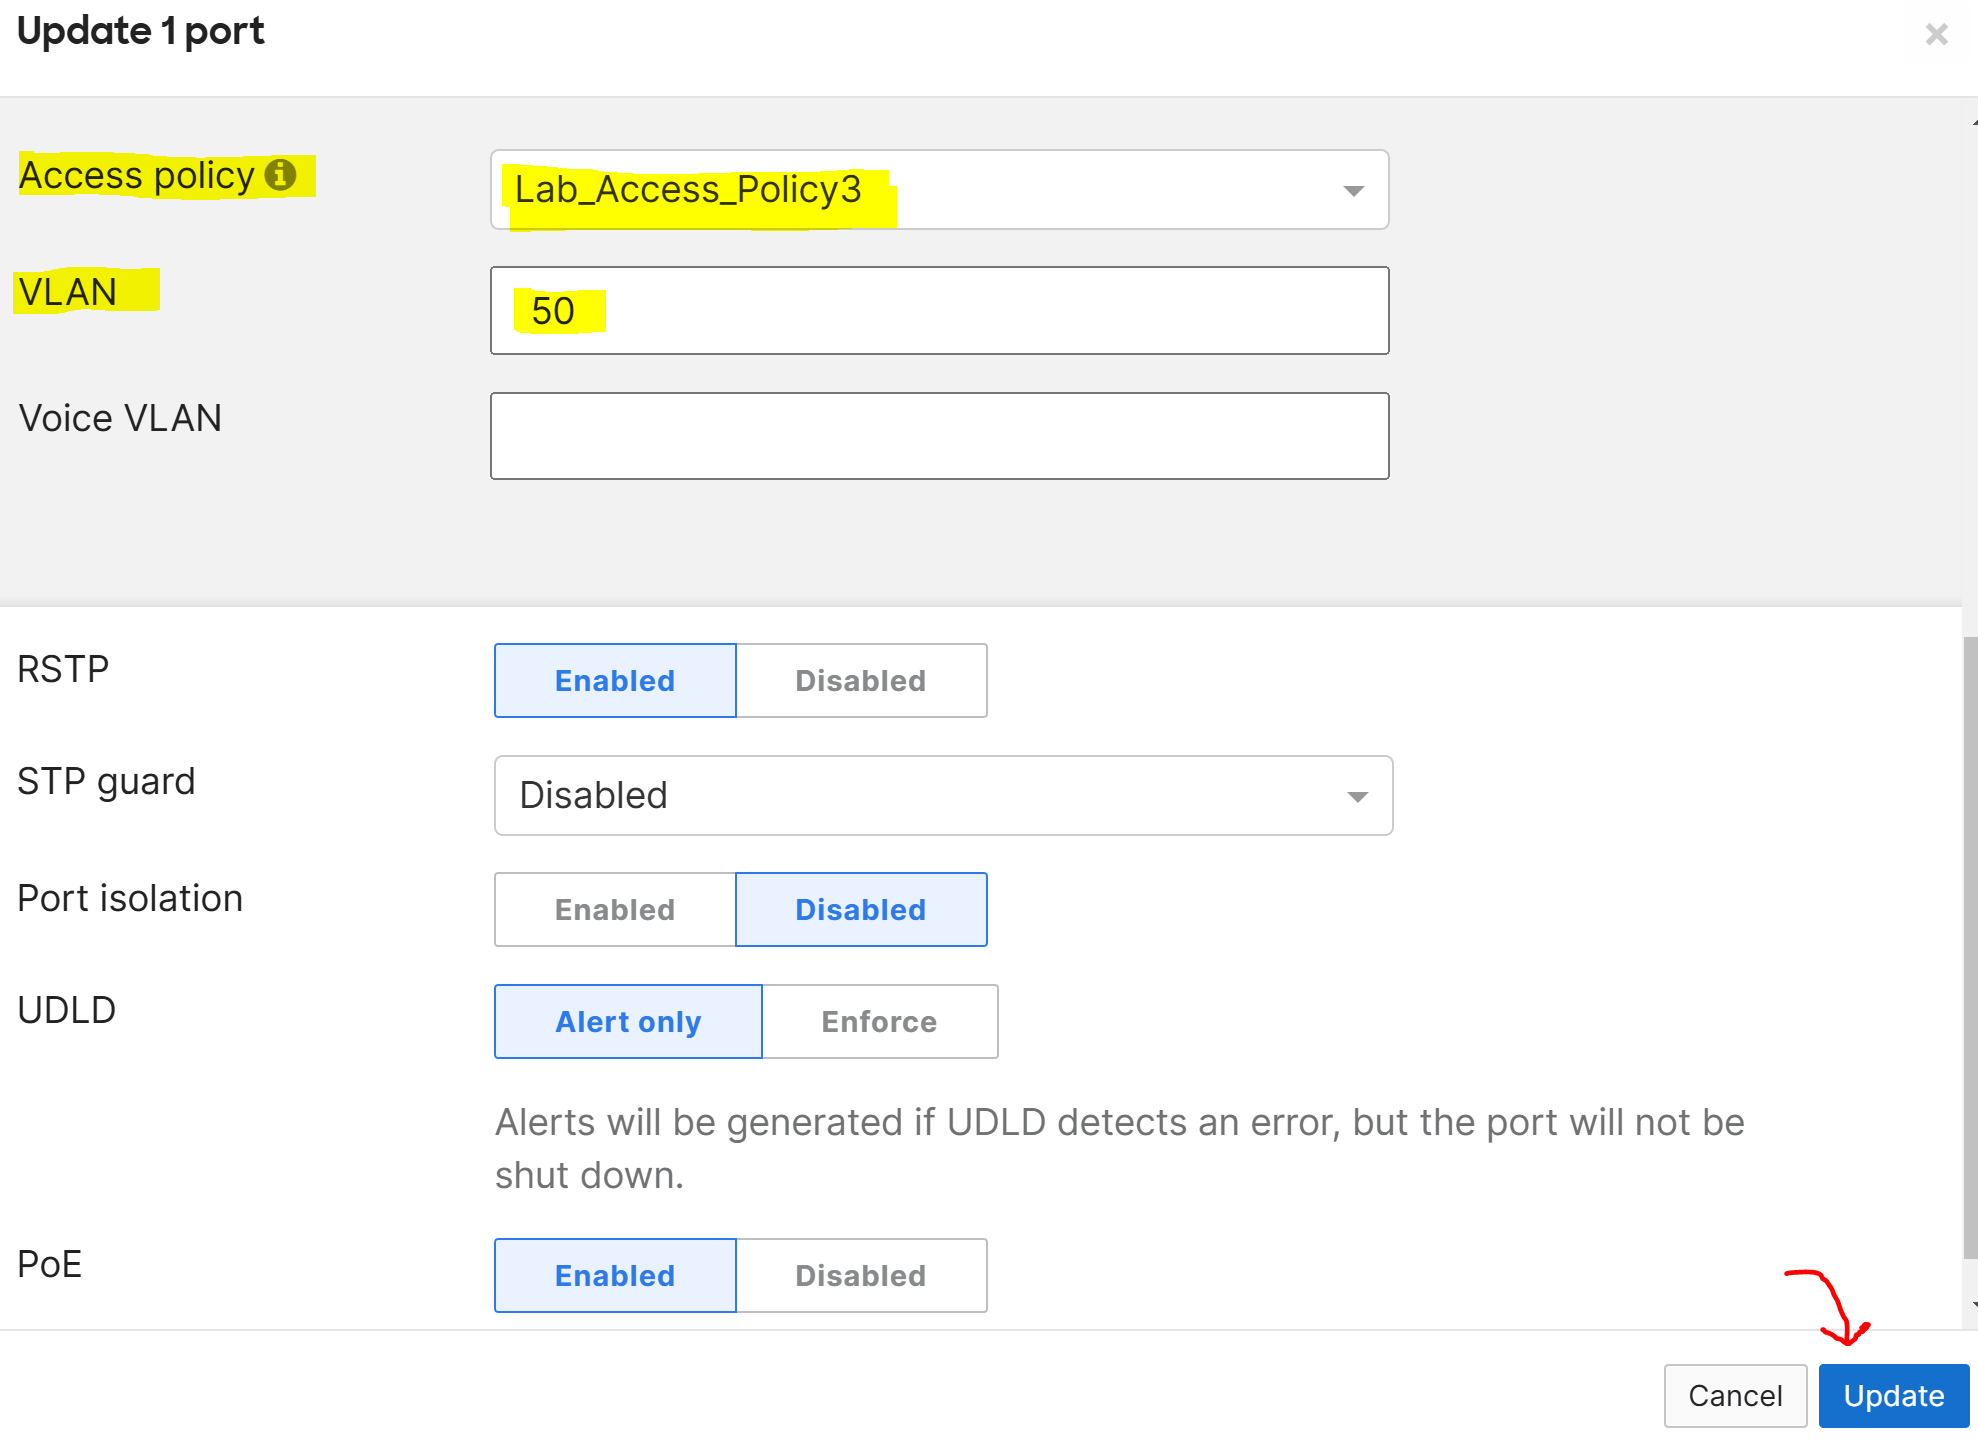
Associating the Meraki Access Policy to the Switchport with the Connected MAB Client
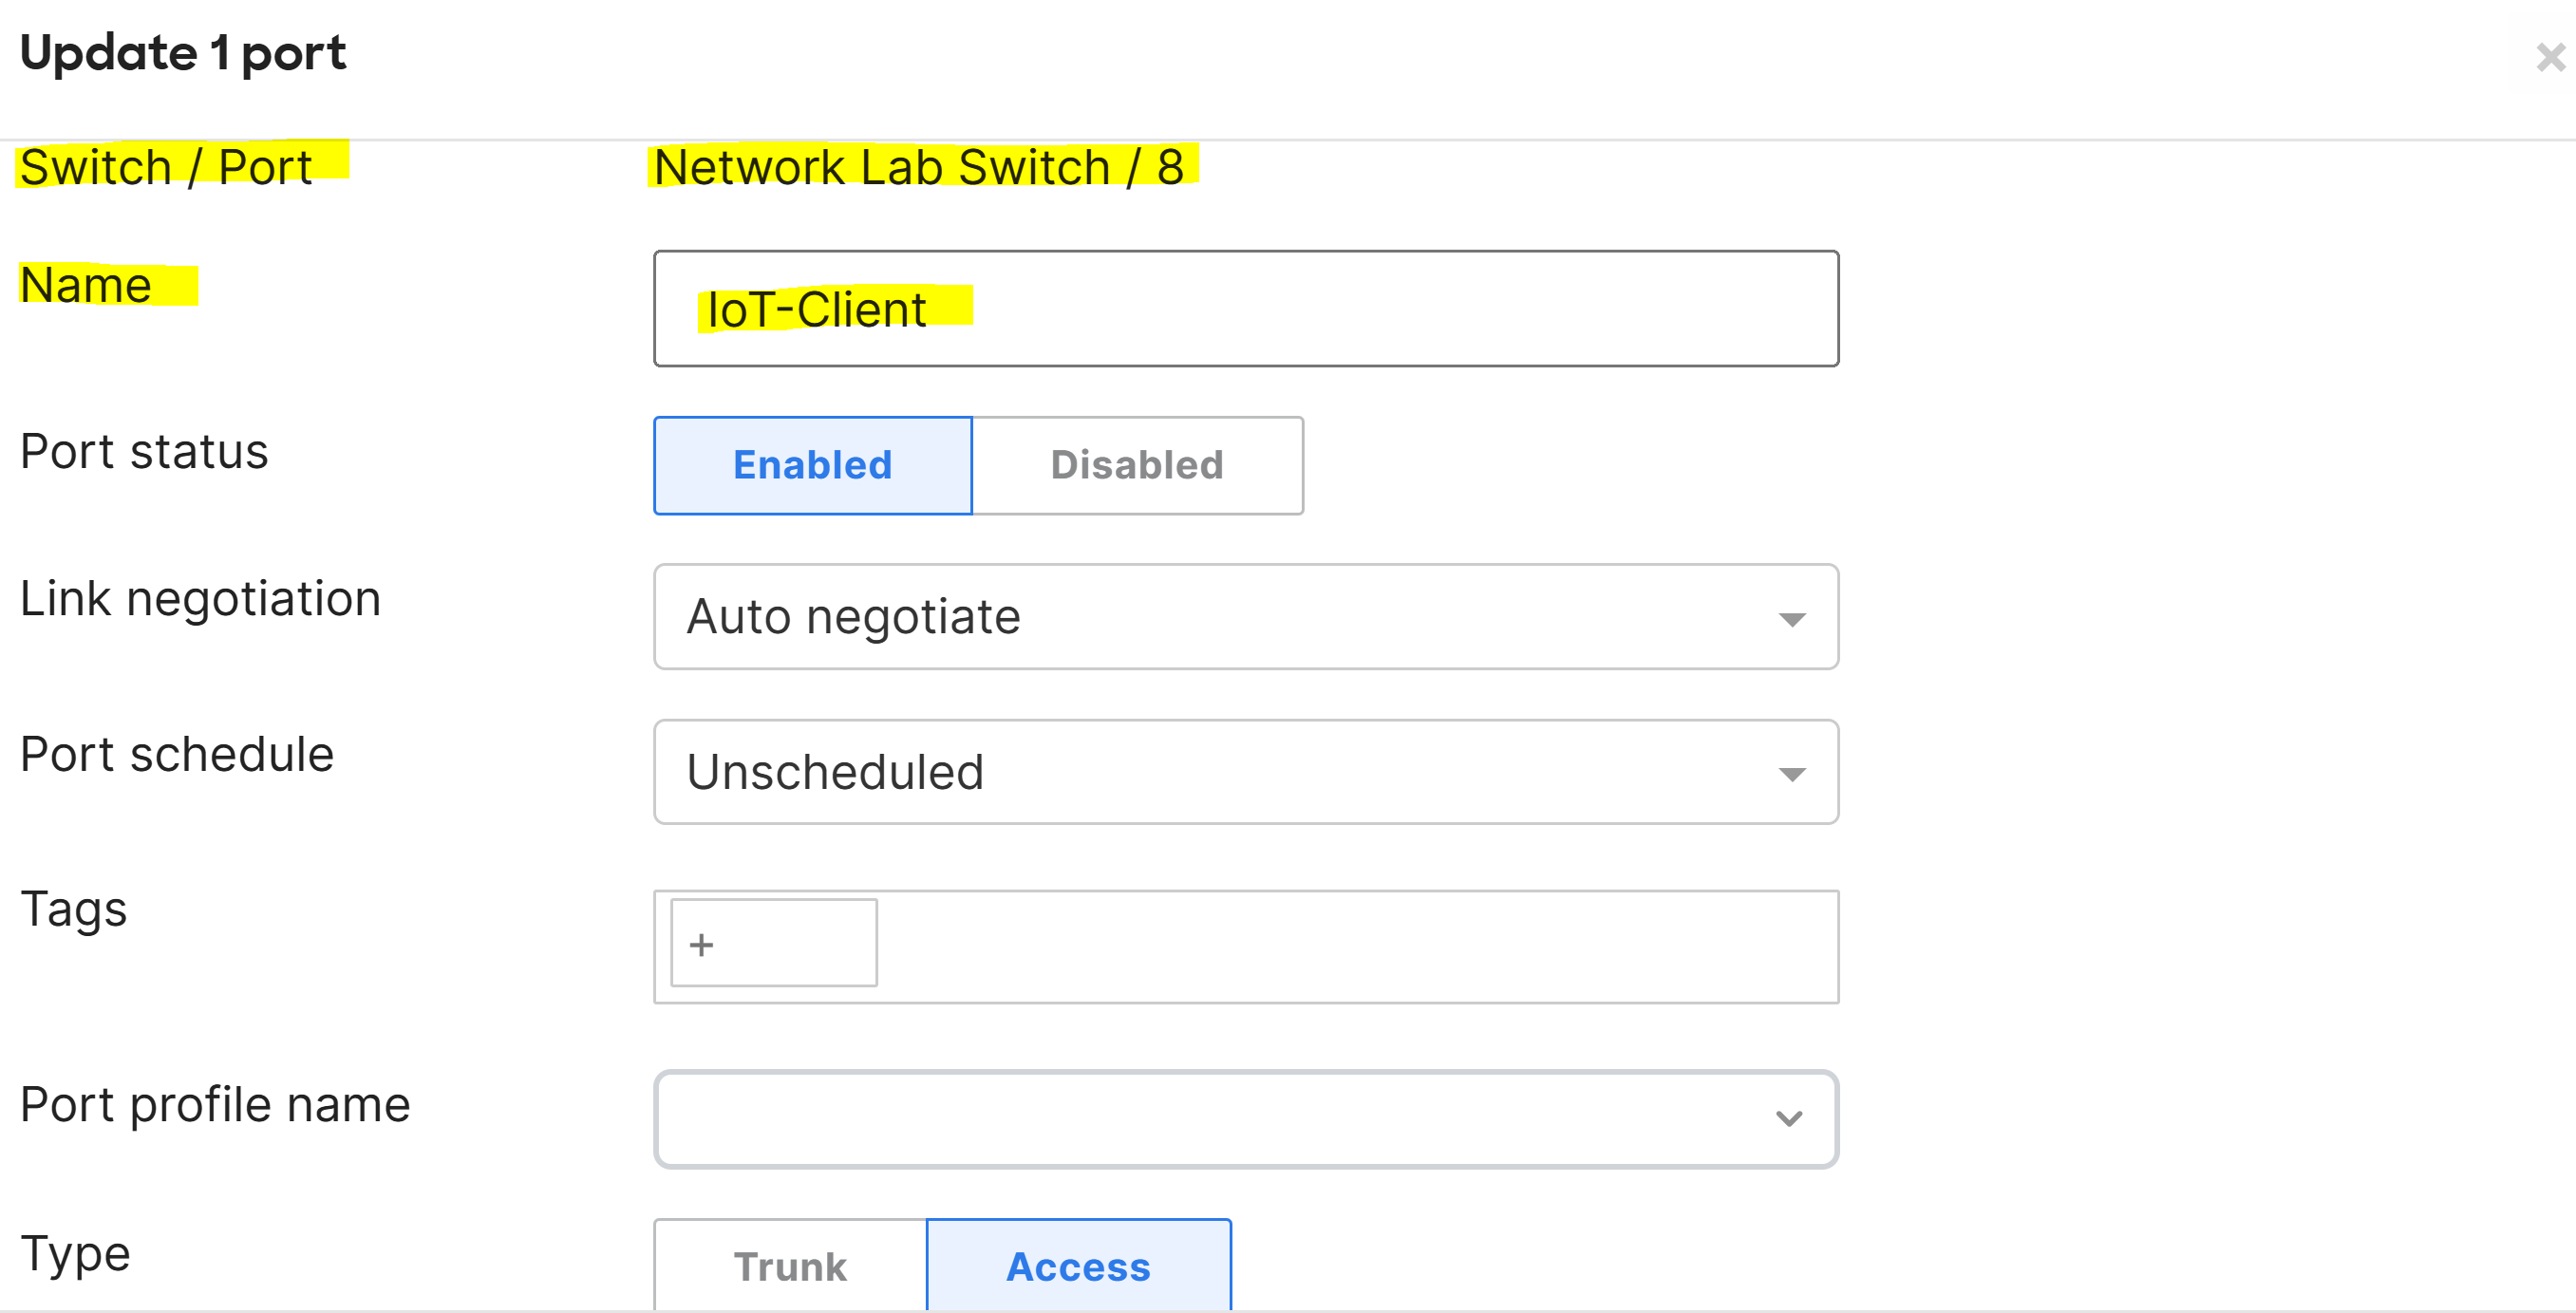
Associating the Meraki Access Policy to the Switchport with the Connected MAB Client
Verification of Successful MAB Authentication via Meraki Event Log
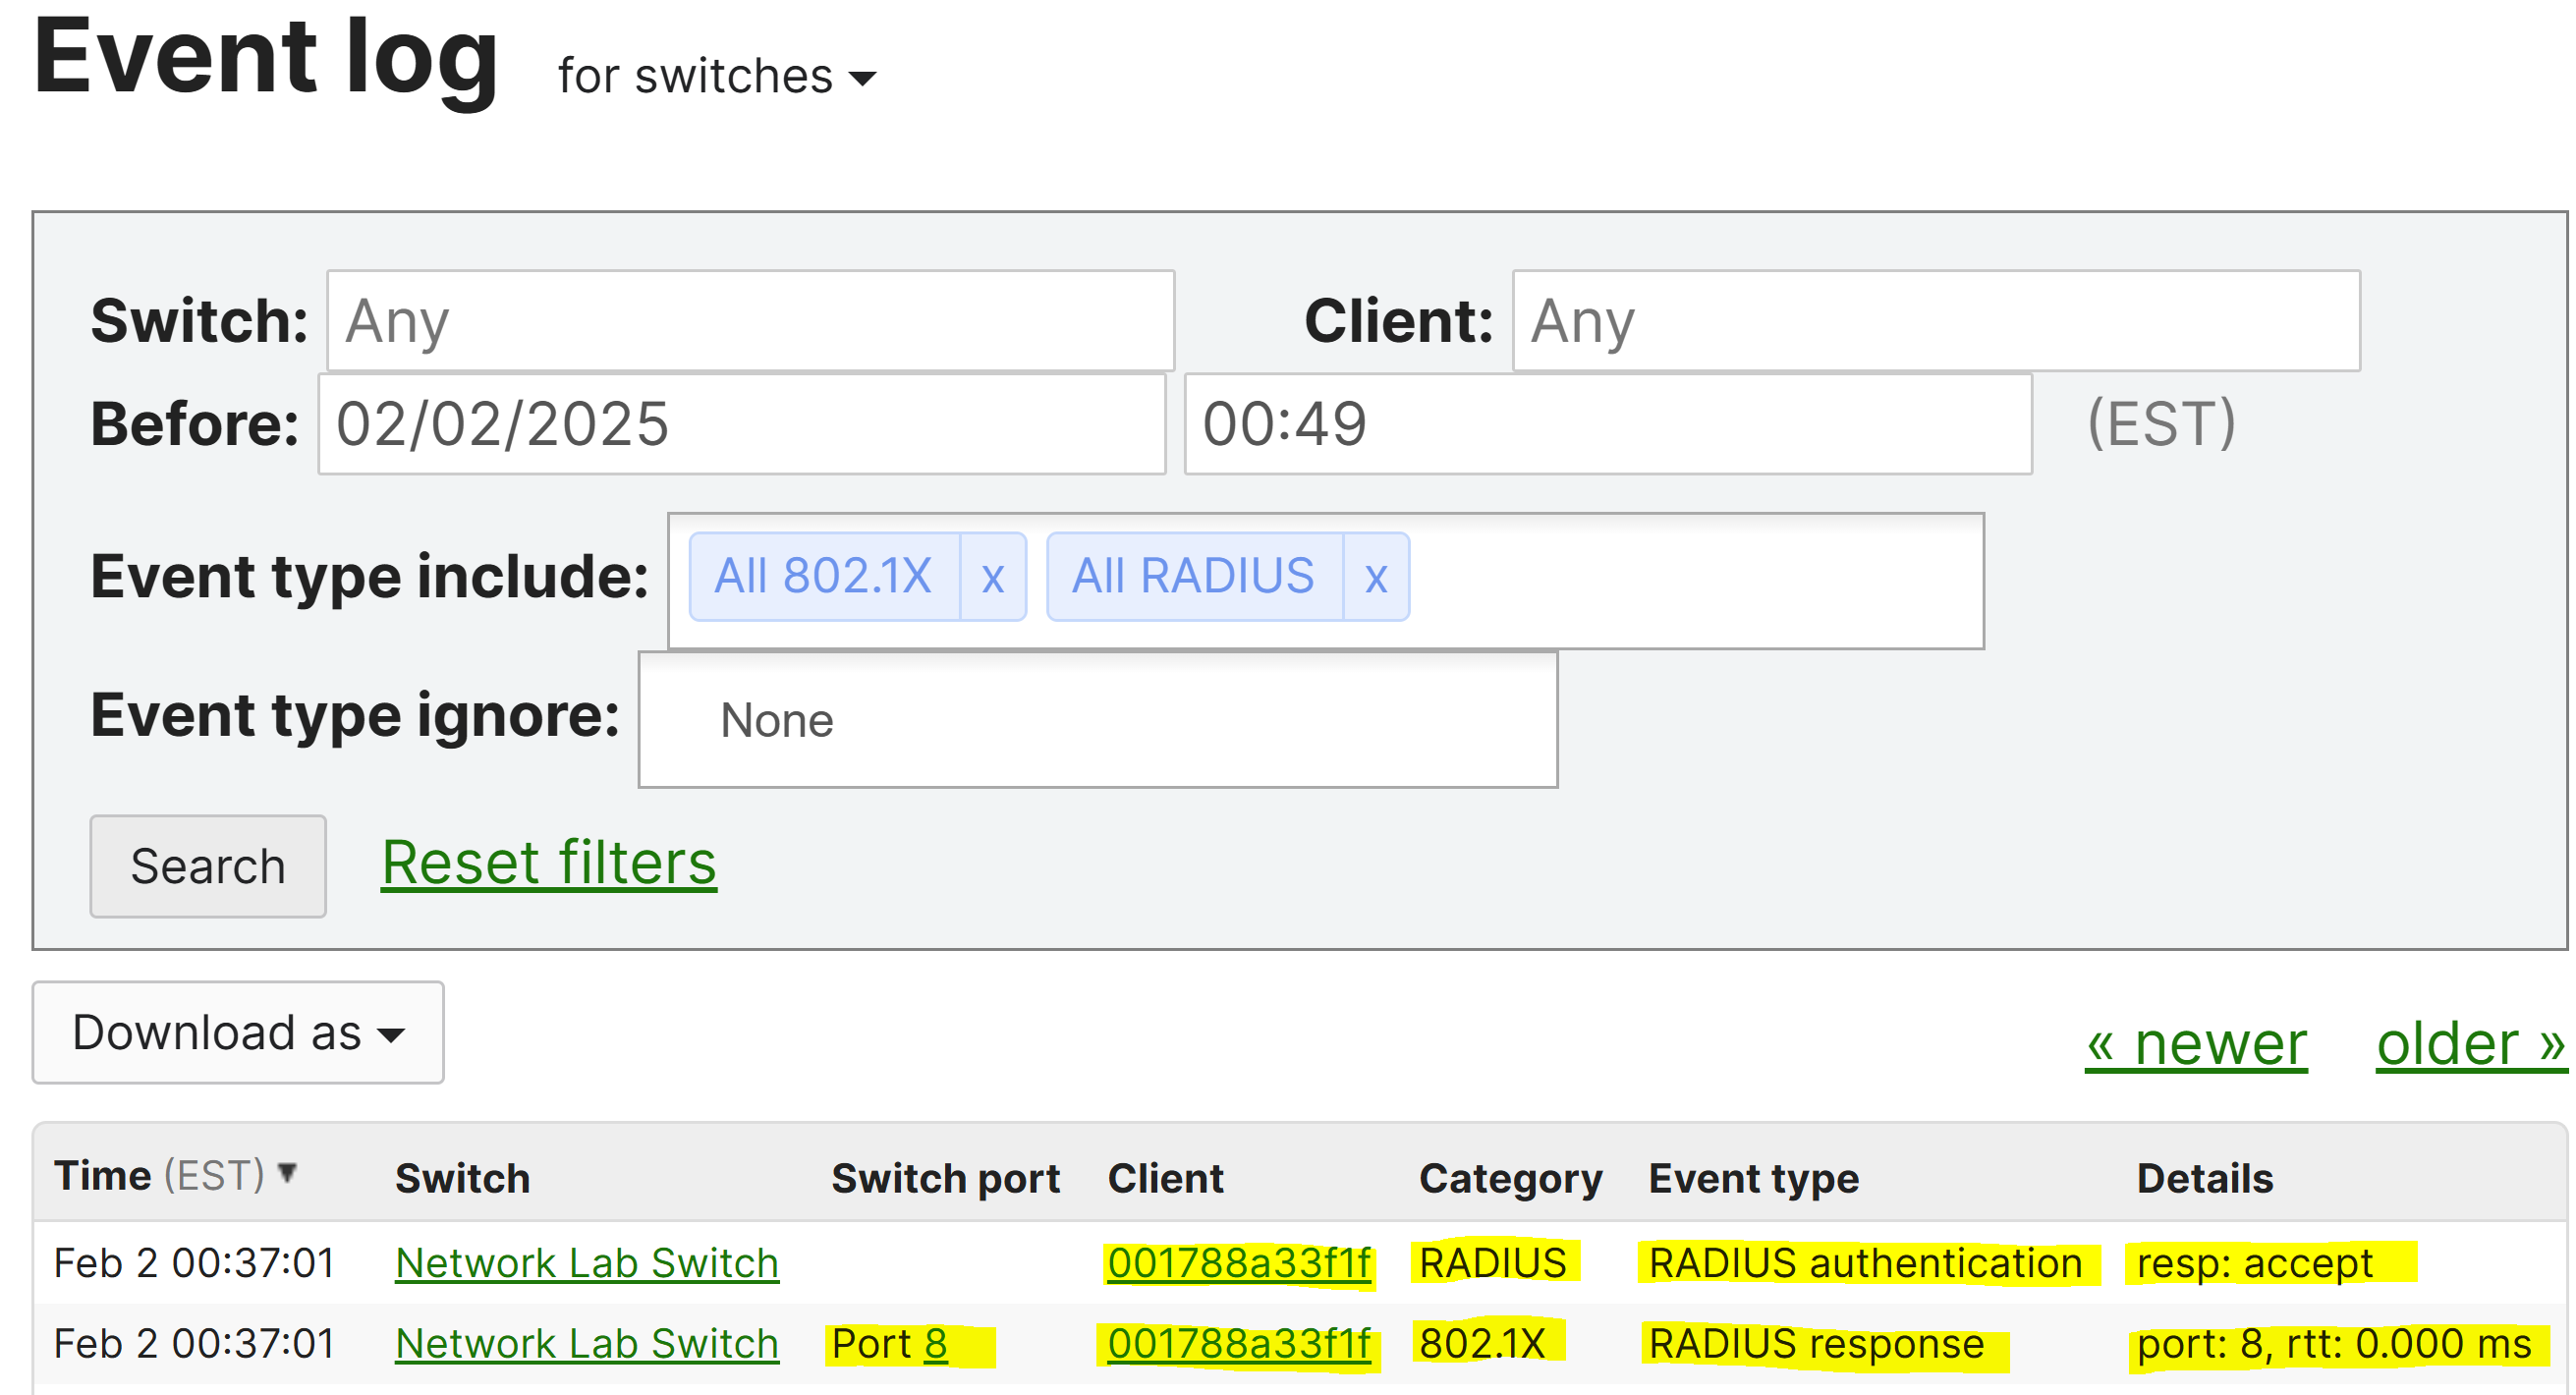
Verification of Successful MAB Authentication
Verification of Successful MAB Authentication
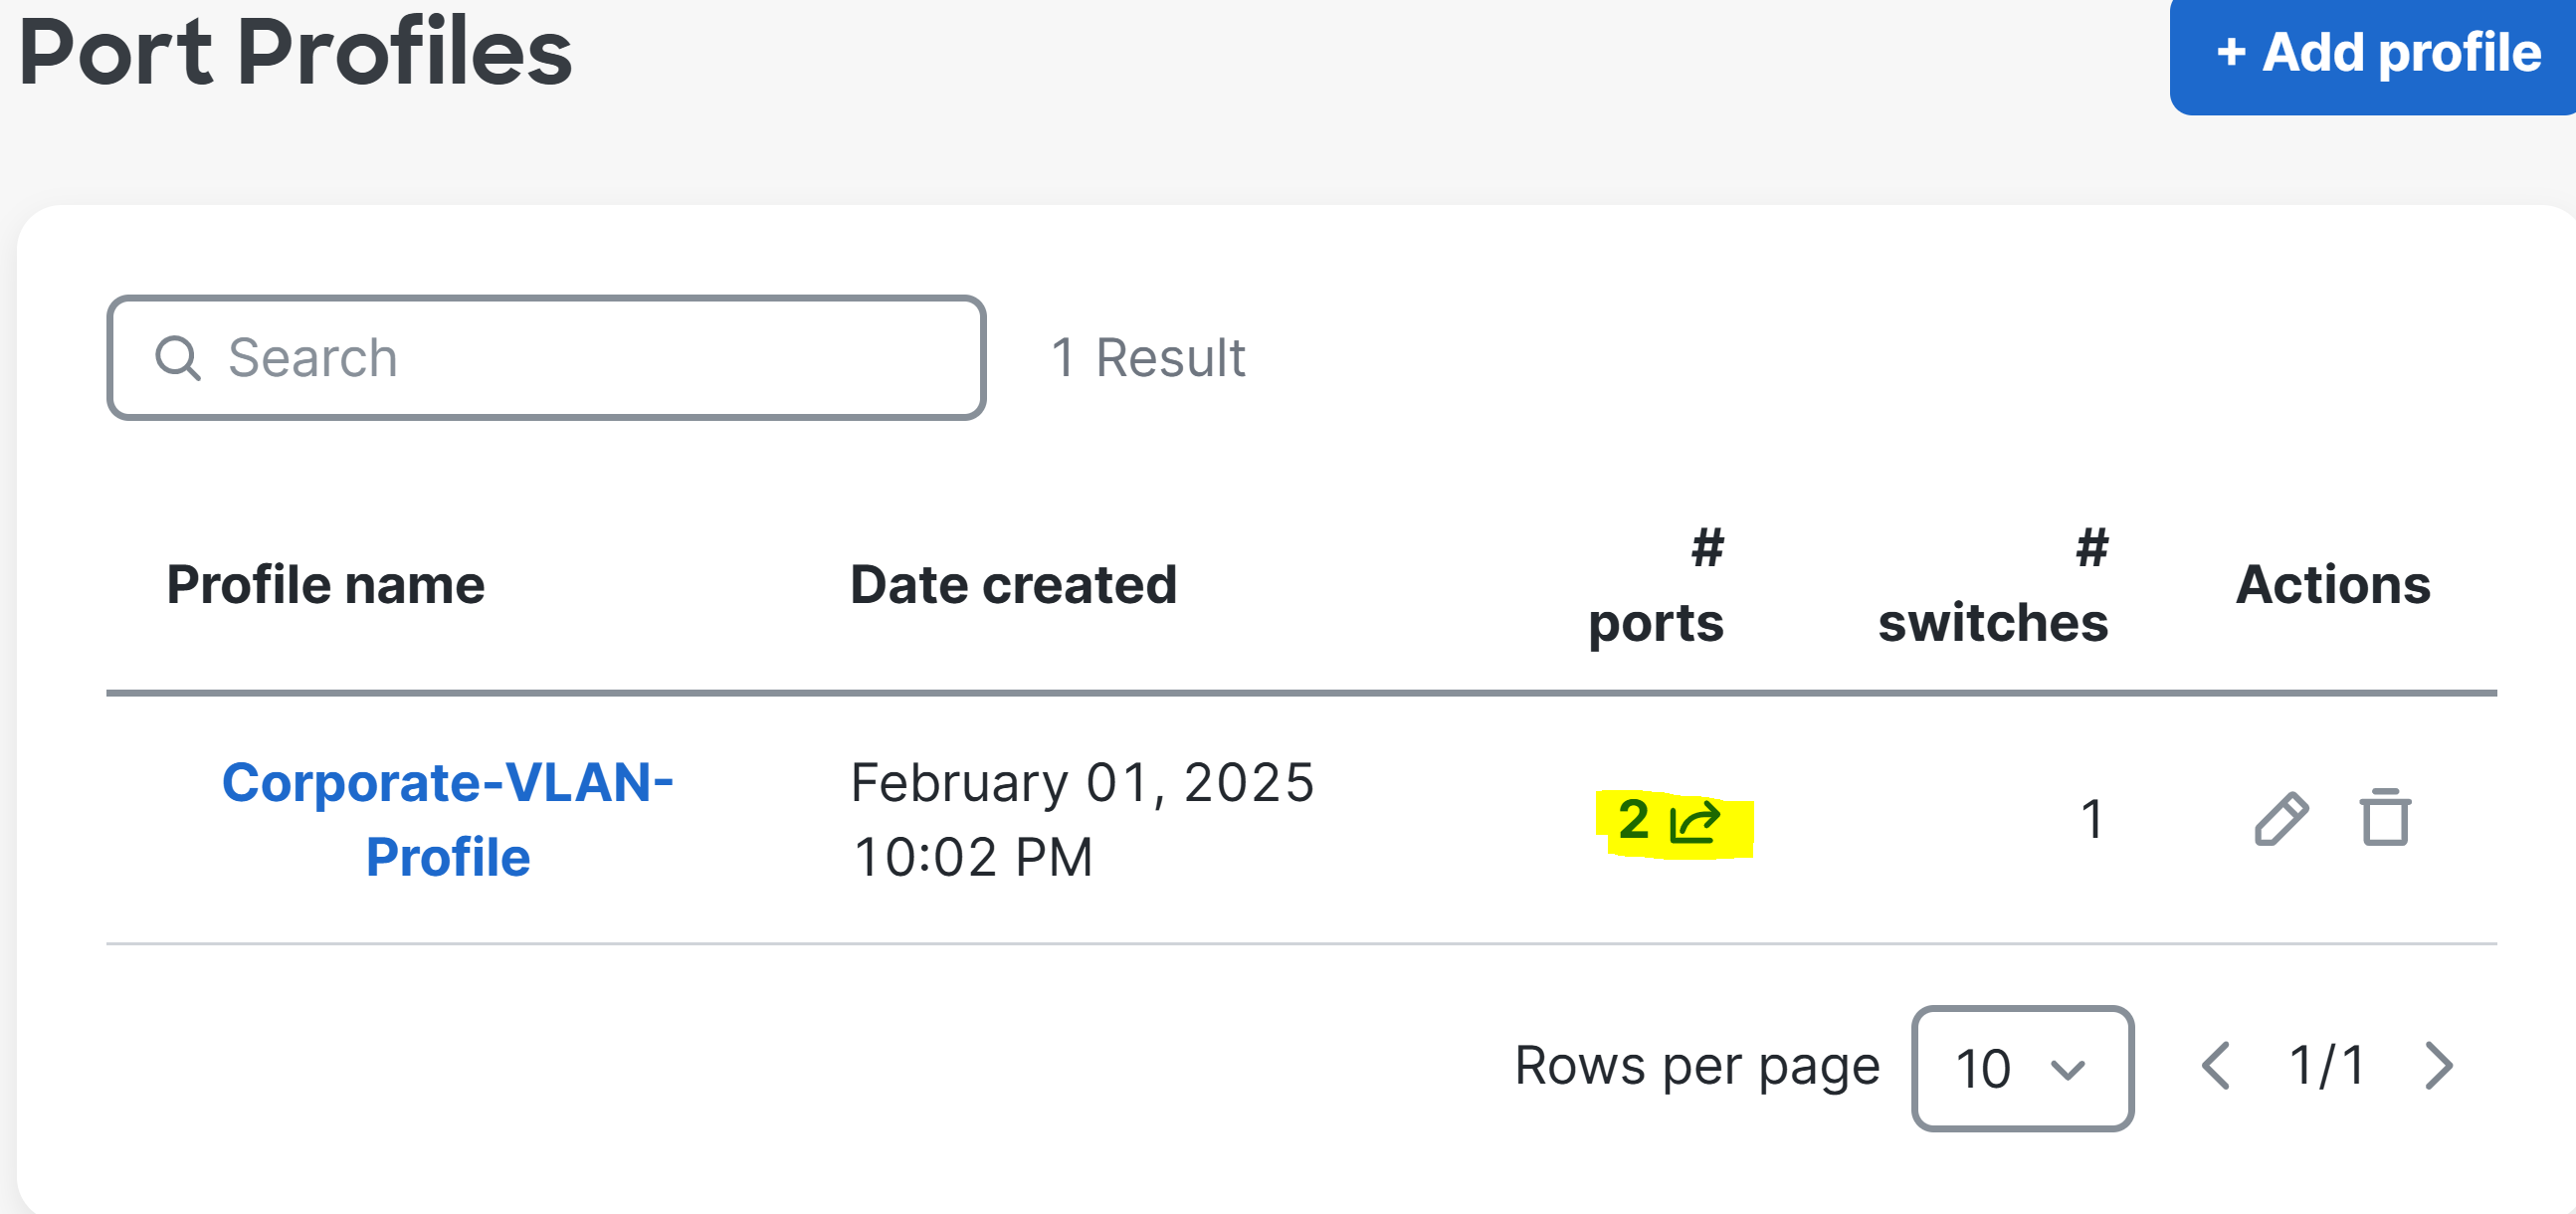
Port Profiles
Overview:
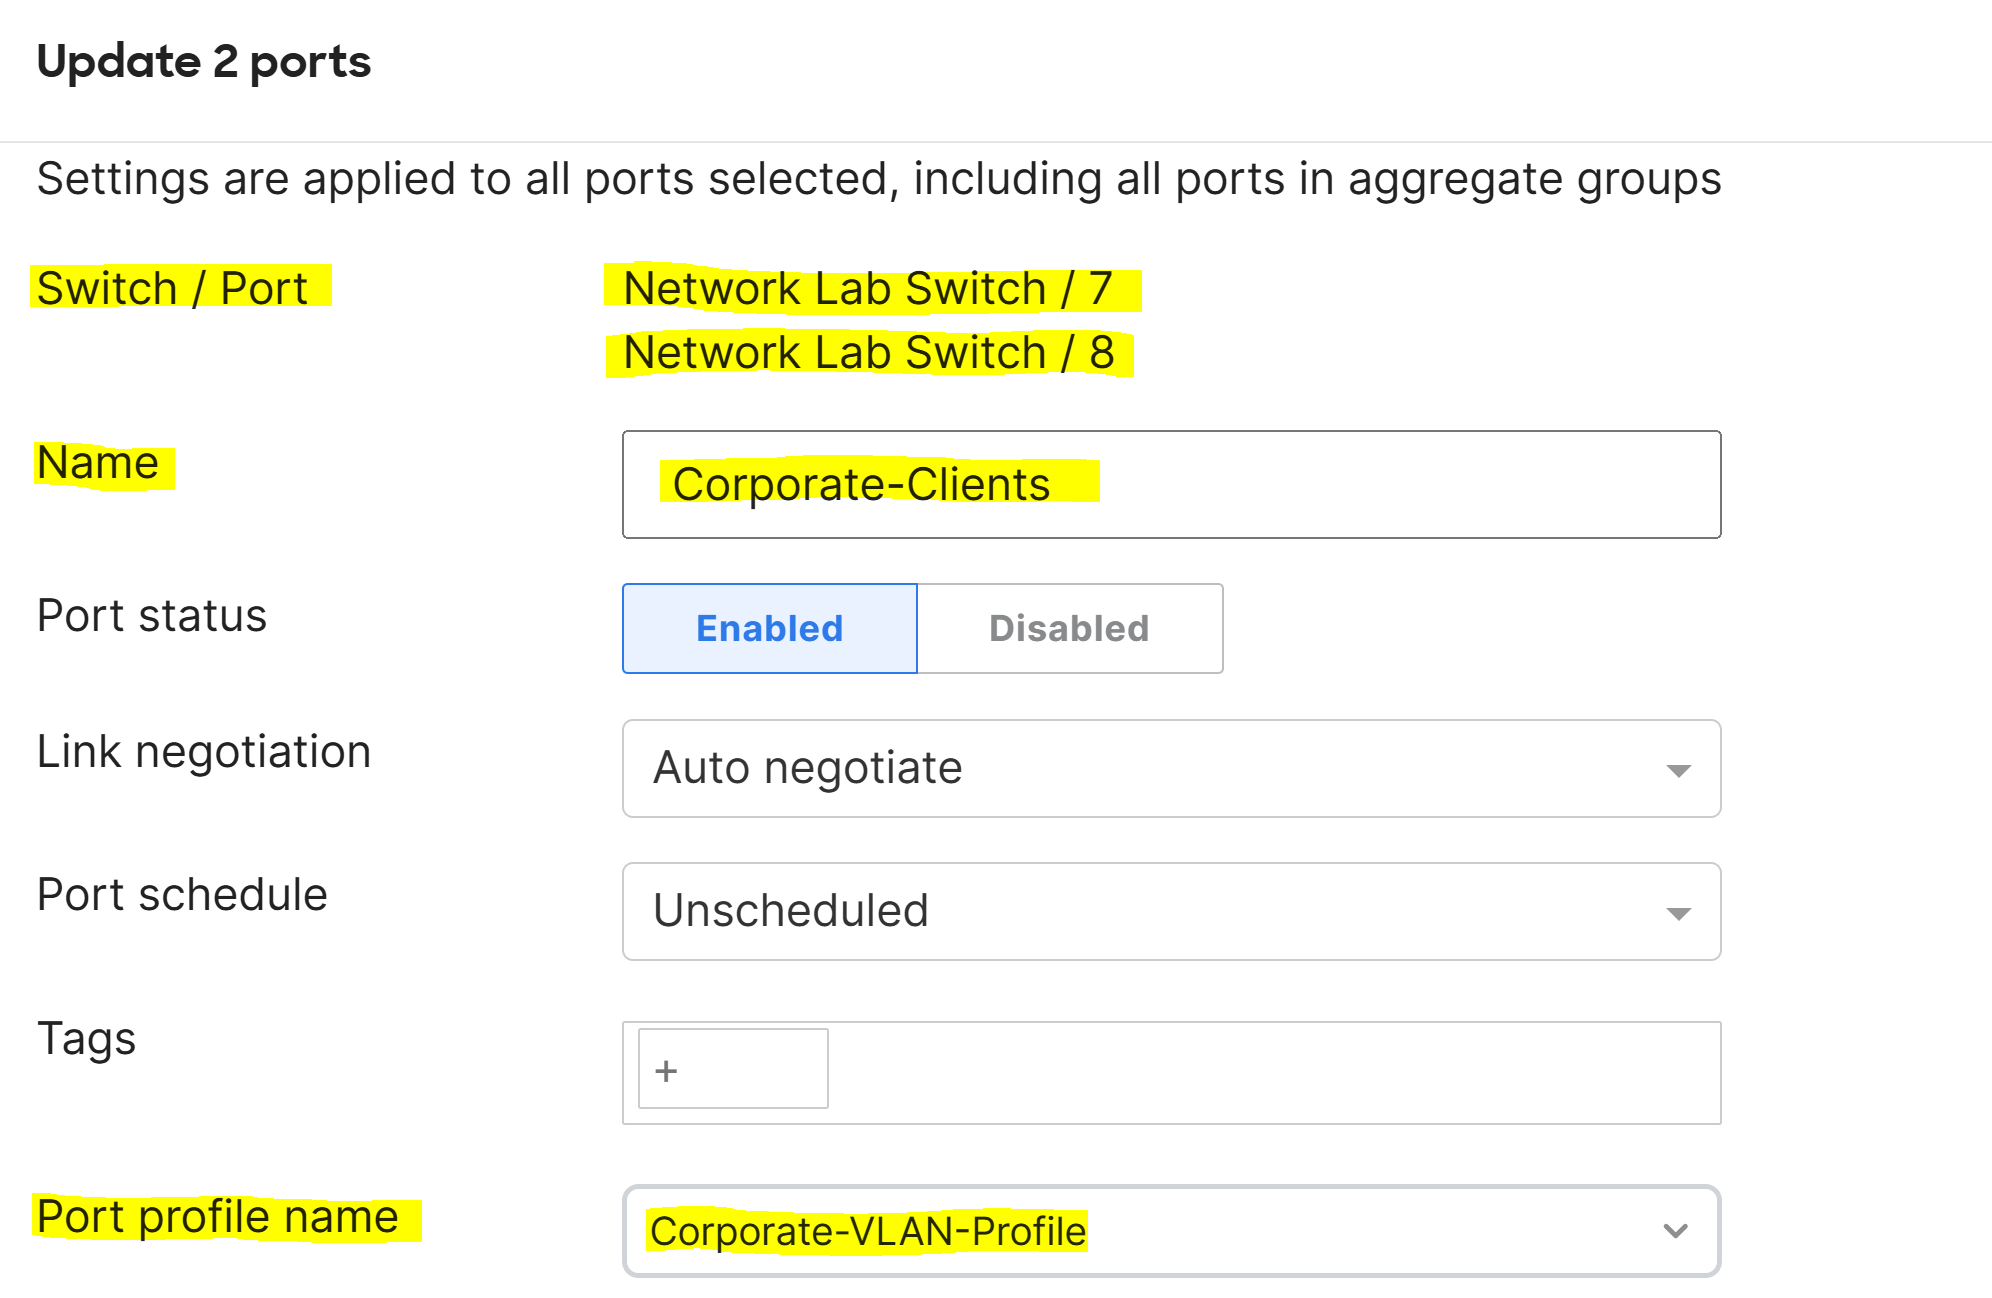
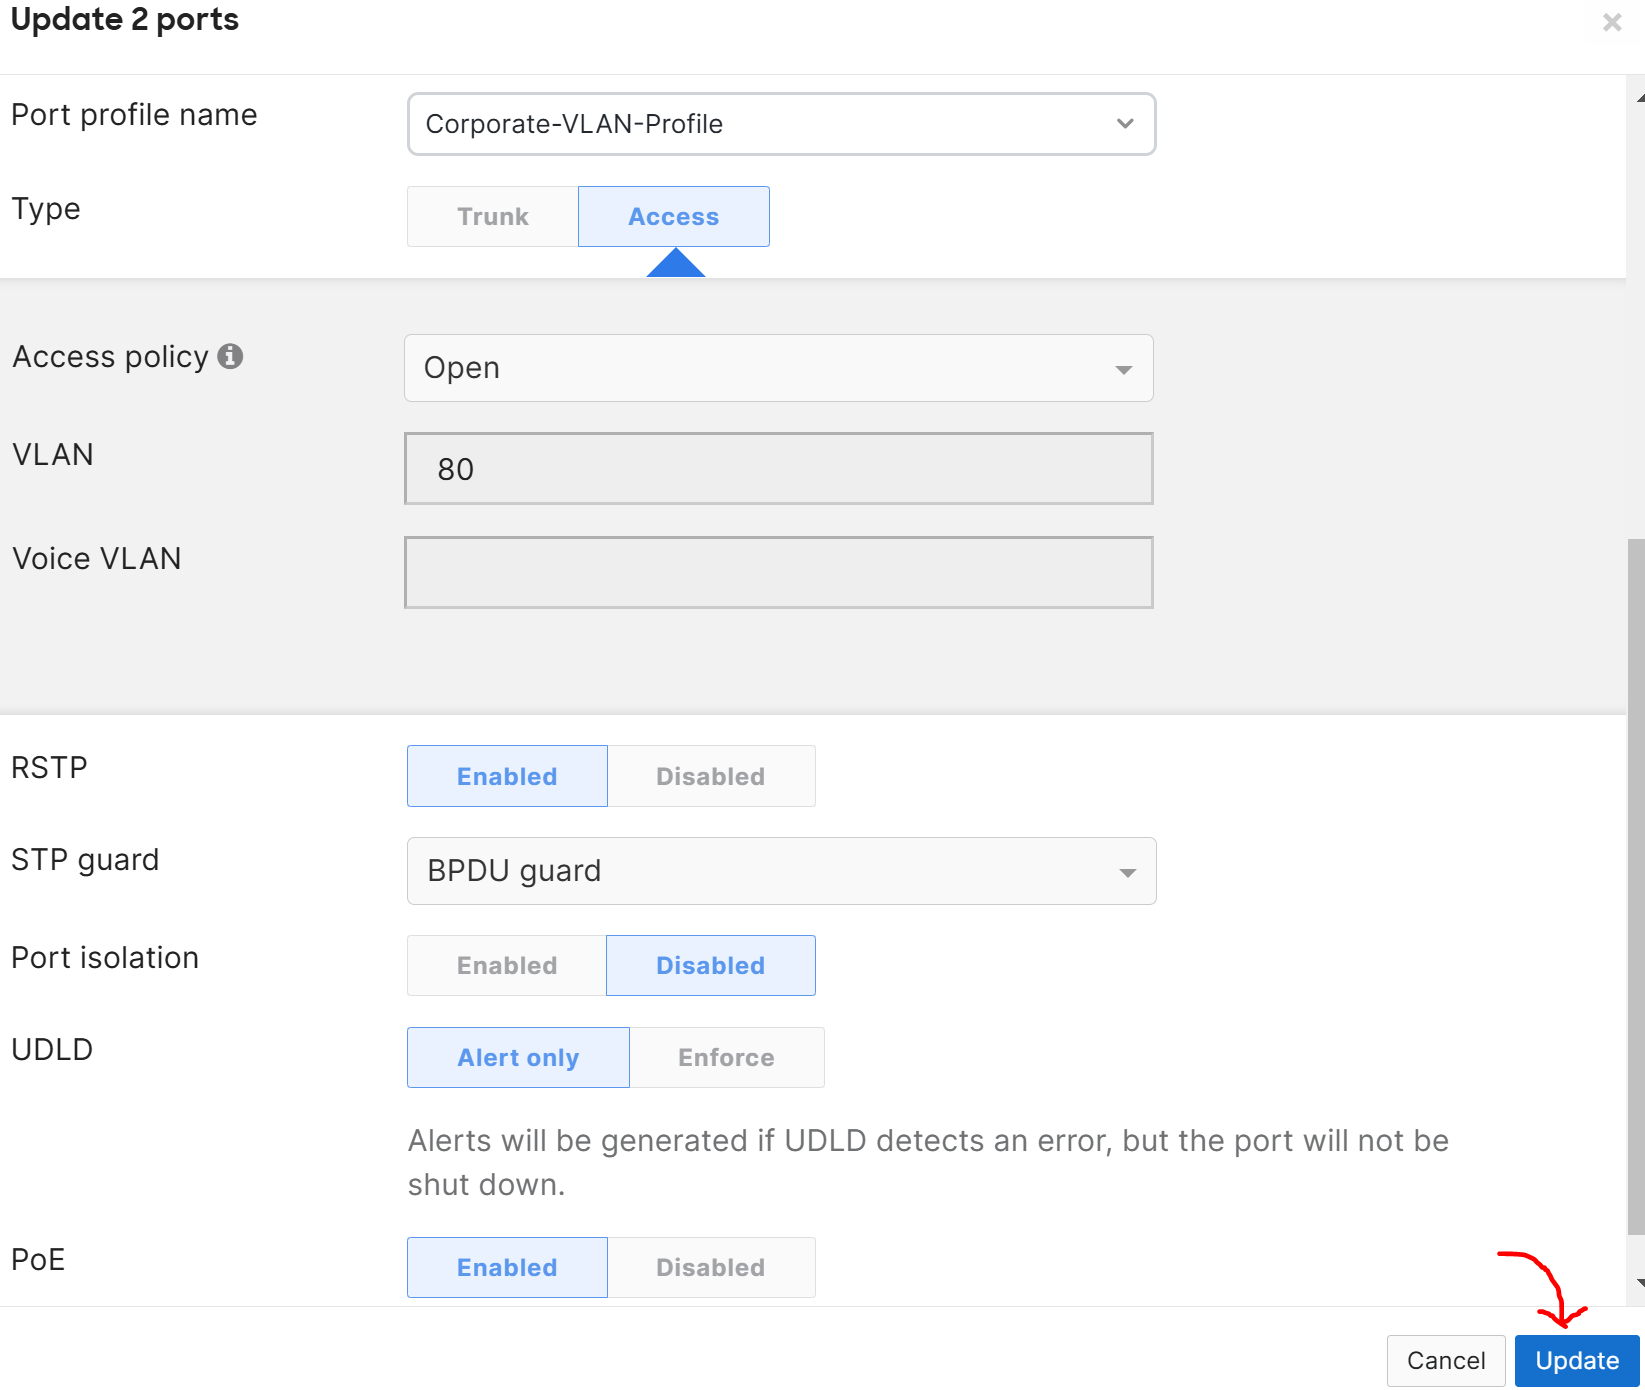
- Port Profiles are pre-configured profiles that help streamline the configuration of switch ports for common device types or network roles
- This feature is useful to solve the problem of repetitive and error prone port configurations by creating a set of port attributes to a profile once
- A port profile can contain a combination of configuration settings that apply to a switch port to inherit its settings
Port Profiles Menu
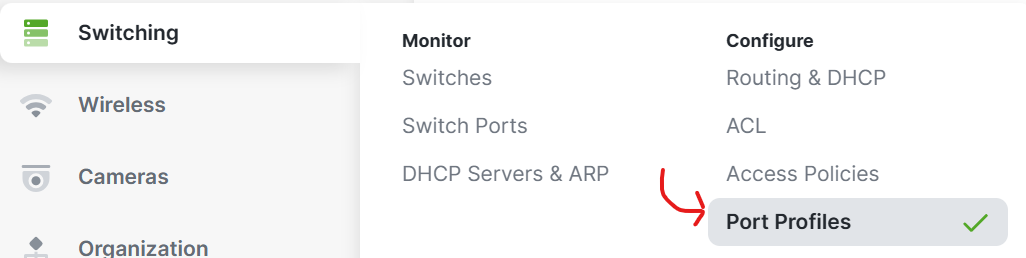
Port Profiles Menu Overview

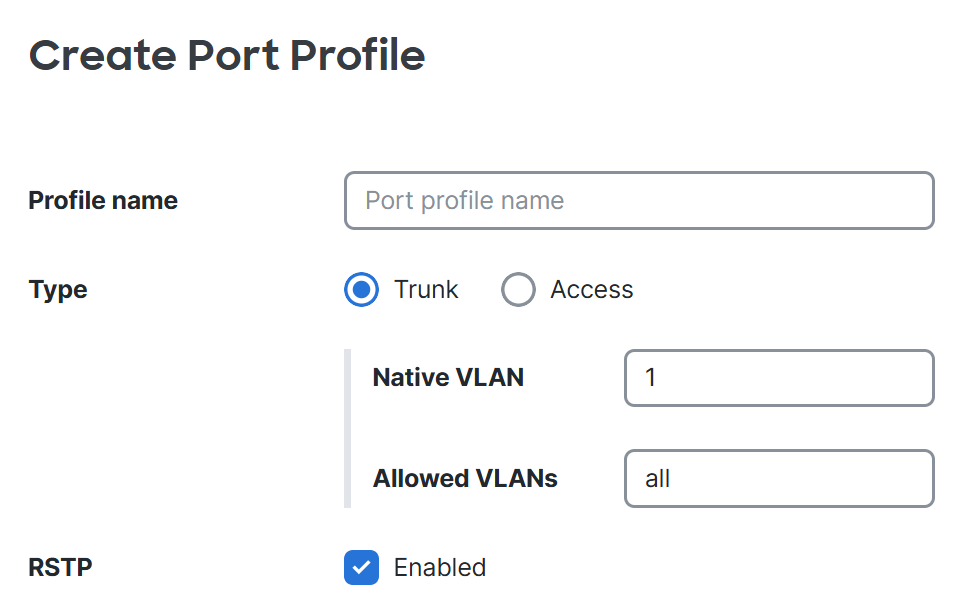

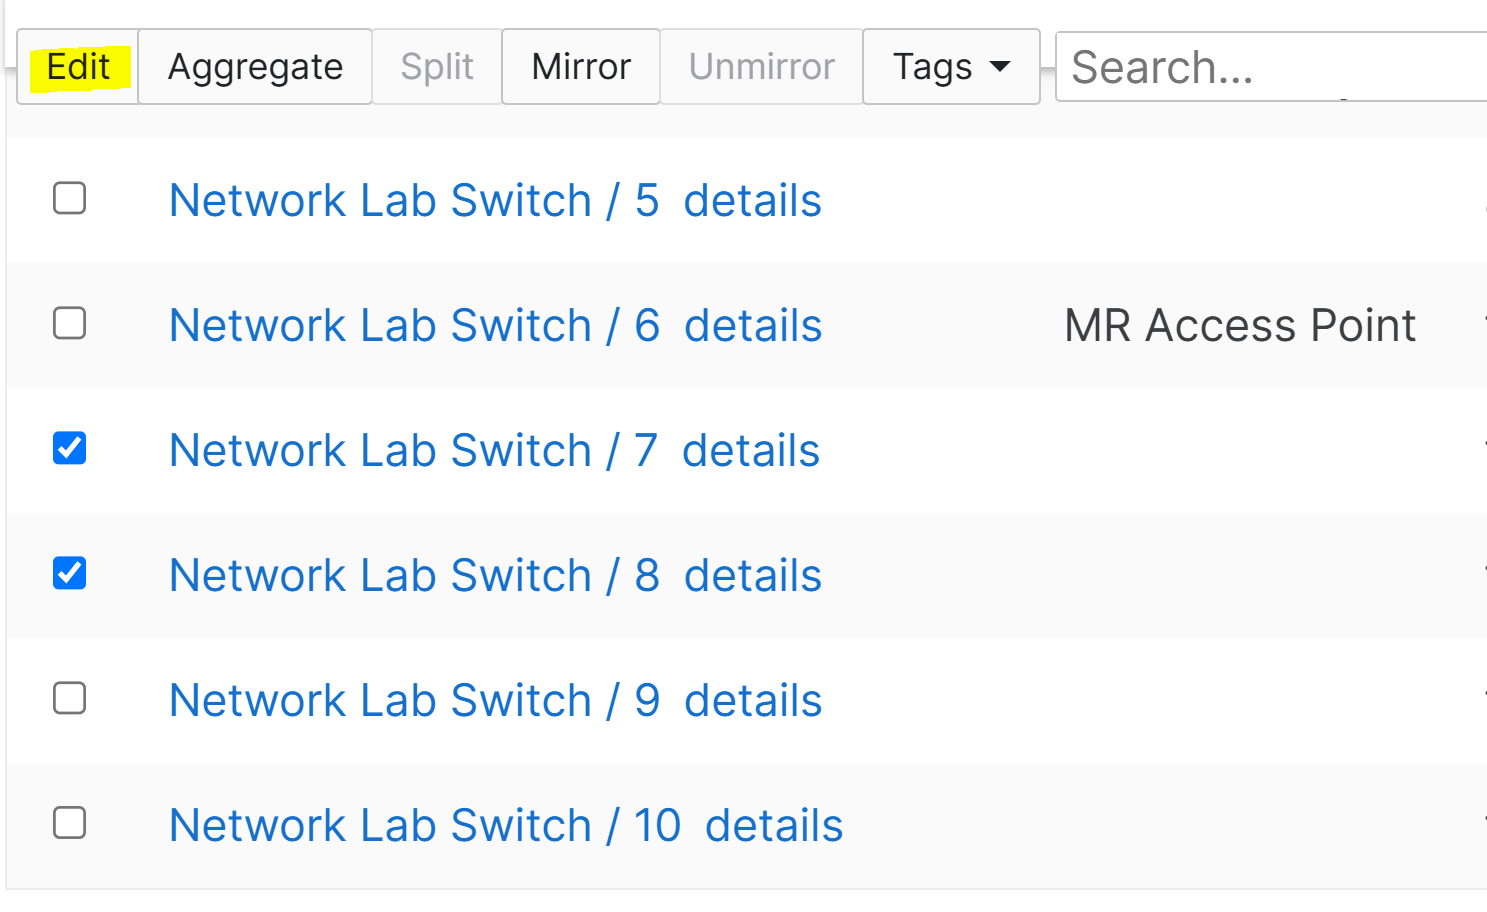
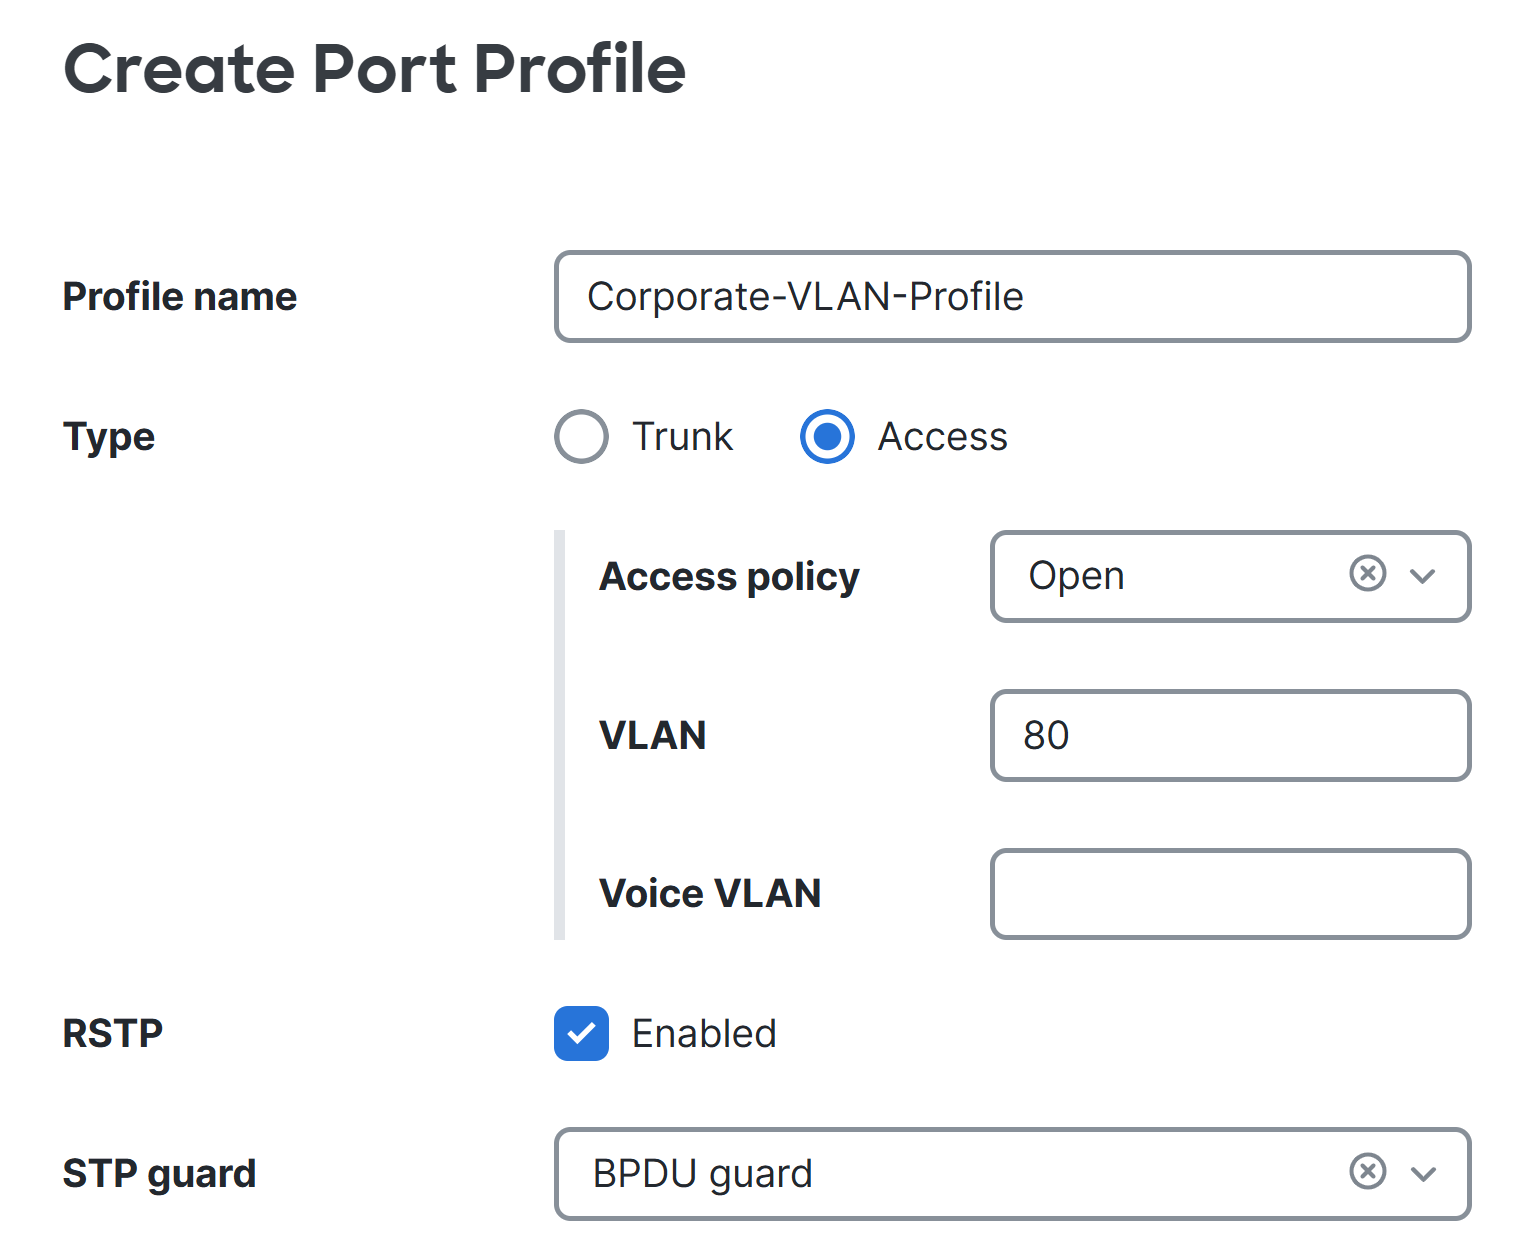
Configuration
Applying Port Profiles