Securing and Addressing SSIDs
Sections:
- Lab Topology
- SSID Configuration
- SSID Configuration Verification
- Splash Page Customization
- SSID Availability
Resources:
- Configuring SSIDs & Access Control
- Multi-SSID Deployment Considerations
- 802.11w Management Frame Protection MFP
- SSID Modes for Client IP Assignment
- Integrating AD with Sign-On Splash Page for MR Access Points
- Splash Page Overview
- SSID Availability
- Customizing Splash Pages
Overview:
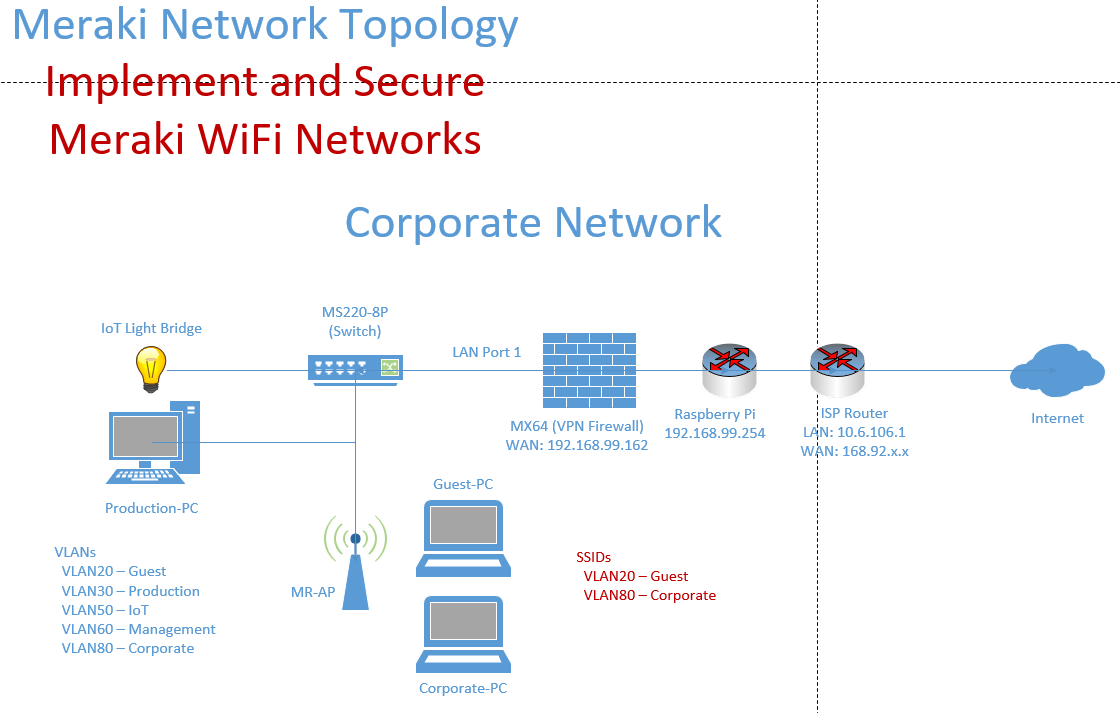
- Meraki access points are a series of wireless networking devices offered by Cisco's Meraki brand. They're known for being cloud managed allowing remote management through the Meraki Dashboard
- Securing and addressing SSIDs on Meraki APs provides not just encryption but a range of tools for managing access control, network segmentation, and monitoring
- In this section, I will demonstrate securing and addressing SSIDs on a Meraki MR access point
Lab Topology
Configuring SSIDs
Overview:
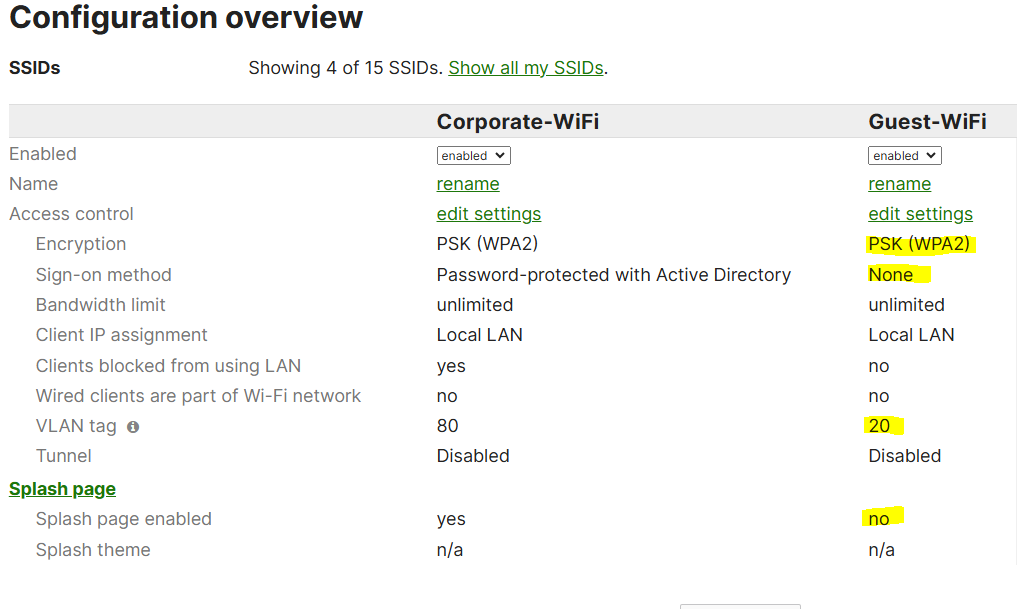
- In this lab exercise, I will be configuring two separate SSIDs on the MR access point that will cover the Corporate and Guest networks in my Meraki lab environment
- Cisco Meraki APs can support up to 16 SSIDs (15 user configurable and 1 reserved for mesh)
- Each SSID can consist of its own set of access controls and firewall rules
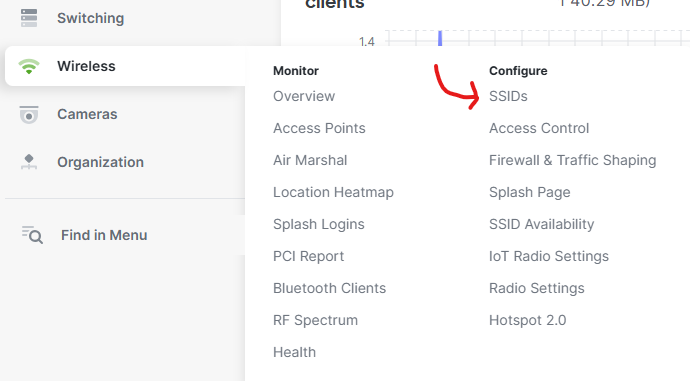
Configure SSID Menu
Overview of available SSIDs
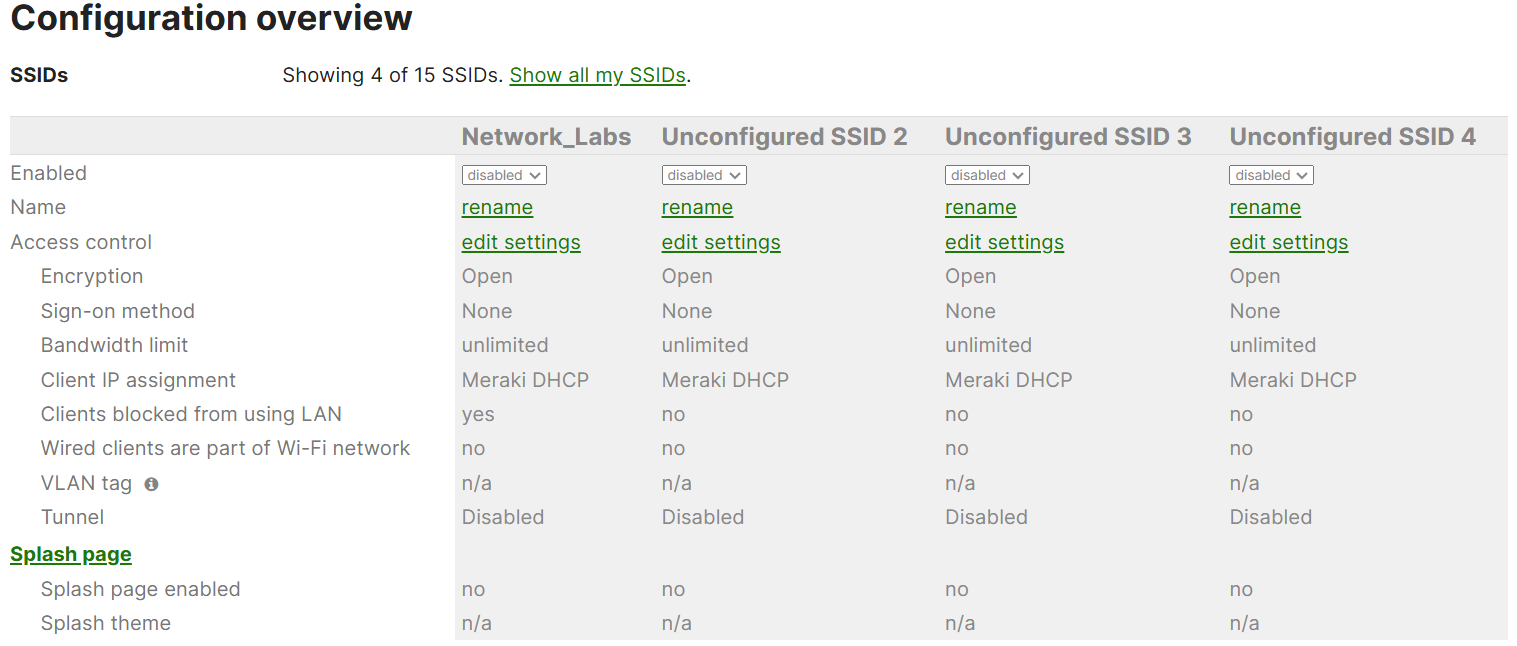
Editing configuration of specified SSIDs
Overview of Available SSID Configuration Settings
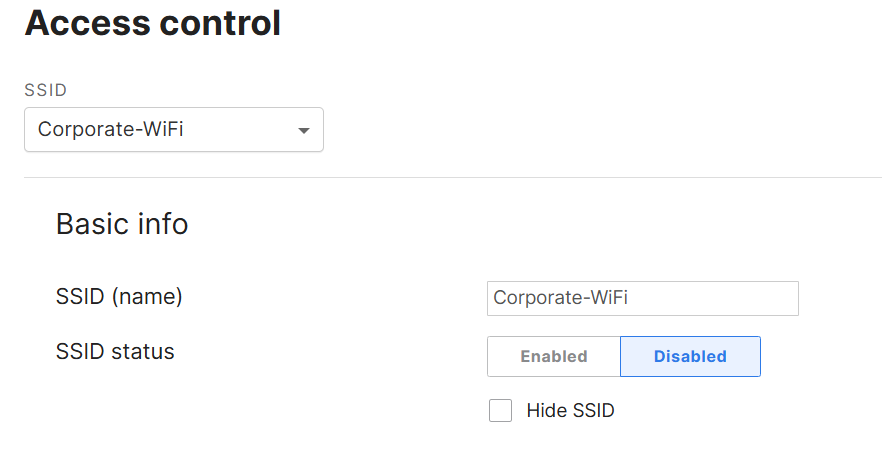
Basic Info
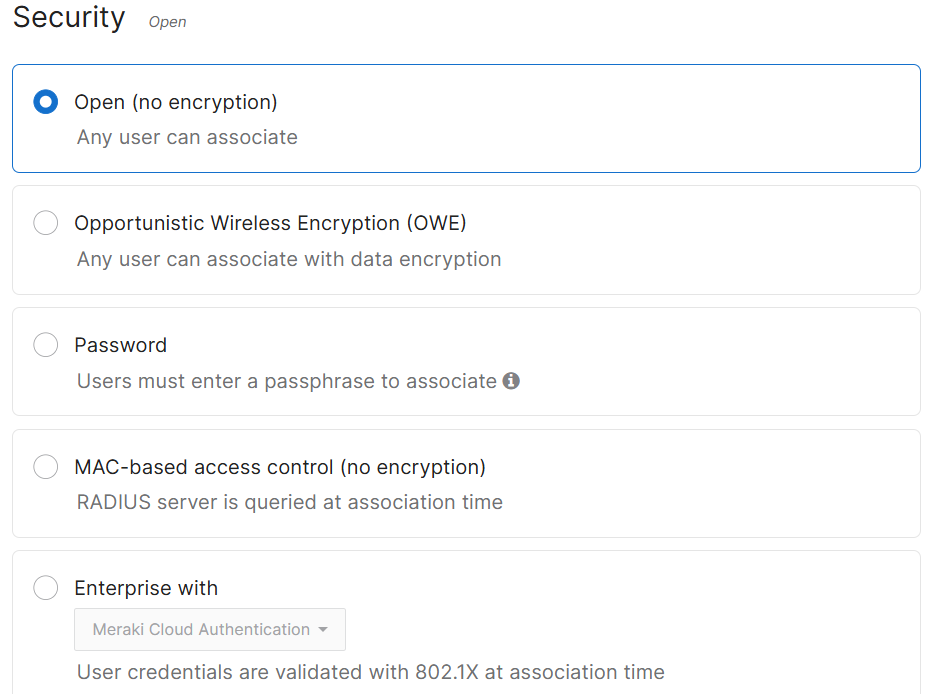
Security
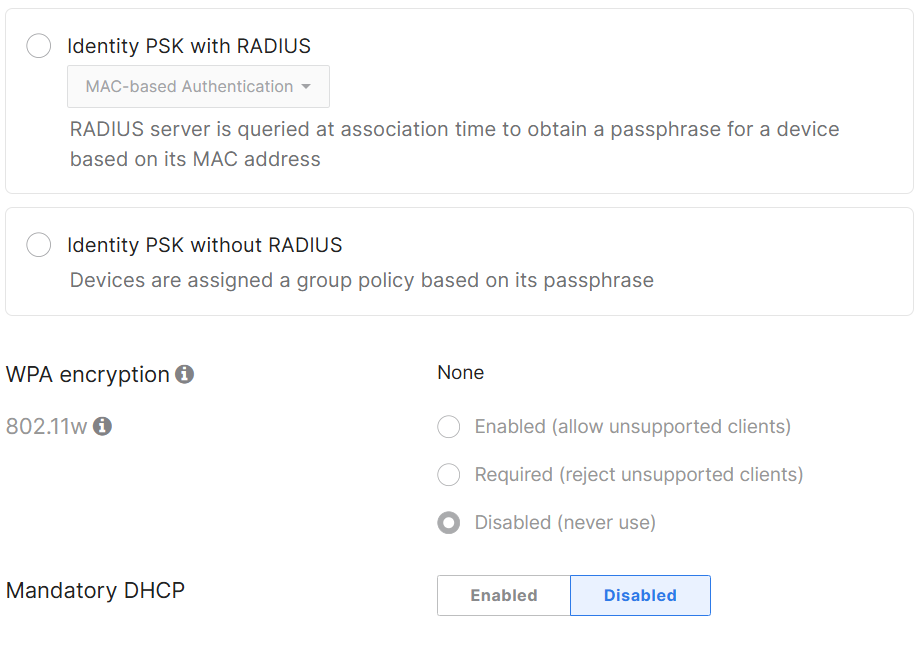
Security
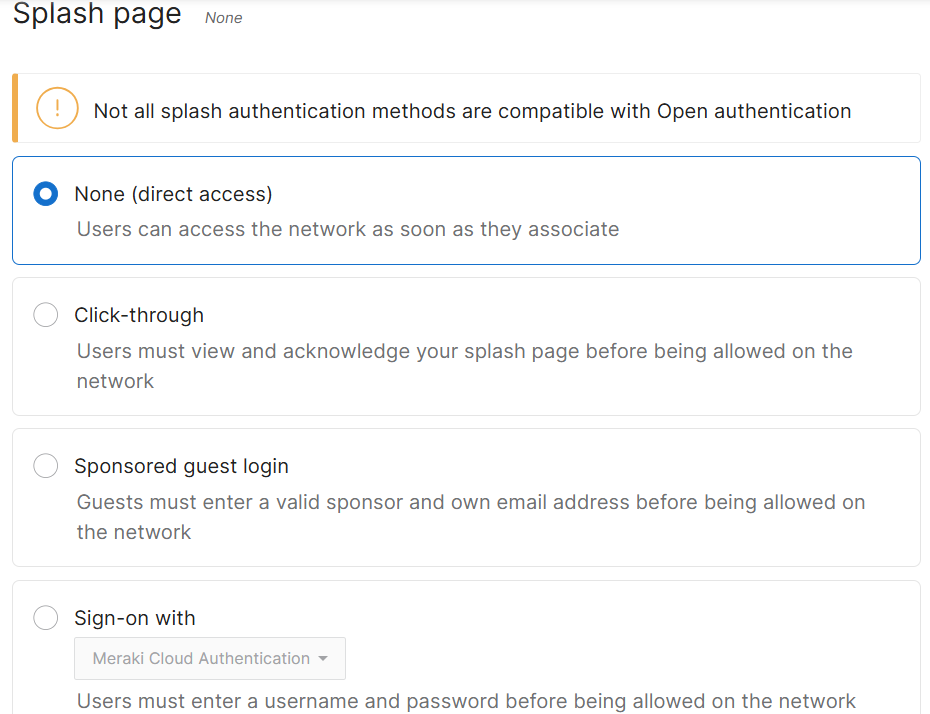
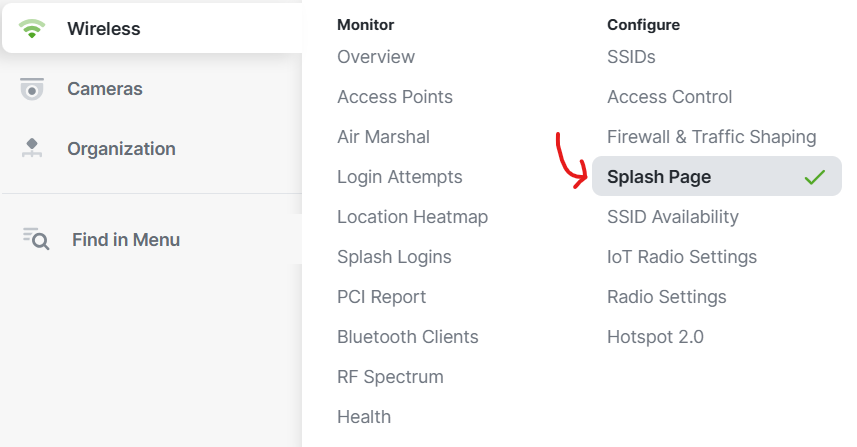
Splash Page
Splash Page
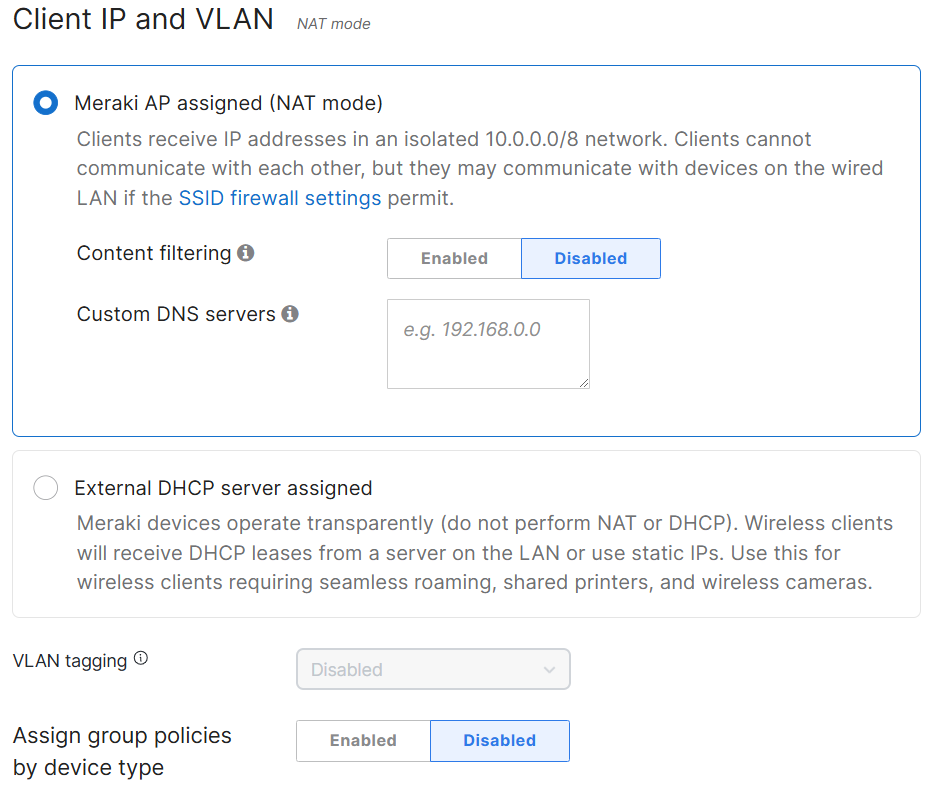
Client IP and VLAN
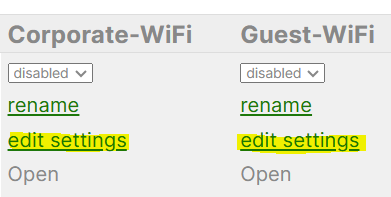
Corporate SSID Settings
Security Overview
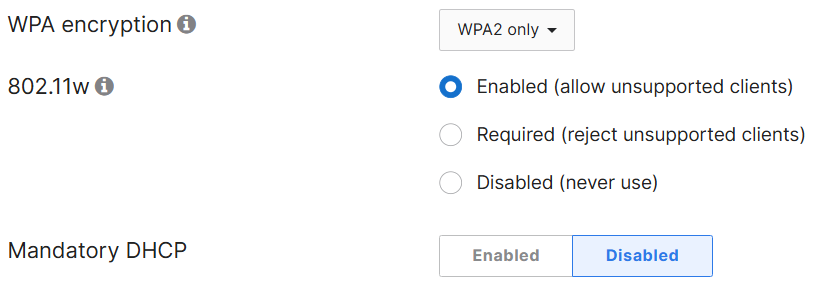
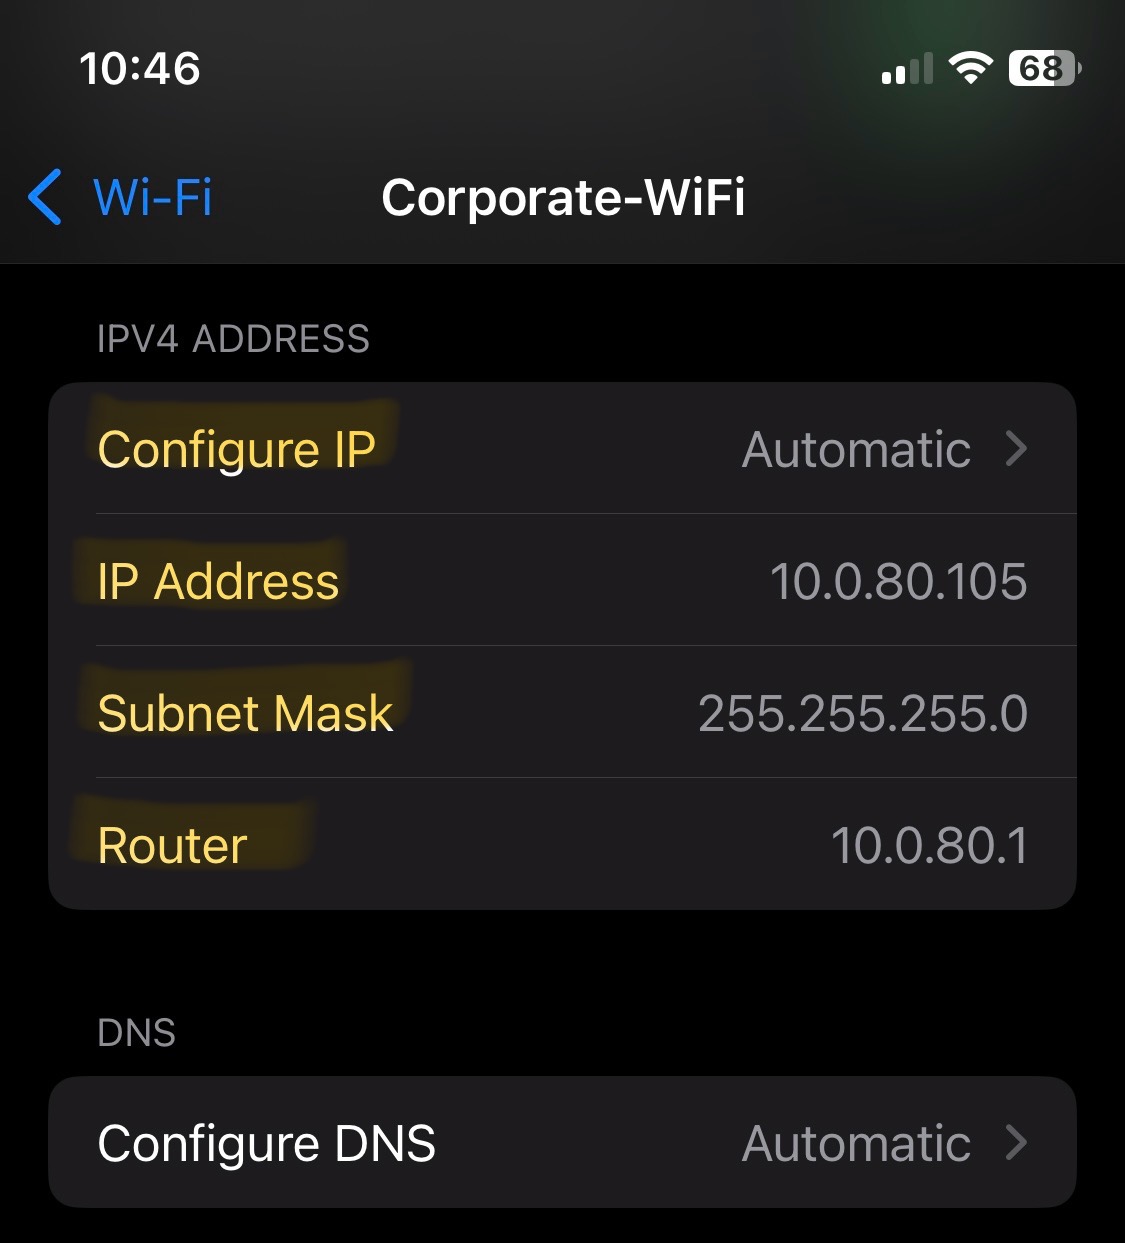
- For the Corporate SSID network, I have implemented WPA2 PSK security
- Clients on the Corporate wireless network have the ability to set static IPs on their devices
- 802.11w is enabled
- 802.11w also known as (MFP) is a security feature in Wi-Fi networks that provides protection for management frames from being intercepted, altered, or spoofed by malicious actors
- Management frames such as authentication, de-authentication, association, dissociation, beacons, and probes are used by wireless clients to initiate and tear down sessions for network services
- Client compatibility should be considered when it comes to supporting 802.11w as older client devices may not support it

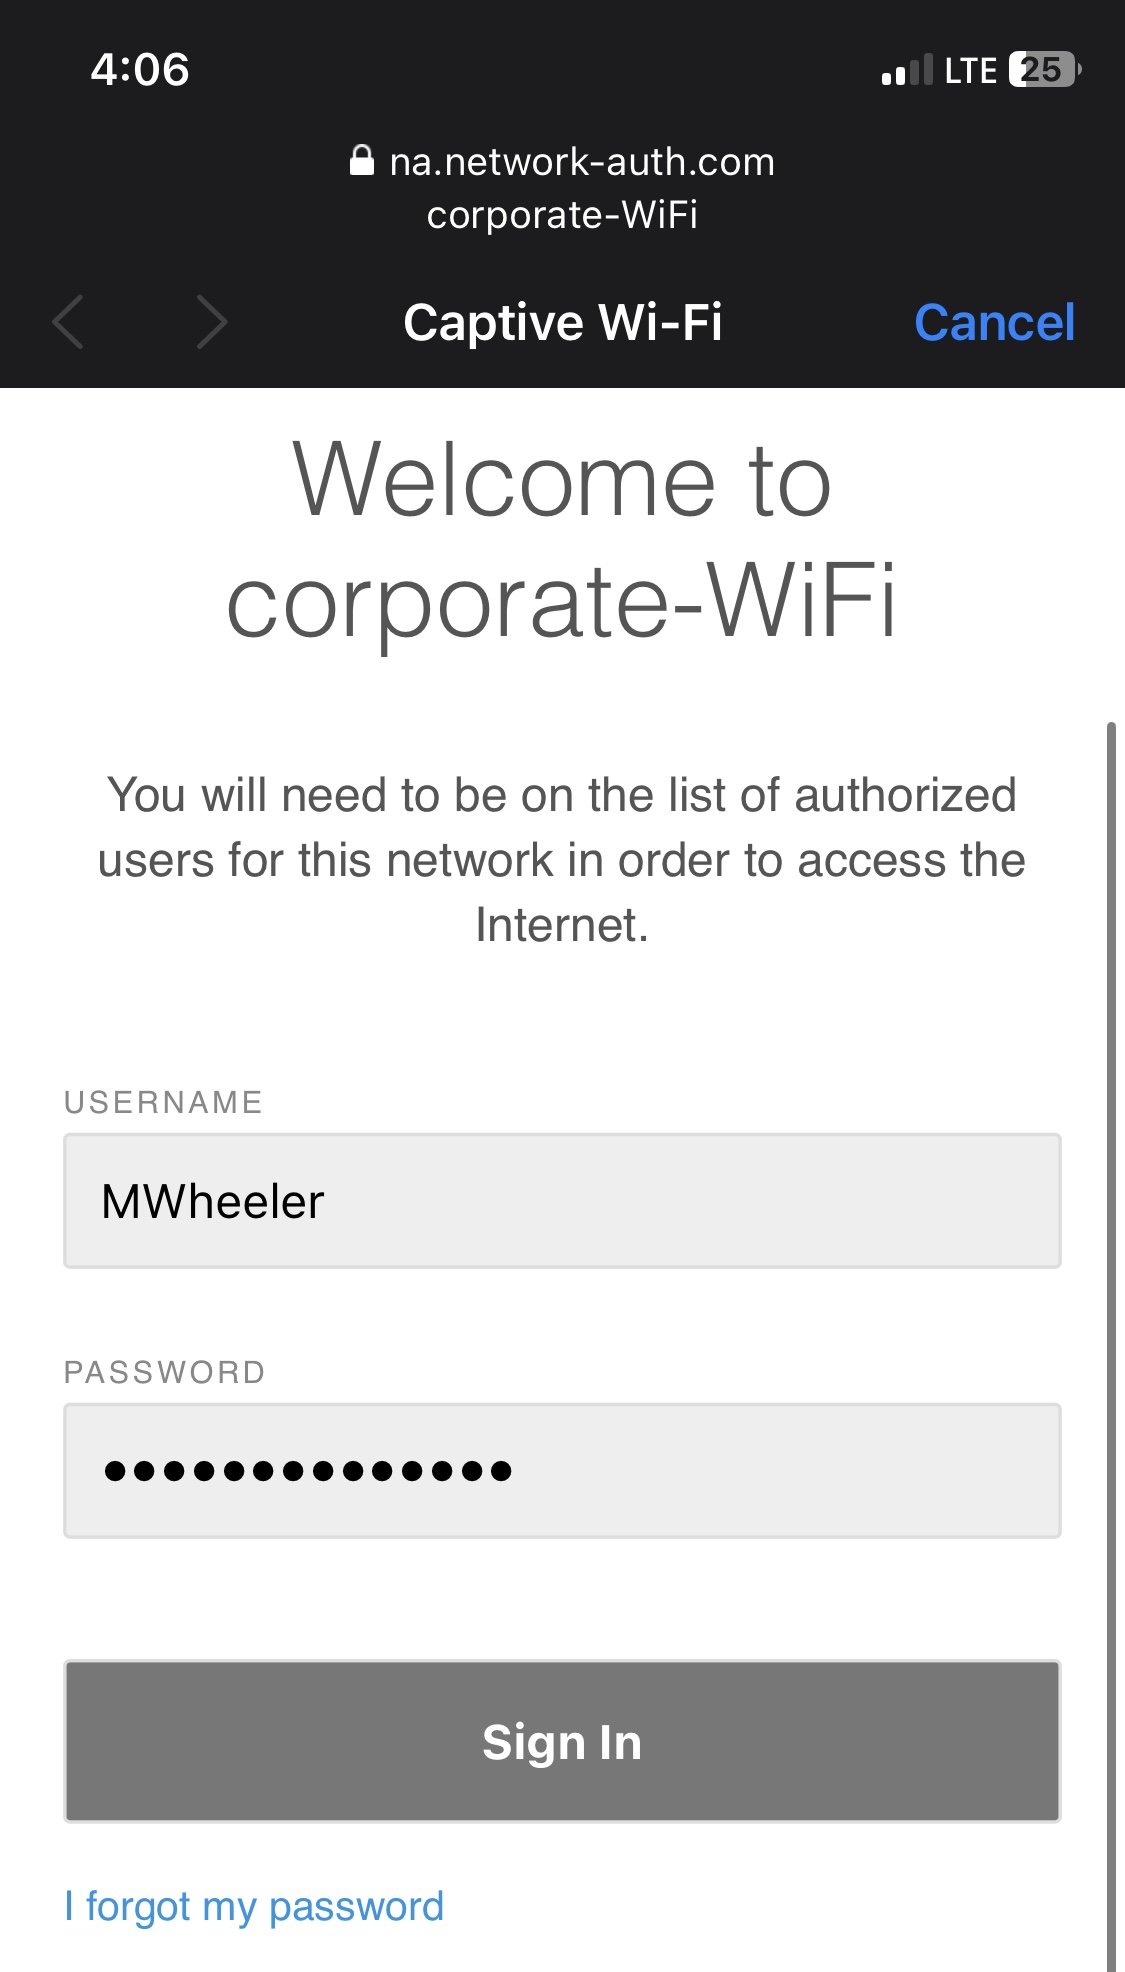
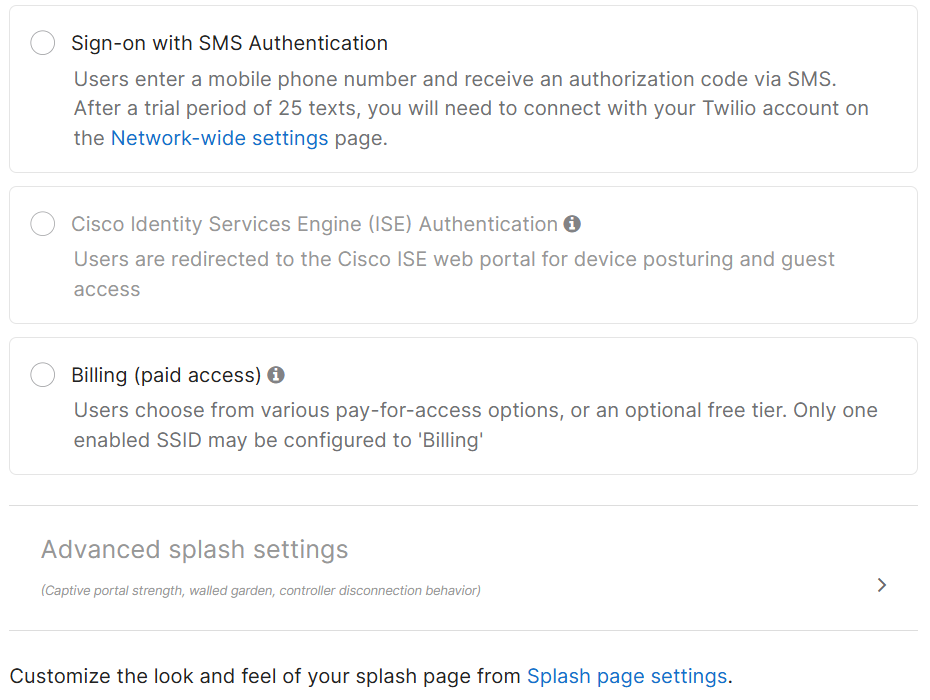
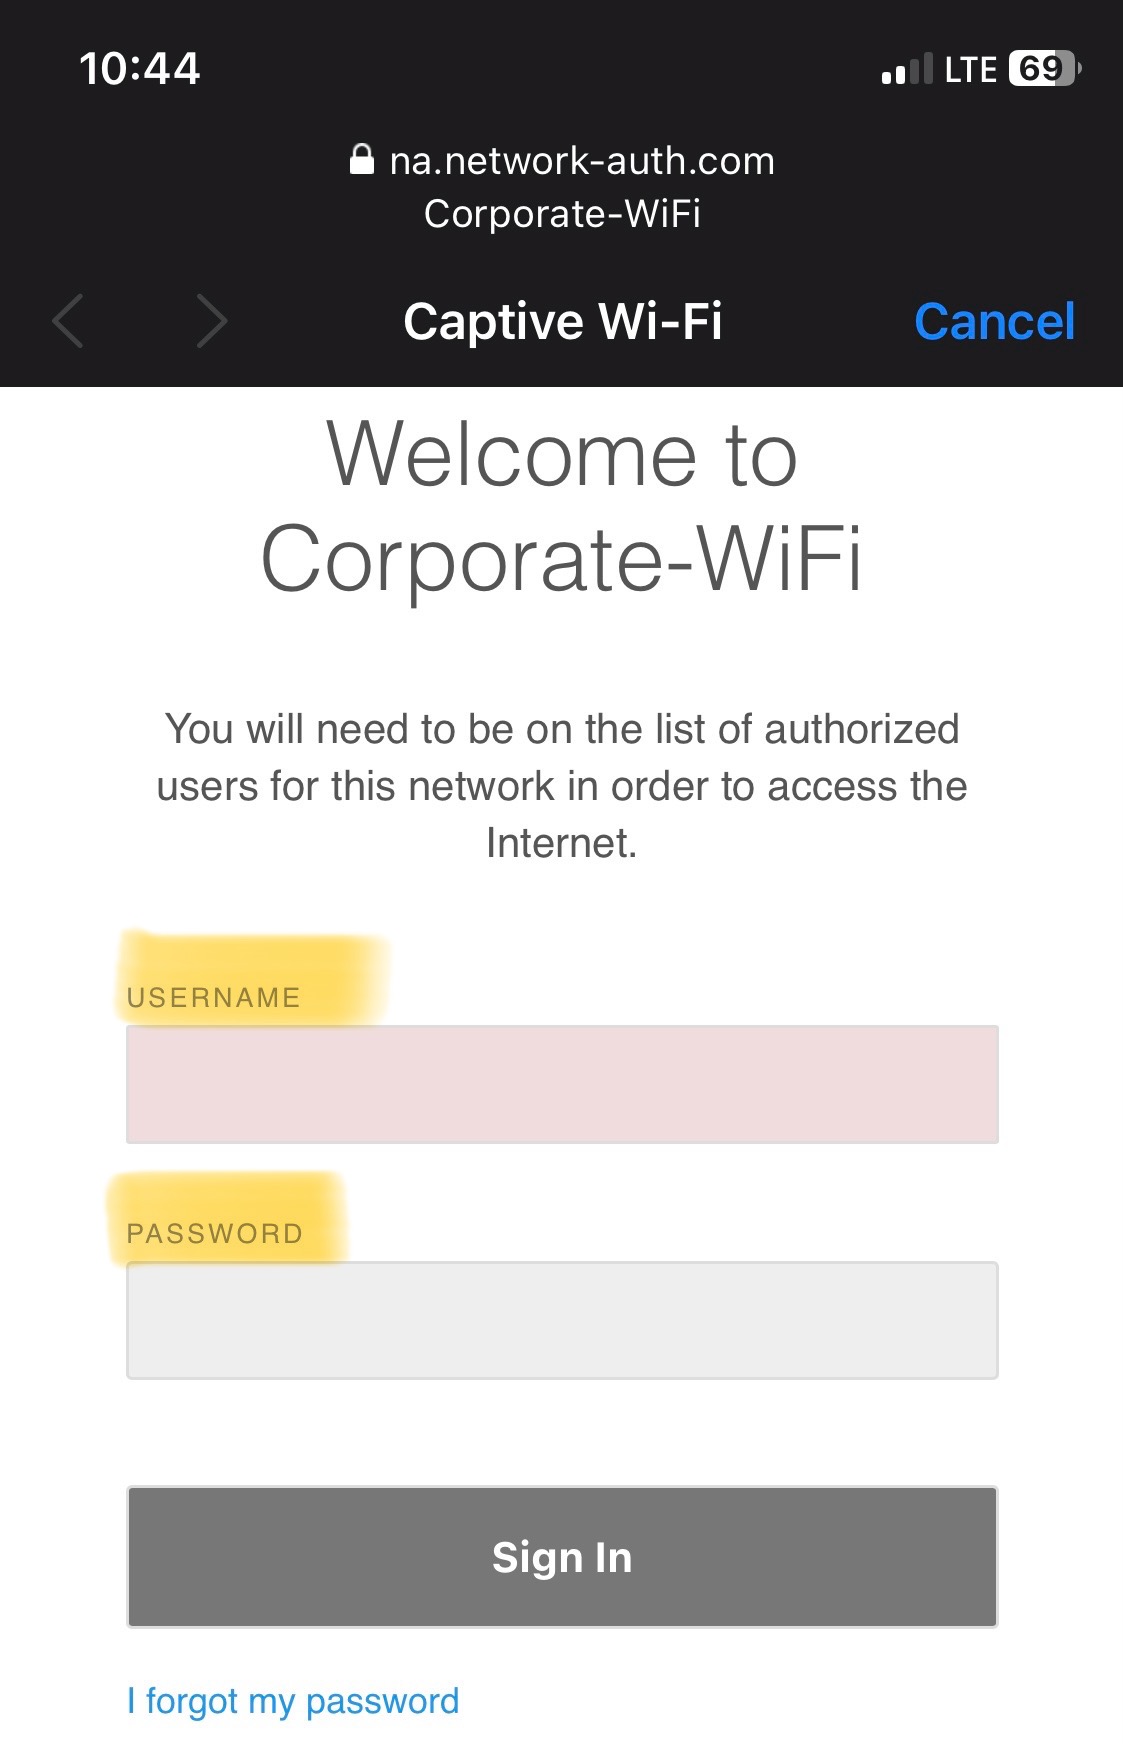
Splash Page Overview
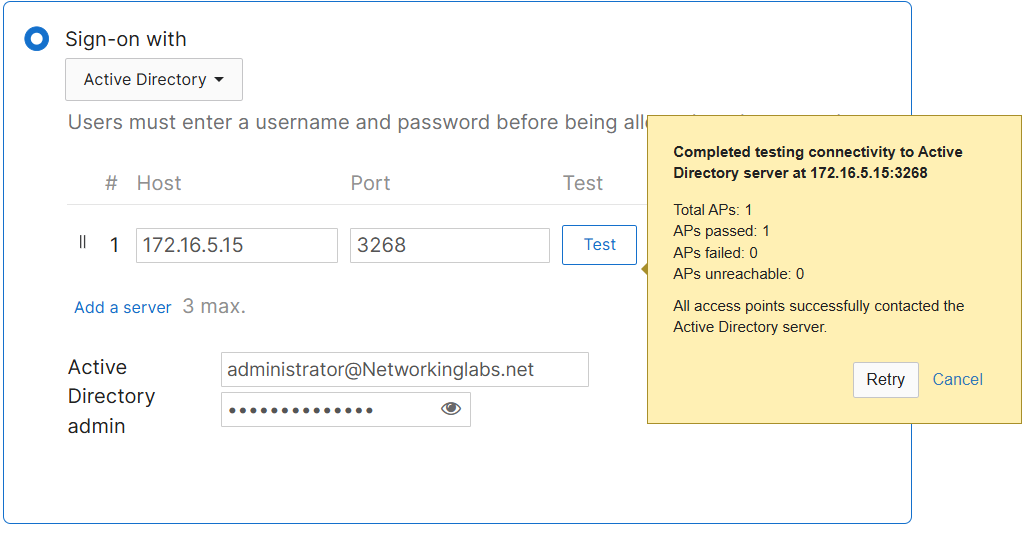
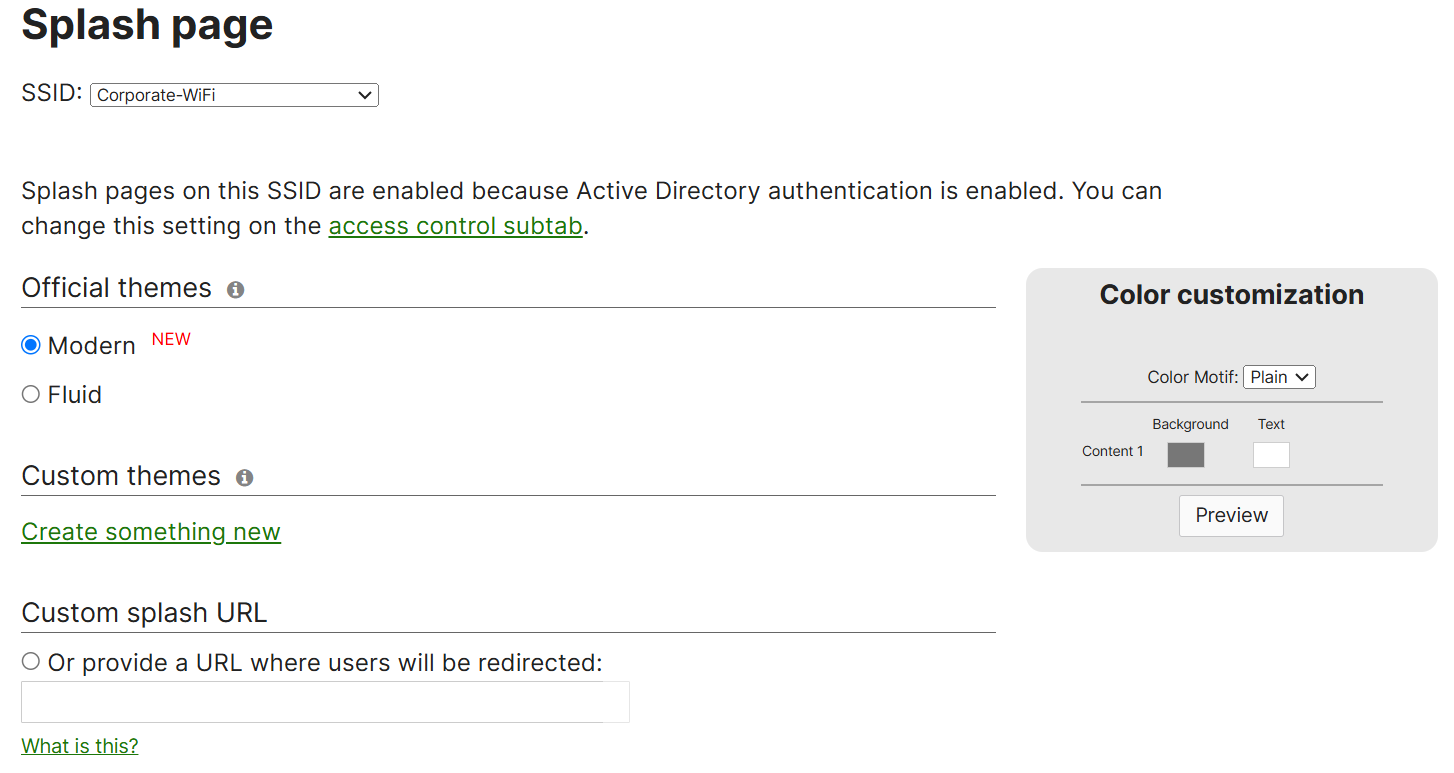
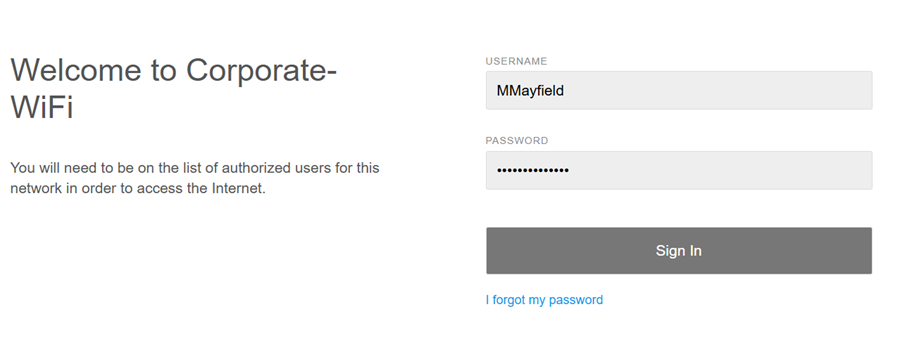
- For the Splash Page configuration options, I have decided to integrate Active Directory for client authentication
- For this lab demonstration, I am utilizing a Windows Server VM off of LAN port 2 on the MX security appliance
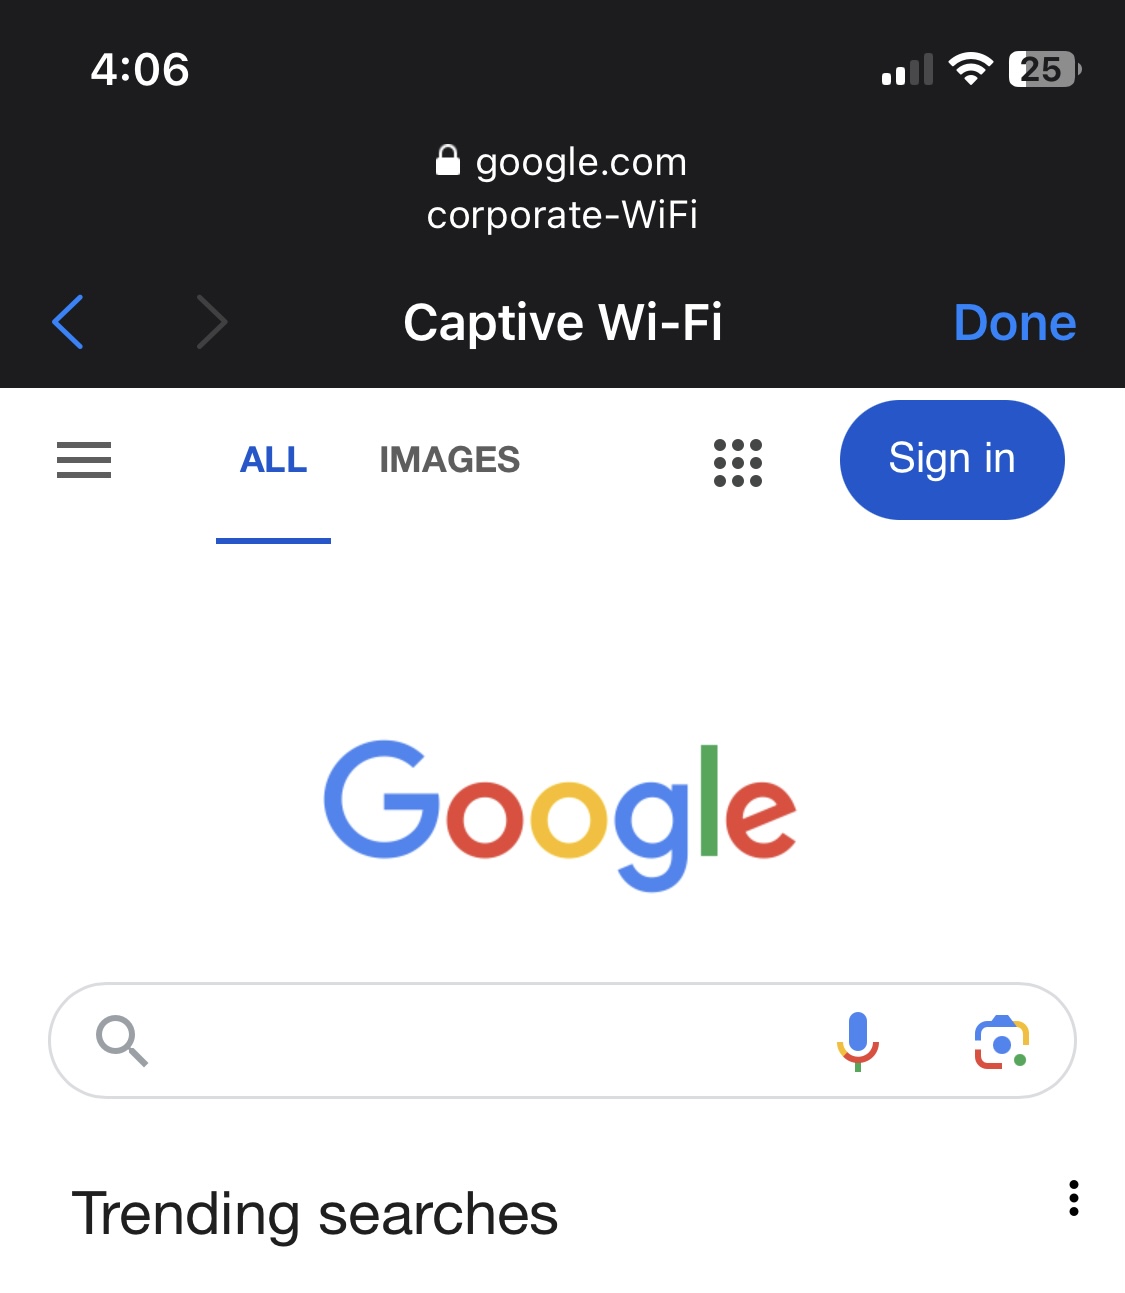
- Upon associating with the SSID, clients are redirected to a Web portal to authenticate via their Active directory credentials before being allowed access to the network
- Per Cisco, the access point establishes a secure TLS connection to the AD server using the AD admin credentials
- When Active Directory authentication is configured, the access point queries the AD's global catalog over TCP port 3268
- When configuring a Splash Page security option, the 'Advanced splash settings' underneath become available
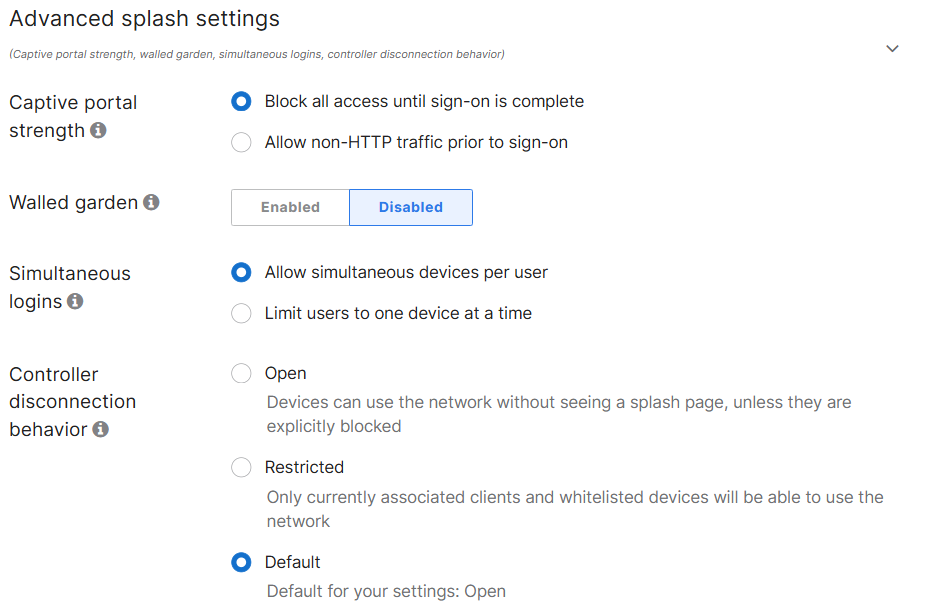
Advanced Splash Page Feature Overview
Captive Portal Strength
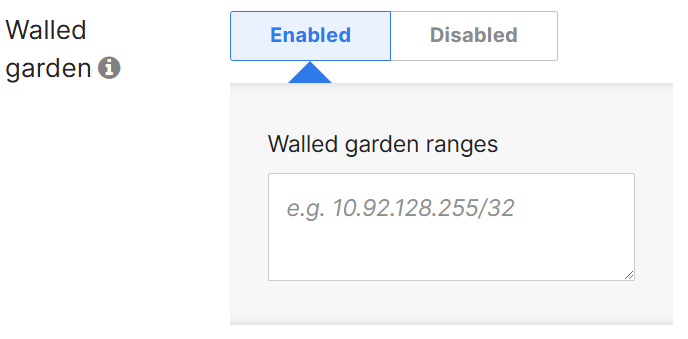
- Allows for limited network services if not passed through the splash page except for hosts that have been added to the walled garden
Walled Garden
- Enabling the walled garden allows you to specify a list of IP addresses and domains that users can access before passing through the splash page
Simultaneous Logins
- Allows multiple devices using the same credentials at the same time or revoke a device's access if the user logs in to another device when limiting to one device at a time
Controller Disconnection Behavior
- Specifies how to treat clients when the Cloud Controller is unreachable
- For the Default option:
- If Click-through splash is enabled: default behavior is 'Open'
- If Sign-on splash is enabled: default behavior is 'Restricted'
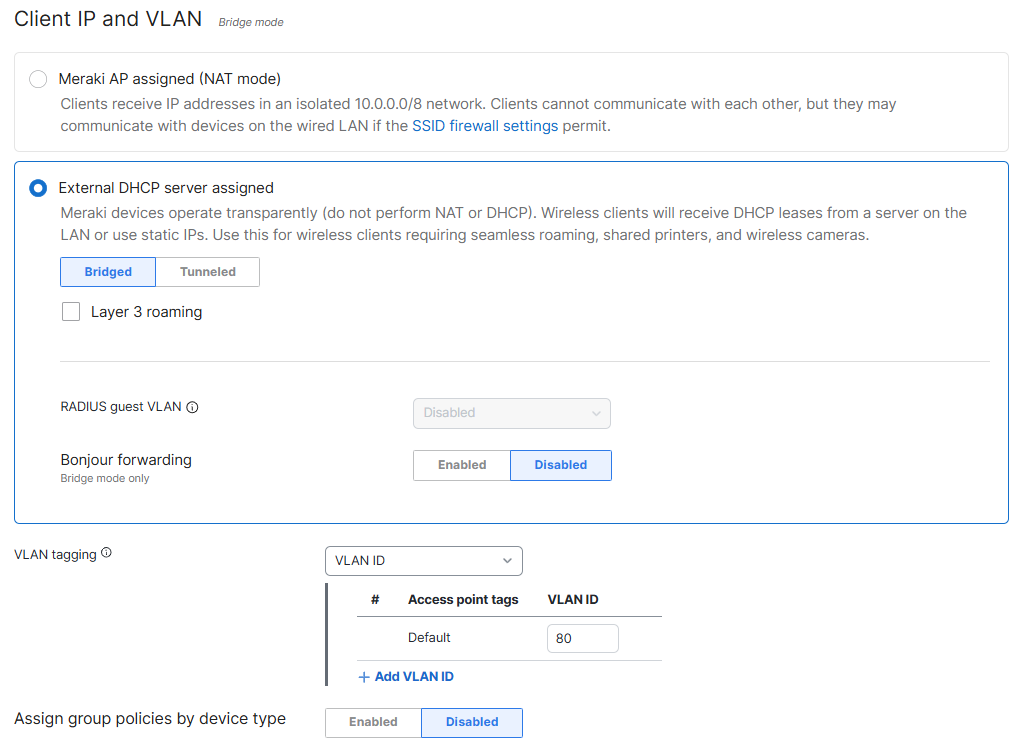
Client IP and VLAN Overview
- In this lab exercise, I have implemented Bridge mode in which the Meraki APs act as bridges, allowing clients to obtain their IP addresses from the upstream MX DHCP server
- Per Cisco, Bridge mode allows for the following:
- Wired and wireless clients in the network need to reach each other
- Layer 2 broadcasts propagating to both wired and wireless clients for device discovery
- Wired and wireless clients need to have IP addresses in the same subnet for monitoring or access control reasons
- Wireless traffic needs to be VLAN tagged between the Meraki AP and the upstream wired infrastructure
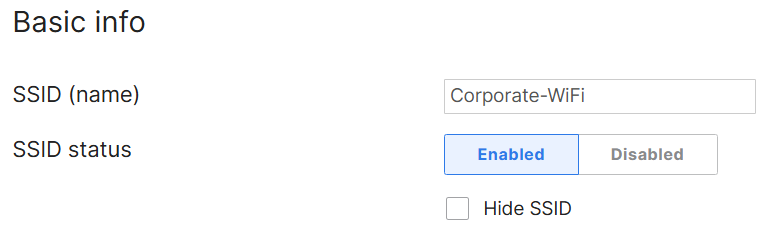
Basic Info Overview
- Upon finishing securing and addressing the SSID settings in the previous sections, the final step would be to enable the SSID in the Basic Info section
Verification - Configuring SSIDs
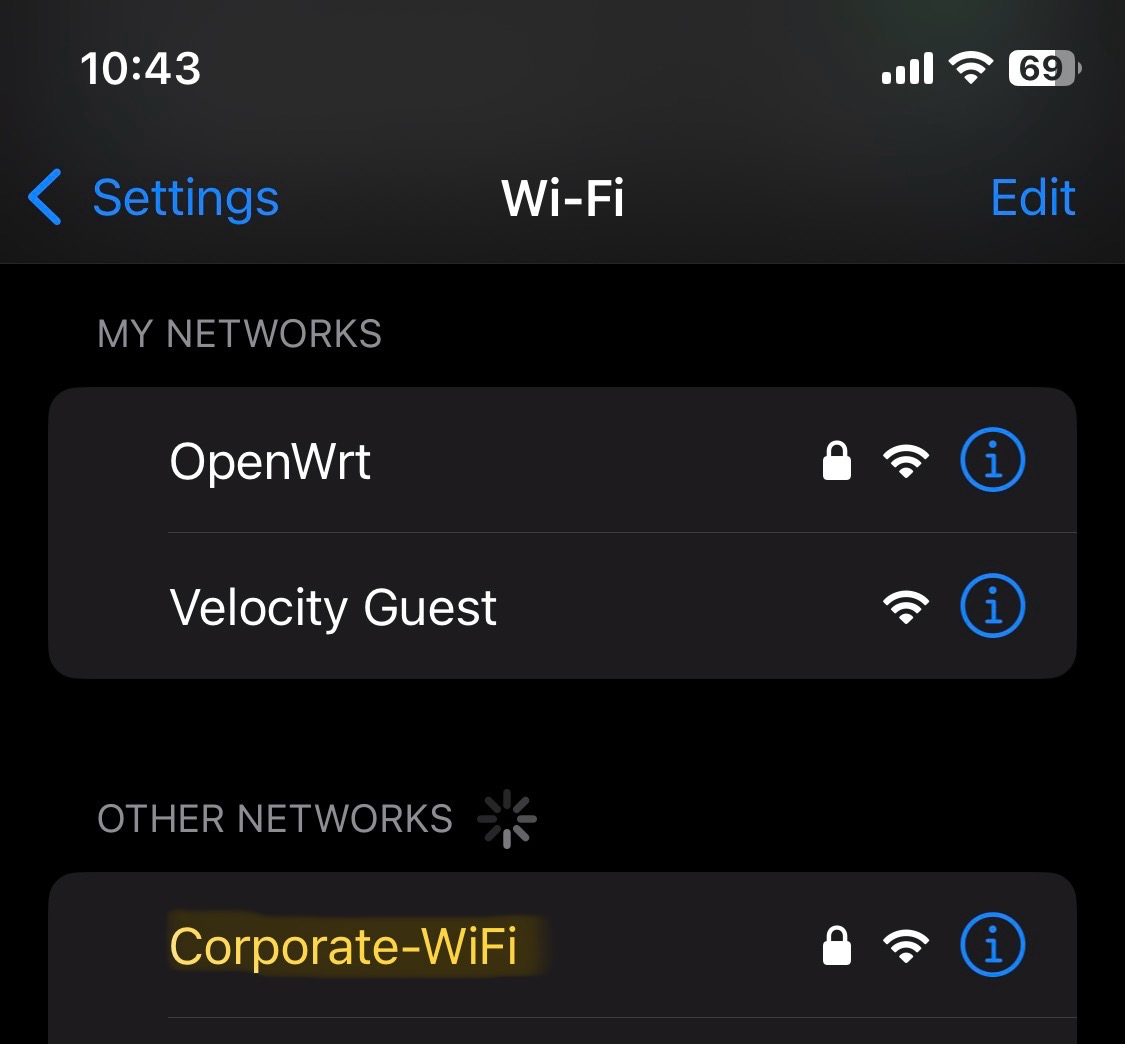
IOS Verification - Corporate SSID
Configured SSID
WPA2 PSK
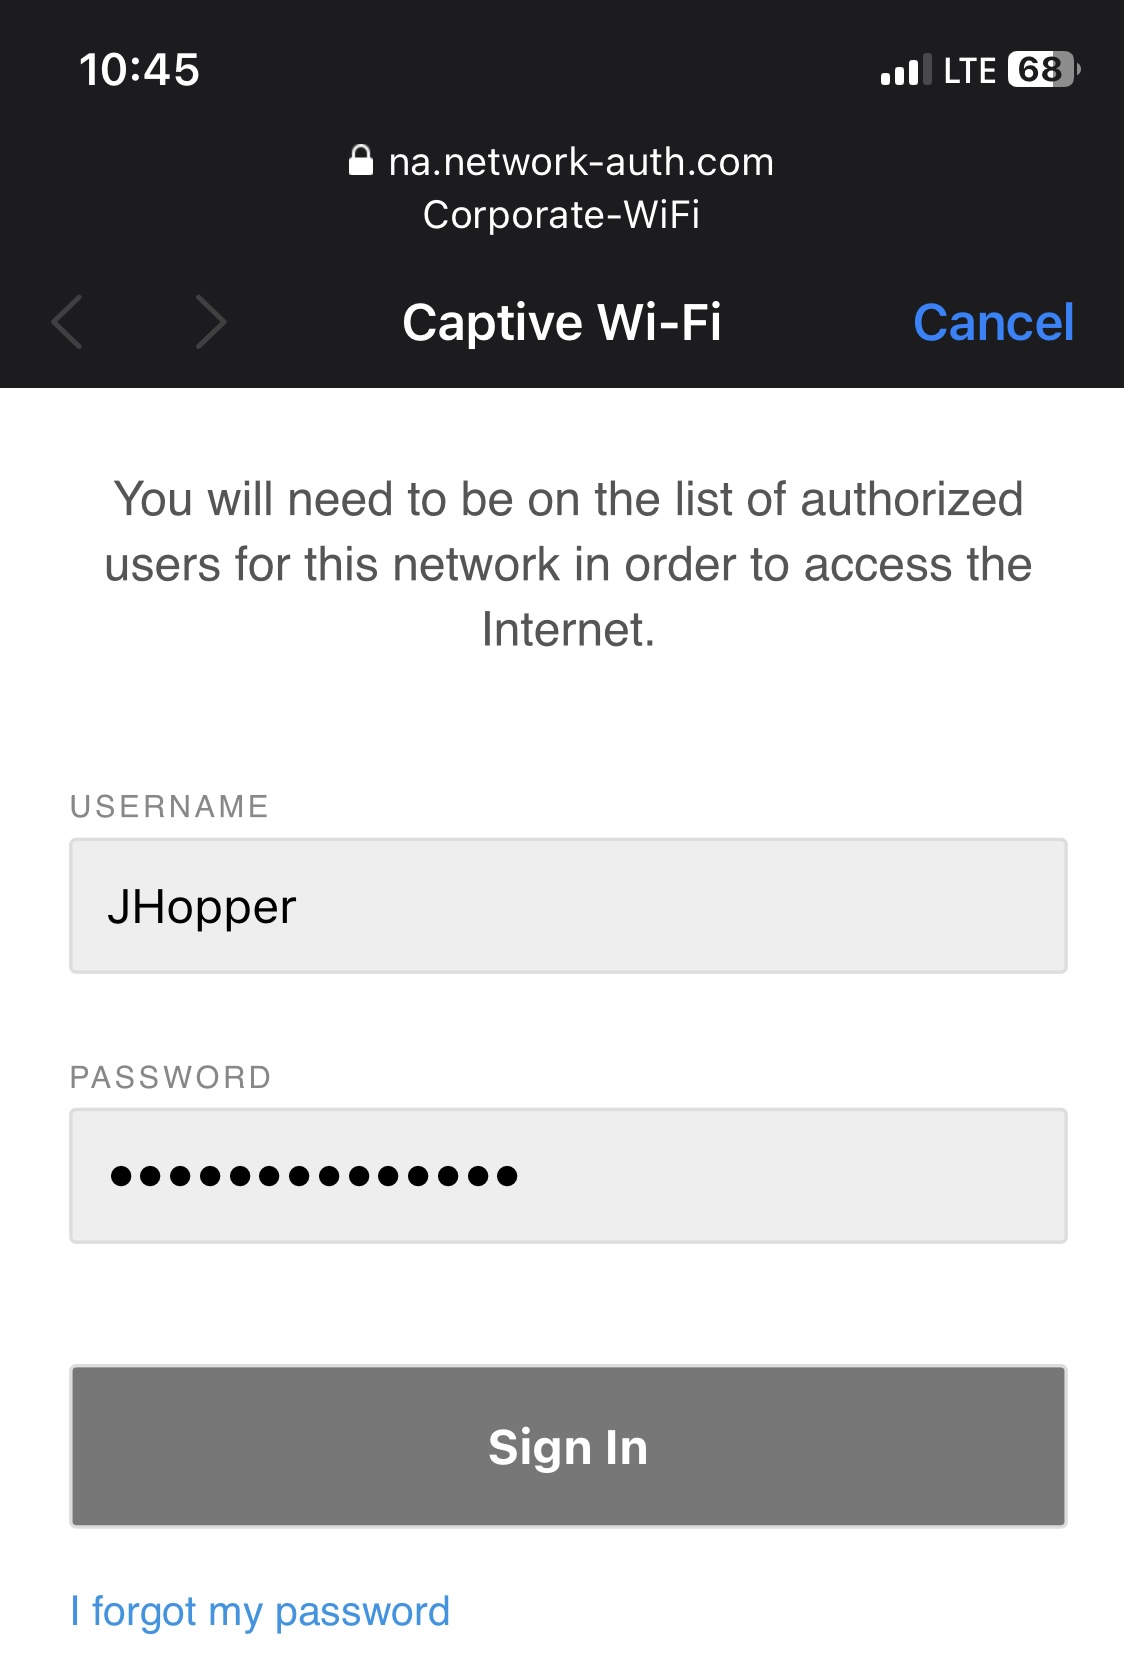
Active Directory Credentials
Active Directory Credentials
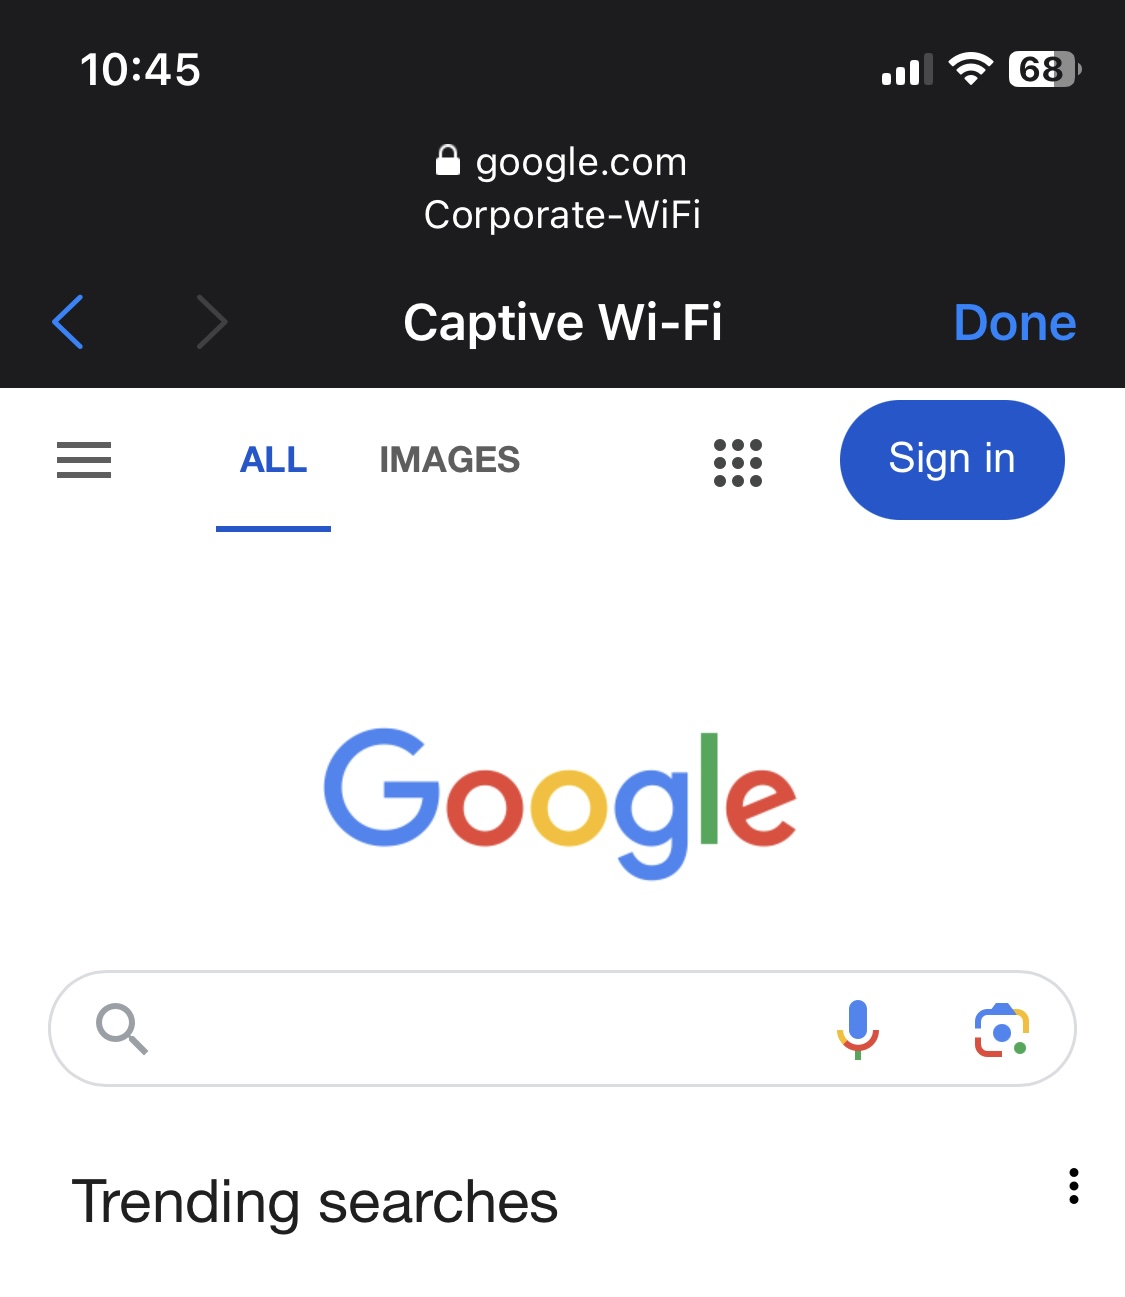
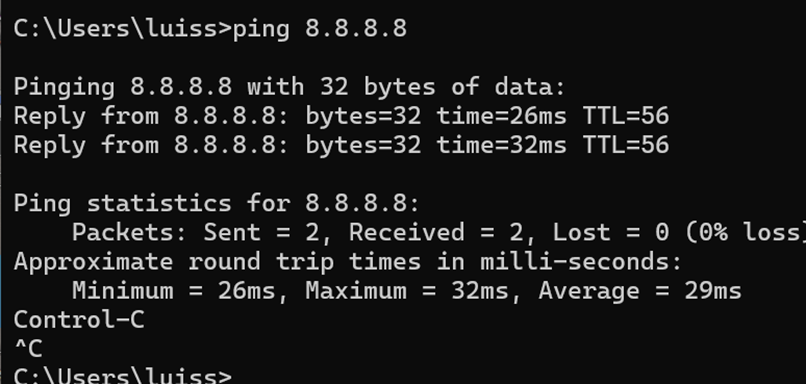
Successful Network Access
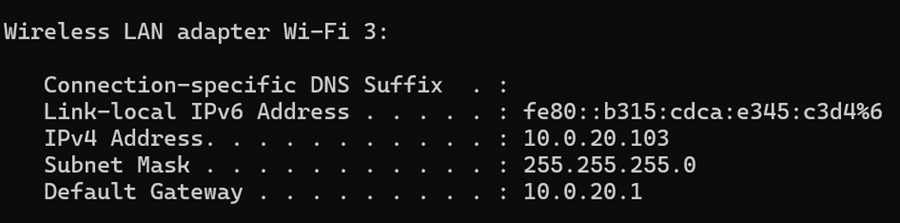
Bridged DHCP from MX Appliance
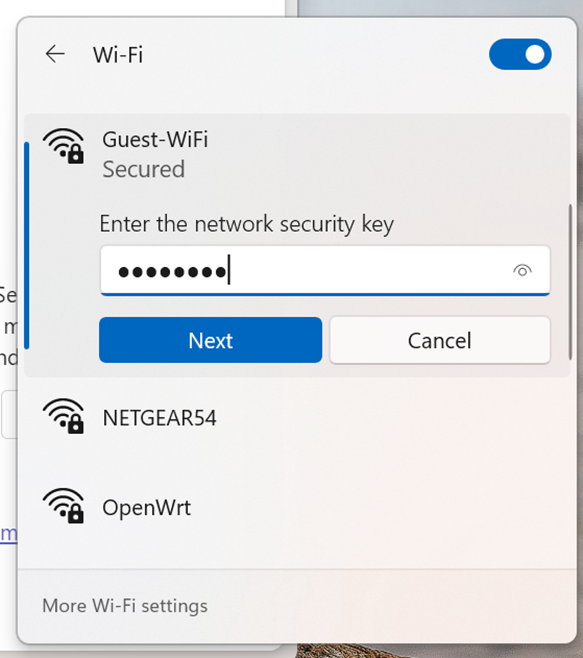
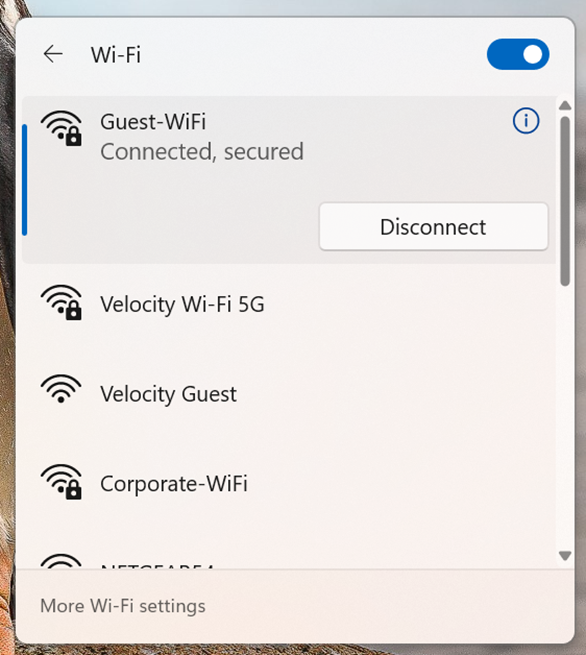
Windows Verification - Guest SSID
Overview:
- No Splash Page has been configured for the wireless Guest network
- Wireless Guest network only relies on a WPA2 PSK
Meraki Verification
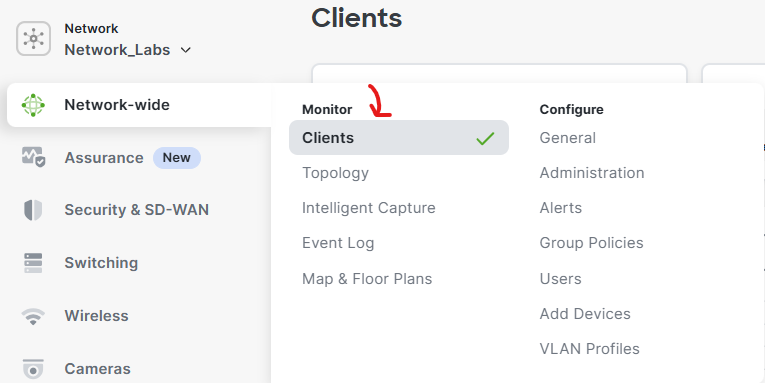
Clients Menu
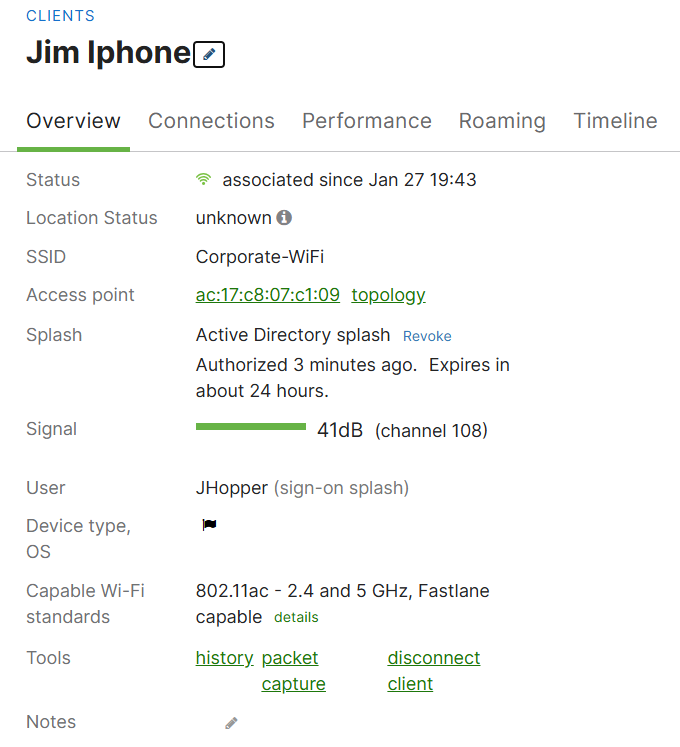
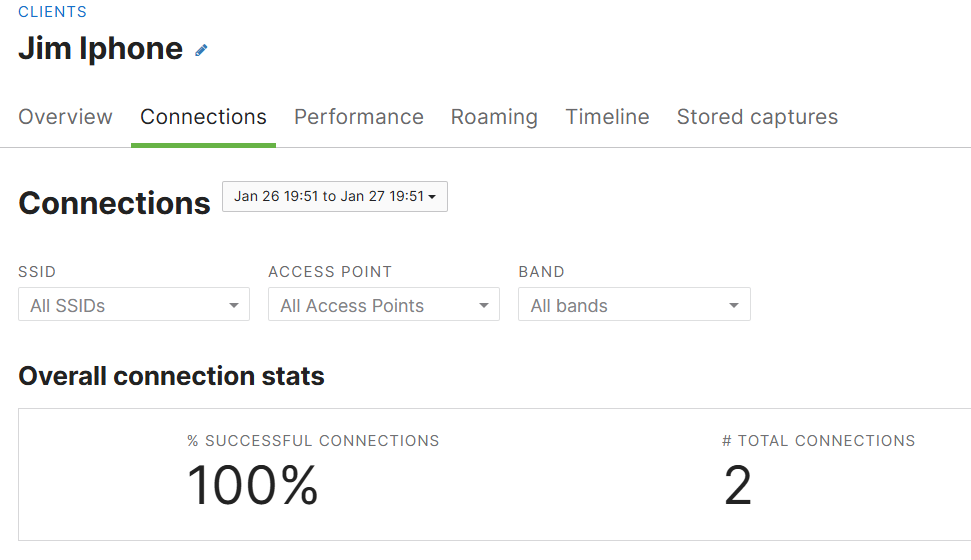
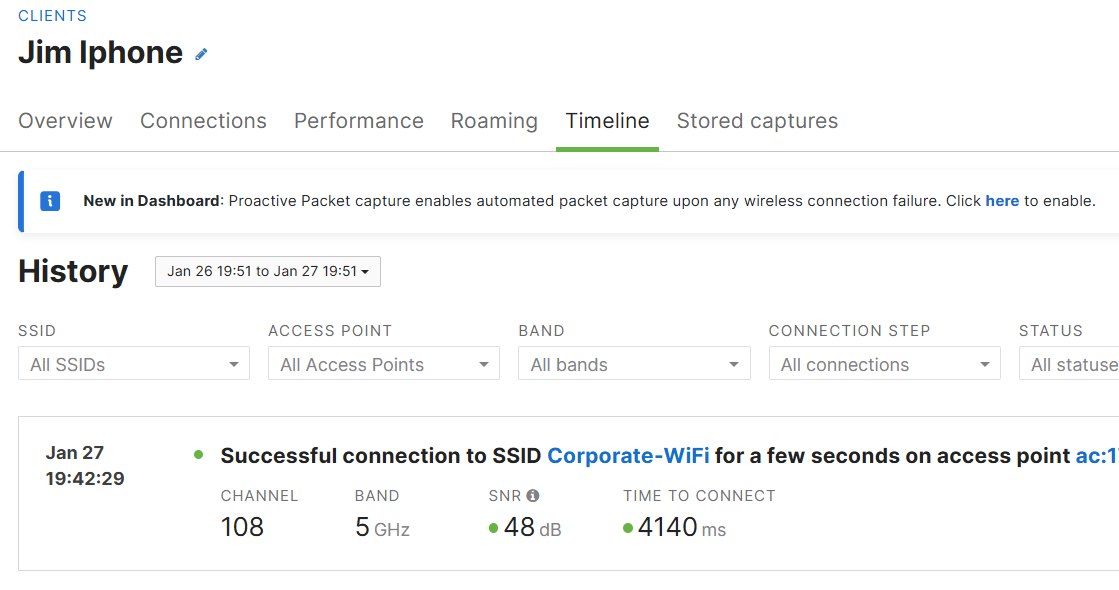
Jim's iPhone connected to the wireless Corporate network via Active Directory authentication
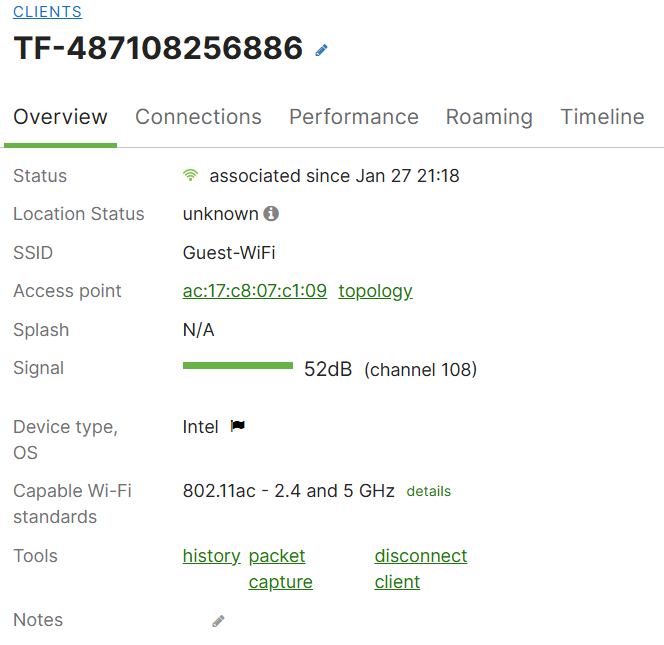
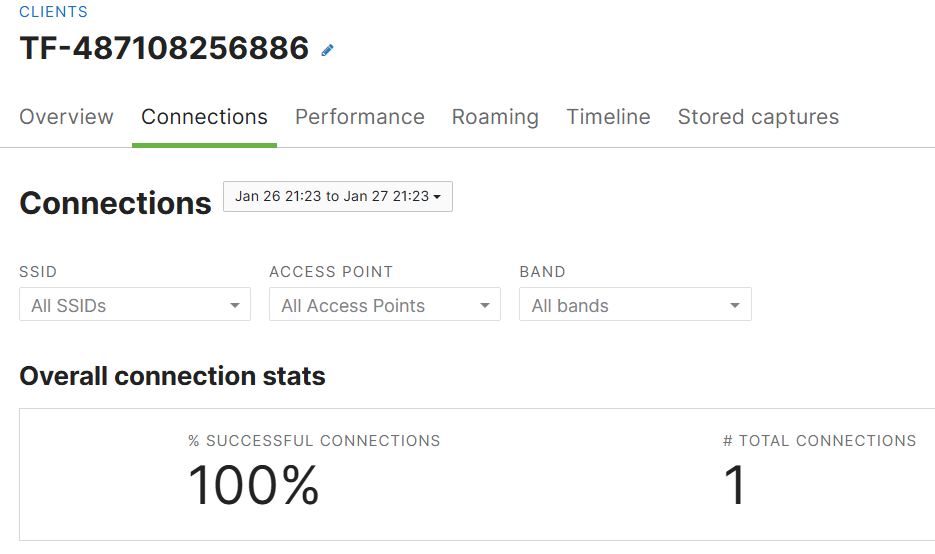
Windows PC connected to the wireless Guest network
Splash Page Customization
Overview:
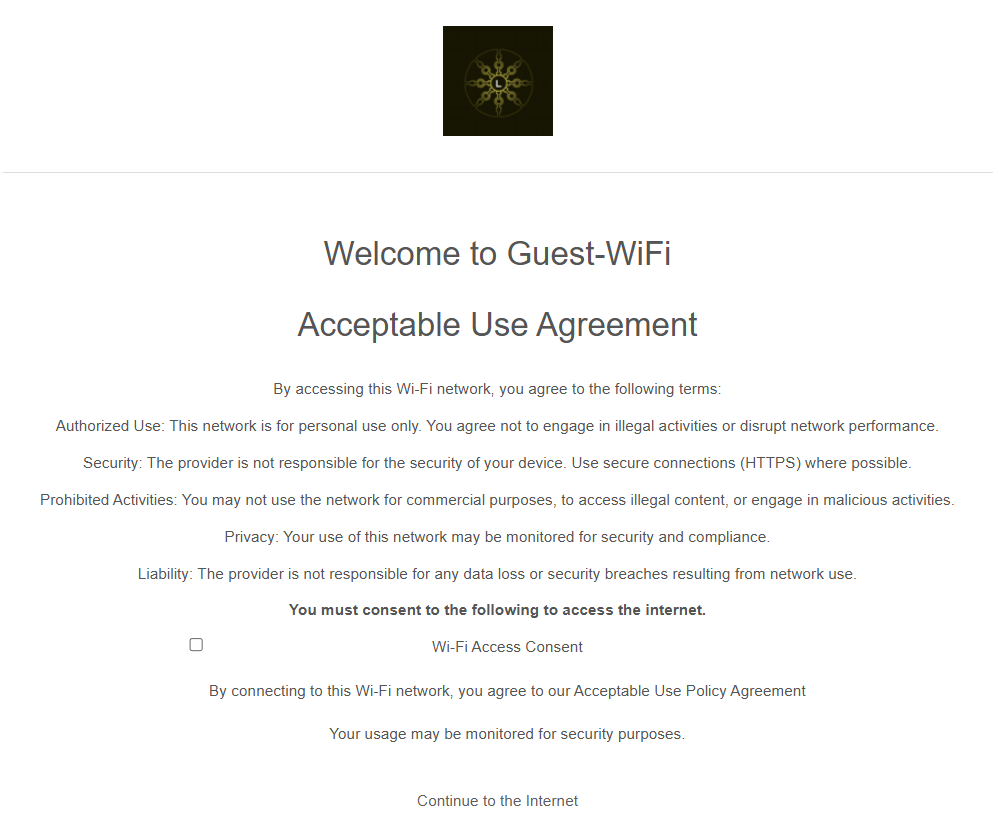
- Splash Page customization in Cisco Meraki is an optional feature that allows you to design and configure the login page users see when they connect to a wireless network, particularly useful in scenarios where you have guest networks or networks that require authentication before granting access
- Per Cisco, the splash page or captive portal can be customized to display a corporate logo and include an acceptable use agreement or a privacy statement for an open guest wireless network
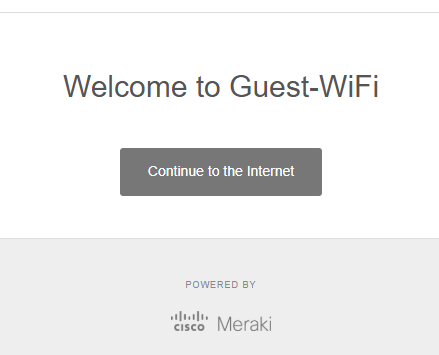
- In this section, I will demonstrate creating a custom captive portal for my Guest wireless network and give a brief description of the available customization options
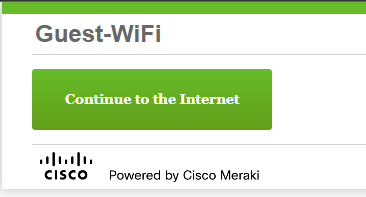
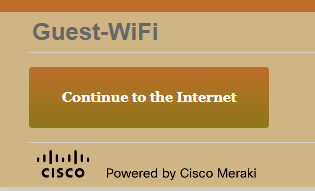
- At the end of this section, I will showcase the completed Splash Page for users connecting to the wireless Guest network
Splash Page Menu
Splash Page Overview

Official & Custom Themes
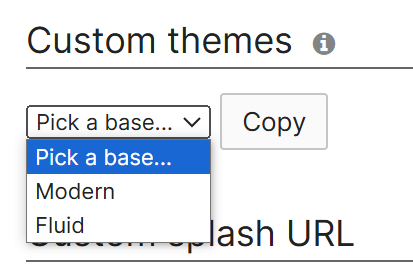
- Meraki offers two predefined themes in addition to defining a custom theme
- With a Custom theme, you choose a starting base either modern or fluid, & edit the color schemes
Modern Theme

Fluid Theme
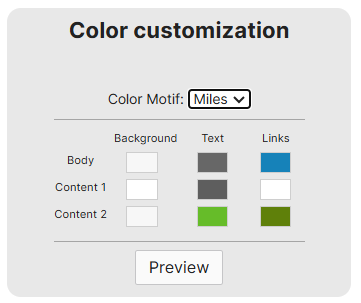
Custom Theme
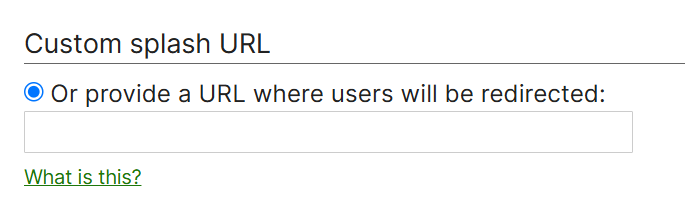
Custom Splash URL
- Custom Splash URLs allow you to host your own splash page and will redirect clients that connect to the network to the URL specified
- Per Cisco, the custom splash URL must be defined inside the Walled Garden that can be accessed in the Access Control Page
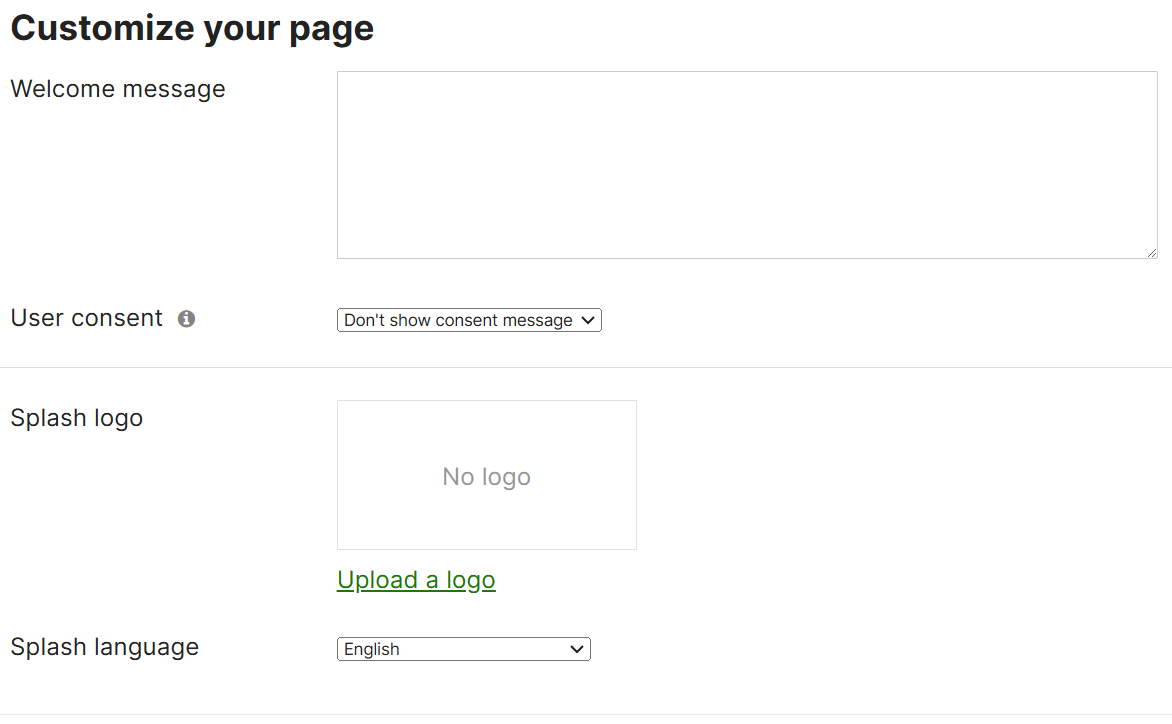
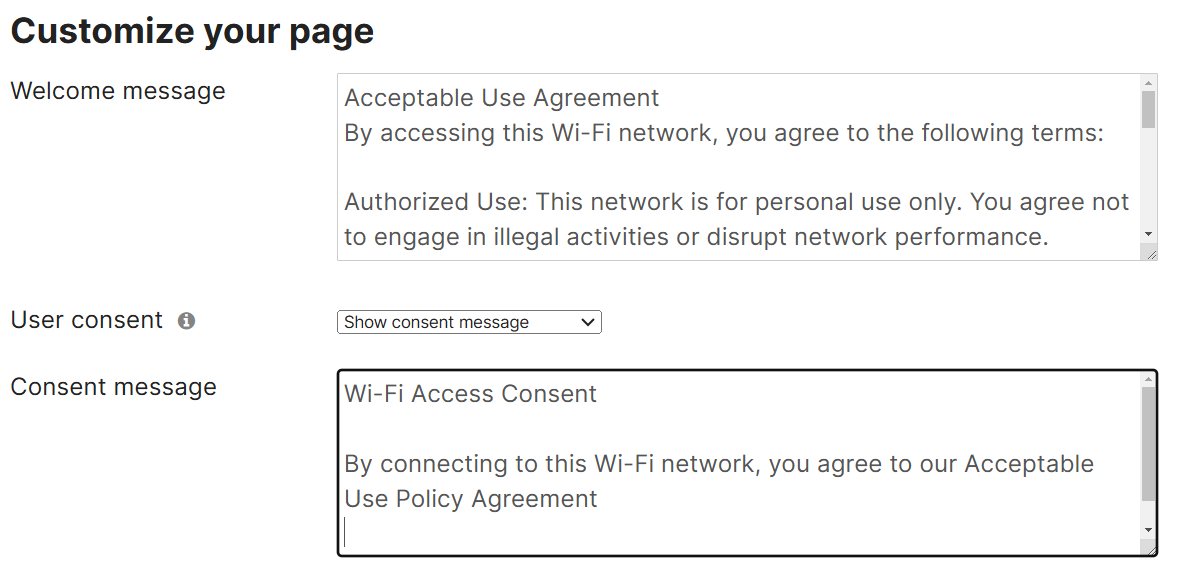
Welcome & Custom Consent Messages
- The Welcome message section of the Splash page is where you can define the message that is seen by all clients connecting to the network before gaining access
- It is best practice to define an acceptable use agreement or privacy policy for clients to view
- Per Cisco, the custom message is treated as HTML
- With Custom Consent messages, this enables admins to notify clients that their data may be collected if they connect to the network
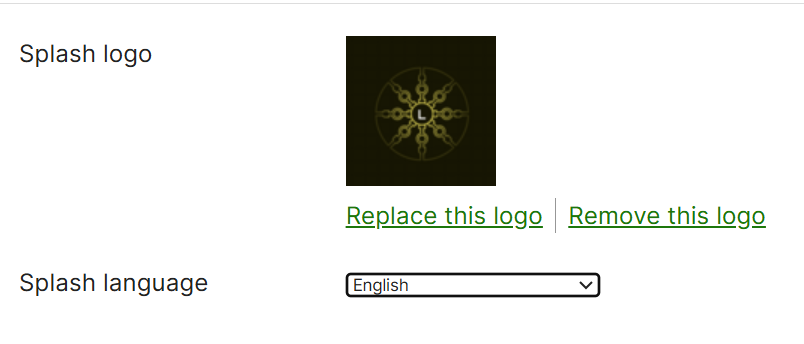
Splash Logo & Language
- The Splash Logo section in the Splash Page configuration allows admins to define a company logo
- The Language section allows for changing the language on your Splash page
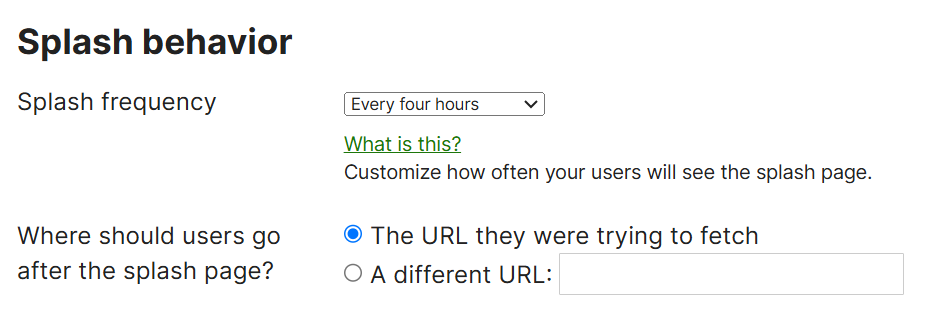
Splash Behavior
- Per Cisco, Splash Behavior can be configured for Splash frequency and URL redirects
- Changing the splash page frequency to a shorter time span can be beneficial in certain use cases to improve network security and ensuring that users are continuously engaged with the network's policies
- By default, Meraki sets the splash frequency to 1 day
Wireless Guest Network Splash Page
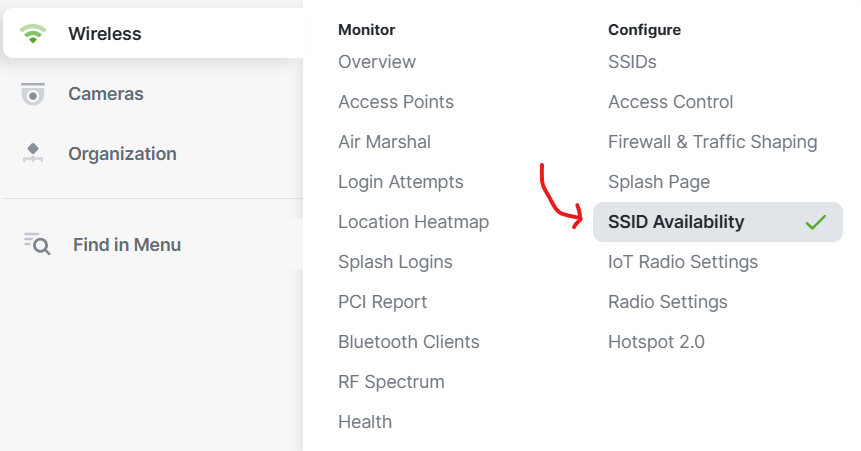
SSID Availability
Overview:
- SSID Availability in Cisco Meraki MR access points refers to the configuration settings that determine whether a specific SSID (Service Set Identifier), or wireless network, is visible to clients
- This setting controls how and when the SSID is broadcast and whether it is accessible for users to connect to, based on certain conditions or requirements
- By disabling SSID broadcasting, your wireless network won't be visible to devices that are scanning for available networks. This makes it harder for unauthorized users to find and attempt to connect to your network
- In this lab exercise, I will demonstrate disabling the SSID availability for the Corporate wireless network and verify on a Windows and iPhone client device
SSID Availability Menu
Configuration via Tagging
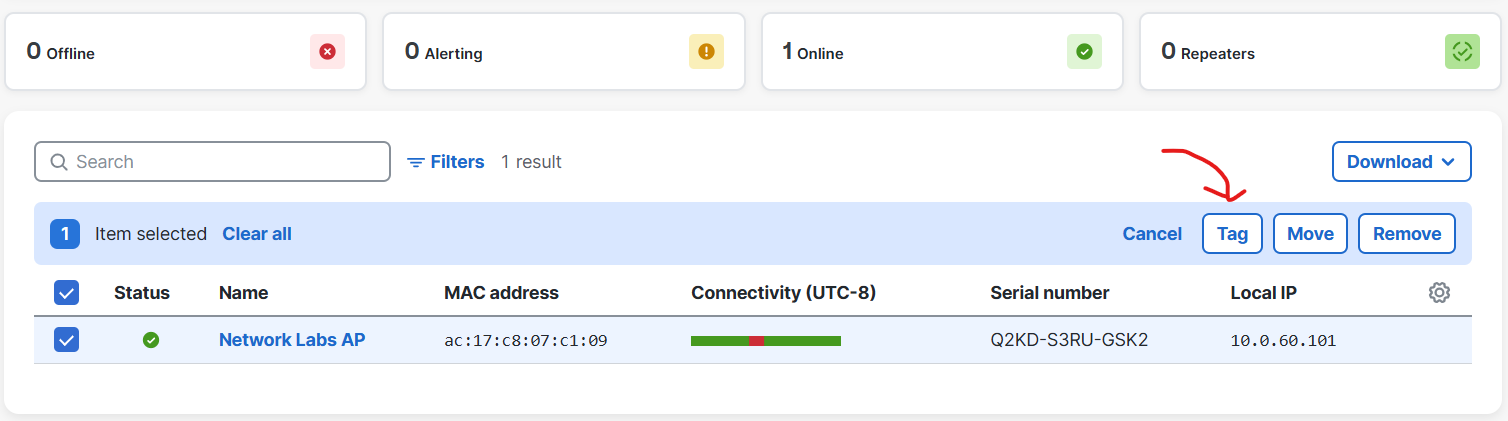
Tagging Overview
- Cisco Meraki recommends tagging access points with a tag for grouping purposes
- By adding tags, it allows admins to organize and manage the network devices more effectively, especially in larger deployments
- Tags defined in the Meraki Dashboard can be used to group access points based on specific attributes, locations, functions, or other criteria
Tagging Menu
Selecting Available APs for Tagging
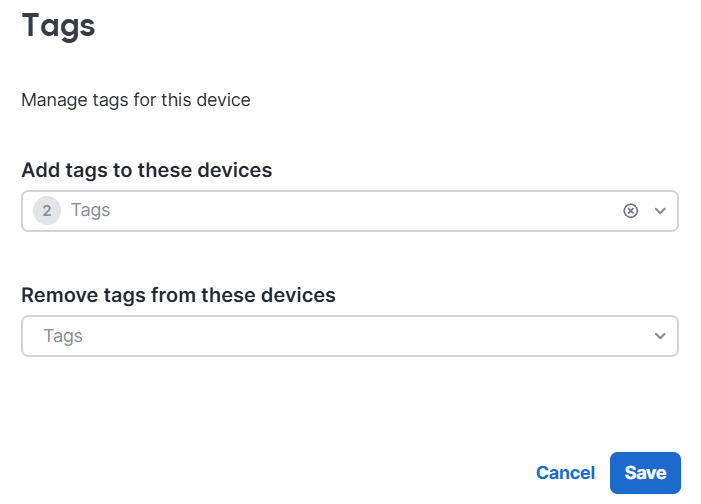
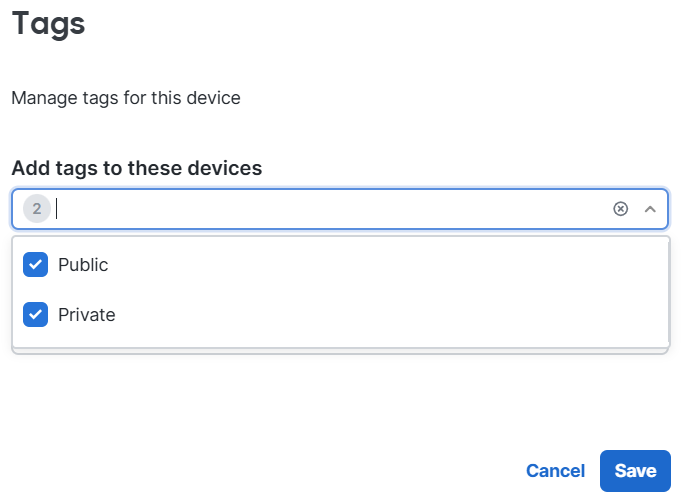
Defining Tags for Public and Private SSIDs
Configuration - SSID Availability
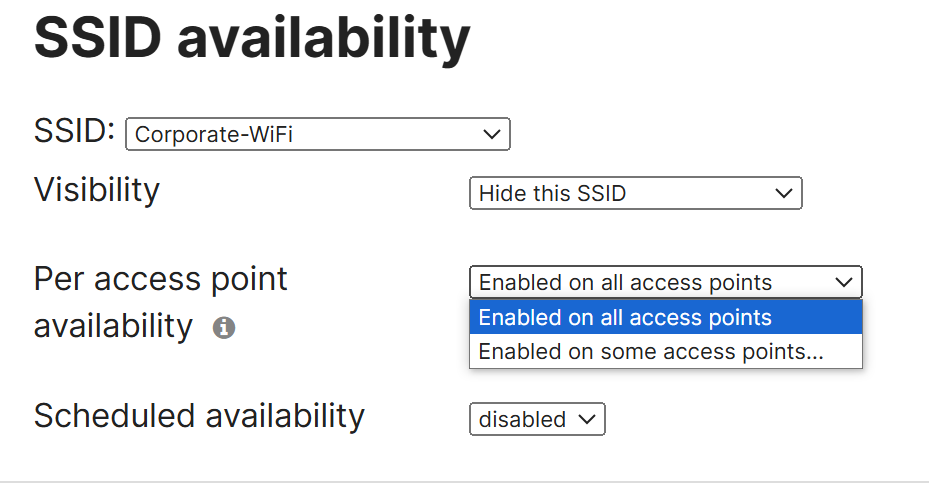
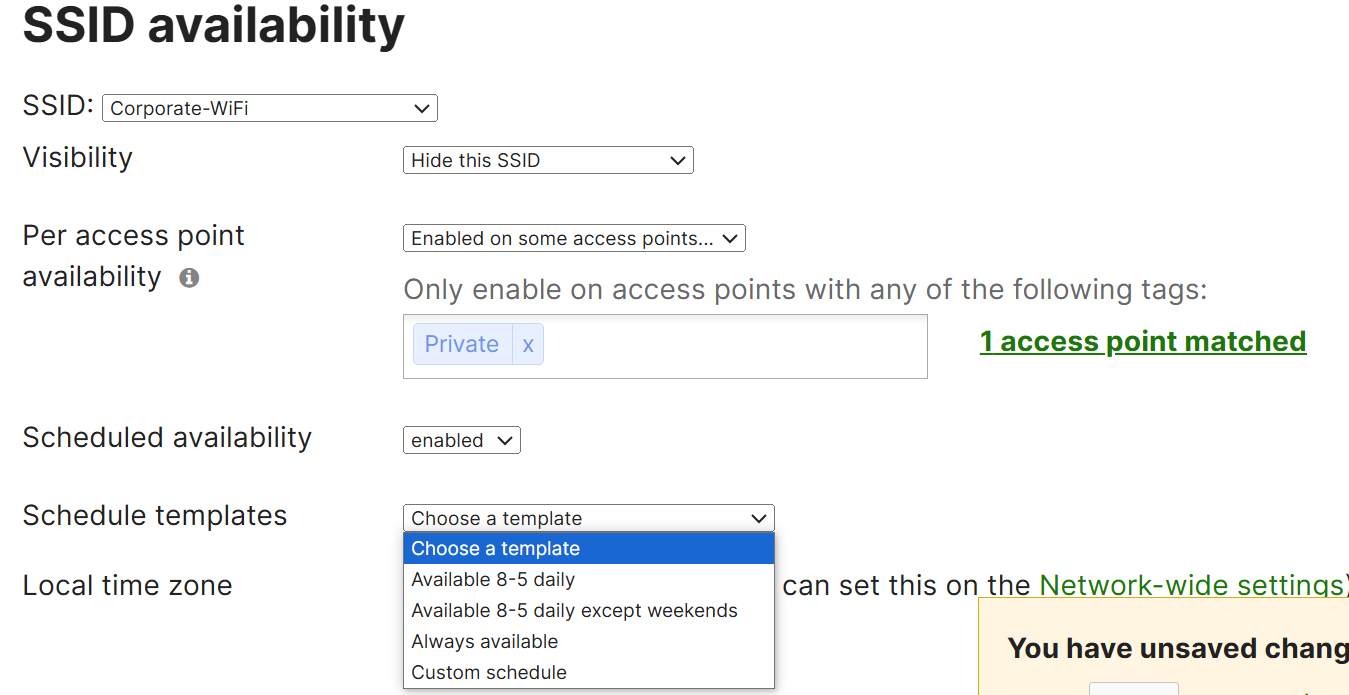
SSID Availability Configuration
- For each SSID selected, Meraki gives us the option to enable availability status on all access points for the given SSID or on certain devices
- For the Corporate network, I will hide the SSID and enable on 'some access points' to demonstrate the tags defined in the previous step
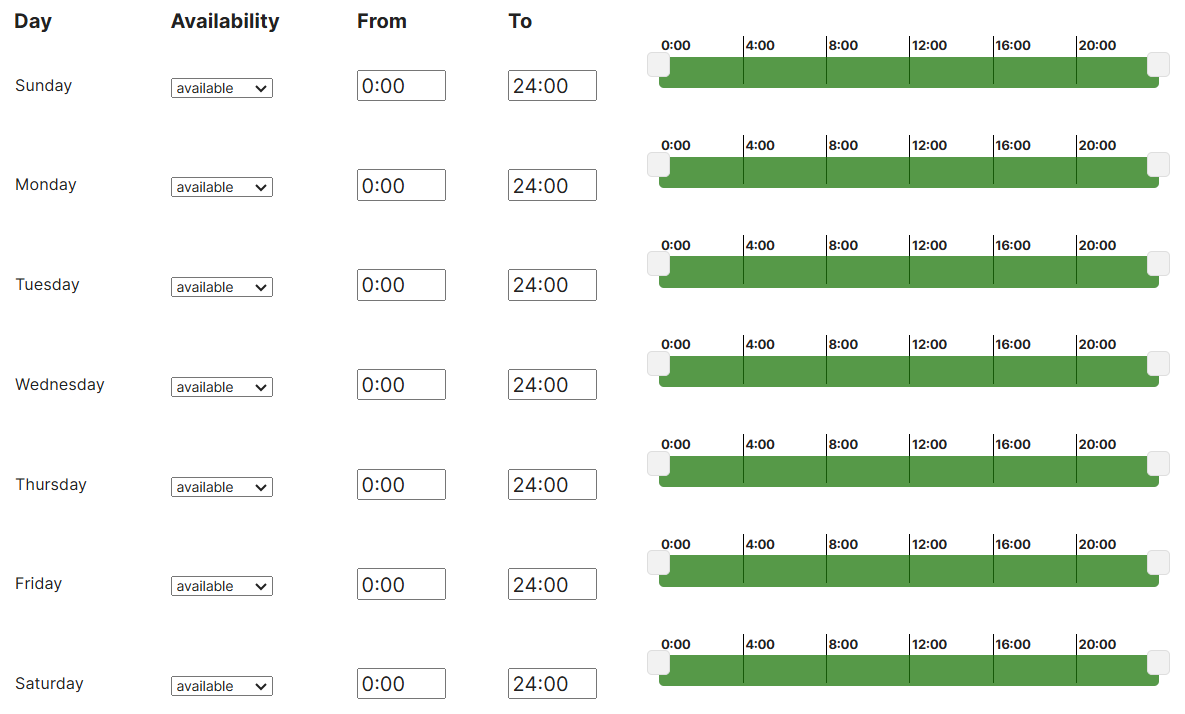
- Optionally, the Meraki access points support scheduled availability that comes pre-defined with schedule templates if there is a need to restrict the the SSID from being broadcast in certain times
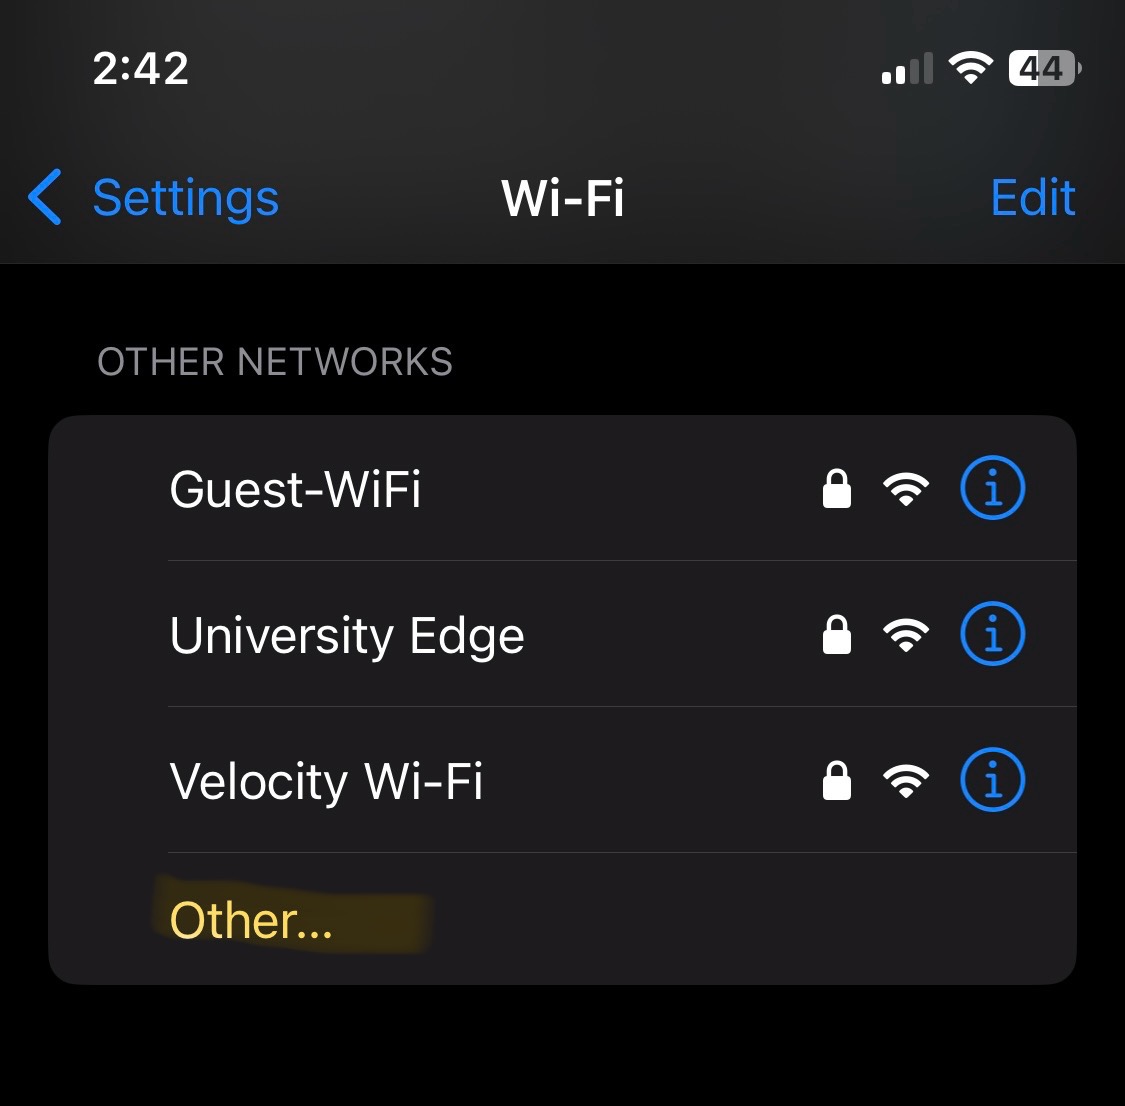
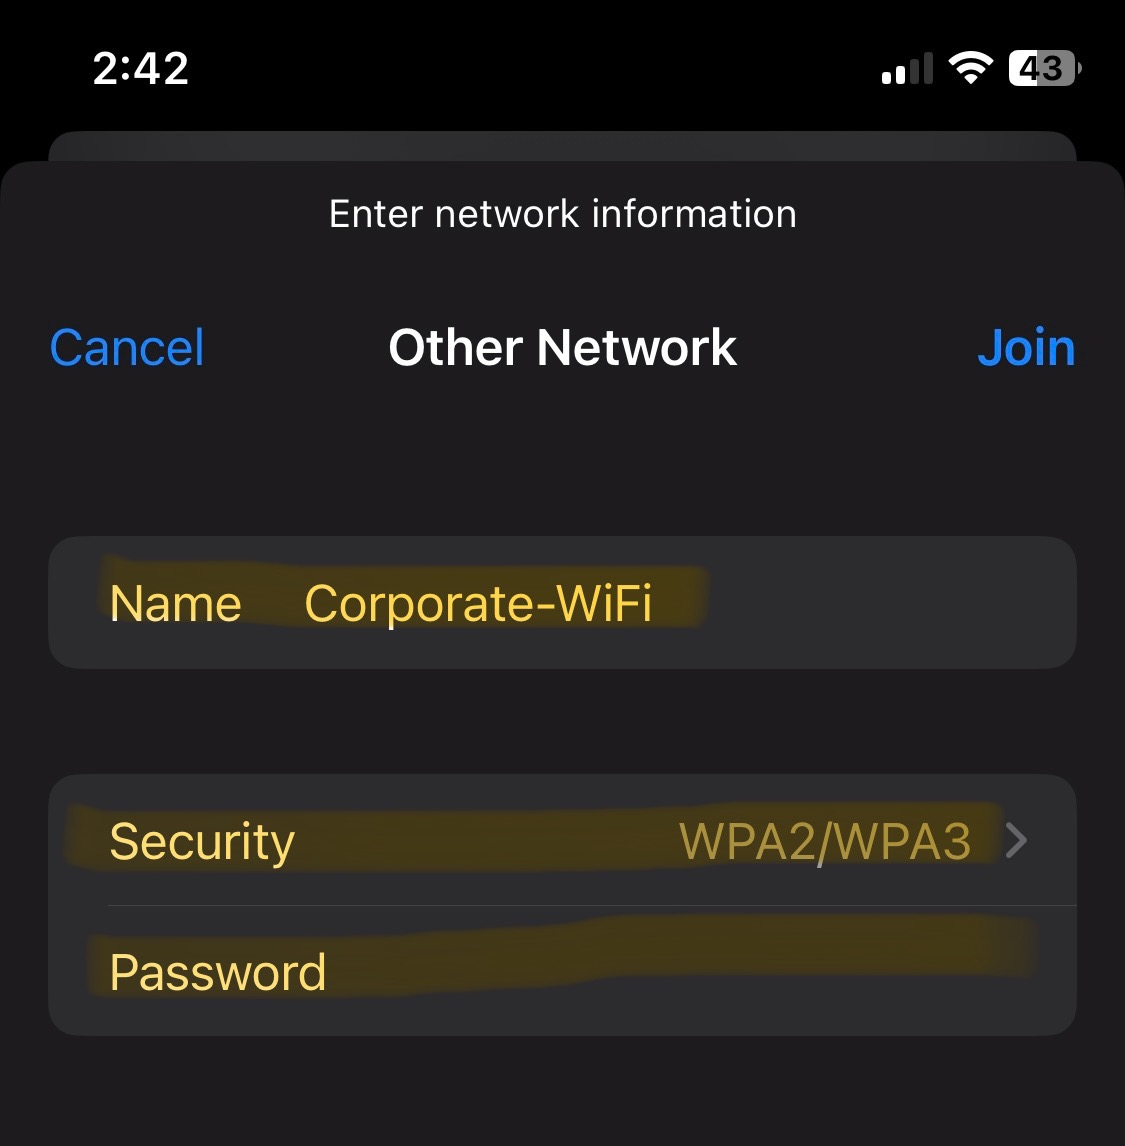
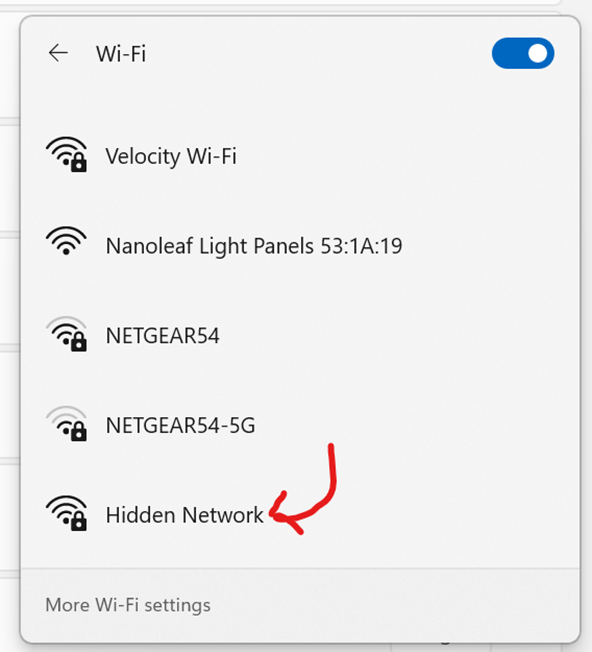
Verification - SSID Availability
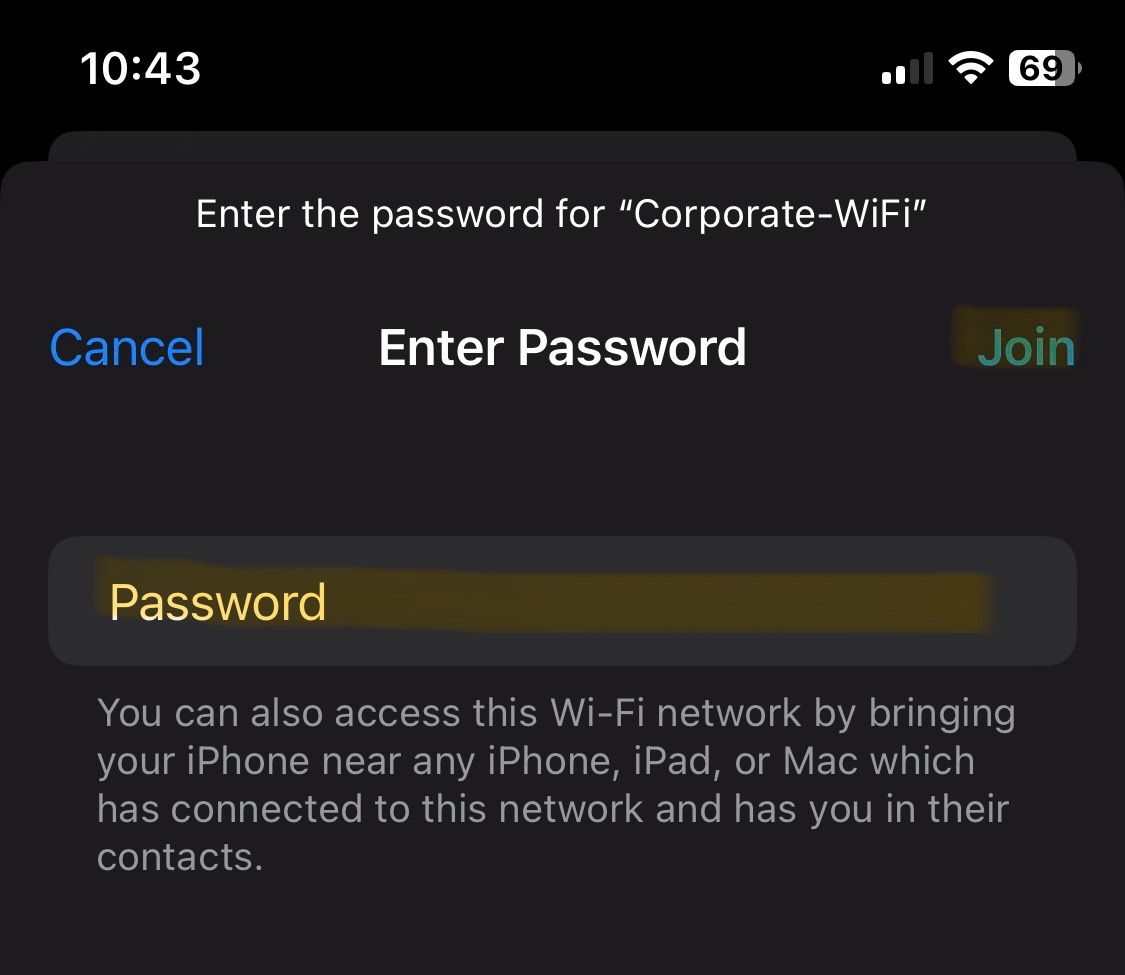
Verification - SSID Availability
- In this section, the wireless corporate SSID from both the Windows and IOS client is no longer being broadcast from the Meraki access point
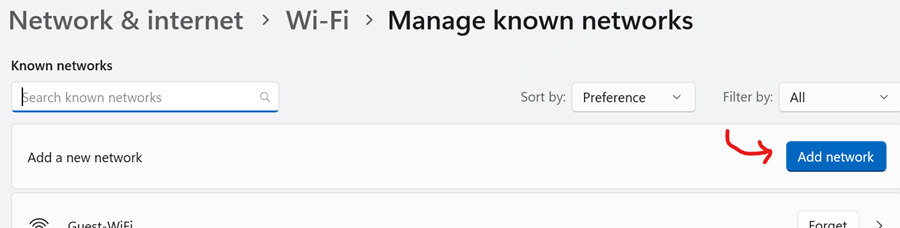
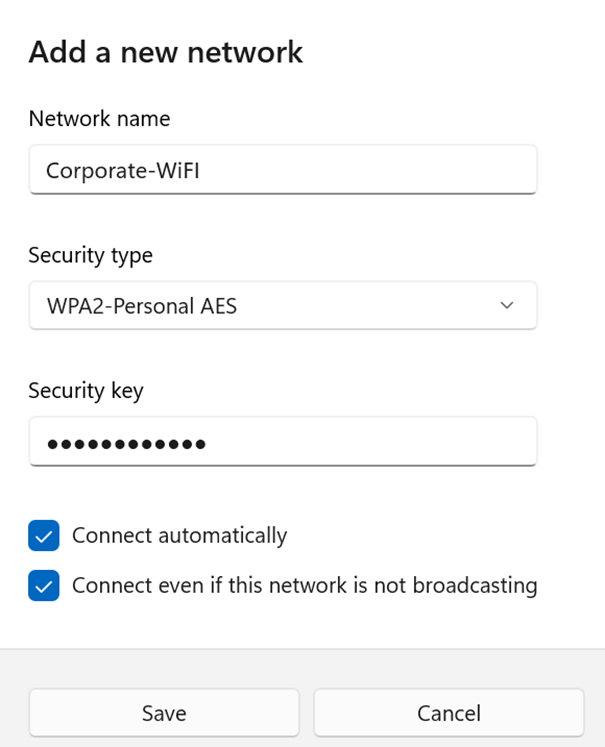
- I will demonstrate joining the now visible SSID network by manually providing the network security details
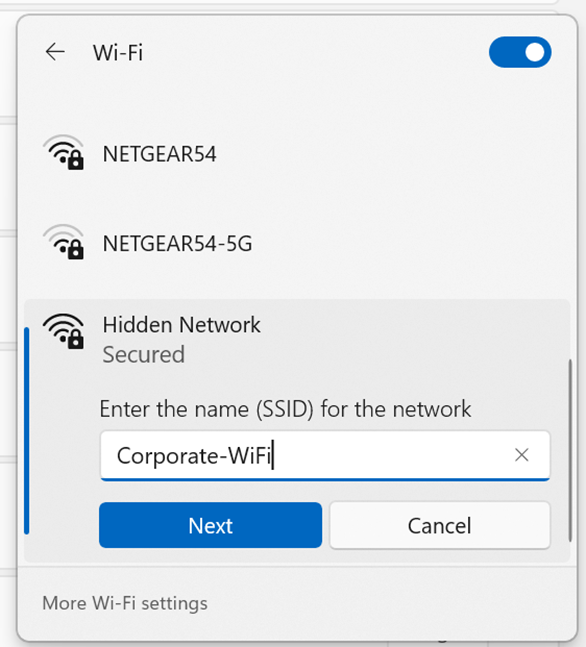
Windows 11 Configuration
Windows 11 Troubleshooting
Overview:
- In some cases when joining the network does not redirect the client to the Splash Page to fully authenticate, there is a method to actively join a hidden SSID network from the WiFi icon located in the system tray
- In the snippets below, method is demonstrated


IOS iPhone Configuration