Setting Primary & Failover WAN IP Addresses
Sections:
Resources:
Overview:
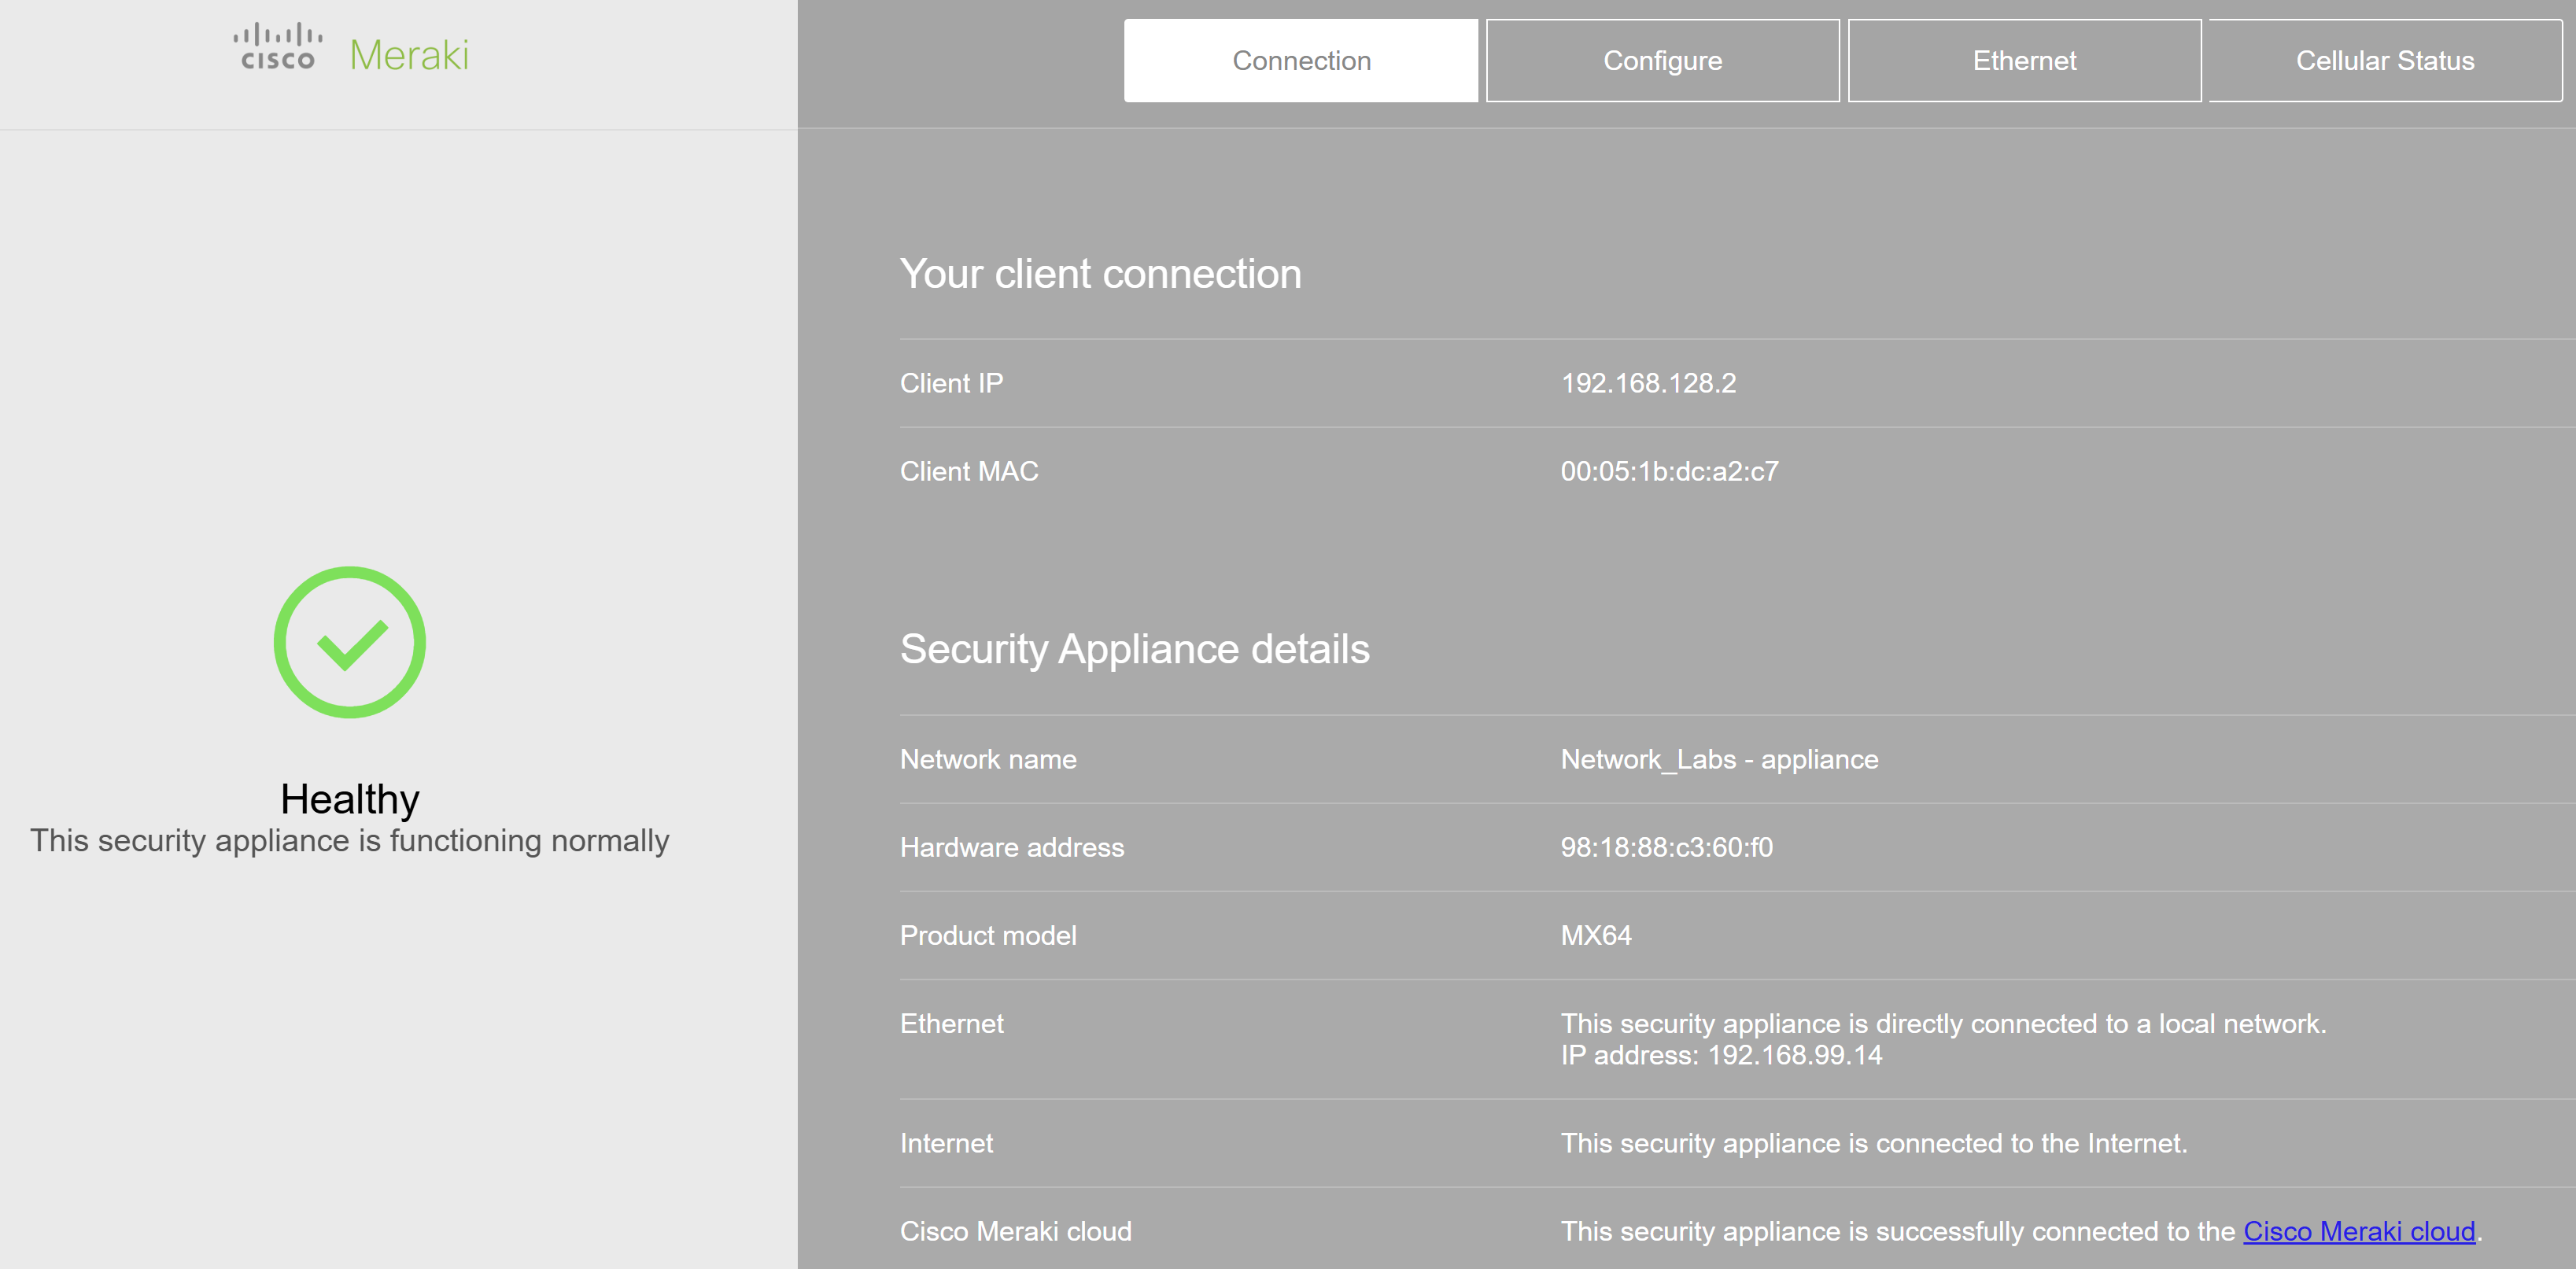
- The Meraki Health page provides insight to the current internet connectivity status and the health of the security appliance's WAN connections, including whether they are active, the quality of the connection, and whether the Meraki appliance is properly connected to the Internet
- In this section, I will go over configuring the primary WAN IP address of my Cisco Meraki firewall by accessing the device's HTTP Web GUI
Configuration
In this lab demonstration, lets take a closer look into configuring the primary WAN IP address when setting up a new Meraki MX security appliance.
HTTP Port 80
Out of the box, Cisco Meraki enables us to view the overall health statistics of our security appliance by accessing its web GUI using its private IP address. By default, Meraki MX appliances run as a DHCP server for the network scope of 192.168.128.0/24, handing out IP addresses to our local devices. Now lets demonstrate how to access the web GUI of a security appliance.
HTTP Steps
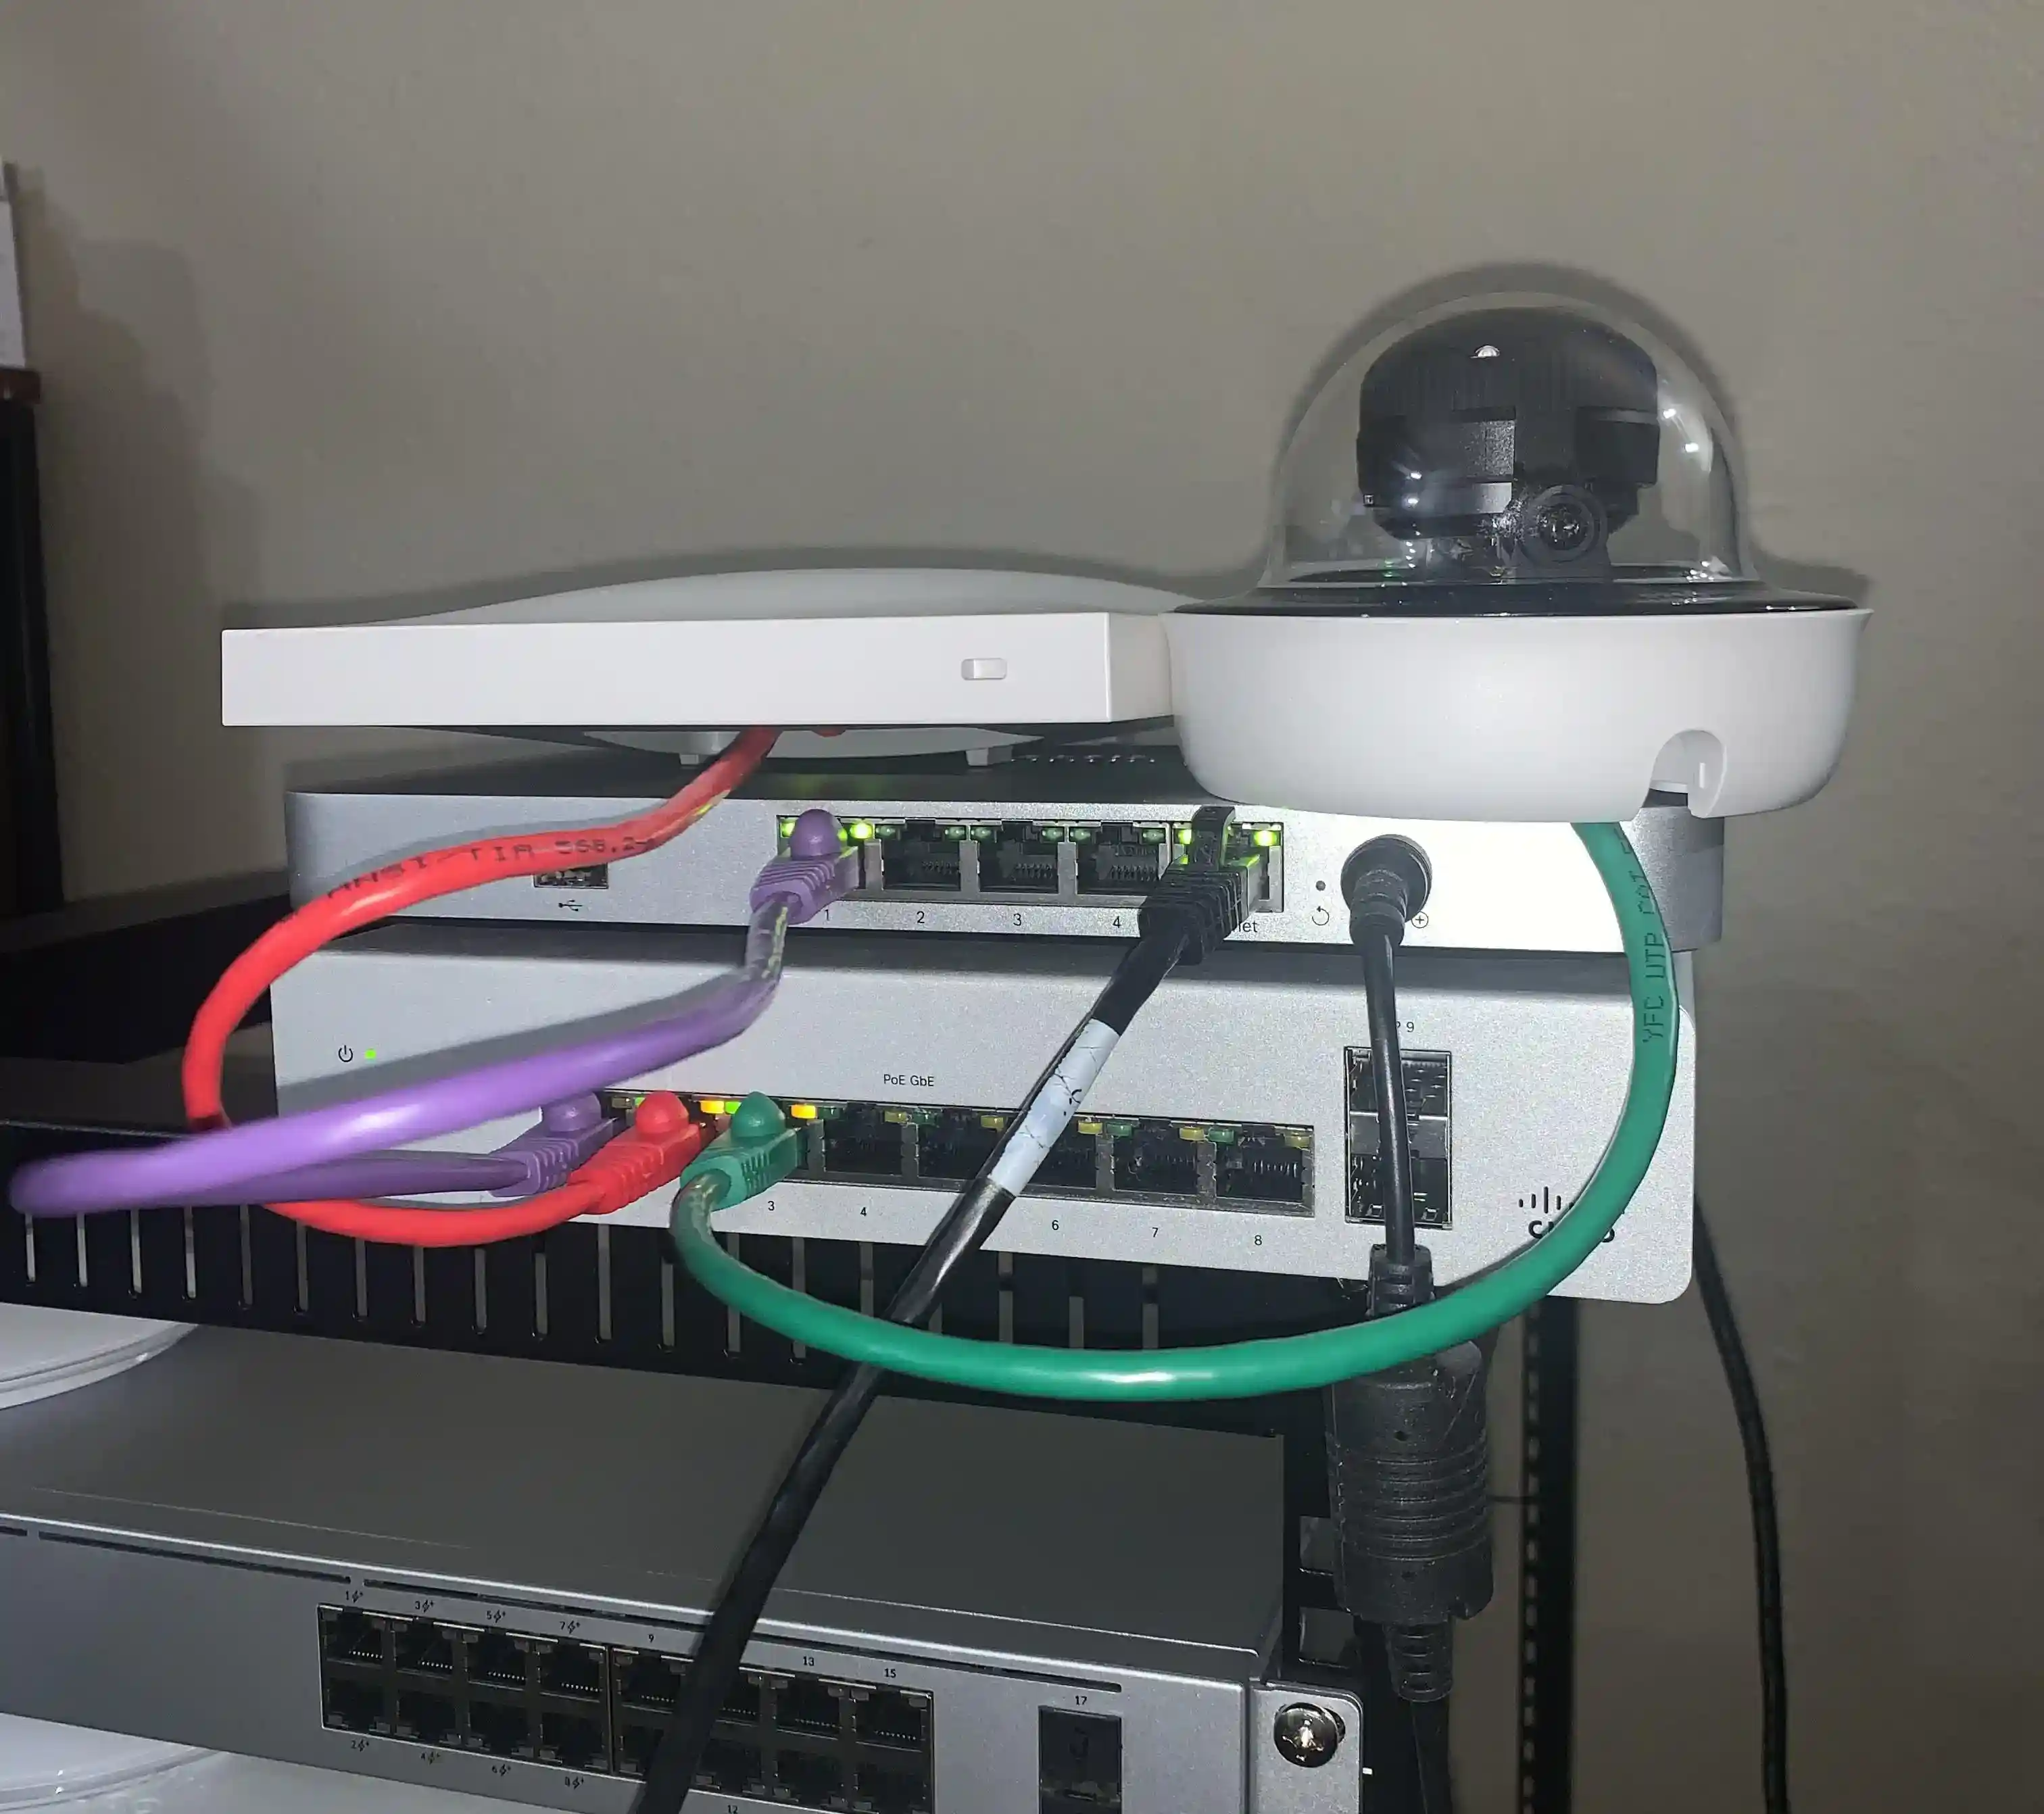
- Step 1: Plug in the WAN ethernet circuit to the 'Internet' WAN port of the security appliance then plug in your PC directly into the Ethernet '1' LAN port of the appliance
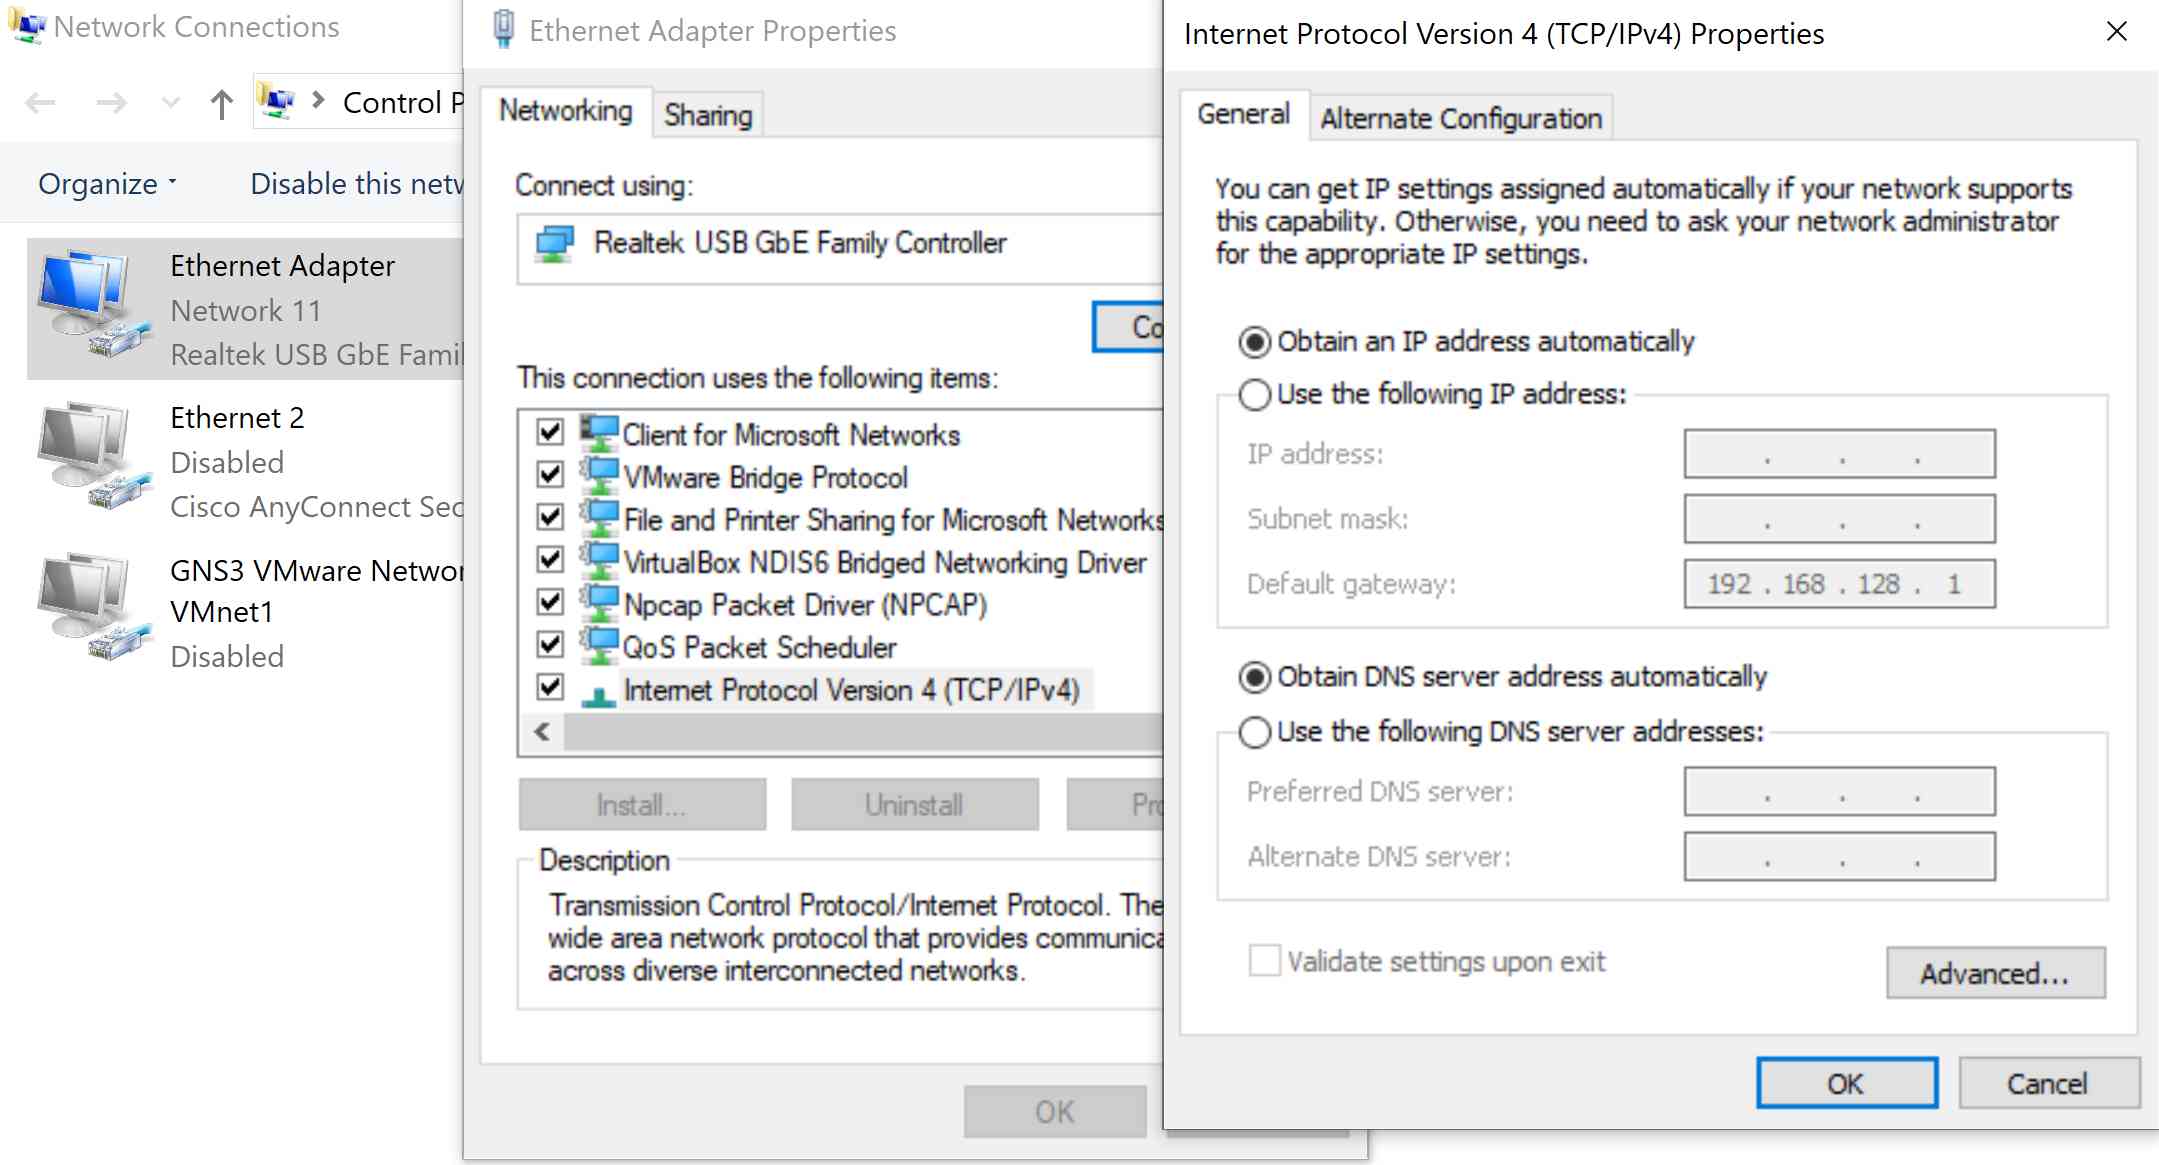
- Step 2: Ensure your PC's Ethernet adapter is set to DHCP
- Step 3: Open up a command prompt session and issue an 'ipconfig' to view the IP address of the Ethernet interface handed out by the security appliance
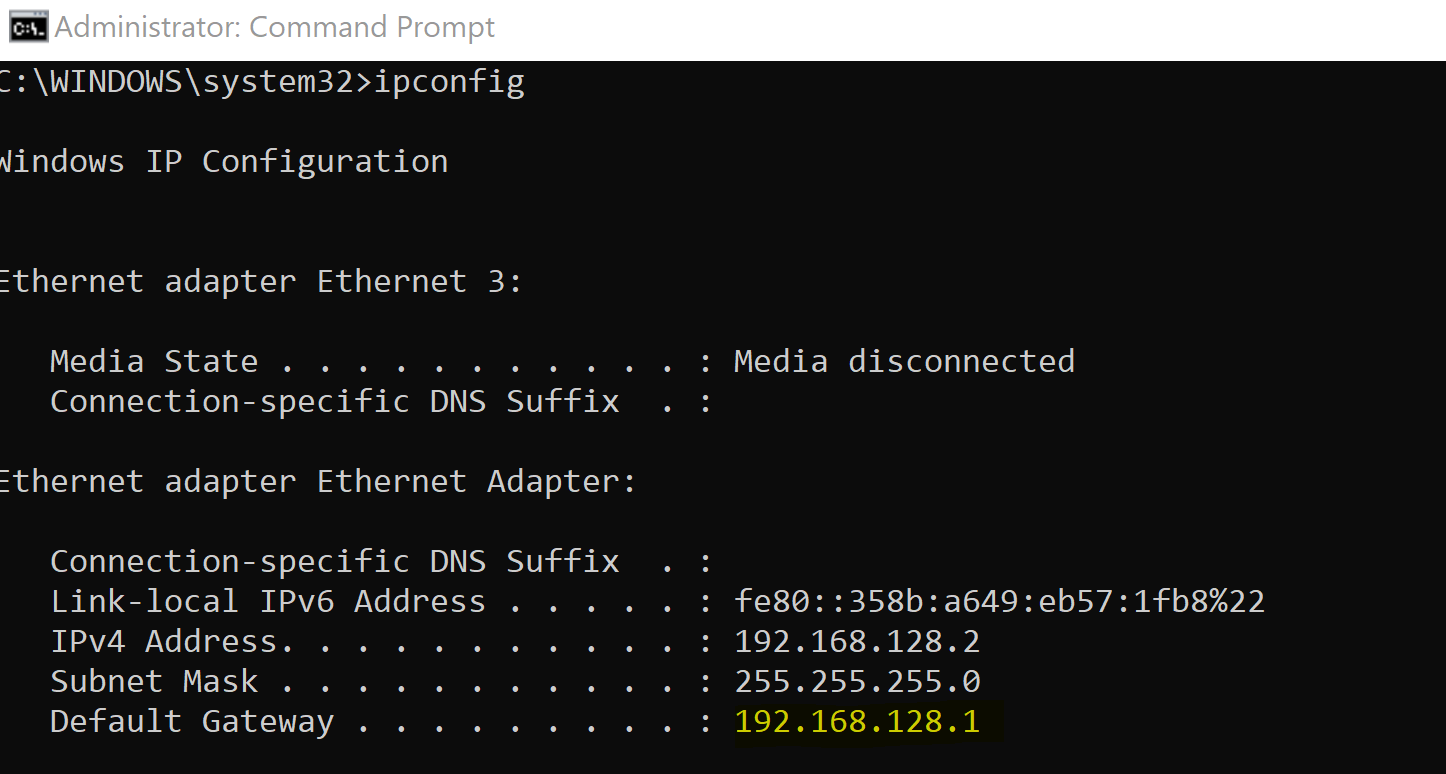
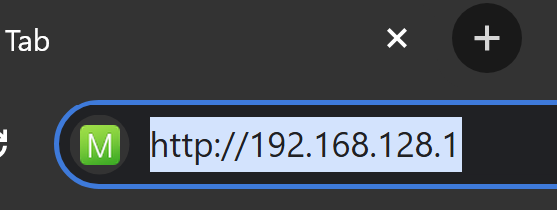
- Step 4: Take note of the 'default gateway' address then open up a web browser of your choice to open a HTTP session using the default gateway IP address handed out by the security appliance
Meraki Connection Section
The Meraki Connection section of the HTTP Health Statistics page provides an overview of the health and performance status of the Meraki device, including important information about the device's connectivity and operational state. The health page is primarily for on-site monitoring and troubleshooting.
Meraki Configure Section
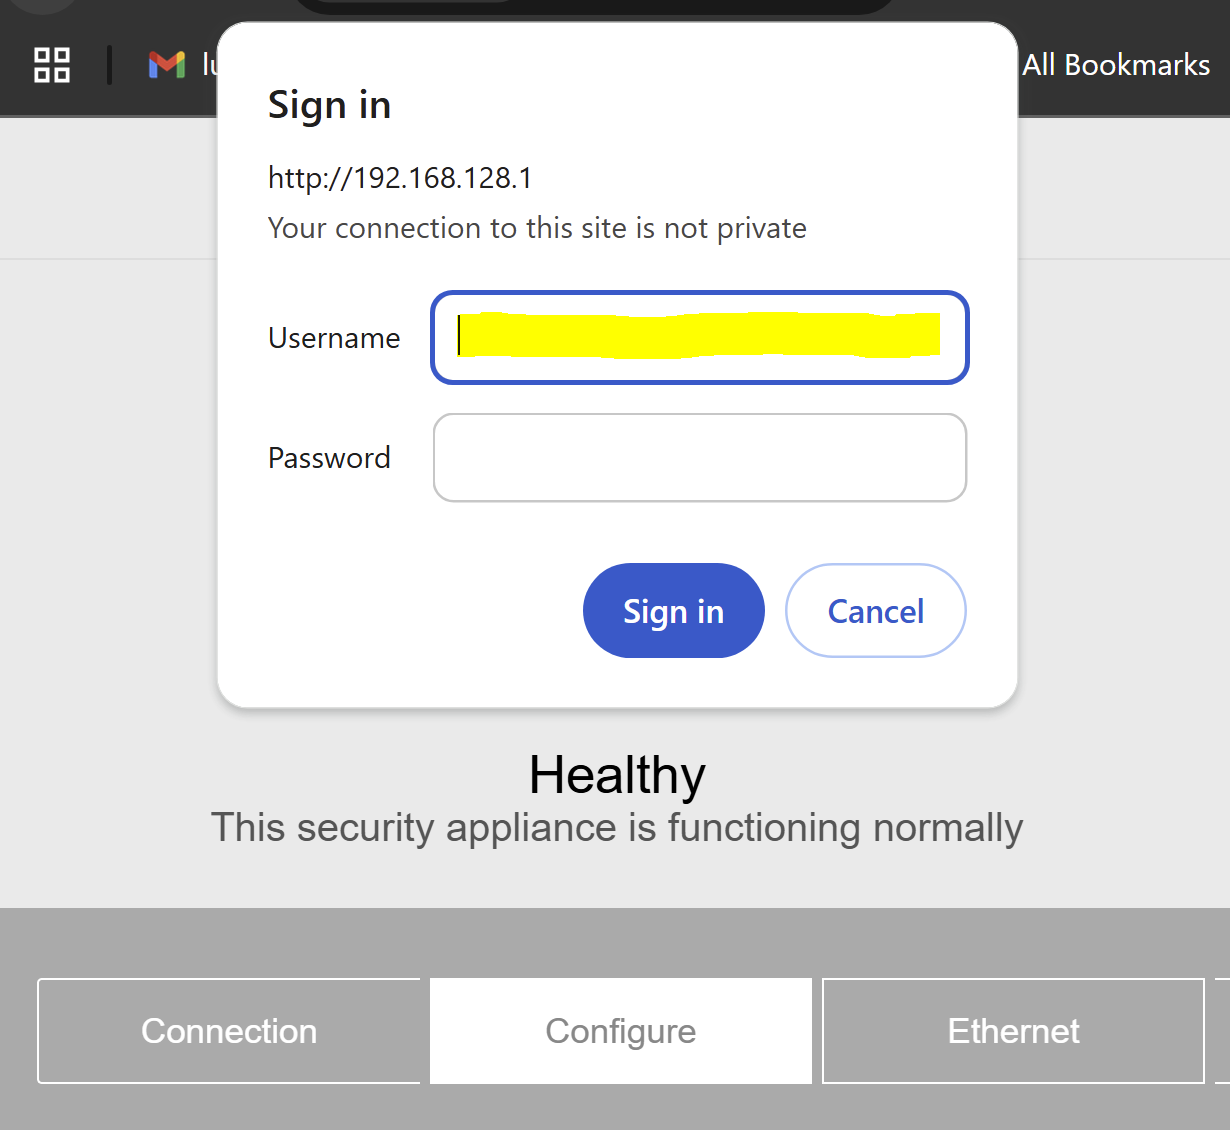
To access the configure section of the Meraki Health page, it is required to enter in login credentials. By default, the username will represent the serial number of the security appliance with an empty string password.
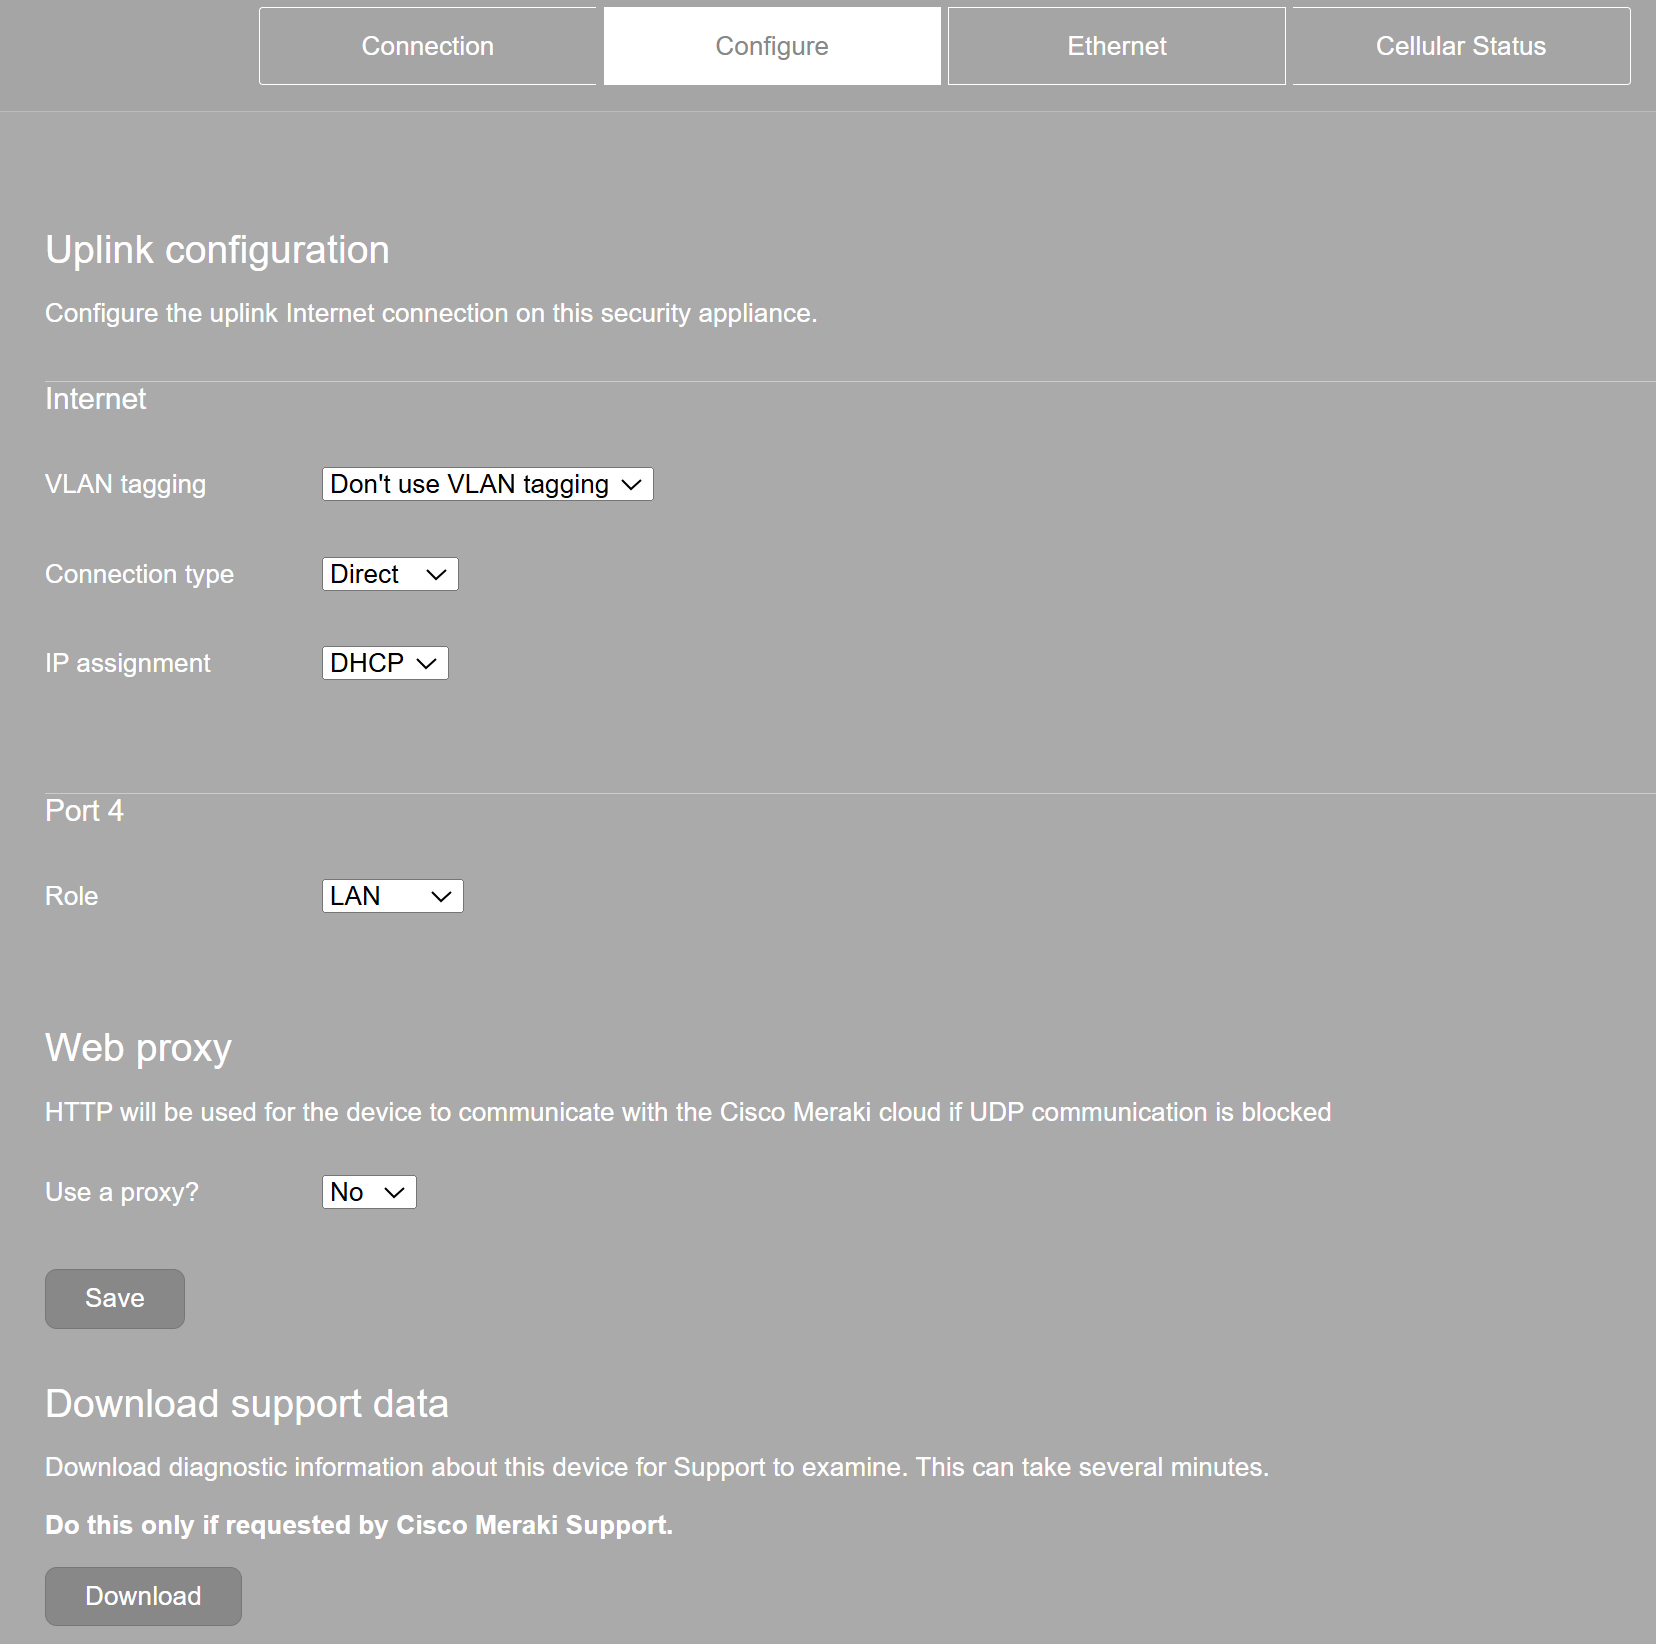
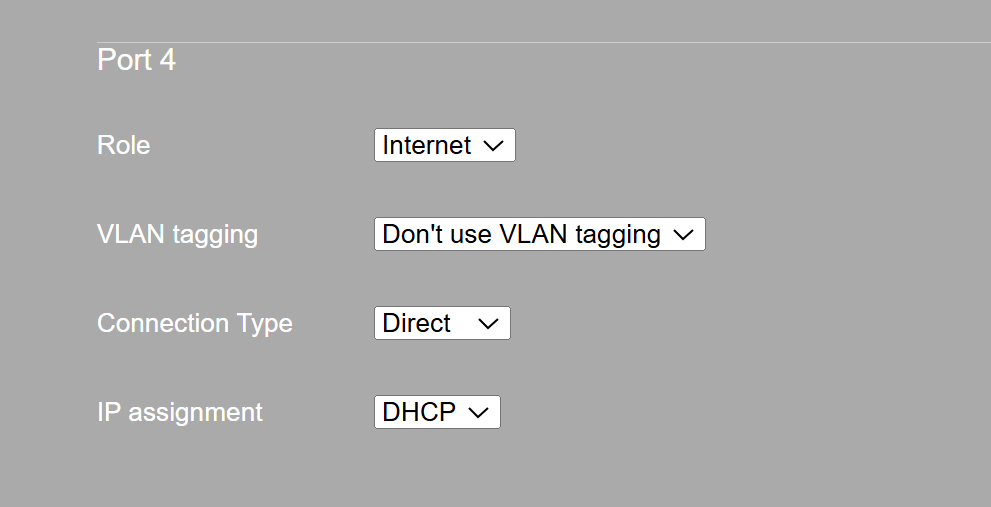
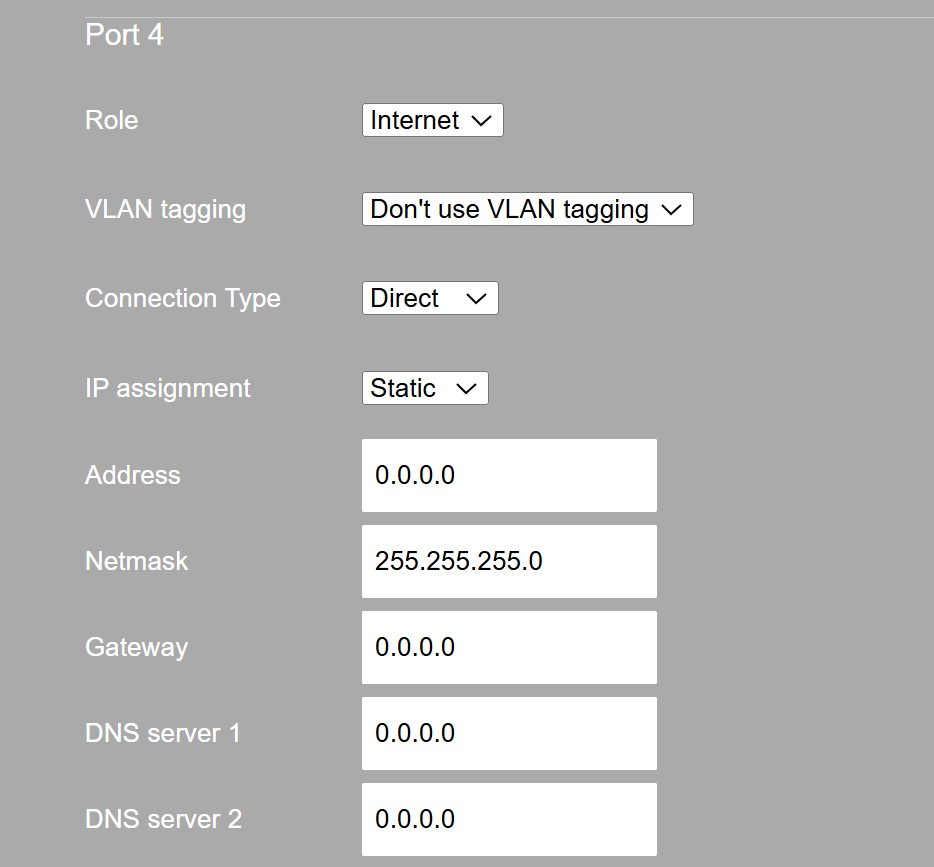
The configure section provides uplink parameters to set VLAN tagging and an option to set the IP address assignment to either 'Static' or 'DHCP' for the WAN port. Scrolling below the Internet section, Port 4 of the security appliance can serve as either a regular LAN port or a backup WAN port for redundancy.
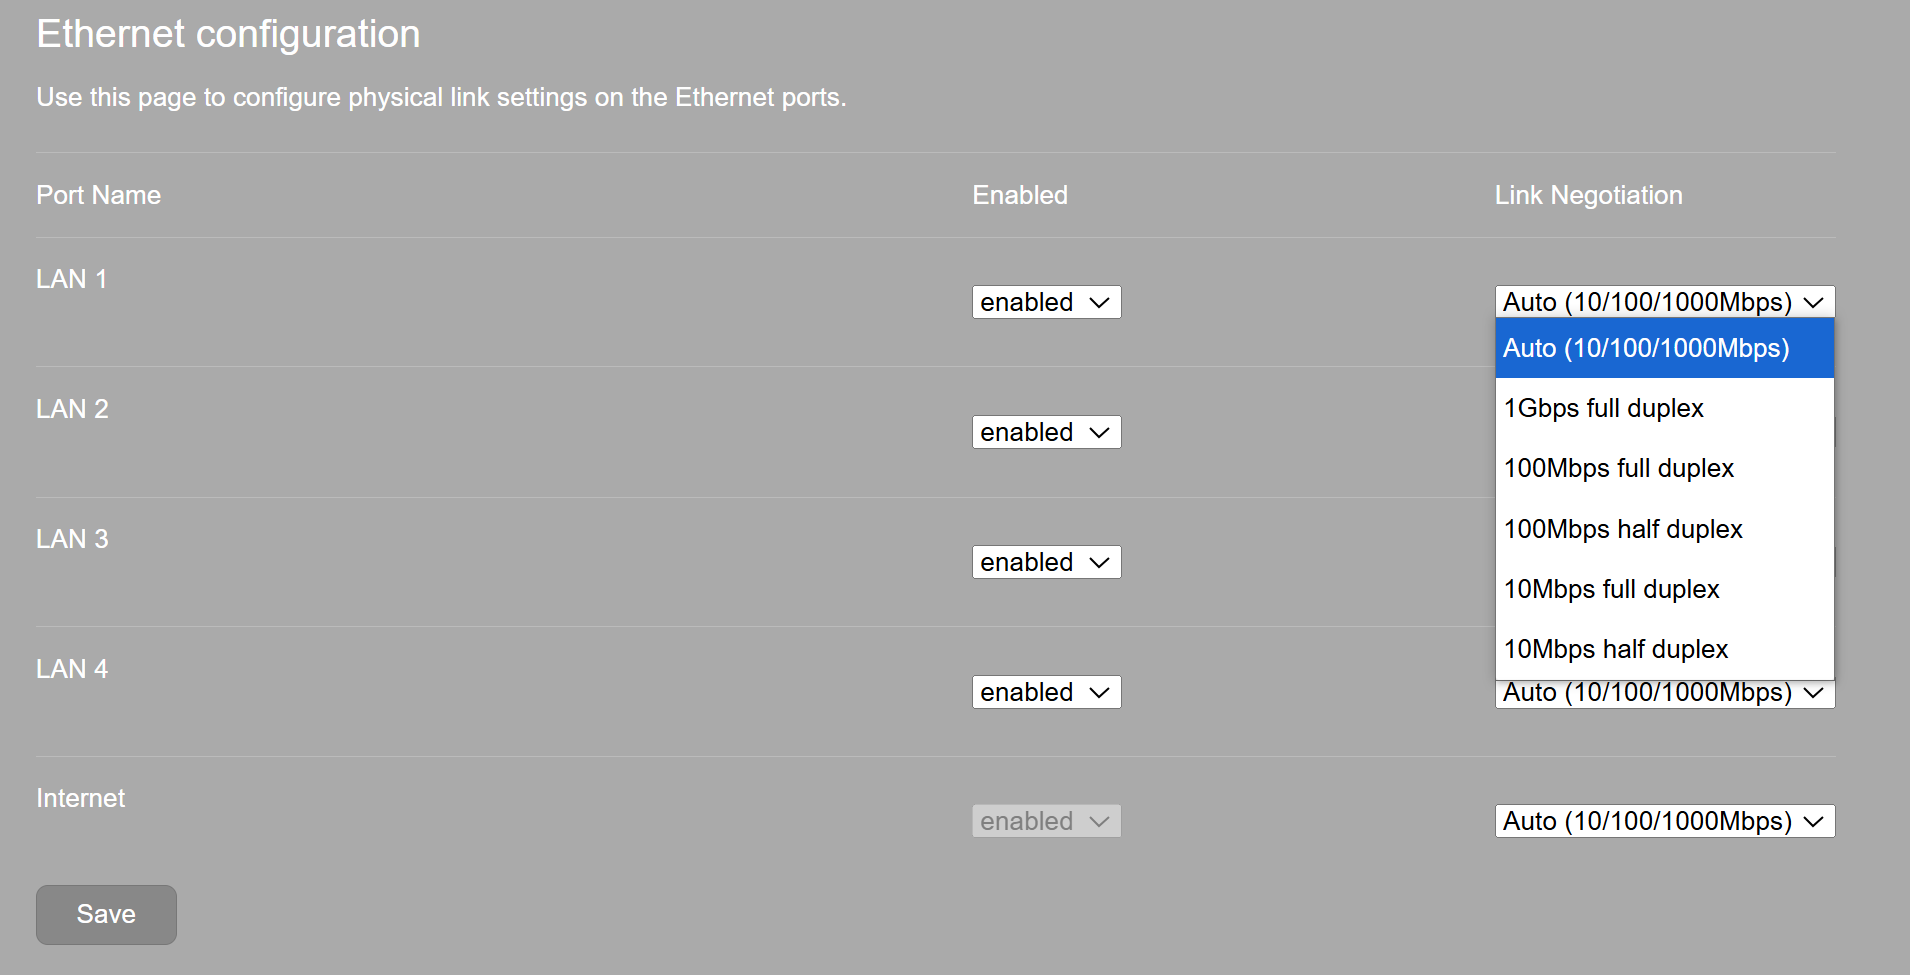
Meraki Ethernet Section
In the Ethernet section, Meraki gives us the ability to enable and disable ports in addition to specifying link negotiation settings for each LAN port.
Setting WAN IP Addresses Summary
To summarize, upon setting the configuration parameters for the WAN IP addresses of a Meraki security appliance and ensuring the device is connected to the Cisco Meraki Cloud, our next steps are to head over to the Meraki Dashboard to see first hand the features Meraki has to offer.
